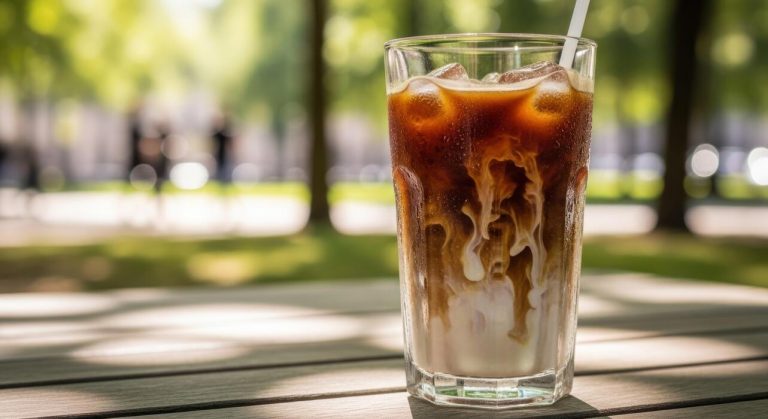
How To Make Iced Cold Brew
If you’re searching for how to make iced cold brew, you probably want a smooth, less acidic coffee concentrate that’s perfect over ice—not watered-down hot coffee. The core problem is getting the right steeping time and coffee-to-water ratio. You’re in the right place: I’ll walk you through the simple, foolproof method using coarse grounds, cold water, and a 12- to 18-hour steep at room temperature. No special gear required, just patience for a silky, concentrated result.
What Is Iced Cold Brew Coffee?
Cold brew vs. iced coffee: key differences
Understanding the difference between cold brew and iced coffee is essential for making the perfect iced cold brew. Iced coffee is simply hot-brewed coffee that is chilled and poured over ice, which can often lead to dilution and bitterness.
In contrast, cold brew is made by steeping coarse-ground coffee beans in cold or room-temperature water for an extended period, typically 12-24 hours. This slow extraction process yields a concentrated coffee that is naturally smoother and less acidic.
When making iced cold brew, you’ll start with this concentrate and dilute it with water or milk before serving over ice. The result is a refreshing, bold beverage that retains its flavor without the watery taste of traditional iced coffee.
For best results, use a ratio of 1:4 coffee to water for the concentrate, then adjust dilution to your preference. This method ensures a consistently rich and satisfying drink that can be stored in the fridge for up to two weeks.
Why cold brew tastes smoother and less bitter
The smoothness and low bitterness of cold brew come from its unique brewing chemistry. Hot water extracts oils, acids, and compounds like chlorogenic acid lactones that contribute to bitterness and acidity.
Cold water, on the other hand, extracts flavors more slowly and selectively, pulling out the sweet, chocolatey, and nutty notes while leaving behind harsh compounds. This results in a mellow, full-bodied brew that is up to 67% less acidic than hot coffee, making it gentler on the stomach and teeth.
For iced cold brew, this smoothness is especially important because the ice can amplify any bitterness. By using coarse grounds and a long steep time, you achieve a clean, crisp flavor that shines even when chilled.
To replicate this at home, simply combine 1 cup of coarse coffee grounds with 4 cups of cold water, stir, and let it steep in the fridge for 12-24 hours. Strain through a fine-mesh sieve or cheesecloth, and you’ll have a silky concentrate perfect for pouring over ice.
The best coffee beans for iced cold brew
Choosing the right coffee beans is crucial for a delicious iced cold brew. Opt for single-origin beans from regions like Central America, Africa, or Indonesia, which offer distinct flavor profiles.
For a smooth, chocolatey base, go with medium to dark roasts from Brazil or Colombia—these beans provide low acidity and rich body that complement cold brew’s natural sweetness.
If you prefer bright, fruity notes, try light roasts from Ethiopia or Kenya, which can add floral or berry undertones without overwhelming bitterness. Always select whole beans and grind them coarse just before brewing to preserve freshness and avoid over-extraction. A burr grinder ensures consistent particle size, preventing muddiness.
For a balanced iced cold brew, blend 70% medium roast with 30% light roast for complexity. Avoid oily dark roasts as they can taste burnt when cold. Experiment with 1:4 coffee-to-water ratio and adjust based on your taste—stronger for milk, milder for black.
Store beans in an airtight container away from light to maintain peak flavor.
How to Make Iced Cold Brew at Home

Step-by-step cold brew concentrate recipe
Start with coarsely ground coffee beans, as a fine grind can lead to over-extraction and bitterness. In a large pitcher or mason jar, combine 1 cup of coarse grounds with 4 cups of cold, filtered water. Stir gently to ensure all grounds are saturated.
Cover the container with a lid or plastic wrap and let it sit at room temperature or in the fridge. Avoid stirring during steeping to prevent sediment. After 12–24 hours, strain the mixture through a fine-mesh sieve lined with a coffee filter or a nut milk bag.
Discard the grounds, and you’ll have a smooth, concentrated cold brew. Store the concentrate in the fridge for up to two weeks. To serve, fill a glass with ice, pour the concentrate over it, and dilute with equal parts water or milk.
Adjust the dilution ratio to taste—some prefer a 1:1 ratio, while others like a stronger 2:1 coffee-to-water mix. This method yields a rich, low-acid coffee perfect for iced drinks.
Best water-to-coffee ratio for a strong brew
For a bold, concentrated cold brew, use a 4:1 water-to-coffee ratio by weight. That means for every 1 ounce (28 grams) of coffee, add 4 ounces (113 grams) of water. This produces a strong base that can be diluted with water, milk, or a dairy alternative when serving.
If you prefer a ready-to-drink strength, try an 8:1 ratio (e.g., 1 cup coffee to 8 cups water) and skip dilution. The key is consistency in measurement—use a kitchen scale for accuracy. For beginners, start with the 4:1 ratio; it’s forgiving and yields a concentrate that stores well.
Avoid using too little water, as it can result in a bitter, over-extracted brew. Conversely, too much water leads to a weak, watery flavor. Remember that the grind size and steep time also affect strength, but the ratio is your foundation.
Experiment with ratios like 3:1 for an extra-strong concentrate or 6:1 for a milder option, adjusting to your taste preference.
How long to steep cold brew for ideal flavor
The optimal steeping time for cold brew is 12 to 24 hours at room temperature, or up to 48 hours in the refrigerator. A 12-hour steep yields a milder, tea-like flavor with lower caffeine extraction, while a 24-hour steep produces a full-bodied, rich concentrate with more caffeine and complexity.
Avoid steeping beyond 24 hours at room temp to prevent bitterness from over-extraction. If using the fridge, you can steep for up to 48 hours, but check at 24 hours first. The water temperature matters: cold water extracts slowly, so longer steeps are needed.
Stir the grounds once at the beginning to ensure even saturation. After steeping, taste a small amount before straining—it should be smooth and not overly bitter. For a balanced result, start with 18 hours and adjust based on your preferred strength.
Note that finer grinds extract faster, so reduce steep time slightly if your grind is not coarse. Always strain thoroughly to remove all grounds for a clean finish.
Best Equipment for Making Iced Cold Brew

French press method for cold brew
For a simple, effective, and affordable setup, a French press is one of the best tools for making iced cold brew. Start by adding coarse-ground coffee (about 1 cup of grounds to 4 cups of cold, filtered water) directly into the carafe. Stir gently to ensure all grounds are saturated.
Place the plunger on top but do not press down; just leave it resting at the surface to keep the grounds submerged. Let it steep at room temperature for 12 to 24 hours—longer for a stronger concentrate.
After steeping, slowly press the plunger down to separate the grounds from the liquid. The built-in filter catches most sediment, giving you a clean, smooth concentrate. Pour over a glass filled with ice and add milk or water to taste.
The French press is ideal because it requires no extra filters or cheesecloth, and its glass carafe lets you monitor the brewing process. Cleanup is quick: just rinse the carafe and plunger. This method yields a rich, low-acid cold brew concentrate perfect for iced coffee lovers on a budget.
Using a mason jar and cheesecloth
If you want a no-fuss, zero-cost alternative to specialized gear, a mason jar paired with cheesecloth is a reliable DIY solution. Simply combine 1 part coarse coffee grounds with 4 parts cold water in a large mason jar.
Stir well, seal the lid, and let it steep in the refrigerator for 12–24 hours. When ready, strain the concentrate through a fine-mesh sieve lined with a double layer of cheesecloth into another jar or pitcher. The cheesecloth catches fine particles while allowing the smooth liquid to pass through.
For even cleaner results, rinse the cheesecloth first to remove any lint. This method is perfect for small batches and requires no special equipment. Pro tip: Use a wide-mouth jar for easier pouring and stirring. The cheesecloth is reusable after washing, making this an eco-friendly option.
Once strained, your concentrate is ready to be poured over ice. Add milk, cream, or flavored syrups to customize. This approach is ideal for beginners or anyone wanting to test cold brew without investing in new tools.
Top cold brew makers under $50
Several affordable cold brew makers deliver excellent results without breaking the bank. The Takeya Cold Brew Maker (around $25) features a fine-mesh filter and a sleek, airtight carafe that fits in your fridge door. Just add grounds and water, steep for 12–24 hours, then remove the filter for ready-to-drink concentrate.
The Primula Burke Cold Brew System (under $30) offers a similar design with a borosilicate glass carafe and a reusable filter, making it easy to brew and serve.
For a larger batch, the County Line Kitchen Cold Brew Mason Jar (about $35) uses a stainless steel filter that fits a standard wide-mouth jar, producing up to 48 ounces of concentrate. Key features to look for: a tight-sealing lid, easy-to-clean filter, and a carafe that pours without dripping.
These makers simplify the process—no cheesecloth or extra straining needed. Simply steep, filter, and pour over ice. Each model is durable, dishwasher-safe, and designed to yield smooth, low-acid cold brew. Investing in one of these under-$50 options saves time and ensures consistent results every brew.
Tips for the Perfect Iced Cold Brew Every Time
Grind size: coarse vs. fine for cold brew
The grind size is critical for a smooth, balanced iced cold brew. Always use a coarse grind, similar to breadcrumbs or sea salt. A fine grind extracts too quickly, leading to bitter, over-extracted flavors and a muddy texture.
Coarse grounds allow water to flow evenly, gently extracting the beans’ natural sweetness and low acidity over 12-24 hours. For a 1:4 coffee-to-water ratio (concentrate), use 1 cup of coarse grounds per 4 cups of cold, filtered water. If you’re using a pre-ground coffee, avoid espresso or drip grinds.
If grinding at home, set your burr grinder to the coarsest setting. A consistent, uniform grind ensures you get a clean, rich concentrate that won’t become harsh when diluted with ice or milk. Remember: coarse is king for cold brew—never compromise on this step.
How to filter cold brew without sediment
Filtering is essential to achieve a silky, sediment-free iced cold brew. After steeping, pour the mixture through a fine-mesh sieve lined with a coffee filter or a nut milk bag into a clean pitcher.
For best results, use a double layer: first, a sieve to catch large grounds, then a paper filter (like a Chemex or V60 filter) to trap fine particles. If you’re making a large batch, a cold brew-specific filter bag (disposable or reusable) can simplify the process—just steep and remove.
Avoid pressing or squeezing the grounds, as this releases bitter sediment. For extra clarity, let the filtered brew sit for 10 minutes, then carefully pour off the top, leaving any settled silt at the bottom.
This method yields a crystal-clear concentrate that blends beautifully with ice and milk, without the gritty mouthfeel. Always filter twice if you’re after that perfect, restaurant-quality finish.
Storing cold brew concentrate for up to two weeks
Proper storage preserves your cold brew’s fresh, vibrant flavor for up to two weeks. Transfer the filtered concentrate into an airtight glass container (like a mason jar or swing-top bottle) and refrigerate immediately. Glass is preferred over plastic, as it won’t absorb odors or impart off-flavors.
Keep the container away from strong-smelling foods (onions, garlic) to avoid flavor contamination. For maximum shelf life, store the concentrate undiluted—it stays fresh longer than ready-to-drink cold brew. Before use, shake or stir gently, as some sediment may settle.
Avoid leaving the container at room temperature; always return it to the fridge after pouring. If you notice a sour or flat taste after 10-14 days, it’s time to brew a new batch. Label your container with the brew date to track freshness.
With this method, you’ll have perfect iced cold brew on demand—just pour over ice and add water or milk to taste.
How to Serve Iced Cold Brew
Pouring over ice: dilution control tips
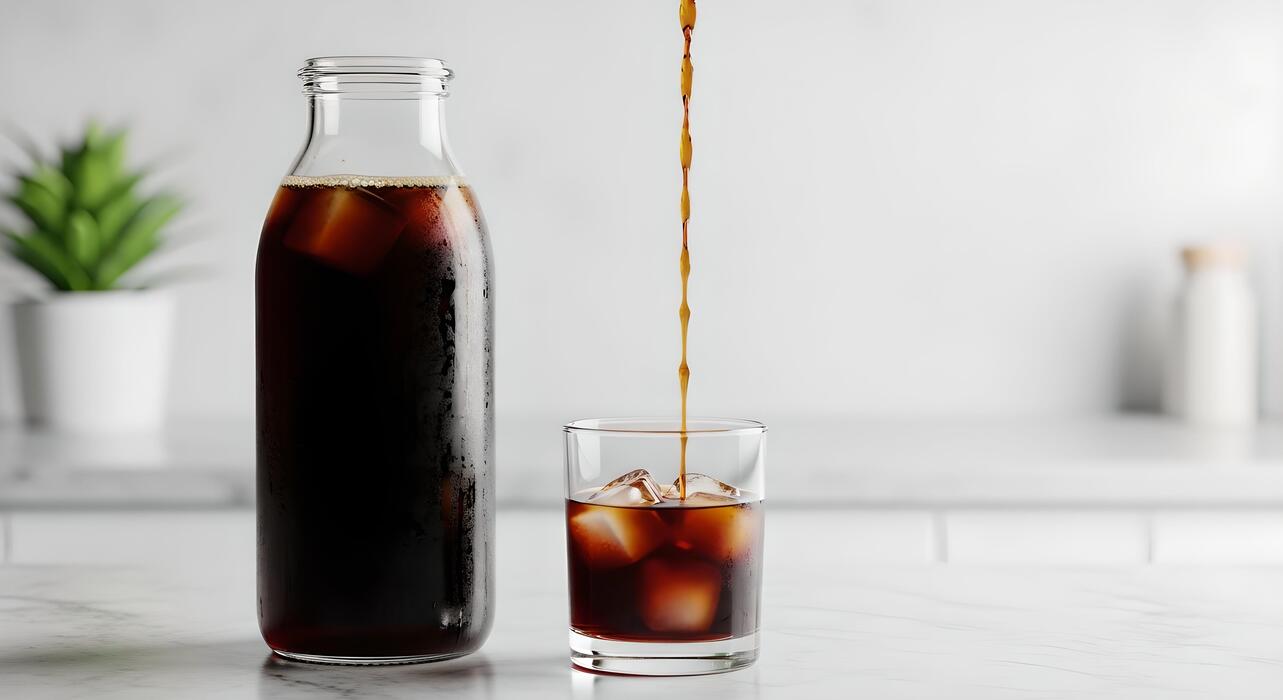
To serve iced cold brew without losing its bold flavor, always pour the concentrate over ice rather than shaking it with ice. This prevents rapid dilution that can wash out the coffee’s natural sweetness.
Start by filling a tall glass with large, dense ice cubes—they melt slower than crushed or small cubes, keeping your drink cold without watering it down. If using homemade cold brew concentrate, use a 1:1 or 2:1 ratio of concentrate to water or milk depending on your strength preference.
For a ready-to-drink cold brew that’s already diluted, simply pour over ice as is. To further control dilution, pre-chill your glass by storing it in the freezer for 10 minutes before serving. This ensures the ice stays intact longer.
If you want a creamier texture without extra ice, try cold foam or a splash of heavy cream instead of more ice cubes. For a truly undiluted experience, consider using coffee ice cubes—freeze leftover cold brew in an ice tray and use them in place of regular ice.
This trick maintains flavor intensity from first sip to last.
Best milk and creamer pairings for cold brew
Cold brew’s smooth, low-acidity profile pairs beautifully with creamy additions. For a classic touch, whole milk or oat milk adds richness without overpowering the coffee’s chocolatey notes. Oat milk’s natural sweetness complements cold brew’s subtle bitterness, while barista-style oat milk froths well for a latte-like finish.
If you prefer dairy, half-and-half or heavy cream creates a luxurious, velvety texture that balances the bold brew. For a nutty twist, almond or macadamia nut milk offers a light, slightly sweet backdrop, though they can thin the drink—use a smaller splash.
Coconut milk (from a carton, not canned) adds a tropical hint that pairs surprisingly well with cold brew’s roasted undertones. For a protein boost, soy milk or a dairy-based protein shake blends seamlessly. Avoid overly watery options like skim milk, which can make the cold brew taste flat.
Always pour the milk or creamer after the cold brew and ice to control the ratio and ensure even mixing. Stir gently to preserve the coffee’s layered flavors.
Sweeteners and syrups that complement cold brew
Cold brew’s naturally low acidity and smooth finish make it an ideal canvas for sweeteners that enhance rather than mask its flavor. Simple syrup (equal parts sugar and water, dissolved) blends instantly into cold liquid without gritty residue.
For a deeper sweetness, brown sugar syrup adds molasses-like warmth that echoes cold brew’s chocolate and caramel notes. Vanilla syrup is a classic choice—its floral sweetness rounds out the brew’s boldness.
If you prefer a sugar-free option, stevia or monk fruit sweetener works well in small amounts; use a liquid form to avoid clumping. For a seasonal twist, maple syrup or honey (thin with warm water first) introduces earthy, fruity undertones.
Caramel or hazelnut syrups also pair beautifully, adding indulgent richness without overwhelming the coffee. Start with 1–2 teaspoons per 8-ounce serving and adjust to taste. Stir thoroughly after adding sweetener to ensure even distribution, especially with thicker syrups.
For a finishing touch, a pinch of cinnamon or sea salt can amplify the sweetness and complexity, creating a café-quality iced cold brew at home.
Common Mistakes When Making Iced Cold Brew
Over-steeping leads to bitterness
The biggest mistake when making iced cold brew is letting the coffee steep for too long. While cold brew is famously smooth, steeping beyond 18-24 hours at room temperature extracts harsh, bitter compounds. You want a rich, chocolatey flavor, not a mouth-puckering brew.
Stick to a 12 to 18-hour steep for a balanced concentrate. Use a timer to avoid guesswork. If your brew tastes astringent or has a dry finish, reduce your steep time by 2-4 hours next batch.
Room temperature steeping is best; the fridge slows extraction, requiring 24+ hours, which can still go bitter. Always taste your cold brew at 12 hours, then every 2 hours after. Stop immediately when it’s smooth and slightly sweet.
Pour the concentrate over ice to dilute and chill, which also mellows any sharp edges. If you accidentally over-steep, you can salvage it by diluting with more water or milk, but prevention is key. Set a timer and stick to a consistent schedule for perfect, never-bitter cold brew every time.
Using the wrong grind size
Grind size dramatically impacts your cold brew’s flavor and strength. A common error is using a grind that’s too fine, like for espresso, which leads to over-extraction and a muddy, bitter taste. Conversely, a grind that’s too coarse results in weak, watery concentrate.
Aim for a coarse, uniform grind, similar to breadcrumbs or kosher salt. This allows water to flow through evenly without extracting harsh tannins. If you don’t have a burr grinder, buy pre-ground coffee labeled ‘cold brew’ or ask your roaster to grind for French press.
Consistency matters: uneven grinds cause some particles to over-extract while others under-extract. For a standard 1:4 coffee-to-water ratio, use 1 cup of coarse grounds per 4 cups of cold water. If your brew tastes sour or weak, your grind is likely too coarse.
If it’s bitter or cloudy, it’s too fine. Adjust your grinder’s coarseness setting until you achieve a smooth, strong concentrate that pours cleanly over ice.
Skipping the filtering step
Many home brewers skip proper filtering, resulting in a gritty, sludge-filled iced coffee. Never skip the final filter even if you used a cold brew maker. After steeping, pour the concentrate through a fine-mesh sieve lined with a paper filter or a nut milk bag to catch fine coffee particles.
This removes sediment that causes bitterness and a muddy mouthfeel. Double filtering is best: first through a sieve to remove large grounds, then through a paper filter for clarity. If you use a French press, press slowly and then pour through a paper filter into your serving container.
Store your filtered concentrate in a sealed glass jar in the fridge for up to two weeks. For iced coffee, pour 1 part concentrate over 1-2 parts ice or cold water. Unfiltered cold brew will continue to extract from sediment, turning bitter over time.
A clean filter ensures a smooth, crisp brew that tastes as good on day 10 as it did on day one. Invest in reusable or disposable filters for consistently clear, delicious cold brew.
How to Customize Your Iced Cold Brew Recipe
Flavored cold brew with vanilla or cinnamon
Elevate your iced cold brew by infusing it with warm, aromatic flavors. The simplest method is to add vanilla extract directly to your brewed concentrate. For a batch, stir in 1-2 teaspoons of pure vanilla extract per quart of cold brew before refrigerating.
For a more pronounced flavor, create a vanilla simple syrup by simmering equal parts water and sugar with a split vanilla bean, then cooling and adding to taste. Cinnamon offers a cozy, sugar-free option. Add 2-3 whole cinnamon sticks to the coffee grounds and water before the 12-24 hour steep.
The spice will gently infuse during brewing. Alternatively, stir a pinch of ground cinnamon directly into your finished cold brew—start with 1/8 teaspoon per glass. Both methods allow you to customize intensity. For a layered experience, rim your glass with cinnamon sugar or garnish with a vanilla bean.
These flavors complement the naturally low acidity of cold brew, creating a smooth, indulgent iced coffee without artificial syrups.
Making nitro cold brew at home
Recreate the velvety, creamy texture of café-style nitro cold brew without a commercial tap system. The key is infusing nitrogen gas into your cold brew concentrate. Start by brewing a strong, double-strength cold brew (use a 1:4 coffee-to-water ratio) and strain it well to remove all fines.
Chill the concentrate to near-freezing. For home use, a nitro cold brew whipper (like an iSi canister) is your best tool. Fill it with cold brew, charge with one or two nitrous oxide (N2O) cartridges (not CO2), shake gently, and dispense through the nozzle into a glass.
The result is a thick, cascading foam and a silky mouthfeel. For a simpler method, use a French press: pour cold brew into the press, pump the plunger vigorously for 30-60 seconds to aerate, then pour immediately. While less intense than true nitro, it creates a lighter texture.
Serve over a single large ice cube to minimize dilution. Nitro cold brew is best enjoyed black to appreciate its natural sweetness and creamy body.
Low-calorie and keto-friendly cold brew options
Enjoying iced cold brew on a low-calorie or keto diet is easy with smart substitutions. Start with a black cold brew base—it’s naturally calorie-free and zero-carb. To add creaminess without sugar, use unsweetened almond milk, coconut milk, or heavy cream (for keto).
A splash of unsweetened vanilla almond milk adds only 30 calories per cup. For sweetness, turn to zero-calorie sweeteners like stevia, monk fruit, or erythritol. Liquid stevia blends seamlessly into cold brew without graininess. Keto-friendly flavor syrups (made with allulose or sucralose) in vanilla, caramel, or hazelnut offer variety.
Avoid powdered sweeteners, which can clump in cold liquid. For a fat-fueled keto boost, blend in 1 tablespoon of MCT oil or unsalted butter for sustained energy. Another trick: cold foam made from unsweetened almond milk or heavy cream frothed with a handheld frother adds texture without carbs.
To keep it truly low-calorie, skip the milk entirely and use a pinch of sea salt to enhance the brew’s natural sweetness. Always check labels on pre-made mixers for hidden sugars.
Frequently Asked Questions
What is the simplest way to make iced cold brew at home?
Combine coarsely ground coffee with cold water in a jar or pitcher using a 1:4 coffee-to-water ratio (e.g., 1 cup coffee to 4 cups water). Stir, cover, and steep in the refrigerator for 12–24 hours, then strain through a fine-mesh sieve or coffee filter. Serve over ice.
How long should I steep cold brew for the best flavor?
Steep for 12–24 hours in the refrigerator. 12–16 hours produces a milder, smoother flavor, while 18–24 hours yields a stronger, bolder concentrate. Avoid steeping longer than 24 hours to prevent bitterness.
What coffee grind size is best for cold brew?
Use a coarse grind, similar to breadcrumbs or sea salt. Fine grinds can over-extract and make the cold brew muddy or bitter, while coarse grinds allow for a clean, smooth extraction during the long steep.
Can I make cold brew without a special filter or French press?
Yes, use a mason jar or pitcher and strain through a nut milk bag, cheesecloth, or a fine-mesh strainer lined with a paper coffee filter. For a simpler method, let the grounds settle and carefully pour off the liquid.
What is the ideal coffee-to-water ratio for iced cold brew concentrate?
A 1:4 ratio (e.g., 1 cup coffee to 4 cups water) makes a strong concentrate. For a ready-to-drink cold brew, use a 1:8 ratio. Dilute the concentrate with water or milk to taste before serving over ice.
How do I serve iced cold brew without it getting watery?
Pour the cold brew concentrate over ice cubes, then add cold water or milk to your desired strength. For extra flavor, freeze leftover coffee into ice cubes so they won’t dilute the drink as they melt.
Can I use any type of coffee bean for cold brew?
Yes, but medium to dark roasts with chocolatey or nutty notes work best for a smooth, rich flavor. Light roasts can taste overly acidic or grassy. Choose a single-origin or blend based on your preference.
Conclusion
Mastering iced cold brew is about patience and proportion: coarsely grind fresh beans, steep them in cool water for 12-24 hours, then strain. The result is a silky, low-acid concentrate that stays smooth over ice. Skip the heat and bitterness forever. Experiment with your favorite beans and dilution ratio. Once you taste the difference, you’ll never go back. Brew a batch tonight and wake up to your new favorite summer ritual.