How To Make Good Cold Brew At Home
How to make good cold brew at home comes down to two things: the right coffee-to-water ratio and patience. Many people end up with bitter, weak, or muddy concentrate because they rush the steep or use the wrong grind. You’re in the right place. We’ll cut through the noise—coarse grounds, a 1:8 ratio, and 12–24 hours at room temp or in the fridge. Smooth, rich, and never acidic. Let’s get brewing.
What Is Cold Brew Coffee and Why Make It at Home
Cold brew vs. iced coffee: key differences
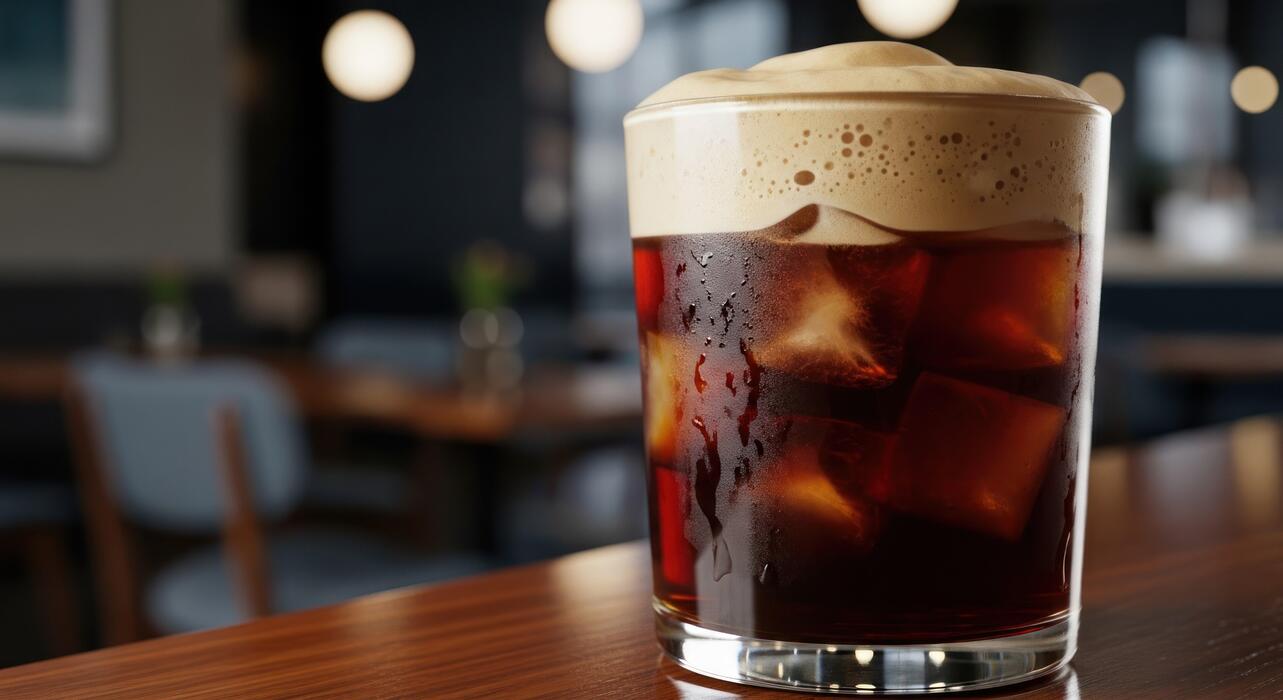
Understanding the difference is the first step to making great cold brew at home. Cold brew is made by steeping coarse coffee grounds in cold or room-temperature water for 12–24 hours, then filtering. This slow extraction produces a smooth, naturally sweet concentrate with 70% less acidity than hot coffee.
In contrast, iced coffee is simply hot-brewed coffee poured over ice, which can taste bitter or watery as the ice dilutes it. For the best homemade cold brew, always use coarse grounds (like sea salt texture) to avoid over-extraction and a muddy flavor.
The result is a concentrate you can dilute with water or milk, giving you full control over strength. Pro tip: Use a 1:4 coffee-to-water ratio (by weight) for a balanced concentrate that’s not too strong.
This method yields a smoother, richer cup that stays fresh in the fridge for up to two weeks—perfect for quick morning pours.
Benefits of homemade cold brew
Making cold brew at home saves money and lets you customize flavor. Cost savings are significant: a 12-ounce bag of quality beans ($12–$15) yields about 8–10 servings of concentrate, compared to $5–$6 per café drink. You also avoid added sugars and preservatives found in store-bought bottles.
Home brewing gives you control over strength and flavor profile—try single-origin beans for fruity notes or a dark roast for chocolatey depth. The low-acid nature of cold brew is gentler on your stomach and teeth, making it a great option for sensitive drinkers.
Plus, you can experiment with flavor infusions like vanilla bean, cinnamon sticks, or a pinch of salt during steeping. Batch brewing saves time: prepare a pitcher on Sunday, and you have ready-to-drink cold brew all week.
The simple process requires minimal equipment—just a jar, filter, and patience—so you can enjoy café-quality results without leaving home.
What you need to get started
You only need three essentials: coffee beans, water, and a container. Start with whole beans ground to a coarse consistency—like breadcrumbs—using a burr grinder for even extraction. Use filtered water for the cleanest taste.
For the container, a large Mason jar or any glass pitcher works, but a dedicated cold brew maker (like a Toddy or French press) simplifies filtering. You’ll also need a fine-mesh strainer, cheesecloth, or paper filters to separate the grounds.
Optional but helpful: a kitchen scale for precise ratios (1 part coffee to 4 parts water by weight) and a refrigerator for cold steeping. No heat or special skills required—just combine grounds and water, stir, cover, and let it steep 12–24 hours.
For easiest cleanup, use a nut milk bag or reusable coffee sock. With these basics, you can make smooth, concentrated cold brew that rivals any café.
Best Coffee Beans for Cold Brew at Home
Roast level: light, medium, or dark
For the smoothest, most balanced cold brew, choose a medium or dark roast. Dark roasts are the classic choice because their bold, chocolatey, and low-acid flavors shine through the long steeping process, resulting in a rich, full-bodied concentrate.
Medium roasts offer a slightly brighter, more nuanced cup with subtle fruity or nutty notes while still maintaining low acidity. Avoid light roasts: they can taste sour, grassy, or overly acidic when brewed cold. If you prefer a lighter profile, opt for a medium-light roast.
For the best results, buy whole beans and grind them coarse—like sea salt—just before brewing. This prevents over-extraction and bitterness. Experiment with a single dark roast batch and a medium roast batch to discover your personal preference.
Remember, the goal is a smooth, sweet, and non-bitter concentrate, so prioritize roasts known for their low acidity and rich body.
Single origin vs. blends for smooth flavor
For the smoothest cold brew, choose a blend specifically designed for cold brewing rather than a single origin. Blends are expertly crafted by roasters to balance flavor, acidity, and body—often combining beans from different regions to create a harmonious, consistently smooth profile.
A well-made blend can mask any harsh or bitter notes that might emerge from a single origin’s unique characteristics.
Single origins, like a fruity Ethiopian or a bright Kenyan, can produce a delicious cold brew but require careful selection—look for beans described as “balanced” or “low-acid.” If you want to experiment, try a single origin from Brazil or Sumatra, which naturally offer chocolatey, nutty, and low-acid flavors.
For beginners, a dedicated cold brew blend is the safest bet. When shopping, read tasting notes: avoid words like “citrus” or “winey” and look for “chocolate,” “caramel,” “nuts,” or “smooth.” The right blend ensures every batch is reliably delicious.
Where to buy quality beans for cold brew
Buy fresh, high-quality beans from a specialty roaster—either online or at a local coffee shop. Local roasters often provide the freshest beans, and you can ask for a recommendation specifically for cold brew.
Online retailers like Counter Culture, Stumptown, Onyx, or Intelligentsia offer excellent cold brew blends and single origins with detailed tasting notes. Look for beans roasted within the last two weeks—freshness is key for maximum flavor and smoothness. Avoid supermarket brands, which may be stale or over-roasted.
Many roasters also sell cold brew-specific blends that are pre-tested for optimal extraction. For convenience, subscribe to a monthly coffee delivery from a roaster you trust. When ordering, choose whole beans and grind them yourself at home.
If you don’t have a grinder, ask the roaster to grind them on a coarse setting for cold brew. Investing in fresh, quality beans is the single most important step to making exceptional cold brew at home.
How to Grind Coffee for Cold Brew

Why coarse grind matters
For cold brew, a coarse grind is essential because it controls extraction speed and clarity. Unlike hot brewing where fine grounds extract quickly, cold water needs hours to pull flavors. A coarse grind—resembling sea salt or raw sugar—slows extraction, preventing over-extraction that leads to bitter, muddy flavors.
This size allows water to flow evenly through the grounds during steeping, producing a smooth, clean concentrate. If you grind too fine, you’ll get a cloudy, harsh brew with sediment. Aim for particles that are uniformly large to maximize flavor without bitterness.
A good test: pinch the grounds—they should feel gritty, not powdery. This texture ensures your cold brew is rich, low-acid, and easy to strain. Remember, coarse grind is your foundation for a successful batch; it balances sweetness and body while minimizing harsh compounds.
Grinder types: burr vs. blade
The grinder you choose directly impacts cold brew quality. Burr grinders are ideal because they crush beans between two surfaces, producing consistent, uniform particles. This consistency ensures even extraction, so every sip is balanced. Manual burr grinders are affordable and quiet; electric ones are faster but pricier.
In contrast, blade grinders chop beans randomly, creating a mix of fine dust and large chunks. This unevenness leads to over-extracted bitterness from fines and under-extracted sourness from boulders. For cold brew, uniformity matters more than speed.
If you only have a blade grinder, pulse briefly in short bursts and shake the grinder to improve consistency, but expect some sediment.
For best results, invest in a burr grinder—it’s a small upgrade that transforms your cold brew from good to great, saving you from strained filtering and bitter batches.
Avoiding common grinding mistakes
Even with the right grind size, mistakes can ruin your cold brew. Don’t grind too fine—this is the top error. Fine grounds clog filters, create sludge, and over-extract tannins, making your brew harsh. Another mistake is grinding too far in advance; coffee stales quickly after grinding, losing aromatic oils.
Always grind just before steeping for peak freshness. Also, avoid inconsistent grinding from a blade grinder; it leads to uneven extraction. If you use a blade, sift out fines with a mesh strainer before steeping. Don’t skip weighing your beans—eyeballing leads to wrong ratios. Use a kitchen scale for precision.
Finally, don’t over-steep to compensate for grind issues; stick to 12-24 hours. By avoiding these pitfalls, you ensure a smooth, flavorful concentrate that’s easy to strain and perfect for mixing. Small adjustments in grinding technique yield big rewards in taste and clarity.
Simple Cold Brew Recipe: Step-by-Step Guide
Coffee-to-water ratio for perfect strength
The foundation of great cold brew is the coffee-to-water ratio. For a balanced, ready-to-drink concentrate that isn’t too weak or too intense, start with a 1:8 ratio by weight (e.g., 1 ounce of coffee to 8 ounces of water).
If you prefer a stronger concentrate to dilute later with milk or water, use a 1:4 or 1:5 ratio. Always use coarsely ground coffee — similar to breadcrumbs — to avoid over-extraction and bitterness. A kitchen scale ensures accuracy: measure your coffee first, then add the corresponding water.
For example, for a 1:8 ratio, use 100 grams of coffee and 800 grams (or milliliters) of water. This precise ratio gives you a smooth, non-acidic brew that highlights the coffee’s natural sweetness.
Adjust the ratio slightly based on your taste preferences: more coffee for a bolder cup, less for a milder one. Remember, cold brew is forgiving, so note what works for you and stick with it.
Mixing and steeping instructions
Combine your coarsely ground coffee with cold, filtered water in a large jar or pitcher. Stir gently with a long spoon to ensure all grounds are fully saturated — no dry clumps should remain.
Cover the container with a lid or plastic wrap and let it steep at room temperature for 12 to 24 hours. The sweet spot for most beans is 18 hours, but start checking at 12 hours to avoid over-steeping, which can cause bitterness.
If your kitchen is warm, steeping in the refrigerator works too, but expect a slightly longer steep time (24–36 hours). Avoid stirring during steeping, as this can disturb the extraction process. For even extraction, ensure the coffee bed is fully submerged. A tight-fitting lid prevents odors from affecting the flavor.
Patience is key — rushing the steep time results in weak, under-extracted brew. Set a timer and let the coffee work its magic.
Straining and storing your cold brew
After steeping, strain the cold brew through a fine-mesh sieve lined with a coffee filter or a nut milk bag into a clean container. For a super-clean cup, strain twice: first through the sieve to remove large grounds, then through a paper filter to catch fine sediment.
Gently press the grounds with a spoon to extract all liquid, but avoid squeezing too hard, which can push bitter compounds into your brew. Transfer the strained concentrate to an airtight glass jar or bottle and refrigerate immediately.
Properly stored, cold brew concentrate stays fresh for up to 2 weeks, though flavor peaks within the first 5–7 days. Never leave it at room temperature after straining. To serve, dilute with equal parts water or milk (or to taste) over ice.
For an extra-smooth result, add a pinch of salt before serving to balance acidity. Enjoy your homemade cold brew within a week for the best flavor.
Tips for Better Cold Brew Flavor and Smoothness
Steep time: 12 to 24 hours
The steep time is the single most important factor for cold brew flavor.
Aim for 12 to 24 hours at room temperature or in the fridge. Shorter steeps (12-14 hours) yield a lighter, tea-like brew with brighter acidity, while longer steeps (18-24 hours) extract more body, chocolatey notes, and subtle sweetness.
Avoid over-steeping beyond 24 hours as this can pull out harsh, bitter compounds from the grounds. If you prefer a smooth, low-acid cup, target 18-20 hours. For a bolder concentrate, push to 22-24 hours. Always use a coarse grind—like breadcrumbs—to prevent over-extraction.
After steeping, filter through a fine-mesh sieve lined with a coffee filter or a nut milk bag. Taste test at 12 hours by dipping a spoon; if it’s weak, steep longer.
Remember, cold brew concentrate is meant to be diluted 1:1 or 1:2 with water or milk, so adjust your steep time based on your desired strength. Consistent timing ensures repeatable results.
Water quality and temperature tips
Water makes up over 98% of your cold brew, so its quality directly impacts smoothness. Use filtered or bottled water free of chlorine and minerals that can cause off-flavors or cloudiness. Tap water often contains impurities that dull the coffee’s natural sweetness.
Cold water is non-negotiable—never use hot or warm water, as heat extracts bitter oils and acids. Start with cold, fresh water straight from the tap or fridge. The ideal temperature is 40-70°F (4-21°C). If your water is too cold, extraction slows; too warm, it risks bitterness.
For best results, use a 1:4 to 1:8 coffee-to-water ratio by weight (e.g., 100g coffee to 400-800g water). Stir the grounds and water gently to ensure even saturation. Let the mixture sit undisturbed during steeping.
After filtering, store your cold brew in a sealed glass container in the fridge for up to two weeks. Always taste and adjust—if your brew tastes flat, try a different water source next time.
How to fix bitter or weak cold brew
Bitter cold brew usually means over-extraction or too-fine a grind. Switch to a coarser grind (like kosher salt) and reduce steep time to 12-14 hours. If it’s still bitter, dilute with more water or milk to mellow the harshness.
Add a pinch of salt to your finished brew—it neutralizes bitterness by blocking taste receptors. For weak cold brew, the issue is often under-extraction. Increase steep time to 20-24 hours or use a finer grind (but not too fine). Alternatively, boost the coffee-to-water ratio to 1:4 instead of 1:8.
If your brew is sour or acidic, it’s likely under-extracted—steep longer or use slightly warmer water (up to 70°F). To salvage a weak batch, brew a small, strong batch and blend them. For bitter batches, add a splash of cream or a sweetener like maple syrup to balance flavors.
Always taste before filtering—adjust steep time or grind on your next batch. Remember, cold brew is forgiving: you can always tweak ratios.
Best Equipment for Making Cold Brew at Home
Mason jar and cheesecloth method
For a budget-friendly and effective start, use a 32-ounce mason jar and fine-weave cheesecloth or a nut milk bag. Combine 1 cup of coarse-ground coffee with 4 cups of cold, filtered water in the jar. Stir gently to ensure all grounds are saturated.
Seal the jar and let it steep at room temperature for 12-24 hours. After steeping, place your cheesecloth or nut milk bag over a large bowl or pitcher, and slowly pour the concentrate through to filter out the grounds. For a cleaner cup, strain a second time.
Store your concentrate in the fridge for up to two weeks. This method gives you full control over strength—simply adjust the steep time or coffee-to-water ratio. Serve over ice with water or milk to taste.
Key tip: Avoid using pre-ground coffee; grind your beans coarsely right before brewing for the best flavor and minimal sediment.
French press cold brew technique
Your French press is an ideal cold brew tool because its built-in plunger and mesh filter make straining effortless. Use a standard 34-ounce press and add 1 cup of coarse-ground coffee.
Pour in 4 cups of cold, filtered water, then stir gently with a long spoon to ensure all grounds are wet. Press the plunger down just enough to submerge the grounds, but do not plunge fully yet. Cover and refrigerate for 12-18 hours.
After steeping, slowly press the plunger down all the way to separate the grounds from the liquid. Pour the concentrate into a separate container to stop extraction, as leaving it in the press can cause bitterness. This method yields a smooth, sediment-free brew with minimal cleanup.
For a stronger concentrate, use less water or steep longer. Pro tip: Rinse the filter screen immediately after use to prevent coffee oils from clogging it.
Top cold brew makers under $50
For consistent results without guesswork, invest in a dedicated cold brew maker under $50. The Takeya Cold Brew Coffee Maker ($25-$30) features a fine-mesh filter and a sleek, airtight pitcher—just add coarse grounds and water, steep 12-24 hours, then remove the filter for mess-free storage.
The County Line Kitchen Cold Brew Mason Jar ($20-$25) uses a reusable stainless steel filter and a classic mason jar design, perfect for small kitchens.
For a larger batch, the Primula Burke Cold Brew System ($15-$20) includes a glass carafe and a removable filter basket, making it simple to brew up to 50 ounces. All these options require coarse-ground coffee and a 12-24 hour steep time. They eliminate the need for cheesecloth or extra straining.
Key benefit: Each keeps grounds separate from the final concentrate, reducing bitterness. Pair with a burr grinder for the freshest flavor, and always use cold, filtered water for the cleanest taste.
How to Serve and Store Your Cold Brew
Serving ideas: over ice, with milk, or black
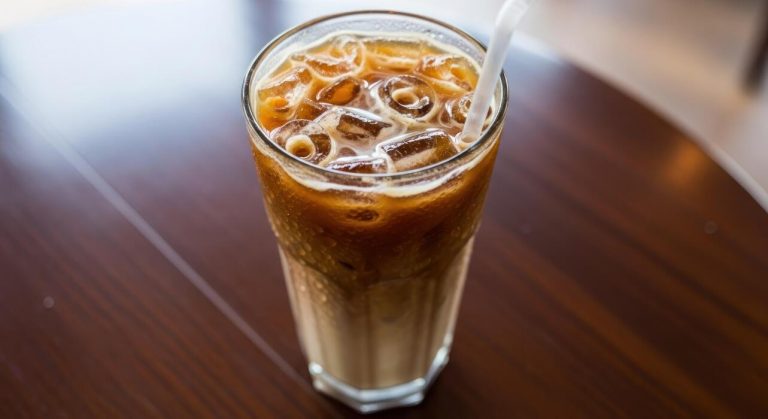
Once your cold brew is filtered and chilled, it’s time to enjoy it your way. For a classic iced coffee, fill a glass with large ice cubes, pour the cold brew over them, and add a splash of cold water or milk.
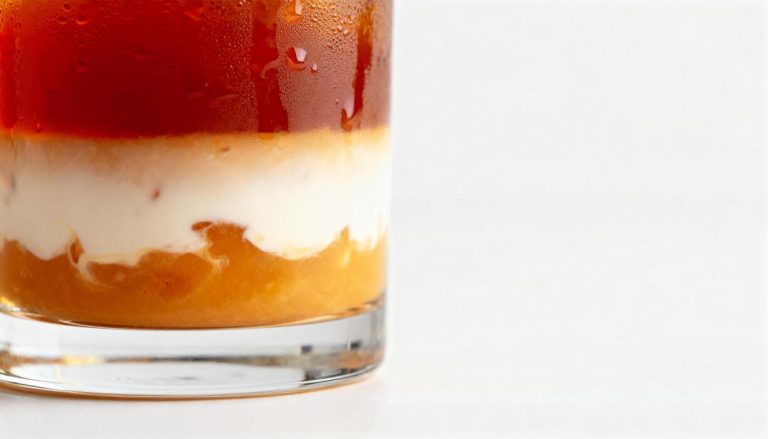
If you prefer it black, you’ll appreciate the naturally smooth, low-acid flavor—just serve it straight over ice. To make it creamy, try whole milk, oat milk, or condensed milk for a richer texture. For a café-style touch, froth a little milk and float it on top.
Cold brew also shines in cocktails or mocktails: mix with tonic water, a citrus twist, or vanilla syrup. Since cold brew is less acidic, it won’t curdle dairy, so it’s perfect for lattes. Always taste before sweetening—cold brew’s natural sweetness often needs less sugar.
Serve immediately for the best freshness and bold aroma.
How long cold brew lasts in the fridge
Properly stored, cold brew concentrate or ready-to-drink coffee stays fresh in the refrigerator for 7 to 10 days. After that, it may develop off-flavors or lose its vibrant taste.
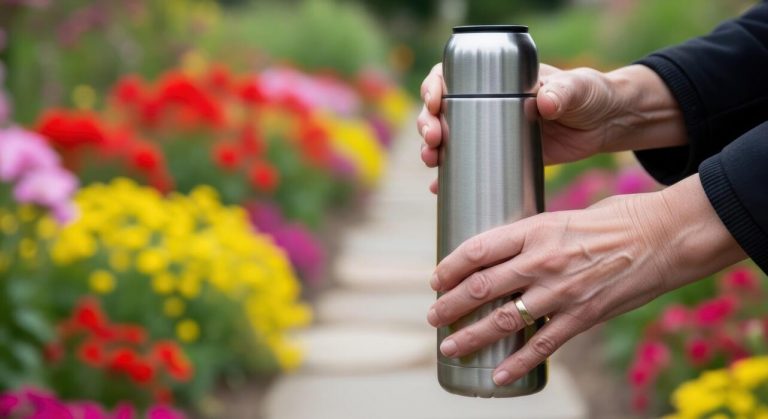
To maximize shelf life, always use a clean, airtight glass container (like a mason jar or a swing-top bottle) and avoid adding milk or sugar until serving—those ingredients spoil faster. Label your container with the brew date so you know when to use it.
If you notice a sour or stale smell, or if the color dulls, it’s time to discard it. For the best flavor, aim to finish your cold brew within the first 5 days. Avoid leaving it at room temperature; refrigeration slows oxidation and bacterial growth.
If you’ve made a large batch, consider freezing some in ice cube trays for smoothies or iced drinks later.
Concentrate vs. ready-to-drink storage
Cold brew concentrate is a stronger, more concentrated coffee that you dilute with water or milk before drinking. Store concentrate in a sealed glass jar in the fridge, and it will keep for up to 10 days.
To serve, mix 1 part concentrate with 1 to 2 parts water or milk (adjust to taste). Ready-to-drink cold brew, which is already diluted, should be stored the same way but consumed within 7 days for peak freshness.
If you’ve added milk, cream, or syrups, drink it within 2-3 days to avoid spoilage. Never store cold brew in a metal container, as it can impart a metallic taste. For convenience, portion concentrate into small bottles for grab-and-go. Always shake or stir before serving, as sediment may settle.
Using opaque or dark glass helps block light, preserving flavor longer. Label containers with type and date to stay organized.
Frequently Asked Questions
What is the best coffee-to-water ratio for cold brew?
A standard ratio is 1:8 coffee to water by weight (e.g., 1 cup coffee to 8 cups water). For a stronger concentrate, use 1:5, and dilute with water or milk when serving.
Should I use coarse or fine grounds for cold brew?
Always use coarse grounds, similar to French press consistency. Fine grounds can over-extract, making the brew bitter and muddy.
How long should I steep cold brew?
Steep at room temperature for 12-24 hours. 18 hours is a sweet spot for balanced flavor; shorter times yield milder brew, longer can become bitter.
Do I need a special cold brew maker?
No, you can use a large jar or pitcher and strain through a fine-mesh sieve, cheesecloth, or a coffee filter. A French press also works well.
How do I filter cold brew without a filter?
Pour the steeped mixture through a fine-mesh strainer lined with a clean kitchen towel or multiple layers of cheesecloth. Repeat if needed for clarity.
Can I use any coffee beans for cold brew?
Yes, but medium to dark roast beans with chocolatey, nutty, or low-acid notes produce the smoothest result. Light roasts can taste sour.
How should I store and serve cold brew?
Store in an airtight container in the fridge for up to 2 weeks. Serve over ice, diluted with water or milk to taste, and add sweetener if desired.
Conclusion
Making exceptional cold brew at home is simple: use a coarse grind, a 1:8 coffee-to-water ratio, and steep for 12-24 hours at room temperature or in the fridge. Strain through a fine filter for a smooth, concentrated result. Dilute to taste and enjoy a rich, low-acid coffee. Experiment with beans and brew times to find your perfect cup. You’ve got this—start brewing today and elevate your morning routine.