How To Make Starbucks Sweet Cream Cold Brew
Wondering how to make starbucks sweet cream cold brew at home? The biggest hurdle is replicating that silky, vanilla-kissed cream that floats perfectly over strong, smooth cold brew. You’ve come to the right place. This guide cuts through the guesswork, giving you the exact ratios for the sweet cream and the proper cold brew method so your homemade version rivals the drive-thru.
What Is Starbucks Sweet Cream Cold Brew?
Key ingredients in the Starbucks version
To replicate the Starbucks Sweet Cream Cold Brew at home, focus on three core components: cold brew coffee, vanilla syrup, and sweet cream. Start with a strong, smooth cold brew concentrate—use a 1:4 coffee-to-water ratio steeped for 12-24 hours.
Starbucks uses their signature Nariño 70 Cold Brew blend, but any medium-to-dark roast works. For the vanilla syrup, combine equal parts water and granulated sugar with vanilla extract (1 tsp per cup of syrup) or use vanilla bean paste for depth.
The sweet cream is the star: mix heavy cream, 2% milk, and vanilla syrup in a 3:2:1 ratio (e.g., 3 tbsp heavy cream, 2 tbsp milk, 1 tbsp syrup). Whisk until slightly thickened but pourable—avoid over-whipping into whipped cream. This cream adds richness without overpowering the coffee.
For a dairy-free version, substitute oat milk and coconut cream with vanilla syrup. Chill all ingredients before assembling to maintain texture. The result is a balanced, subtly sweet drink that mirrors the café classic.
How it differs from regular cold brew
The Starbucks Sweet Cream Cold Brew diverges from regular cold brew primarily through added sweetness and creaminess. Regular cold brew is simply coffee steeped cold, served black or over ice, with no sweeteners or dairy—offering a bold, smooth, and naturally low-acid profile.
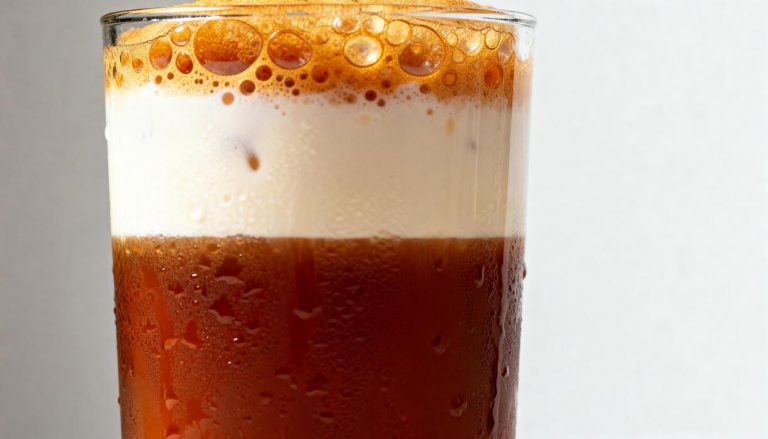
In contrast, the sweet cream version incorporates vanilla-infused syrup directly into the coffee, providing a gentle sweetness that complements the coffee’s chocolatey notes. The key differentiator is the sweet cream foam: a blend of heavy cream, milk, and vanilla syrup that’s lightly aerated to create a velvety, cascading layer.
This foam isn’t just a topping; it slowly integrates into the cold brew as you drink, creating a gradual flavor shift from creamy sweetness at the top to robust coffee at the bottom. Regular cold brew lacks this textural evolution.
Additionally, the sweet cream version has a higher calorie and fat content due to the cream, making it more indulgent. For a DIY version, skip the foam and simply stir in vanilla syrup and milk—but you’ll miss the signature layered experience.
Why the sweet cream foam matters
The sweet cream foam is the defining element that elevates this drink from a simple iced coffee to a sensory experience. Unlike regular milk or cream, the foam is lightly aerated to create a silky, cloud-like texture that floats atop the cold brew.
As you sip, the foam gradually cascades down, blending with the coffee in a slow, visual dance that changes the flavor profile with each drink. The initial sips are creamy and sweet from the vanilla-infused foam, while the lower layers remain bold and coffee-forward.
This dynamic contrast keeps each mouthful interesting. To make the foam at home, whisk together 3 parts heavy cream, 2 parts milk, and 1 part vanilla syrup until it thickens slightly—stop before it forms stiff peaks. Pour it over ice and cold brew, and watch it settle.
For a thicker foam, use a milk frother or shake vigorously in a jar. The foam also traps cold air, keeping the drink cooler longer. Without it, you lose the signature Starbucks texture and the gradual sweetness that makes this drink crave-worthy.
Ingredients You Need for Sweet Cream Cold Brew
Best coffee beans for cold brew concentrate
Start with high-quality, coarsely ground coffee beans for a smooth, rich concentrate. Starbucks uses their House Blend, but a medium or dark roast with chocolate and nutty notes works perfectly. Avoid light roasts, as they can taste sour when cold-brewed.
Use a 1:4 coffee-to-water ratio (e.g., 1 cup coffee to 4 cups water) for a strong concentrate. For best results, choose 100% Arabica beans and grind them just before brewing. Pre-ground coffee is fine, but whole beans ground at a medium-coarse setting yield a cleaner flavor.
Experiment with single-origin beans like Colombian or Guatemalan for unique taste profiles. Remember, the cold brew process extracts smoother flavors, so skip oily, dark-roast beans that might turn bitter. Store your beans in an airtight container away from light and heat to maintain freshness.
How to make the vanilla sweet cream
Whisk together 1 cup heavy cream, 1/2 cup 2% milk, and 2 tablespoons vanilla syrup (or make your own by combining 1/2 cup sugar with 1/2 cup water and 1 teaspoon vanilla extract). For a lighter version, use half-and-half or oat milk.
Stir gently until the sugar dissolves and the mixture is smooth and pourable. Avoid over-whisking to keep it from turning into whipped cream. For a thicker texture, chill the cream for 30 minutes before serving. The key is balancing sweetness and creaminess without overpowering the coffee.
Store leftover sweet cream in the fridge for up to 5 days in a sealed jar. Shake or stir before each use, as separation is natural. This recipe yields about 1.5 cups, enough for 6-8 servings of cold brew.
Tools and equipment for the best results
Invest in a large glass jar or pitcher (at least 64 ounces) for brewing the concentrate. A fine-mesh strainer or nut milk bag is essential for filtering out grounds, ensuring a smooth, sediment-free drink. Use a coffee grinder with a coarse setting to avoid over-extraction.
A scale helps measure coffee and water precisely for consistent results. For serving, a tall glass filled with ice is key, plus a long spoon to stir in the sweet cream. A french press can double as a brewer and filter, simplifying cleanup.
Reusable silicone bags are eco-friendly for small batches. Don’t forget a sharp knife to cut citrus peels if adding flavor twists. These tools make the process efficient and mess-free, ensuring your sweet cream cold brew rivals Starbucks every time.
How to Make Cold Brew Concentrate at Home

Step-by-step cold brew brewing method
To make a Starbucks-style sweet cream cold brew at home, start by coarsely grinding your favorite coffee beans—a medium roast works well for balance. Combine 1 cup of coarse grounds with 4 cups of cold, filtered water in a large jar or French press.
Stir gently to ensure all grounds are saturated. Cover the container and let it steep at room temperature for 12–24 hours; 18 hours is ideal for a smooth, rich concentrate. After steeping, strain the mixture through a fine-mesh sieve lined with a coffee filter or cheesecloth into a clean pitcher.
Do not press the grounds to avoid bitterness. This yields a concentrated base that you can refrigerate for up to two weeks.
For the sweet cream element, simply whisk together 1/2 cup heavy cream, 1/4 cup milk, and 2 tablespoons of vanilla syrup (or homemade simple syrup with vanilla extract) until frothy.
To serve, fill a glass with ice, pour cold brew concentrate halfway, top with cold water or milk to taste, and slowly add the sweet cream over the back of a spoon for that signature layered look.
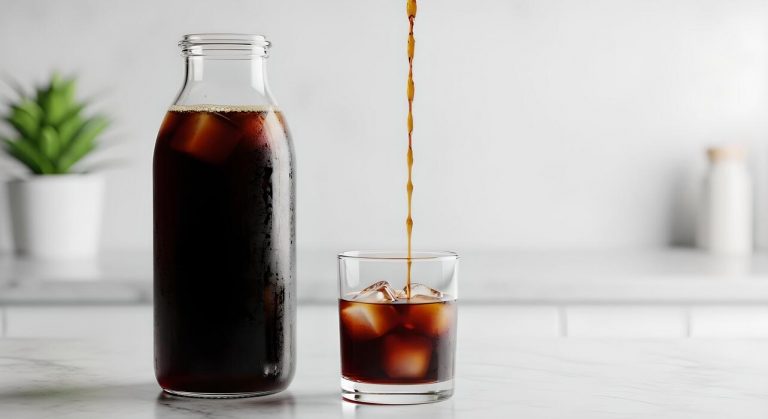
Coffee-to-water ratio for a strong concentrate
The key to mimicking Starbucks’ bold cold brew is using a 1:4 coffee-to-water ratio by volume, which produces a strong concentrate that can be diluted later. For a standard batch, combine 1 cup (80 grams) of coarsely ground coffee with 4 cups (32 ounces) of cold water.
This ratio ensures deep extraction without over-brewing, giving you a concentrate that’s smooth and slightly syrupy.
If you prefer a less intense brew, adjust to a 1:5 ratio (1 cup coffee to 5 cups water), but avoid going weaker as you want the concentrate to hold up against ice and cream. Use filtered water for the cleanest taste—tap water can introduce off-flavors.
For precision, weigh your coffee with a kitchen scale: aim for about 80–100 grams of grounds per liter of water.
Remember, the concentrate should be diluted when serving: a typical serving is 1 part concentrate to 1 part water or milk, so the initial ratio is crucial for achieving that familiar coffee-forward profile that balances perfectly with sweet cream.
How long to steep for optimal flavor
Steeping time directly impacts the taste of your cold brew concentrate. For a smooth, balanced flavor with low acidity, aim for 18–20 hours at room temperature. This duration extracts the coffee’s natural sweetness and chocolate notes without pulling out bitter compounds.
If you steep for less than 12 hours, the brew may taste weak or sour; longer than 24 hours risks over-extraction, leading to a harsh, chalky flavor. Starbucks-style cold brew typically steeps for 20 hours, so set a timer to hit that sweet spot.
Use a tightly sealed container to prevent absorption of fridge odors if steeping in the refrigerator, though room temperature steeping is more consistent. After the steeping period, taste a small amount of the concentrate—it should be rich and slightly thick, not watery.
If it’s too intense, you can always dilute it, but you can’t fix over-steeped bitterness. For the best results, filter immediately after steeping to stop the extraction process and preserve that clean, velvety finish that pairs perfectly with sweet cream.
How to Make Starbucks-Style Vanilla Sweet Cream
Simple recipe with heavy cream and vanilla syrup
To recreate Starbucks-style vanilla sweet cream at home, start with a simple 2:1 ratio of heavy cream to 2% milk. In a jar or measuring cup, combine 1 cup of heavy cream with ½ cup of 2% milk.
Add 3 to 4 tablespoons of vanilla syrup—you can use store-bought like Torani or make your own by simmering equal parts sugar and water with vanilla extract. Stir gently until fully combined; avoid vigorous shaking to prevent over-aeration.
This base makes about 1½ cups of sweet cream, enough for 4 to 6 servings of cold brew. For a thinner pour, add an extra splash of milk. Refrigerate any leftovers in an airtight container for up to 7 days.
Before using, give it a light stir since the cream may separate slightly. This recipe delivers the same velvety texture and sweet vanilla flavor as the coffee chain’s version, perfect for elevating your cold brew at home.
Tips for getting the right consistency
Achieving the perfect consistency for Starbucks-style sweet cream is key to a smooth, pourable texture that doesn’t separate in cold brew. Start by using cold ingredients—chilled heavy cream and milk blend more evenly and prevent graininess.
When mixing, gently stir with a spoon or whisk rather than shaking, which can whip air into the cream and create foam. The ideal result should be slightly thicker than whole milk but still fluid enough to pour slowly.
If it’s too thick, add a teaspoon of milk at a time until it flows freely. For a richer mouthfeel, use more heavy cream; for a lighter touch, increase the milk ratio.
Always pour the sweet cream over a tall glass of cold brew ice—the temperature contrast helps it cascade beautifully. Let it sit for 30 seconds before drinking to allow the flavors to meld. This method ensures a consistent, barista-quality pour every time.
How to adjust sweetness to your taste
Customizing the sweetness of your vanilla sweet cream is easy and lets you match your personal preference or dietary needs. Start with the base recipe of 1 cup heavy cream and ½ cup milk, then add 2 to 6 tablespoons of vanilla syrup depending on how sweet you like it.
For a less sugary version, use sugar-free vanilla syrup or reduce the syrup to 2 tablespoons and add a pinch of salt to enhance flavor without extra sweetness. If you prefer a natural sweetener, substitute maple syrup or honey—start with 3 tablespoons and adjust to taste.
To balance the cream’s richness, a tiny dash of cinnamon or nutmeg can add complexity. Always taste after stirring, then adjust gradually. Remember, the sweet cream will taste slightly less sweet once poured over cold brew, so aim for a slightly sweeter base than your final desired level.
This flexibility ensures your homemade cold brew is perfectly tailored to your cravings.
Step-by-Step Guide to Assemble the Drink

How to layer the cold brew and sweet cream
Start with a tall glass filled to the top with ice to keep the drink cold without diluting it too quickly. Pour Starbucks Cold Brew (or your favorite store-bought or homemade cold brew) into the glass, filling it about 3/4 full—typically 8 to 10 ounces for a standard serving.
This gives the sweet cream room to float on top. Next, slowly pour 2 to 3 tablespoons of vanilla sweet cream over the back of a spoon held just above the cold brew’s surface.
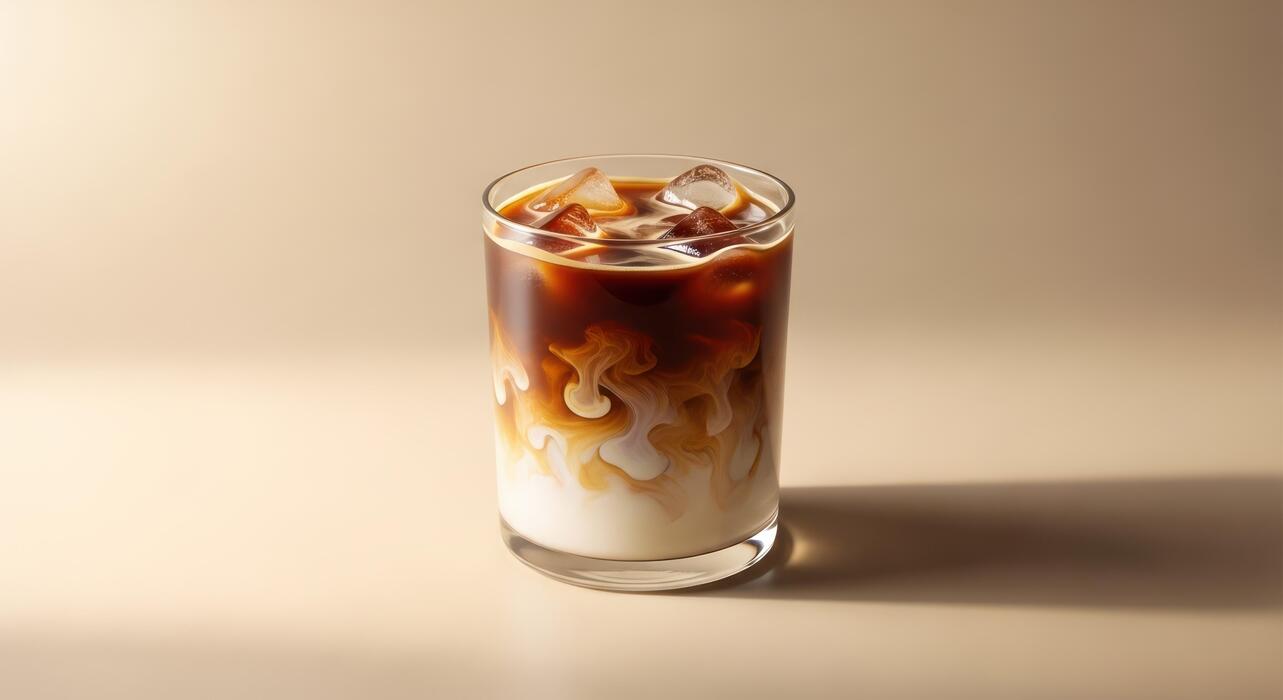
The spoon breaks the fall of the cream, allowing it to gently settle on top instead of mixing in. For a perfect layered look, tilt the glass slightly while pouring. If you want a blended version, simply stir the cream into the cold brew after layering.
The key is to avoid vigorous pouring, which would immediately combine the two layers. This method creates the signature Starbucks look with a dark coffee base and a creamy white top that gradually swirls together as you sip.
Best way to pour for a creamy top
For the creamiest, most Instagram-worthy top, the pouring technique is crucial. Use a chilled sweet cream that’s thick but pourable—if it’s too runny, it will sink; too thick, it won’t spread.
Hold a spoon upside down just above the cold brew’s surface, then slowly pour the cream onto the spoon’s bowl. This diffuses the flow and lets the cream float gently. Pour in a circular motion from the center outward to create an even layer.
Aim for a 1/2-inch thick cream cap that stays separate for at least 30 seconds. For extra richness, use heavy cream instead of milk in your sweet cream recipe—it will sit denser on top. Avoid pouring directly into the ice, as this can cause the cream to solidify and clump.
Practice makes perfect: if your cream sinks, it’s likely too thin, so add a bit more vanilla syrup or heavy cream next time. This technique ensures every sip starts with a velvety, sweet cream finish.
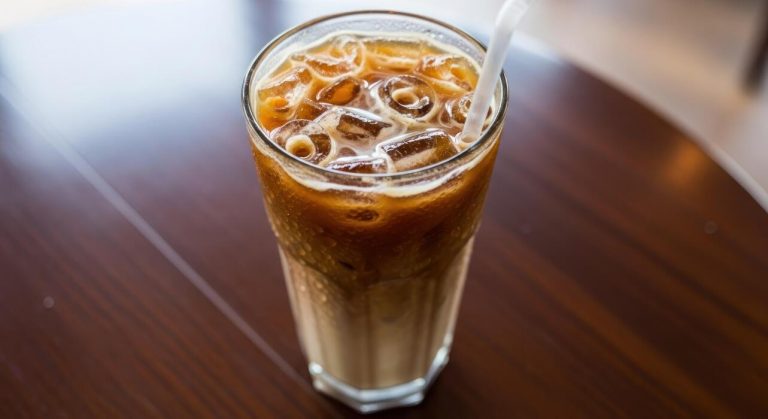
Serving suggestions with ice and garnishes
Serve your sweet cream cold brew in a tall, clear glass to show off the beautiful layers. Use large ice cubes or ice spheres, as they melt slower than crushed ice, keeping the drink concentrated and creamy longer.
For a Starbucks-style touch, add a drizzle of vanilla syrup around the glass rim or a sprinkle of cinnamon or cocoa powder on top of the cream. If you want a coffee shop vibe, garnish with a short cinnamon stick or a single coffee bean floating on the foam.
For a stronger coffee flavor, use dark roast cold brew and reduce the sweet cream to 2 tablespoons. If you prefer a sweeter drink, add 1 tablespoon of simple syrup or caramel sauce to the cold brew before layering.
Serve immediately with a sturdy straw for sipping through the cream, or a spoon for mixing. For a decadent twist, top with a dollop of whipped cream and a drizzle of caramel—perfect for a dessert-like treat. Always keep extra sweet cream chilled for refills.
Tips for Customizing Your Sweet Cream Cold Brew
Add flavors like caramel or chocolate
Elevate your homemade sweet cream cold brew by incorporating complementary flavors. For a caramel twist, stir 1-2 tablespoons of caramel sauce into the sweet cream before layering it over the cold brew, or drizzle it directly on top for a visually appealing finish.
To replicate Starbucks’ popular variations, try chocolate by mixing in 1 tablespoon of chocolate syrup or cocoa powder with a splash of vanilla syrup into the cream. For a mocha-like experience, add a pinch of sea salt to balance the sweetness.
You can also experiment with cinnamon, hazelnut, or peppermint extracts—just a few drops will do. If using flavored syrups, reduce the vanilla in the cream to avoid over-sweetening. Remember to stir the base cold brew first, then pour the flavored cream over ice for distinct layers.
These small tweaks let you customize your drink to match seasonal cravings or personal preferences without straying far from the original recipe.
Dairy-free alternatives for the sweet cream
Making a dairy-free sweet cream cold brew is simple with plant-based swaps. Start with coconut cream or full-fat oat milk as the base—both provide the rich, velvety texture needed.
For the sweet cream, combine ½ cup of your chosen milk with 2 tablespoons of maple syrup or agave and 1 teaspoon of vanilla extract. Oat milk works best because it froths well and has a neutral taste, while coconut cream adds a subtle tropical note.
If using almond or soy milk, opt for barista editions to prevent curdling when mixed with cold brew. For a creamier result, blend in 1-2 tablespoons of cashew butter or silken tofu. To mimic the original’s thickness, shake the mixture vigorously or use a milk frother.
Pour it over ice and cold brew, letting the dairy-free cream sink slowly. Adjust sweetness to taste—plant-based milks vary in natural sugar content. This adaptation ensures a lactose-free, vegan-friendly version that doesn’t compromise on flavor.
How to make it less sweet or more indulgent
Tailor the sweetness level of your sweet cream cold brew with simple adjustments. For a less sweet version, reduce the vanilla syrup in the cream to 1 tablespoon or replace it with sugar-free syrup. Use unsweetened almond or oat milk as the base, and skip any extra drizzles.
You can also dilute the cream with a splash of plain milk or increase the coffee-to-cream ratio to let the bold cold brew flavor shine. For a more indulgent treat, double the vanilla syrup and add 2 tablespoons of sweetened condensed milk for extra richness.
Top with whipped cream and a drizzle of caramel or chocolate sauce for a dessert-like experience. To enhance the creamy texture, use half-and-half or heavy cream instead of milk. For a boozy twist, stir in 1 ounce of Irish cream liqueur or Kahlúa.
These customizations let you control the sweetness and decadence, whether you prefer a lighter sip or a full-on splurge.
Common Mistakes to Avoid When Making It
Using the wrong coffee grind size
One of the most common mistakes is using a coffee grind that is too fine. For cold brew, you need a coarse grind, similar to breadcrumbs or kosher salt. A fine grind will over-extract during the long steep time, resulting in a bitter, muddy, and overly acidic brew.
Instead, aim for a consistent coarse grind to ensure a smooth, balanced extraction. If you don’t have a grinder, buy pre-ground coffee labeled specifically for cold brew. Another tip is to use filtered water for the best flavor.
The ratio matters too: start with 1 cup of coarsely ground coffee to 4 cups of water. This will give you a concentrate that mimics Starbucks’ rich, bold base. Avoid the temptation to use a medium or fine grind, as it will ruin the clean taste.
Remember, the goal is a smooth, chocolatey cold brew that isn’t harsh or over-extracted.
Over-steeping the cold brew
Steeping your cold brew for too long is a surefire way to get a bitter, unpleasant concentrate. While it might seem like longer steeping equals stronger flavor, it actually leads to over-extraction of bitter compounds.
The ideal steeping time is 12 to 18 hours at room temperature or in the fridge. If you steep for 24 hours or more, you risk a harsh, overly strong brew that masks the sweet cream’s flavor. To avoid this, set a timer and taste test after 12 hours.
If it’s already bold enough, strain it immediately. Another mistake is steeping in direct sunlight or a warm area, which accelerates extraction. Always steep in a cool, dark place. After steeping, strain through a fine-mesh sieve or cheesecloth to remove all grounds.
Over-steeping can’t be fixed later, so stick to the recommended time for a smooth, balanced concentrate that pairs perfectly with sweet cream.
Not chilling the cream properly
A common oversight is failing to properly chill the sweet cream before adding it to the cold brew. If the cream is too warm, it will immediately melt the ice and dilute your drink, ruining the layered effect and texture.
The key is to make the sweet cream in advance and refrigerate it for at least 2 hours until it’s very cold. Starbucks uses a mixture of heavy cream, 2% milk, and vanilla syrup, so ensure all components are chilled before combining.
Another mistake is not shaking or stirring the cream well before pouring, as the vanilla syrup can settle at the bottom. For the best result, pour the cold brew over ice, then slowly add the chilled cream to create a beautiful swirl.
If you skip chilling, you’ll lose the creamy, velvety mouthfeel that defines the drink. Always taste and adjust sweetness, but never add warm cream to cold brew—it compromises the entire experience.
Frequently Asked Questions
What is Starbucks Sweet Cream Cold Brew?
It’s a popular Starbucks drink that combines their slow-steeped cold brew coffee with a house-made vanilla sweet cream, which is poured over the coffee to create a layered, creamy beverage.
What ingredients do I need to make Sweet Cream Cold Brew at home?
You’ll need coarsely ground coffee beans (preferably a medium or dark roast) for the cold brew, water, heavy cream, 2% milk, and vanilla syrup (or a simple syrup with vanilla extract).
How do I make the cold brew coffee base?
Combine 1 cup of coarsely ground coffee with 4 cups of cold water in a large jar or pitcher. Stir gently, cover, and let it steep in the refrigerator for 12-24 hours. Strain through a fine-mesh sieve or cheesecloth to remove the grounds.
How do I make the vanilla sweet cream?
In a small bowl or jar, whisk together 1/2 cup heavy cream, 1/4 cup 2% milk, and 2 tablespoons of vanilla syrup (or to taste). For a thicker cream, use more heavy cream; for a lighter texture, use more milk.
What is the proper way to assemble the drink?
Fill a glass with ice, then pour the cold brew coffee over the ice, filling the glass about 3/4 full. Slowly pour the vanilla sweet cream over the back of a spoon held just above the coffee to create a layered effect.
Can I make a dairy-free version of Sweet Cream Cold Brew?
Yes, substitute the heavy cream and milk with full-fat oat milk or coconut cream for a similar richness. Use a dairy-free vanilla syrup to maintain the flavor.
How long does homemade cold brew and sweet cream last?
Homemade cold brew can be stored in the refrigerator for up to 1-2 weeks. The vanilla sweet cream is best used within 3-5 days when stored in an airtight container in the fridge.
Conclusion
Mastering the Starbucks Sweet Cream Cold Brew at home is simpler than you think. The key takeaways are steeping coarse-ground coffee for 20 hours for a smooth concentrate, and whisking together heavy cream, milk, and vanilla syrup for the signature sweet cream. With a little patience, you can enjoy this café favorite any time, saving money and impressing your friends. Go ahead and brew your own barista-worthy refreshment today