How To Make Diy Iced Coffee
You want to know how to make diy iced coffee without it turning watery or bitter. The core problem is balancing strong coffee flavor with proper chilling. You’re in the right place. The solution is simple: brew double-strength coffee, cool it quickly, then pour over ice. This guide gives you the exact ratios and methods—hot brew, cold brew, or flash chill—so you get a rich, smooth iced coffee every time, without the coffee shop price tag.
Why Make Iced Coffee at Home
Save money vs. coffee shop drinks
Making iced coffee at home is one of the easiest ways to slash your daily caffeine budget without sacrificing quality. A typical coffee shop iced coffee costs $3 to $6, but brewing your own costs just pennies per glass.
For the price of two café visits, you can buy a bag of whole beans that yields 20+ servings. Invest in a cold brew pitcher or a simple French press, and you’ll break even in under a week.
To maximize savings, buy beans in bulk, grind them yourself, and reuse your ice cubes (or make coffee ice cubes to avoid dilution). Even if you splurge on premium syrups or oat milk, your homemade version will cost 50-80% less.
Plus, you eliminate the tip and the trip—saving both money and time. Start by brewing a double-strength batch of hot coffee, chill it quickly, and pour over ice. You’ll never pay $5 for watered-down iced coffee again.
Control strength and sweetness
When you DIY, you become the barista, tailoring every element to your exact taste. Hate overly sweet coffee? Use half the syrup or swap in a sugar-free option. Prefer a bold, concentrated brew? Increase your coffee-to-water ratio or steep cold brew for 18 hours.
Start with a 2:1 water-to-coffee ratio for hot brew, then dilute with milk or ice to your liking. For sweetness, dissolve simple syrup (equal parts sugar and water) directly into hot coffee before chilling—it blends better than granulated sugar. You can also experiment with flavored syrups, cinnamon, or vanilla extract.
The key is to test small batches and adjust gradually. If your iced coffee tastes bitter, reduce brew time or use a coarser grind. If it’s too weak, add more grounds. With home control, you can replicate your favorite café drink exactly—or invent a signature blend that no shop offers.
Avoid watery or bitter iced coffee
The #1 complaint about homemade iced coffee is that it turns watery or bitter—but these issues are easily preventable with a few tweaks. First, never pour hot coffee directly over ice; this melts the ice too fast and dilutes flavor.
Instead, brew double-strength coffee (use twice the grounds), let it cool to room temperature, then refrigerate before serving over ice. Alternatively, make coffee ice cubes by freezing leftover coffee in an ice tray—they chill without watering down.
For bitterness, switch to a medium roast (dark roasts can taste harsh when iced) and use filtered water. Grind beans coarsely for cold brew, or use a paper filter to remove oils that cause off-flavors. Chill your glass beforehand, and add ice only when ready to drink.
Finally, stir in a pinch of salt to cut bitterness. These steps ensure every sip is crisp, smooth, and full-bodied—never watery or harsh.
What You Need to Start Making DIY Iced Coffee

Essential tools and equipment
To make DIY iced coffee at home, start with a few key items. You’ll need a coffee maker or brewing device like a drip machine, French press, or AeroPress.
A heatproof carafe or pitcher is essential for hot coffee, and a large glass or mason jar works perfectly for serving over ice. Don’t forget ice cube trays—consider making coffee ice cubes to avoid dilution.
A fine-mesh strainer or cheesecloth helps if you’re using a French press or cold brew method. For precise measurements, use a kitchen scale (aim for 1:15 coffee-to-water ratio) or measuring spoons. A tall spoon or stirrer ensures even mixing, and a reusable straw makes sipping eco-friendly.
If you plan to batch-brew, a pitcher with a lid keeps your iced coffee fresh in the fridge for up to a week. Optional but helpful: a milk frother for creamy textures or a silicone ice cube tray for fun shapes.
With these tools, you’ll consistently craft bold, refreshing iced coffee at home without the café price tag.
Best coffee beans for iced coffee
For the best DIY iced coffee, choose medium to dark roast beans with a rich, full-bodied flavor. Dark roasts like French or Italian roast offer low acidity and a chocolatey, smoky profile that shines when chilled.
Medium roasts such as Colombian or Sumatra provide balanced sweetness with nutty or caramel notes, ideal for iced lattes. Avoid light roasts, as their bright acidity can turn bitter when cooled.
Opt for whole beans and grind them just before brewing—a coarse grind works for cold brew, while a medium grind suits hot brewing methods. Single-origin beans from Brazil or Guatemala deliver smooth, low-acid results. For a sustainable choice, look for shade-grown or Fair Trade options.
Store beans in an airtight container away from light to preserve freshness. Experiment with blends like Hazelnut or Vanilla for flavored iced coffee. Remember, freshness matters—use beans within 2-4 weeks of roasting for peak taste. Your choice of beans directly impacts the final cup’s clarity and richness.
Optional add-ins and syrups
Elevate your DIY iced coffee with simple add-ins. Start with liquid sweeteners like simple syrup (equal parts sugar and water, dissolved), honey, or agave nectar—they blend smoothly into cold drinks. For sugar-free options, try stevia drops or monk fruit syrup.
Flavor syrups such as vanilla, caramel, or hazelnut add café-style depth; make your own by simmering sugar, water, and extracts. Milk alternatives like oat, almond, or coconut milk create creamy iced lattes—oat milk froths especially well.
For a dairy boost, use whole milk, half-and-half, or condensed milk for a Vietnamese-style treat. Spices like cinnamon, nutmeg, or cocoa powder sprinkled on top add warmth. Experiment with salted caramel by adding a pinch of sea salt to syrup.
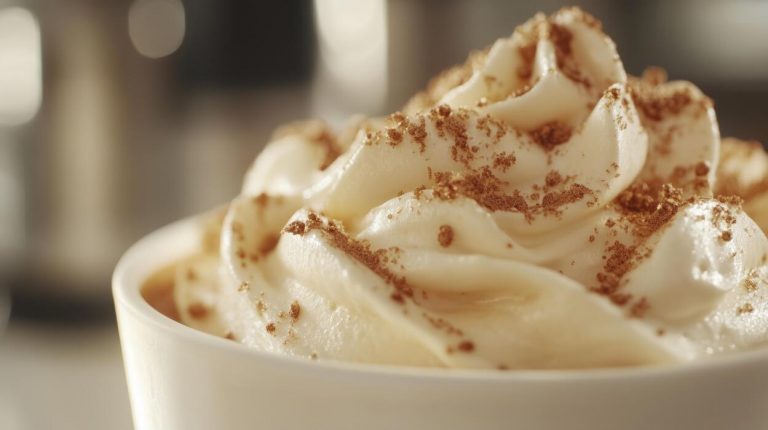
For a protein kick, stir in a scoop of vanilla protein powder. Whipped cream and chocolate shavings turn your brew into a dessert. Start with 1-2 tablespoons of syrup per cup, adjusting to taste. These customizable add-ins let you craft a unique iced coffee every time.
How to Make Classic Iced Coffee with Hot Brew

Brew strong coffee and cool it down
Start by brewing a double-strength batch of hot coffee using your preferred method, such as a drip machine, French press, or pour-over. Use twice the usual amount of coffee grounds per cup of water to ensure the flavor remains bold after dilution.
For a standard 12-ounce serving, aim for 4 tablespoons of ground coffee per 6 ounces of water. Once brewed, let the coffee cool to room temperature for about 15–20 minutes, then transfer it to a glass or airtight container and refrigerate until chilled, typically 1–2 hours.
For faster cooling, pour the hot coffee into a wide, shallow dish or stir in a few ice cubes (accounting for dilution) and refrigerate for 30 minutes. This method preserves the coffee’s rich taste while preventing bitterness from overheating.
Always use filtered water for a cleaner brew, and avoid leaving coffee at room temperature for more than 2 hours to maintain freshness.
Pour over ice without diluting
To serve, fill a tall glass with fresh ice cubes—preferably large or spherical ones that melt slower. Slowly pour the chilled, strong coffee over the ice, aiming for a steady stream to minimize splashing.
For an even more dilution-resistant approach, make coffee ice cubes by freezing leftover brewed coffee in an ice tray; use these instead of regular ice to keep the flavor intact as they melt. Alternatively, pre-chill your glass in the freezer for 10 minutes before adding ice and coffee.
If you prefer a lighter taste, add a splash of cold water or milk first, then pour the coffee. Always stir gently for 5–10 seconds to ensure even temperature distribution without over-agitating the ice.
This technique yields a crisp, refreshing iced coffee that stays strong from the first sip to the last.
Add milk, cream, or sweetener to taste
Customize your iced coffee by stirring in milk, cream, or a non-dairy alternative like oat or almond milk, starting with 1–2 tablespoons per 8-ounce serving. For sweetness, add simple syrup (equal parts sugar and water dissolved together) or liquid sweeteners like honey or agave—these blend easily without grit.
If using granulated sugar, dissolve it in a small amount of hot coffee first, then cool before pouring over ice. For a creamy twist, add a splash of heavy cream or a dollop of whipped cream on top.
Adjust ratios to your preference: for a latte-like drink, use 2–3 ounces of milk; for a black iced coffee, skip dairy and sweeten lightly. Taste after each addition, and remember that cold temperatures dull sweetness, so add slightly more than you think you need.
Stir well and serve immediately for the best flavor.
How to Make Cold Brew Iced Coffee
Step-by-step cold brew concentrate recipe
To make DIY cold brew iced coffee, start with coarse ground coffee (like French press grind) to avoid bitterness. In a large jar or pitcher, combine 1 cup of coffee grounds with 4 cups of cold, filtered water. Stir gently to ensure all grounds are saturated.
Cover and let it steep at room temperature for 12 to 24 hours—longer for a stronger concentrate. After steeping, strain the mixture using a fine-mesh sieve lined with a coffee filter, cheesecloth, or a nut milk bag. Press gently to extract all liquid, then discard the grounds.
This yields a smooth, low-acid concentrate that you can dilute with water or milk when serving. For a quick fix, skip the filter and use a French press to plunge and separate grounds. Store the concentrate in the fridge for up to two weeks.
This method is simple, hands-off, and perfect for meal prep, giving you ready-to-enjoy iced coffee without heat or complex equipment.
Ratio of coffee to water for smooth flavor
The ideal coffee-to-water ratio for cold brew is 1:4 (one part coffee to four parts water) for a concentrate, or 1:8 for a ready-to-drink strength.
Using a 1:4 ratio (e.g., 1 cup grounds to 4 cups water) produces a bold, smooth concentrate that you can dilute 50/50 with water or milk to taste. For a milder brew, use a 1:8 ratio (e.g., 1 cup grounds to 8 cups water) and skip dilution.
Always use coarse ground coffee—fine grounds lead to over-extraction and cloudiness. If your brew tastes bitter or weak, adjust by steeping less time (12 hours) or adding more grounds next batch.
The cold brewing process naturally reduces acidity and bitterness, so this ratio ensures a silky, balanced flavor without harsh notes. Experiment by starting with 1:4 and tweaking to your preference—more coffee for stronger, less for lighter. This ratio is your key to consistently delicious, café-quality iced coffee at home.
Storing and serving cold brew
Store your cold brew concentrate in an airtight glass container or mason jar in the refrigerator for up to two weeks. Glass is best to avoid any plastic taste, and keep it sealed to preserve freshness. Before serving, shake or stir the concentrate as grounds may settle.
To serve, fill a glass with ice cubes (large cubes melt slower), then pour equal parts concentrate and cold water, milk, or a dairy-free alternative—adjust to your desired strength. For a creamy twist, add a splash of oat milk or sweetened condensed milk.
Enhance flavor with vanilla extract, cinnamon, or a drizzle of simple syrup. Avoid pouring hot coffee over ice to prevent dilution—cold brew is already chilled. For a quick iced latte, combine concentrate with cold milk and ice, then stir.
This make-ahead method saves time and ensures you always have smooth, refreshing iced coffee ready. Experiment with different milks or flavored syrups to customize your daily brew.
Tips for Avoiding Watery Iced Coffee

Use coffee ice cubes
The most direct way to prevent watery iced coffee is to replace regular ice cubes with frozen coffee. Simply brew a batch of your favorite coffee, let it cool to room temperature, then pour it into an ice cube tray and freeze overnight.
When you make your iced coffee, use these coffee cubes instead of water-based ones. As they melt, they infuse your drink with more coffee flavor rather than diluting it. For best results, use a slightly stronger brew than usual for the cubes, as freezing can mute some subtle notes.
You can also experiment with adding a splash of milk or cream to the cubes for a creamier result. This technique works especially well if you enjoy sipping your iced coffee slowly, since the cubes will gradually enrich the taste instead of weakening it.
To save time, make a large batch of cubes at once and store them in a sealed freezer bag for up to two weeks. This simple swap transforms your iced coffee from a diluted disappointment into a consistently bold and satisfying drink.
Double-strength brewing method
A powerful way to combat dilution is to brew your coffee at double the normal strength. For example, if you usually use 2 tablespoons of grounds per 6 ounces of water, use 4 tablespoons for the same amount of water.
This creates a concentrated coffee base that will still taste robust even after melting ice waters it down. To execute this, use a French press, pour-over, or drip machine with a finer grind to maximize extraction.
Brew directly over a heatproof container filled with ice, or let the concentrate cool before pouring over fresh ice. The key is to account for the volume of ice you’ll add—aim for a 1:1 ratio of concentrate to ice for a balanced flavor.
You can also adjust the strength based on your preference; if you like a milder taste, use a 1:2 ratio. This method not only prevents watery coffee but also saves time, as you can brew a large batch of concentrate and refrigerate it for up to a week.
Just shake or stir before serving to ensure consistency. With double-strength brewing, every sip remains rich and satisfying from start to finish.
Chill coffee before pouring over ice
One of the most common mistakes is pouring hot coffee directly over ice, which causes rapid melting and immediate dilution. Instead, cool your freshly brewed coffee to room temperature first, then refrigerate it until chilled.
This pre-chilling step ensures that when you pour it over ice, the ice melts slowly, preserving the coffee’s flavor and strength. To speed up the process, you can use a shallow dish to increase surface area or place the coffee in the freezer for 20-30 minutes, stirring occasionally.
Once chilled, fill your glass with ice and pour the cold coffee over it. For an even more effective approach, combine this with the double-strength method—brew strong coffee, cool it, and then pour over ice. This two-step process guarantees a bold, non-watery result.
You can also store a pitcher of pre-chilled coffee in the fridge for quick iced coffee all week. Just remember to keep it covered to prevent absorbing other fridge odors.
By taking the time to chill your coffee first, you’ll enjoy a crisp, full-flavored iced coffee that stays delicious until the last sip.
Best Ways to Flavor Your DIY Iced Coffee
Simple syrups and vanilla recipes
Elevate your DIY iced coffee with homemade simple syrups that dissolve instantly in cold liquid. To make a basic syrup, combine equal parts water and sugar (1:1 ratio) in a saucepan, heat until dissolved, then cool.
For vanilla flavor, split a vanilla bean and steep it in the warm syrup, or stir in 1-2 teaspoons of pure vanilla extract after removing from heat.
Experiment with brown sugar for a richer, molasses-like taste, or use honey or agave—though these may need to be stirred into hot coffee first. For a seasonal twist, infuse your syrup with lavender buds, mint leaves, or citrus zest; just strain before bottling.
Store your syrup in a glass jar in the fridge for up to two weeks. Add 1-2 tablespoons per cup of iced coffee, adjusting to your sweetness preference. This approach lets you control sugar levels while creating a smooth, balanced flavor without gritty residue.
Spices like cinnamon or nutmeg
Transform your iced coffee into a warming, aromatic treat by incorporating spices directly. For the easiest method, sprinkle a pinch of ground cinnamon, nutmeg, or cardamom onto the coffee grounds before brewing—this infuses the flavor as it extracts.
Alternatively, stir a dash of pumpkin pie spice or cinnamon into your cooled coffee before pouring over ice. For a more intense experience, create a spice syrup by simmering whole cinnamon sticks, star anise, or cloves in simple syrup for 10 minutes, then straining.
A cinnamon stick also makes a delightful stirrer, slowly releasing flavor as you drink. Start with 1/4 teaspoon per cup and adjust to taste; these spices pair beautifully with vanilla, chocolate, or caramel notes. Avoid overdoing it, as strong spices can overwhelm the coffee.
This method adds complexity and depth without extra calories, making your iced coffee feel gourmet and cozy.
Dairy-free milk and creamer options
Craft a creamy, dairy-free iced coffee with plant-based milks that complement coffee’s acidity. Oat milk is a top choice due to its neutral flavor and silky texture that mimics whole milk. Almond milk works well but can separate; opt for barista blends or shake vigorously before adding.
Coconut milk (from a carton) adds subtle sweetness and a tropical hint, while cashew milk offers richness without overpowering. For a thick, indulgent creamer, blend full-fat coconut cream with a pinch of salt and vanilla.
Alternatively, use store-bought dairy-free creamers in flavors like vanilla, caramel, or hazelnut—just check for added sugars. To avoid curdling, temper your milk by mixing it with a small amount of hot coffee first, then pour over ice.
For extra richness, whisk in a spoonful of coconut oil or almond butter before serving. These options let you customize creaminess and flavor while keeping your iced coffee vegan-friendly and refreshing.
Quick Iced Coffee Recipes for Busy Mornings
Blended iced coffee in minutes
Skip the drive-through and make a creamy blended iced coffee at home in under 5 minutes. Start with 1 cup of strong brewed coffee that has been chilled (or use leftover coffee from yesterday).
Add it to a blender along with 1/2 cup of milk (dairy or plant-based), 2 tablespoons of sugar or sweetener, and a generous handful of ice cubes. For extra richness, toss in a tablespoon of heavy cream or a scoop of vanilla ice cream.
Blend on high until smooth and frothy, about 30 seconds. Pour into a tall glass and top with whipped cream or a drizzle of caramel if you like. This method gives you that cafe-style frappé texture without any fancy equipment.
For a protein boost, add a scoop of vanilla protein powder before blending. Adjust sweetness to taste, and remember that the ice dilutes the coffee slightly, so brew it stronger than usual. Perfect for hot mornings when you need a quick, refreshing pick-me-up.
Iced latte with espresso shots
Master the classic iced latte with just two ingredients: fresh espresso and cold milk. Brew 2 shots of espresso (about 2 ounces) using an espresso machine, stovetop moka pot, or strong instant coffee. While it’s hot, stir in 1-2 teaspoons of sugar or simple syrup so it dissolves easily.
Fill a tall glass with ice cubes, then pour the sweetened espresso over the ice. Slowly add 1 cup of cold milk—whole milk gives the creamiest texture, but oat or almond milk works well too. Stir gently to combine, and the drink will develop a beautiful layered look.
For a faster version, use cold brew concentrate instead of espresso: mix 1/4 cup concentrate with 3/4 cup milk over ice. To mimic the frothy top, shake the milk in a jar before adding it.
This recipe is endlessly customizable—add a splash of vanilla extract, a pinch of cinnamon, or a pump of caramel syrup. It’s the ultimate no-fuss, barista-quality drink for busy mornings.
Vietnamese-style iced coffee with condensed milk
Transport your taste buds with this rich and sweet Vietnamese iced coffee (cà phê sữa đá). The key is using a small drip filter (phin) or a French press for a slow, dark brew.
Add 2 tablespoons of coarse-ground dark roast coffee (preferably robusta) to the filter, press gently, and pour 2 tablespoons of hot water to bloom. Then add 1/4 cup of boiling water and let it drip through for 4-5 minutes.
While it drips, add 2-3 tablespoons of sweetened condensed milk to a glass. Once the coffee is done, stir the hot coffee into the condensed milk until smooth and caramel-colored. Fill the glass with ice cubes and stir again.
The result is a bold, velvety, dessert-like drink that wakes you up instantly. For a quicker version, brew strong coffee in a moka pot or use instant coffee dissolved in a little hot water. Adjust sweetness by adding more or less condensed milk.
This recipe is perfect for those who love a decadent, energy-packed morning treat.
Frequently Asked Questions
What is the easiest way to make DIY iced coffee at home?
The simplest method is to brew a double-strength batch of hot coffee using your usual method (drip, French press, or pour-over), then let it cool to room temperature. Pour it over a glass filled with ice, and add milk or sweetener to taste.
Can I make iced coffee without watering it down?
Yes, use coffee ice cubes instead of regular ice. Brew a batch of coffee, pour it into an ice cube tray, freeze, and use those cubes in your iced coffee. Alternatively, brew a concentrated cold brew by steeping coarsely ground coffee in cold water for 12-24 hours, then straining.
What is the difference between cold brew and iced coffee?
Iced coffee is made by brewing hot coffee and then cooling it down with ice, which can result in a slightly acidic and bright flavor. Cold brew is steeped in cold water for 12-24 hours, producing a smoother, less acidic, and naturally sweeter concentrate that you dilute with water or milk.
How do I make a quick iced coffee with instant coffee?
Dissolve 1-2 teaspoons of instant coffee in 2 tablespoons of hot water (or cold water if using instant cold brew powder). Stir until fully dissolved, then pour over a glass of ice and add milk, cream, or flavored syrup to taste.
What ratio of coffee to water should I use for strong iced coffee?
For hot brew iced coffee, use a 1:8 coffee-to-water ratio (e.g., 2 tablespoons of ground coffee per 1 cup of water). For cold brew, use a 1:4 ratio (e.g., 1 cup coarse grounds to 4 cups water) to create a concentrate that you can dilute with ice or milk.
How can I make my DIY iced coffee taste like a café version?
Use freshly ground beans, brew a stronger concentrate, and chill it completely before serving. Add a splash of vanilla syrup, a pinch of salt to reduce bitterness, and top with cold foam (frothed milk) or a dollop of whipped cream for a creamy texture.
Can I make iced coffee without a coffee maker?
Absolutely. You can use a French press, a mason jar with a fine mesh strainer, or even a sock filter. For a no-brew method, simply mix instant coffee with cold water and shake vigorously in a sealed jar, then pour over ice.
How do I sweeten iced coffee without sugar?
Use liquid sweeteners like honey, agave nectar, or stevia drops, as they dissolve easily in cold liquids. Alternatively, add a flavored syrup (like sugar-free vanilla) or a splash of sweetened condensed milk for a richer taste.
Conclusion
Making DIY iced coffee is simple, cost-effective, and endlessly customizable. By choosing between cold brew, flash-chilled hot coffee, or iced lattes, you can control the strength and sweetness to your taste. Remember to use fresh, coarse grounds for cold brew or double-strength hot coffee to avoid dilution. Now, skip the expensive café lines and experiment with flavors at home. Your perfect, refreshing cup is just a few minutes away—enjoy the chill!