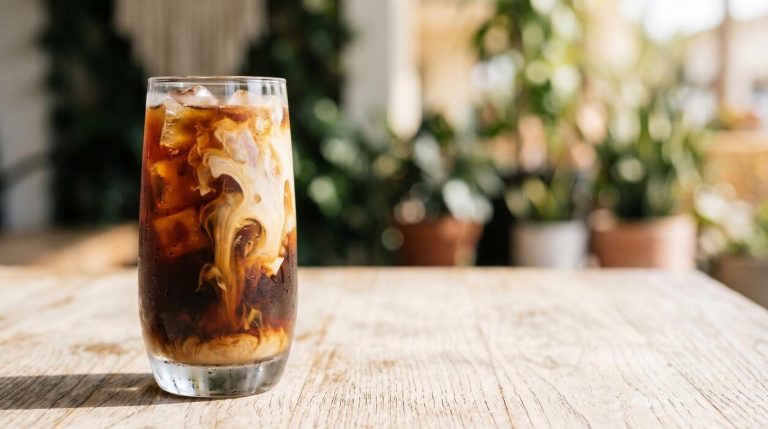
True Brew Brewing Kit
If you are ready to start your homebrewing journey, the True Brew brewing kit is the perfect place to begin. This all-in-one setup takes the guesswork out of making your first batch of beer, providing everything from fermenters to essential tools. In this guide, we will break down exactly what comes in the box and how to use it effectively. You will find quick answers to your setup questions so you can stop researching and start brewing your own delicious beer today.
What is a True Brew Brewing Kit?
Equipment included in the box
A True Brew brewing kit serves as a comprehensive foundation for homebrewing, providing all the essential hardware needed to transition from a novice to a confident brewer. Inside the box, you will typically find a 6.5-gallon primary fermenting bucket and a matching bottling bucket with a convenient spigot.
To ensure your beer remains uncontaminated, the kit includes a triple-scale hydrometer for measuring alcohol content and a stick-on thermometer for precise temperature monitoring. You also receive a specialized capper and crown caps to seal your bottles professionally.
The inclusion of an easy-to-clean racking cane and vinyl tubing makes transferring liquids seamless, while the automatic bottle filler prevents messy overflows during the final packaging stage. By providing high-quality, food-grade components, this kit eliminates the guesswork of sourcing individual parts.
It is designed to be a reusable system, meaning you only need to purchase new ingredients for your subsequent batches, making it a cost-effective long-term investment for your hobby.
Types of beer you can make
The versatility of the True Brew system allows you to explore a vast spectrum of beer styles ranging from light, refreshing ales to dark, complex stouts. Because the kit is designed for five-gallon batches, it is perfectly compatible with a wide variety of pre-measured ingredient sets.
You can easily craft a classic American Pale Ale featuring citrusy hop notes or a robust Porter with deep chocolate and coffee undertones. For those who prefer lighter profiles, the kit is ideal for brewing crisp Wheat beers or German-style Pilsners that require steady fermentation control.
The process typically utilizes malt extract, which simplifies the brewing day while still allowing for the addition of specialty steeping grains to enhance color and flavor complexity.
Whether you are interested in experimenting with high-IBU India Pale Ales or smooth, malty Amber Ales, this kit provides the consistent environment necessary to produce professional results. It empowers you to customize your recipes by adding fruit, spices, or unique hop varieties to suit your specific palate.
Why it works for beginners
The primary reason the True Brew brewing kit is highly recommended for beginners is its focus on simplicity and foolproof instructions. The transition into homebrewing can often feel overwhelming due to technical jargon, but this kit breaks down the process into manageable, logical steps.
It emphasizes proper sanitation and temperature control, which are the two most critical factors in successful brewing. By using a malt extract-based approach, beginners can skip the complex all-grain mashing process while still achieving a high-quality finished product.
The equipment is durable and easy to sanitize, reducing the risk of batch spoilage that often discourages newcomers. Furthermore, the all-in-one nature of the kit ensures that you won’t find yourself missing a vital tool in the middle of your first brew day.
This creates a stress-free environment where you can focus on learning the science of fermentation. Ultimately, it provides a reliable entry point into the craft, building the fundamental skills required to eventually progress toward more advanced brewing techniques and custom recipe formulation.
How to set up your home brewery
Cleaning and sanitizing your gear
Before you begin your first batch with the True Brew brewing kit, you must prioritize hygiene to ensure a successful fermentation process. Start by thoroughly scrubbing all your equipment, including the primary fermenter, airlock, and stirring spoon, using a non-scented detergent to remove any factory residues or dust.
Once the physical debris is gone, the most critical step is applying a no-rinse sanitizer to every surface that will come into contact with your wort. This includes small items like the thermometer and the inside of the tubing.
Bacteria are the primary enemy of homebrewers, as they can quickly spoil a batch and create off-flavors that ruin your hard work.
Make sure to follow the dilution ratios provided on your sanitizer packaging strictly, as a solution that is too weak will not kill wild yeast, while one that is too strong might leave a chemical aftertaste.
Always keep a spray bottle of sanitizer nearby to disinfect your hands and any tools you might set down during the brewing process.
Essential tools not in the kit
While the True Brew kit provides the foundational hardware for making beer, there are several additional items you will need to source to complete your home brewery setup.
First and foremost, you must acquire a large stainless steel brew kettle with at least a five-gallon capacity to accommodate the boiling process without risking messy boil-overs.
You will also need a reliable heat source, such as a kitchen stove or a propane burner, capable of bringing several gallons of liquid to a rolling boil.
Since the kit focuses on the fermentation and bottling hardware, you should also invest in a long-handled stainless steel spoon for vigorous stirring and a digital timer to track hop additions accurately.
Do not forget that you will eventually need approximately 50 clean pry-off bottles and a supply of crown caps when it comes time to package your finished product.
Having these supplemental tools ready before you open your ingredient kits will prevent stressful last-minute trips to the store and ensure a smooth, professional brewing experience from start to finish.
Finding the best space for fermentation
The success of your True Brew kit depends heavily on where you choose to store your fermenter during the active bubbling phase.
You need to identify a location in your home that maintains a consistent, cool temperature, ideally between 64 and 72 degrees Fahrenheit, to keep the yeast healthy and prevent harsh alcohol notes.
Basements or interior closets are often the best choices because they are buffered against the temperature swings found in kitchens or garages.
Additionally, it is vital to keep your fermenter in a dark environment because ultraviolet light can react with hop compounds to create a skunky aroma, a phenomenon known as light-striking.
If your chosen spot has windows, simply wrap the fermenting bucket in a thick towel or a dark t-shirt to block out light. Finally, ensure the area is easy to clean and has a stable surface where the heavy bucket won’t be disturbed.
A dedicated fermentation corner allows you to monitor the airlock activity without moving the vessel, which helps the sediment settle properly for a clearer beer.
Step-by-step guide to your first brew day
Steeping grains and boiling extract
Begin your True Brew journey by heating approximately two gallons of water in your stockpot until it reaches the ideal temperature range of 150 to 165 degrees Fahrenheit.
Place the specialty grains provided in your kit into the muslin steeping bag and submerge them for twenty minutes to extract essential colors and complex flavors. Avoid boiling the grains directly, as this can release harsh tannins that negatively impact the final profile of your beer.
Once the time is up, remove the bag without squeezing it and bring the liquid to a rolling boil. Turn off the heat source briefly to stir in the liquid malt extract or dry malt powder, ensuring it dissolves completely to prevent scorching on the bottom of the pot.
Returning the mixture to a boil marks the official start of your wort production. Maintaining a consistent boil is critical for sterilization and preparing the liquid for the upcoming hop additions that define the character of your specific brew style.
Hop additions and timing
Once your wort has reached a steady boil, it is time to begin the hopping schedule outlined in your True Brew instructions.
The first addition typically consists of bittering hops, which must boil for a full sixty minutes to isomerize the alpha acids and balance the sweetness of the malt extract. Set a reliable timer immediately after adding these initial pellets to ensure precision.
As the boil progresses, you will likely add aroma or flavor hops during the final fifteen to five minutes of the process. These late additions are vital for capturing the volatile oils that provide the distinct floral, citrus, or earthy scents associated with fresh craft beer.
Keep a close eye on the pot to prevent a boil-over, which can occur rapidly after adding hops due to increased surface tension.
Using a precise timer is the most effective way to guarantee that your finished product has the exact bitterness and aromatic complexity intended by the recipe kit designers for a professional result.
Cooling the wort quickly
After the sixty-minute boil is complete, you must lower the temperature of the wort to under 70 degrees Fahrenheit as rapidly as possible to prepare for yeast pitching. The most common method for beginners using a True Brew kit is the ice bath technique.
Carefully place your covered brew pot into a sink or tub filled with a mixture of cold water and several bags of ice. Rapid cooling is essential because it creates a cold break, where proteins clump together and settle, resulting in a much clearer finished beer.
Furthermore, quickly passing through the danger zone of 140 to 90 degrees minimizes the risk of bacterial contamination or the production of off-flavors like DMS. While the wort cools, ensure that your fermenter and airlock are thoroughly cleaned with the included sanitizer to maintain a sterile environment.
Once the pot feels cool to the touch, you can safely transfer the liquid to your primary fermenter, top it off with fresh water, and prepare to pitch your yeast for fermentation.
Fermentation and monitoring basics
Pitching the yeast correctly
When using your True Brew brewing kit, the moment you introduce yeast to the cooled wort is critical for a healthy fermentation. First, ensure your wort has been cooled to between 65°F and 75°F to avoid thermal shock, which can kill or stress the yeast cells.
Sanitize the yeast packet and scissors thoroughly before opening to prevent wild bacteria from entering the fermenter.
If you are using dry yeast, you can sprinkle it directly onto the surface of the liquid, but many brewers prefer rehydrating it in a small amount of lukewarm water first to ensure maximum viability.
Once the yeast is added, secure the lid and airlock immediately to create an airtight seal. Aerating the wort by vigorously shaking the fermenter for a few minutes before pitching is essential, as yeast requires oxygen to build strong cell walls during the initial growth phase.
This proactive step ensures a vigorous start to the fermentation process, leading to a cleaner and more professional-tasting final beer.
Managing temperature for better flavor
Temperature control is often the difference between a mediocre homebrew and a gold-medal winner. Most ale yeasts included in starter kits perform best at a steady range of 64°F to 72°F.
If the environment is too warm, the yeast may produce off-flavors like fusel alcohols or fruity esters that overwhelm the malt profile. Conversely, if the temperature drops too low, the yeast might go dormant and leave the beer under-attenuated and overly sweet.
To manage this, place your fermenter in a dark area with a consistent temperature, away from direct sunlight or drafty windows.
Using an adhesive liquid crystal thermometer on the side of the bucket allows for real-time monitoring of the internal liquid temperature, which is often higher than the ambient air due to the heat generated by active fermentation.
If your room is too warm, consider a simple swamp cooler setup or a dedicated fermentation chamber to maintain thermal stability throughout the entire primary fermentation period for the best results.
How to use a hydrometer
The hydrometer is the most important tool in your kit for tracking progress and ensuring fermentation is complete. To use it, sanitize the hydrometer and the testing jar, then draw a sample of the wort before pitching the yeast to find your Original Gravity (OG).
This number tells you the potential alcohol content based on the dissolved sugars. During fermentation, you should see the gravity drop as sugars convert to alcohol. To check if your beer is finished, take a reading near the end of the two-week mark.
If the Specific Gravity remains identical over three consecutive days, fermentation is officially complete. Always read the scale at the base of the meniscus for accuracy and record every measurement in a brew log. Never pour the sample back into the fermenter to avoid contamination risks.
Understanding these readings helps you calculate the final ABV and ensures you do not bottle the beer too early, which could lead to dangerous over-pressurization and potential bottle bombs in your storage area.
Bottling your finished beer
Priming sugar calculations
To ensure your True Brew kit achieves the perfect level of carbonation, you must accurately calculate and prepare your priming sugar before bottling.
Most standard five-gallon kits include a pre-measured five-ounce bag of corn sugar, but the exact amount needed depends on the specific beer style and the highest temperature reached during fermentation.
To begin, boil the priming sugar in two cups of filtered water for ten minutes to create a sterile simple syrup. Once cooled slightly, pour this solution into your sanitized bottling bucket before siphoning the finished beer on top of it.
This method allows the sugar to distribute evenly through the beer without the need for aggressive stirring, which could introduce unwanted oxygen.
Avoid adding dry sugar directly into individual bottles, as this often leads to inconsistent carbonation levels or dangerous ‘bottle bombs.’ By following these precise steps, you ensure that every bottle has the exact amount of fermentable sugar required for the yeast to produce the ideal volume of CO2.
Filling and capping techniques
Efficiently moving your beer from the bottling bucket to the glass requires sanitized equipment and a steady hand to prevent oxidation. Attach your spring-loaded bottling wand to the bucket’s spigot using a short length of food-grade tubing.
When you press the wand to the bottom of a clean bottle, the flow begins; fill each bottle until the liquid reaches the very top. When you remove the wand, the displacement naturally leaves the perfect one-inch headspace required for proper pressure regulation.
Once filled, place a sanitized crown cap onto the bottle neck. Use your twin-lever capper to apply firm, even downward pressure until the cap crimps tightly around the rim. It is essential to inspect the seal of every cap to ensure no CO2 will escape during the conditioning phase.
Working in a streamlined assembly line—filling several bottles then capping them in a batch—minimizes the time the beer is exposed to open air, preserving the fresh hop aromas and malt profiles of your True Brew batch.
Carbonation and conditioning time
After the bottles are sealed, the final stage of the brewing process involves patience while the remaining yeast consumes the priming sugar. Move your capped bottles to a dark, temperature-stable environment maintained between 65 and 75 degrees Fahrenheit.
This temperature range is critical for keeping the yeast active enough to convert the sugar into carbon dioxide. Generally, it takes a minimum of two weeks for the beer to become fully carbonated, though heavier ales may require additional time to reach peak flavor.
During this period, the yeast also performs ‘clean-up’ work, reabsorbing certain fermentation byproducts to create a smoother, more refined taste. Resist the urge to open bottles too early, as green beer often tastes overly yeasty or lacks a proper head.
Once the two-week mark hits, refrigerate a tester bottle for 24 hours to help the CO2 dissolve into the liquid properly. If the carbonation level is crisp and the flavor is balanced, your True Brew creation is officially ready for enjoyment.
Common mistakes and how to fix them
Dealing with stuck fermentation
One of the most frequent hurdles for users of the True Brew brewing kit is encountering a fermentation process that stops prematurely.
If your airlock activity ceases or your gravity readings remain stagnant before reaching the target range, the first step is to check the ambient temperature of your brewing area. Yeast often becomes dormant if the environment drops below 65 degrees Fahrenheit.
To fix this, simply move your fermenter to a slightly warmer spot or use a heat wrap to gently raise the temperature. Another common mistake is failing to properly aerate the wort before pitching the yeast. Yeast requires oxygen to build strong cell walls for a healthy fermentation cycle.
If you suspect low oxygen levels, you can gently swirl the fermenter to rouse the yeast back into suspension, being careful not to introduce too much air at this late stage.
Finally, always verify your hydrometer readings over two consecutive days to confirm if the fermentation is truly stuck or just finishing slowly.
Preventing off-flavors and odors
Developing unexpected tastes like green apple, vinegar, or butter is a common frustration when using a homebrew kit. These off-flavors are usually the result of poor temperature control during the high-growth phase of fermentation.
When the wort gets too hot, yeast produces fusel alcohols and esters that create a harsh, solvent-like profile. To prevent this, ensure your True Brew bucket is kept in a stable, cool environment away from direct sunlight. Another critical factor is minimizing oxygen exposure after the fermentation has begun.
While oxygen is vital at the start, introducing it during bottling or transferring can lead to oxidation, which makes the beer taste like wet cardboard. Always use a proper siphoning technique and keep the tubing submerged at the bottom of the vessel to avoid splashing.
Additionally, allowing the beer to condition for an extra week can often give the yeast enough time to reabsorb certain byproducts like diacetyl, resulting in a much cleaner and more professional-tasting final product.
Identifying contamination signs
Contamination is the primary reason for ruined batches, and it usually stems from inadequate sanitization of equipment. If you notice a fuzzy white film, oily skin, or stringy structures known as ‘pellicles’ forming on the surface of your beer, these are clear indicators of wild yeast or bacterial infection.
To fix this in future batches, you must be meticulous about sanitizing every single item that touches the wort after the boil, including the airlock, bung, and thermometer.
If you find a batch is infected, it is often best to discard it to avoid ‘bottle bombs’ caused by over-carbonation from wild bacteria. To prevent recurrence, inspect your plastic fermenter for deep scratches where bacteria can hide, as these crevices are nearly impossible to sanitize effectively.
If your True Brew bucket is heavily scuffed, consider replacing it. Always use a no-rinse sanitizer like Star San and ensure it maintains the correct contact time on all surfaces to guarantee a sterile environment for your yeast to thrive without any competition.
Tips for improving your True Brew results
Upgrading to fresh liquid yeast
While the dry yeast packets included in a standard True Brew kit are reliable for beginners, upgrading to fresh liquid yeast is one of the most effective ways to elevate the professional quality of your homebrew.
Liquid cultures offer a significantly wider variety of specific strain profiles, allowing you to target precise ester levels and attenuation rates that dry alternatives often lack.
When using liquid yeast, it is essential to create a yeast starter 24 to 48 hours before your brew day to ensure a healthy cell count, which leads to a faster lag phase and cleaner fermentation.
Maintaining a consistent fermentation temperature is also critical when working with these sensitive cultures to avoid off-flavors like fusel alcohols or excessive phenolics.
By making this simple switch, you will notice a marked improvement in the clarity, aroma, and overall mouthfeel of your finished beer, making your True Brew results indistinguishable from high-end craft brewery offerings found on commercial shelves today.
Using specialty grains for custom flavors
To move beyond the basic extract profile of a True Brew kit, consider the technique of steeping specialty grains to add complexity, color, and head retention to your recipes.
This process, often called ‘extract with steeping grains,’ involves soaking crushed malts like Crystal, Chocolate, or Roasted Barley in hot water before adding your malt extract.
This simple addition allows you to customize the flavor profile of your beer, adding notes of caramel, coffee, or toasted biscuit that pre-packaged kits might miss.
For the best results, ensure your water temperature stays between 150 and 160 degrees Fahrenheit during the steep to avoid extracting harsh tannins from the grain husks.
After steeping for about twenty to thirty minutes, rinse the grains with a small amount of hot water to collect all the fermentable sugars and pigments.
This method bridges the gap between extract brewing and all-grain brewing, providing a much richer and more nuanced sensory experience in every pint you pour from your home setup.
Transitioning to larger batches
Once you have mastered the standard five-gallon True Brew kit, you may find yourself wanting to scale up your production to increase your total yield per brew day.
Transitioning to larger batches requires a few strategic equipment upgrades, most notably a larger stainless steel brew kettle and a more robust cooling system like a copper immersion chiller.
When moving to ten-gallon batches or more, it becomes vital to recalculate your hop additions and water chemistry, as utilization rates can change significantly with larger volumes.
You should also consider the logistics of fermentation space, as larger carboys or conical fermenters will require more dedicated room and potentially active temperature control systems to manage the increased heat generated during vigorous fermentation.
Scaling up allows you to share more of your creation with friends and family while reducing the frequency of your brew days. Focus on maintaining strict sanitation protocols regardless of size, as the impact of contamination is much greater when dealing with larger volumes of high-quality wort.
Frequently Asked Questions
What is included in a True Brew brewing kit?
A standard True Brew kit typically includes a 6.5-gallon primary fermenting bucket, a 6.5-gallon bottling bucket with spigot, an airlock, a triple scale hydrometer, and a bottle capper. It also provides essential cleaning supplies like sanitizer and a bottle brush to ensure a sterile brewing environment.
Does the True Brew kit come with ingredients?
Most True Brew gold and silver kits do not include ingredients by default, allowing you to choose your own recipe kit separately. However, some retailers bundle them with a pre-packaged ingredient kit that includes malt extract, hops, yeast, and priming sugar.
How much beer does a True Brew kit make per batch?
The True Brew system is designed to produce 5-gallon batches of beer, which yields approximately 48 to 54 standard 12-ounce bottles. This is the industry standard size for homebrewing, making it easy to find compatible recipe kits.
What additional equipment do I need to start brewing with this kit?
To complete your first batch, you will need a 4 to 5-gallon stainless steel or enamel stockpot for boiling the wort and approximately two cases of empty, non-twist-off glass bottles. You will also need a heat source, such as a kitchen stove, to boil the water and ingredients.
Is the True Brew kit suitable for beginners?
Yes, the True Brew kit is specifically designed for beginners and is widely considered one of the most reliable entry-level systems. It includes comprehensive instructions and all the fundamental hardware needed to learn the fermentation and bottling process.
How do I clean and sanitize my True Brew equipment?
You should use the included cleanser to remove visible debris and a no-rinse sanitizer on all equipment that comes into contact with the beer after the boil. Proper sanitation is the most critical step in homebrewing to prevent bacteria from spoiling your batch.
Can I use the True Brew kit to make cider or wine?
While optimized for beer, the fermentation buckets and airlocks in the True Brew kit are perfectly suitable for making hard cider or small batches of fruit wine. You would simply swap the beer recipe for a cider or wine base and follow the appropriate fermentation timeline.
Conclusion
The True Brew brewing kit offers an exceptional entry point for anyone eager to master the art of craft beer at home. By providing high-quality equipment and straightforward instructions, it removes the intimidation factor from the fermentation process. Whether you are a curious beginner or looking to refine your skills, this kit ensures a rewarding and delicious experience. Embrace the challenge, start your first batch today, and enjoy the satisfaction of pouring a perfect pint you created yourself.