How To Make Homemade Nitro Cold Brew
How to make homemade nitro cold brew is a common question for coffee lovers who crave that creamy, stout-like texture without the café price. The core challenge is infusing cold brew with nitrogen gas to create tiny bubbles and a velvety mouthfeel, which typically requires a keg setup. You’re in the right place—this guide cuts through the complexity, showing you exactly how to brew, charge, and serve barista-quality nitro cold brew at home using a simple whipped cream dispenser or mini keg system.
What Is Nitro Cold Brew and How Is It Different
Definition of nitro cold brew
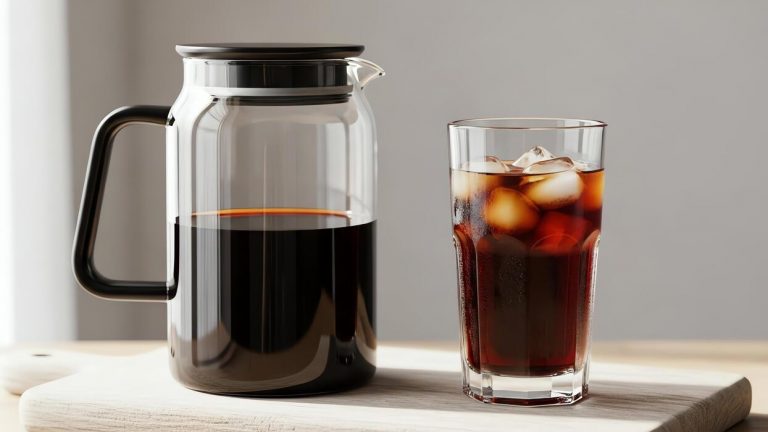
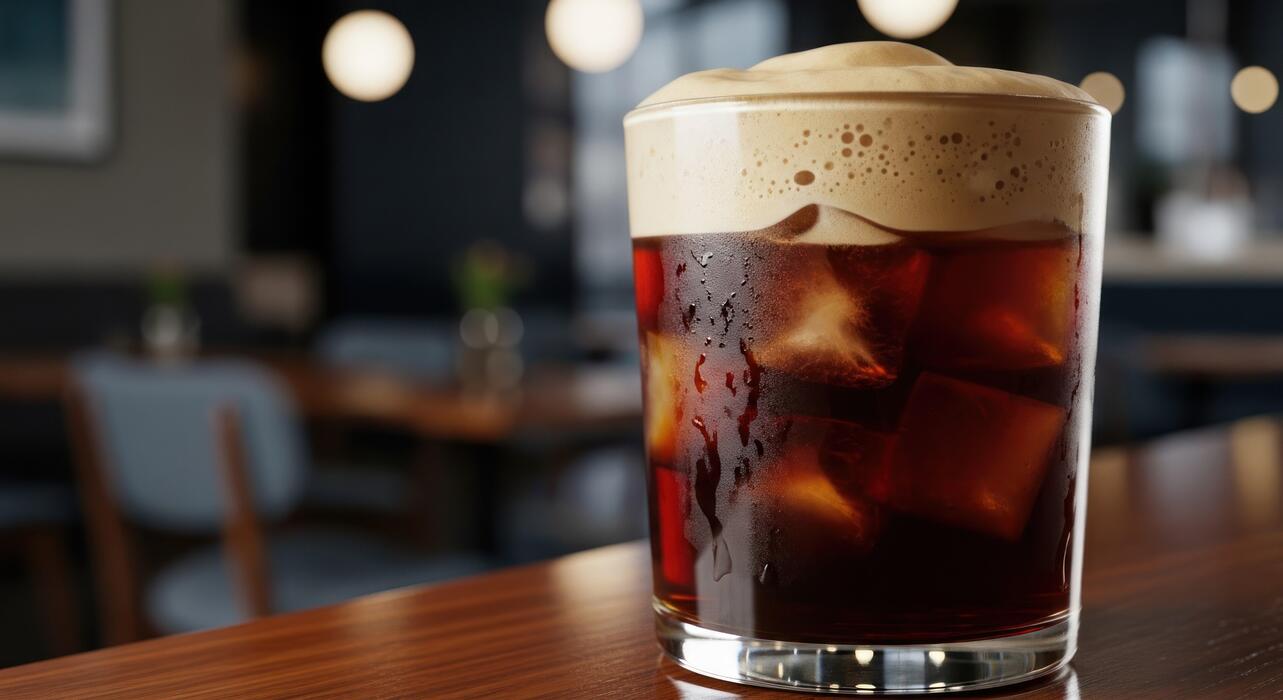
Nitro cold brew is a cold brew coffee infused with nitrogen gas and served from a pressurized tap or keg system. Unlike regular cold brew, which is simply steeped coffee served over ice, nitro cold brew undergoes a crucial extra step: nitrogen is dissolved into the coffee under pressure.
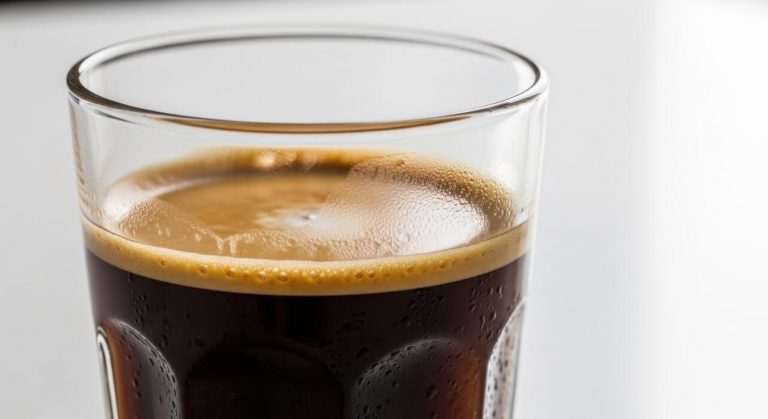
This process creates a creamy, velvety texture and a thick, cascading head similar to a stout beer.
To make homemade nitro cold brew, you’ll need cold brew concentrate (made by steeping coarse-ground coffee in cold water for 12-24 hours, then filtering), a nitrogen tank or whipped cream dispenser with N2O cartridges, and a method to infuse the gas.
The result is a smooth, low-acid beverage that can be served straight from the tap or poured from a specialized bottle. Start by brewing a strong cold brew concentrate—use a 1:4 coffee-to-water ratio—then chill it thoroughly before nitrogen infusion.
For beginners, a whipped cream dispenser offers an easy entry point: fill it with concentrate, charge with a nitrous oxide cartridge, shake, and pour gently to achieve that signature creamy mouthfeel.
Key differences from regular cold brew
The primary differences between nitro cold brew and regular cold brew lie in texture, serving style, and flavor perception. Regular cold brew is typically served over ice or chilled, with a smooth but watery consistency and no foam.
In contrast, nitro cold brew is served cold without ice (to preserve the nitrogen effect) and has a thick, cascading foam that mimics a draft beer. The nitrogen infusion creates tiny bubbles that give the drink a creamy, almost dairy-like mouthfeel without any milk or cream.
Additionally, nitro cold brew often tastes less bitter and more subtly sweet because nitrogen reduces the perception of acidity and bitterness on the palate. To make homemade nitro cold brew that stands apart, use a finer filter for your concentrate to remove all sediment, ensuring a clean infusion.
Also, serve it in a glass with a tight pour from a tap or dispenser to build that iconic cascading effect.
Remember, regular cold brew can be stored in a pitcher for days, but nitro cold brew’s texture degrades quickly after dispensing—so only infuse what you’ll drink within a few hours for the best experience.
Why nitrogen makes a smoother drink
Nitrogen gas creates a smoother drink because its small bubble size and low solubility in coffee alter the beverage’s physical and sensory properties.
Unlike carbon dioxide (used in sodas), nitrogen forms tiny, microbubbles that are about one-tenth the size, resulting in a creamy, silky texture rather than a sharp, fizzy one.
These bubbles also coat the tongue gently, reducing the perception of bitterness and acidity, which makes even strong cold brew taste mellow and sweet.
For homemade nitro cold brew, achieving this smoothness requires proper technique: use a whipped cream dispenser charged with N2O (nitrous oxide, which is easier for home use than pure N2), and shake vigorously for 10-15 seconds to dissolve the gas.
Then, pour slowly into a chilled glass, tilting it slightly to minimize foam disruption. The nitrogen also creates a thick, stable foam that lasts for minutes, adding a visual cascade that enhances the drinking experience.
To maximize smoothness, chill your cold brew to near-freezing before infusing, as colder liquid holds gas better. The result is a luxurious, dessert-like coffee that needs no sugar or cream to be enjoyable.
Equipment You Need for Homemade Nitro Cold Brew
Essential tools: keg, whip cream dispenser, or growler
The core of homemade nitro cold brew is the vessel that infuses nitrogen. Your most practical option is a 1-liter or 1-quart whipped cream dispenser (ISI brand is reliable). It’s affordable, easy to use, and perfect for small batches.
For larger volumes or a more authentic tap experience, invest in a mini keg system (like a 1.5-gallon keg with a CO2 tank and nitrogen tank). This requires more setup but delivers professional results. A simpler alternative is a nitro growler—a specialized bottle with a built-in nitrogen cartridge chamber.
It’s portable and great for single servings, but has lower nitrogen infusion. Regardless of choice, ensure all equipment is stainless steel and rated for pressure. Avoid plastic containers. For whipped cream dispensers, get one with a nitrogen charger head (not just CO2).
Cleanliness is critical: disassemble and wash all parts after each use to prevent off-flavors.
Choosing the right nitrogen source
Nitrogen is the star, but not all sources are equal. For whipped cream dispensers, use food-grade nitrous oxide (N2O) chargers—these small cartridges are easy to find and inexpensive. However, N2O dissolves more in liquid, giving a slightly creamier texture.
For true nitro cold brew (with tiny bubbles and cascading effect), food-grade nitrogen (N2) cartridges are better. They produce larger bubbles that rise quickly, creating the signature visual. For keg systems, you need a pure nitrogen tank (not mixed with CO2). CO2 adds carbonation, which ruins the smooth mouthfeel.
Buy from a local beverage supply store or welding shop—ask for food-grade nitrogen. A 5-pound tank lasts many batches. For growlers, use pre-filled nitrogen cartridges designed for that specific model. Always check compatibility: some chargers fit only certain dispensers. Store cartridges in a cool, dry place and never puncture them.
Optional gear for better results
To elevate your homemade nitro cold brew, consider these upgrades. A fine-mesh strainer or cheesecloth filters out coffee grounds before filling your vessel—this prevents clogging and ensures a silky texture. A digital kitchen scale helps you dial in precise coffee-to-water ratios (e.g., 1:5 for concentrate).
For temperature control, a coffee brewing thermometer ensures you steep at room temperature (avoid hot extraction, which causes bitterness). A nitrogen regulator with a pressure gauge is vital for kegs—it lets you set the ideal PSI (30-40 PSI) for perfect infusion.
A cold brew maker with a reusable filter simplifies large batches. Finally, a clear glass serving mug shows off the cascading bubbles—add ice if you like. These tools aren’t mandatory, but they reduce waste, improve consistency, and make the process more enjoyable.
Start simple, then add gear as you refine your technique.
How to Make the Perfect Cold Brew Concentrate
Best coffee beans for nitro cold brew
For homemade nitro cold brew, choose a single-origin bean with low acidity and a full body, like a Colombian or Brazilian roast. Medium to dark roasts work best because they provide the rich, smooth flavor that nitro’s creamy texture enhances.
Avoid light roasts, which can taste too sharp or fruity when cold-brewed. Opt for freshly roasted beans (within 2 weeks of roast date) to maximize flavor. A coarse grind is essential—aim for a consistency similar to breadcrumbs. Pre-ground coffee is too fine and will over-extract, leading to bitterness.
Use 1 cup of beans per 4 cups of cold, filtered water for a balanced concentrate that dilutes well. For nitro, a slightly stronger ratio (1:3) creates a bolder base that holds up against nitrogen’s dilution. Store beans in an airtight container away from light and heat to preserve freshness.
Experiment with different origins to find your perfect profile, but start with a medium-dark Brazilian for a classic, chocolatey nitro cold brew.
Grind size and water ratio tips
Grind size is critical for perfect extraction—use a coarse grind, like sea salt or coarse sand. A burr grinder ensures consistency; blade grinders create fines that cause over-extraction and sludge. For nitro cold brew, a 1:4 coffee-to-water ratio (by weight) is ideal: 1 part coffee to 4 parts water.
This yields a strong concentrate that won’t taste watery when nitrogen is added. If you prefer a less intense brew, use 1:5, but avoid going weaker or it may lack body. Use room-temperature, filtered water to prevent premature extraction.
Combine grounds and water in a large jar or French press, stir gently to ensure all grounds are saturated, then cover. Steep for 12–24 hours at room temperature (not in the fridge) for optimal flavor.
After steeping, strain through a fine-mesh sieve lined with a coffee filter or a nut milk bag. Press or squeeze gently to extract all liquid without forcing bitter particles through. Store concentrate in a sealed glass container in the fridge for up to 2 weeks.
Steeping time and temperature guide
Steep cold brew at room temperature (68–72°F) for 16–18 hours for the smoothest, most balanced concentrate. Room temperature allows slow, even extraction of oils and sugars without bitterness. Avoid steeping in the fridge, as cold slows extraction and can lead to sour, underdeveloped flavors.
If your kitchen is warm (above 75°F), reduce steeping time to 12–14 hours to prevent over-extraction. For a bolder nitro base, steep for 18–20 hours at room temp, but never exceed 24 hours or the brew may become bitter.
Use a timer to track steeping and taste at 16 hours—if it’s strong and smooth, strain immediately. If it’s weak, let it go another 2 hours. Temperature consistency is key: avoid placing the brew in direct sunlight or near a heat source. After steeping, strain and chill the concentrate quickly.
For serving, pour over ice and add nitrogen using a whipped cream dispenser with N2O cartridges. Shake well and dispense cold for a creamy, velvety nitro cold brew at home.
Step-by-Step Guide to Infusing Nitrogen
Using a whipped cream dispenser for nitro
Start with freshly brewed cold brew concentrate that has been filtered to remove all fines. Fill a 1-quart ISI-style whipped cream dispenser no more than halfway to allow room for gas expansion.
Screw on the head and charge it with two N2O (nitrous oxide) cartridges—not N2, as N2O dissolves better in this setup. Shake vigorously for 10 seconds, then refrigerate upright for at least 2 hours to allow the gas to infuse fully.
When ready, invert the dispenser, hold a chilled glass at a 45-degree angle, and slowly press the lever. Pour until the glass is full, then let the cascading bubbles settle for 30 seconds before serving.
For best results, use a high-quality cold brew with a 1:4 coffee-to-water ratio and serve over ice. This method yields a creamy, velvety texture similar to commercial nitro, though it requires careful handling to avoid over-foaming. Always release pressure before disassembling.
Setting up a keg system at home
For a more authentic nitro experience, invest in a 1- or 2.5-gallon homebrew keg with a nitrogen regulator and a tank of food-grade nitrogen gas. First, brew a strong cold brew concentrate using a 1:5 coffee-to-water ratio and steep for 18-24 hours.
Filter the concentrate through a fine-mesh sieve or paper filter to remove sediment, which can clog the keg lines. Fill the sanitized keg completely with the cold brew, leaving minimal headspace. Connect the gas line to the N2 tank set at 30-40 PSI and pressurize the keg.
Shake gently to dissolve the gas, then refrigerate at 35-40°F for 12-24 hours to stabilize. Use a stout faucet with a restrictor plate to create the signature creamy pour. This setup allows for consistent, large-batch production and mimics commercial systems. Clean all equipment thoroughly between uses to prevent off-flavors.
How to charge and serve nitro cold brew
After infusion, always serve nitro cold brew very cold (near freezing) to maintain gas solubility and foam stability. For a whipped cream dispenser, charge with two N2O cartridges, shake, and refrigerate for 2+ hours.
For kegs, ensure the nitrogen pressure is steady at 30-40 PSI and the brew has rested overnight. When serving, tilt your glass at a 45-degree angle and pour slowly down the side to minimize initial foam.
Once full, let the cascading bubbles settle for 20-30 seconds—this creates the iconic creamy head. Serve over ice if desired, but avoid adding milk or sweeteners before pouring, as they can disrupt the nitrogen infusion.
For optimal taste, consume within 24-48 hours for dispenser batches or 5-7 days for kegged versions. Always release gas pressure before opening any container. Experiment with different coffee roasts to find your perfect balance of smoothness and flavor.
Tips for Getting That Smooth, Creamy Texture

Why filtration matters for mouthfeel
Achieving that velvety, creamy texture in homemade nitro cold brew starts long before the nitrogen is added. The key is double filtration to remove all fine coffee particles and oils that can cause a thin, gritty, or overly bitter mouthfeel.
After your initial 12-24 hour steep (using a coarse grind at a 1:8 coffee-to-water ratio), pour the concentrate through a fine-mesh sieve lined with a paper coffee filter or a nut milk bag.
For the best results, filter a second time through a clean, damp paper towel or a dedicated cold brew filter bag. This step eliminates the sediment that can disrupt the formation of tiny, stable nitrogen bubbles.
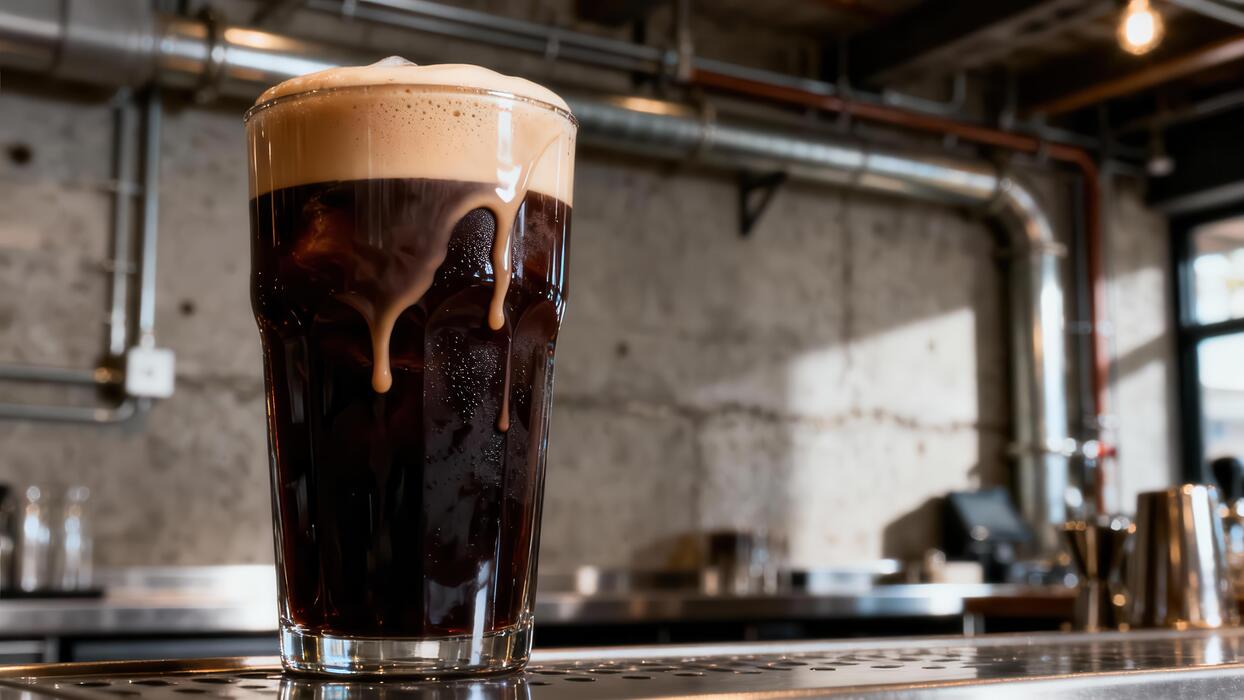
A perfectly clear concentrate allows the nitrogen to create a cascading effect and a thick, creamy head, much like a stout beer. Without thorough filtration, your brew will lack the smooth, luxurious texture that defines a great nitro cold brew.
How to control nitrogen pressure
The secret to a silky, cascading texture lies in precise nitrogen pressure regulation. For home systems like a whipped cream dispenser or keg, always use pure nitrogen (N2), not nitrous oxide (N2O), as N2O dissolves into the liquid and creates a sour, fizzy soda texture.
The optimal pressure range is 30 to 40 PSI (pounds per square inch). If using a keg with a nitrogen regulator, start at 35 PSI and shake the keg gently for 30 seconds to saturate the cold brew. Let it rest for 1-2 hours before serving.
For a whipped cream dispenser, charge it with one N2 cartridge, shake vigorously for 10 seconds, and refrigerate for at least 2 hours. Avoid over-pressurizing—too much pressure forces the nitrogen into large, unstable bubbles that collapse quickly, leaving you with a flat, watery drink.
Always test a small pour; the ideal cascade should be a slow, continuous stream of micro-bubbles that settle into a dense, creamy head.
Serving temperature and glassware tips
Temperature and glassware are final, crucial factors for achieving that smooth, creamy texture. Serve your nitro cold brew very cold, ideally between 34°F and 38°F (1°C to 3°C). Cold liquid holds nitrogen bubbles better, preventing them from expanding too rapidly and bursting.
Warm brew will result in a foamy, unstable head that dissipates quickly. Use a tall, narrow glass, such as a pint glass or a pilsner glass, which allows the nitrogen to form a proper cascading effect as the bubbles rise from the bottom.
Pour the cold brew directly from the tap or dispenser—avoid pouring over ice, as ice melts and dilutes the creamy texture. Hold the glass at a 45-degree angle, then tilt it upright as the foam forms.
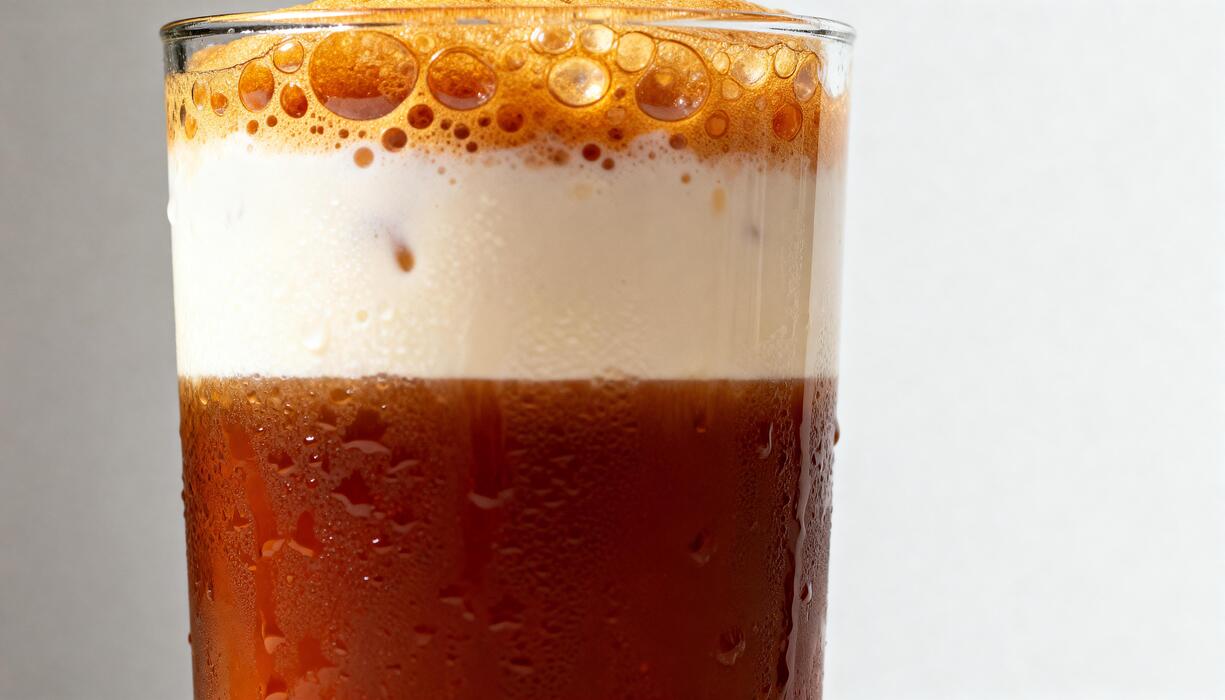
The ideal pour should yield a thick, white, beer-like head that slowly settles into a creamy collar. This careful attention to temperature and glassware transforms your homemade cold brew into a barista-quality, velvety experience.
Common Mistakes When Making Nitro Cold Brew
Over- or under-infusing nitrogen
The hallmark of nitro cold brew is its creamy, cascading texture, which comes from properly infusing nitrogen gas. A common mistake is under-infusing, resulting in a flat brew that lacks the velvety mouthfeel and dense foam.
To fix this, ensure your whipping siphon or keg is charged with enough nitrous oxide (N2O) cartridges—typically one per liter of cold brew—and shake vigorously for 10-15 seconds after charging. Conversely, over-infusing can create excessive foam that pours like a gushing soda, wasting product and causing a messy pour.
Avoid shaking too long or using too many cartridges. Always follow the recommended ratio for your equipment, and test the pour: a proper stream should show a thick, creamy head that settles into a smooth, dark body. Adjust by releasing pressure or adding more brew if needed.
Using the wrong coffee grind
The grind size for nitro cold brew is critical, and a frequent error is using a grind suited for hot coffee or standard cold brew. Too fine a grind leads to over-extraction, creating a bitter, muddy flavor that clogs filters and yields a cloudy brew.
Too coarse a grind under-extracts, resulting in a weak, sour, or watery concentrate that won’t hold nitrogen well. Aim for a medium-coarse grind, similar to raw sugar or coarse sea salt. This allows water to extract balanced flavors over 12-24 hours without over- or under-extracting.
Use a burr grinder for consistency; blade grinders produce uneven particles that worsen extraction issues. For best results, stick with a dark roast for its bold, chocolatey notes that shine through the nitrogen’s creamy texture. Test your grind by brewing a small batch first.
Skipping the filtration step
Filtration is not optional for nitro cold brew; skipping it introduces fine coffee particles that clog your siphon or keg’s nozzle and ruin the pour. Unfiltered brew contains sediment that settles in the tank, leading to inconsistent carbonation and a gritty mouthfeel.
Always filter your cold brew concentrate through a fine-mesh sieve lined with a paper filter or a nut milk bag after steeping. For extra clarity, double-filter: first through a colander to remove coarse grounds, then through a paper filter or cheesecloth.
This step removes oils and fines, producing a clean, smooth liquid that infuses nitrogen evenly. If you use a French press, press slowly and consider an additional paper filter. A clear, sediment-free brew ensures a creamy, stable foam and prevents equipment damage.
Don’t rush—proper filtration takes minutes but elevates your final result significantly.
How to Store and Serve Homemade Nitro Cold Brew
Best storage containers and shelf life
To keep your homemade nitro cold brew fresh and fizzy, transfer it to a glass growler or a stainless steel serving pitcher immediately after infusing.
Glass growlers with airtight swing-top seals are ideal for maintaining carbonation and preventing off-flavors, while stainless steel options like a whipped cream dispenser can double as storage if kept sealed. Avoid plastic containers as they can absorb odors and degrade the coffee’s quality over time.
For shelf life, store the brew in the refrigerator at 33-40°F—properly sealed, it stays fresh for 7-10 days, though the nitro bubbles will dissipate after 2-3 days.
To maximize longevity, purge oxygen by filling the container to the brim before sealing, and never add milk or sweeteners until serving, as dairy speeds spoilage. If you notice a flat, stale taste or sour aroma, discard the batch.
For best results, brew smaller batches weekly rather than storing large quantities for weeks.
Serving tips for cascading effect
The signature cascading effect of nitro cold brew comes from tiny nitrogen bubbles rising and settling, creating a creamy, stout-like head. To achieve this, pour the brew from a chilled, pressurized container (like a whipped cream dispenser) into a frozen glass—the cold glass helps stabilize the foam.
Tilt the glass at a 45-degree angle and pour slowly, then straighten it as the glass fills to encourage the cascade. Use a nitro faucet or a fine-mesh strainer over the glass if your dispenser lacks a nozzle, as this aerates the coffee.
For best results, serve immediately after pouring; the cascading effect lasts only 30-60 seconds before settling into a creamy layer. Avoid over-pouring or agitating the brew, which can break the bubbles.
If you lack a dispenser, try shaking the brew in a sealed jar with a nitrogen cartridge, then pour gently. The ideal serving temperature is 34-38°F—too warm, and the foam collapses quickly.
Flavor variations and add-ins to try
Enhance your homemade nitro cold brew with simple syrups, spices, or creamers without destroying the nitrogen texture. Start by adding flavor before infusing—stir in vanilla extract, cinnamon sticks, or cocoa nibs to the grounds during the 12-24 hour steep.
For a sweet twist, mix a homemade simple syrup (equal parts sugar and water, boiled with a flavor like lavender or cardamom) and add 1-2 teaspoons per serving after pouring.
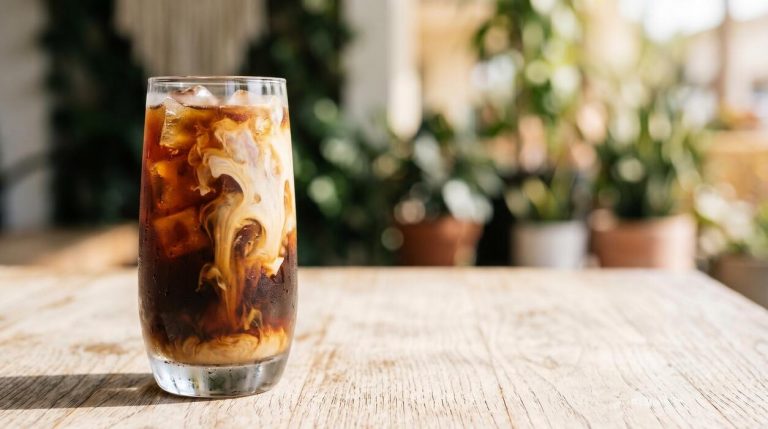
Dairy or non-dairy creamers work best when poured gently over the foam to preserve the cascade—try oat milk for creaminess or coconut cream for richness. For a boozy kick, float a shot of bourbon or Kahlúa on top.
Other add-ins to experiment with include sea salt, maple syrup, or a dash of nutmeg for a seasonal touch. Always avoid stirring vigorously, as this deflates the foam; instead, layer ingredients and let them blend naturally as you sip.
Frequently Asked Questions
What is nitro cold brew coffee?
Nitro cold brew is cold brew coffee infused with nitrogen gas, which gives it a creamy, velvety texture and a thick, beer-like head. Unlike regular cold brew, it’s served from a tap or bottle with a special widget that releases nitrogen bubbles.
Do I need special equipment to make nitro cold brew at home?
Yes, you’ll need a way to infuse nitrogen, such as a whipped cream dispenser with N2O cartridges, or a home keg system with a nitrogen tank. For the cold brew base, you just need coarse coffee grounds, cold water, and a container for steeping.
How do I make the cold brew concentrate for nitro cold brew?
Combine 1 cup of coarse-ground coffee with 4 cups of cold water in a jar or pitcher, stir, and steep in the fridge for 12-24 hours. Strain through a fine-mesh sieve or coffee filter to get a smooth concentrate.
How do I nitrogenate the cold brew at home?
Pour the cold brew concentrate into a whipped cream dispenser, charge it with one N2O cartridge, shake vigorously, and dispense into a glass. For a keg, pressurize with nitrogen gas at 30-40 psi and let it settle before serving.
Can I use regular coffee grounds for nitro cold brew?
Yes, but use a coarse grind to avoid over-extraction and bitterness. Finer grinds can clog filters and make the coffee muddy. For best results, use a medium-to-dark roast for a smoother, richer flavor.
How long does homemade nitro cold brew last?
The cold brew concentrate lasts up to two weeks in the fridge when stored in an airtight container. Once nitrogenated, it’s best consumed within 24 hours to maintain the creamy texture and carbonation.
Why does my homemade nitro cold brew taste flat or watery?
Flatness often comes from insufficient nitrogen infusion or using too weak a concentrate. Ensure you’re using a strong ratio (1:4 coffee to water) and charge the dispenser fully. Also, serve it cold, as warm temperatures reduce nitrogen retention.
Conclusion
Mastering homemade nitro cold brew is simpler than you think, requiring only coarse grounds, a long steep, and a whipping siphon or keg. The reward is a velvety, cascading coffee that rivals any café creation. By controlling the beans and sweetness, you save money and craft a personalized brew. Embrace the process, experiment with ratios, and enjoy the satisfaction of pouring your own perfect, creamy cup at home.