How To Make Starbucks Foam
Wondering how to make starbucks foam at home? You’re in the right place. The key isn’t just frothing milk—it’s nailing that thick, velvety microfoam Starbucks uses for lattes and cold foam for cold brews. Whether you have an espresso machine, a French press, or just a jar, this guide breaks down the exact milk, temperature, and technique to replicate that signature silky texture every time.
What Is Starbucks Foam and Why Is It So Popular?
The difference between cold foam and hot foam
To master making Starbucks-style foam at home, you must first understand the two distinct types: cold foam and hot foam.
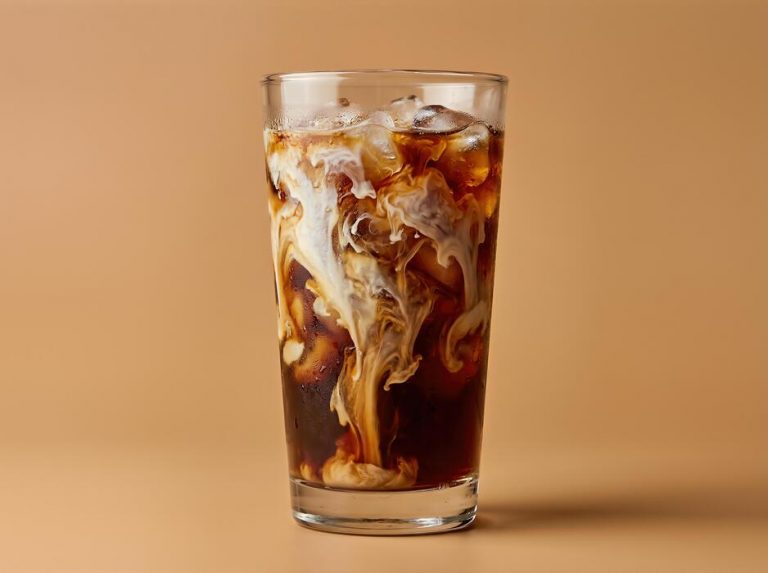
Cold foam is made by frothing cold, nonfat milk (or a milk alternative like oat milk) without heat, creating a thick, velvety, and pourable texture that sits atop iced drinks like the famous Cold Brew with Sweet Cream.
To replicate it, use a cold frother or whisk chilled milk vigorously until it doubles in volume and forms soft peaks. Hot foam, on the other hand, is steamed milk with small, uniform bubbles, often used in lattes and cappuccinos.
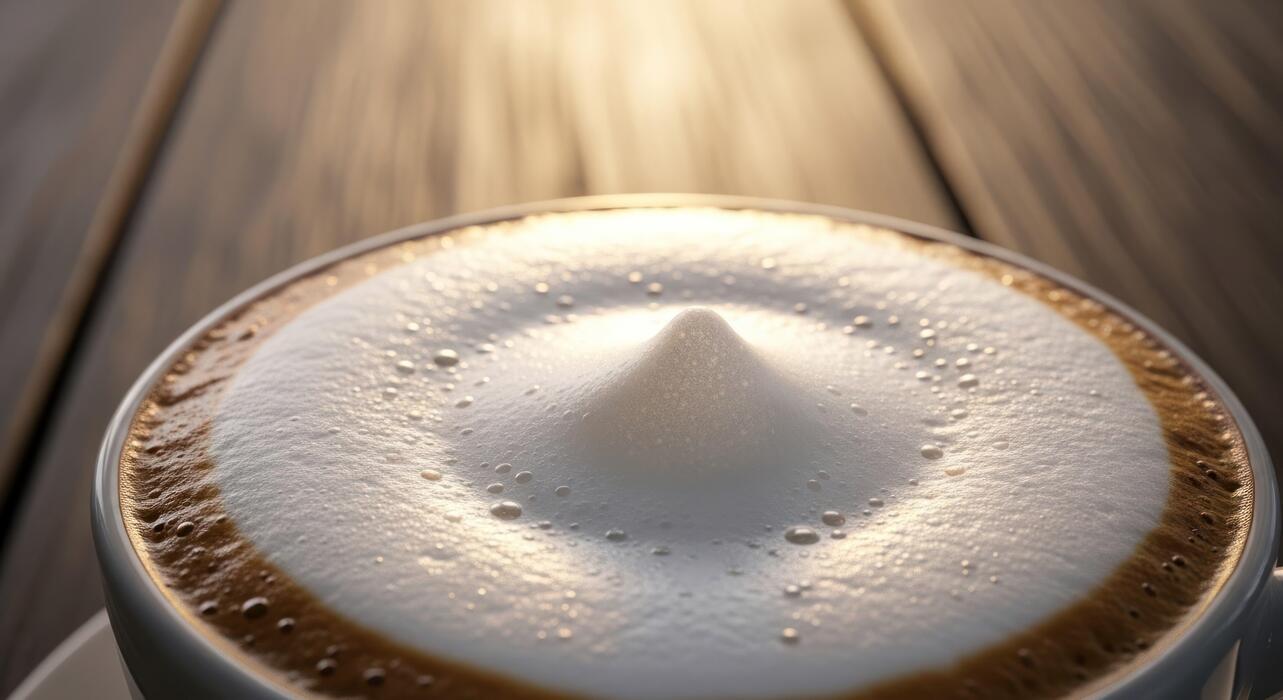
Starbucks achieves this by heating milk to around 150°F using an espresso machine’s steam wand, creating a microfoam that blends smoothly into hot coffee. For home recipes, a stovetop frother or microwave method can work, but the key is to avoid large bubbles by tapping and swirling the pitcher.
Understanding this distinction ensures you choose the right technique for your drink—cold foam for refreshing iced beverages and hot foam for cozy, warm cups.
Key ingredients that give Starbucks foam its texture
The signature texture of Starbucks foam comes down to a few strategic ingredients and techniques you can easily replicate. Nonfat milk is the star for cold foam because its low fat content allows it to aerate and hold structure, creating a dense, creamy foam that doesn’t deflate quickly.
For hot foam, 2% milk is often preferred as it strikes a balance between richness and froth stability. Starbucks also adds vanilla syrup (a simple syrup of sugar, water, and vanilla extract) to sweeten and stabilize the foam, especially in drinks like the Vanilla Sweet Cream Cold Brew.
To mimic this at home, use a ratio of 1 tablespoon of vanilla syrup per 4 ounces of milk. Additionally, powdered ingredients like cinnamon or cocoa can be blended in for flavor variations.
The secret to achieving that silky, Starbucks-like consistency lies in using a high-speed frother or blender for cold foam, and a steam wand for hot foam, ensuring the milk is aerated properly without overheating. Avoid whole milk for cold foam, as it will be too heavy and flat.
Why Starbucks foam became a coffee trend
Starbucks foam didn’t just appear; it became a cultural phenomenon by solving a common coffee problem: how to enjoy creamy texture without diluting flavor. Cold foam revolutionized iced coffee by replacing melting ice cubes with a thick, airy topping that adds sweetness and body without watering down the drink.
This innovation aligned perfectly with the rise of social media, where visually striking layered beverages—like the Pink Drink or Cold Brew with cascading foam—became Instagram sensations. Additionally, Starbucks leveraged customization culture, allowing customers to add foam to any drink, making it a versatile upgrade.
The trend also tapped into the demand for premium, café-style experiences at home, as DIY recipes for foam went viral on platforms like TikTok.
By focusing on texture and presentation, Starbucks transformed a simple milk froth into a symbol of indulgence and creativity, inspiring home baristas to experiment with flavors like pumpkin spice or matcha foam.
This trend shows no signs of fading, as foam continues to evolve with new milk alternatives and seasonal offerings.
How to Make Starbucks Cold Foam at Home
Essential tools: frother, blender, or mason jar
To replicate Starbucks cold foam at home, you need a tool that creates microfoam—tiny, uniform bubbles that give a thick, silky texture. An electric milk frother is the easiest option; handheld or automatic versions work well with cold milk.
A blender (like a NutriBullet or immersion blender) is faster and creates a denser foam, ideal for larger batches. A mason jar with a tight lid is a no-equipment hack: shake vigorously for 30–60 seconds until frothy.
For best results, use cold, low-fat or nonfat milk (2% or skim) since higher fat content (whole milk or cream) resists foaming. If you want a dairy-free version, oat milk (barista blend) or soy milk froths best. Avoid almond milk—it’s too thin.
Chill your tool and milk beforehand for maximum volume. Pro tip: if using a mason jar, microwave the milk for 15 seconds after shaking to stabilize the foam.
Step-by-step recipe for vanilla sweet cream cold foam
Start with 2 tablespoons of vanilla syrup (homemade or store-bought like Torani) and 1/2 cup of cold 2% milk. For the sweet cream base, mix 1 tablespoon heavy cream with the milk for extra richness. Pour all ingredients into your frother, blender, or mason jar.
Froth for 20–30 seconds until it doubles in volume and forms soft peaks—like a cloud. If using a blender, pulse 3–4 times on low speed to avoid over-aerating. For a mason jar, shake hard for 60 seconds, then microwave for 15 seconds to set.
The foam should be thick enough to sit on top of your drink without sinking. For a Starbucks-style iced coffee, fill a glass with ice and cold brew, then spoon the foam over the top. Adjust sweetness: add 1–2 extra teaspoons of syrup if you like it sweeter.
Store leftover foam in the fridge for up to 24 hours—just re-froth briefly before using.
Tips for getting the right thick, silky consistency
Achieving Starbucks-level foam requires attention to milk temperature and technique. Always use ice-cold milk—warm milk creates larger, unstable bubbles that collapse. Nonfat milk yields the thickest foam due to its higher protein content; 2% is a good compromise for silky texture without being too thin.
Avoid over-frothing: 20–30 seconds is ideal—beyond that, foam becomes stiff and dry. If using a blender, pulse, don’t blend continuously to prevent a watery consistency. For a velvety finish, let the foam sit for 30 seconds after frothing to let larger bubbles rise and pop.
Then spoon only the top, creamy layer onto your drink. Add a pinch of salt to the milk before frothing—it stabilizes the foam and enhances flavor. For a thicker texture, include 1 tablespoon of nonfat dry milk powder per cup.
Finally, pour your cold foam over a freshly made cold brew (not hot coffee) to prevent melting. Practice makes perfect—adjust milk fat and frothing time to your preference.
How to Make Starbucks Hot Foam for Lattes
Best milk types for steaming and frothing
To replicate Starbucks hot foam, start with the right milk. Starbucks uses 2% milk as their standard for lattes, as it strikes the perfect balance between fat and protein for creamy microfoam. For a richer, velvety texture, whole milk creates denser foam with a sweeter taste, ideal for indulgent lattes.
Non-dairy options work too: oat milk (especially barista blends) froths well due to its added oils and starches, producing smooth foam similar to dairy. Almond milk can foam but tends to be thinner, so opt for barista versions. Avoid skim milk, as it creates large, airy bubbles that dissipate quickly.
For best results, use cold milk (around 40°F) straight from the fridge—warm milk won’t froth properly. Always pour fresh milk into a clean pitcher, filling it to no more than half full to allow room for expansion.
This choice ensures your foam holds its shape, integrates seamlessly into espresso, and delivers that signature Starbucks texture.
Using a steam wand vs. a handheld frother
The method you choose directly impacts foam quality. A steam wand, like those on espresso machines, is the gold standard for Starbucks-style microfoam.
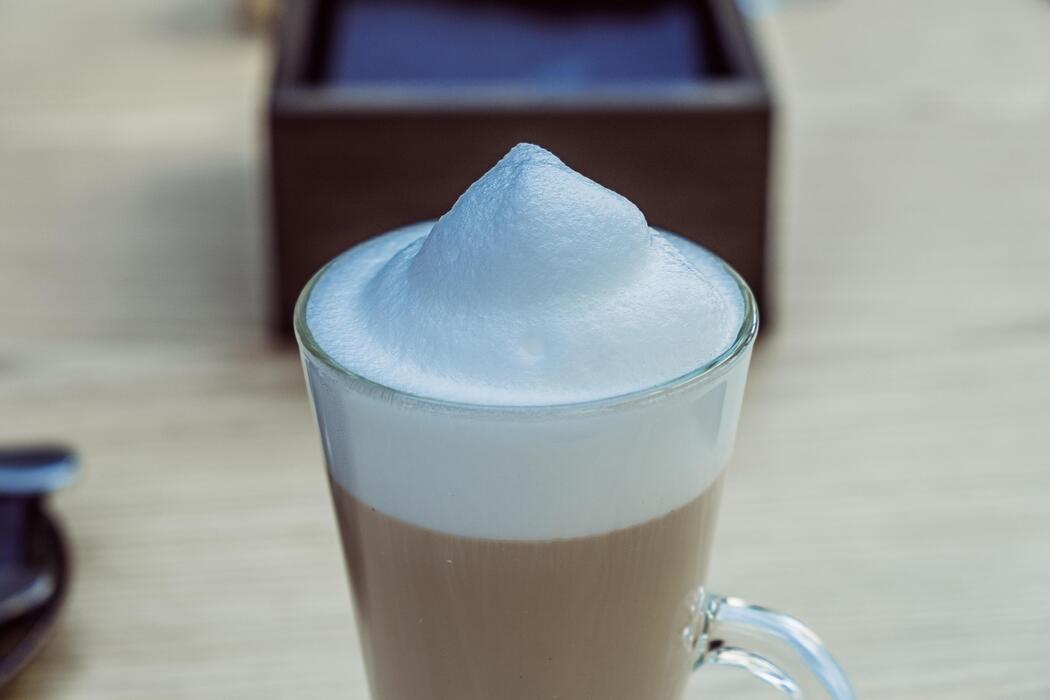
Submerge the wand tip just below the milk’s surface, turn it on, and stretch the milk by keeping the tip near the top until the milk increases in volume by about 20%. Then, lower the wand deeper to create a vortex, heating the milk to 150°F–155°F without scorching.
This technique integrates air smoothly for silky foam. If you lack a steam wand, a handheld frother is a budget-friendly alternative. Heat milk on the stove or microwave to 150°F, then submerge the frother’s whisk just below the surface and blend for 15–30 seconds until foam forms.
While easier, handheld frothers produce larger bubbles, so tap the container on the counter to burst them. For closest results, invest in a manual milk frother that heats and froths simultaneously, mimicking steam wand action.
Techniques for achieving microfoam like a barista
Perfect microfoam requires precise technique. Begin by purging your steam wand to remove condensation. Submerge the tip just below the milk’s surface and tilt the pitcher at a 45-degree angle. Open the steam valve fully, then listen for a gentle hissing sound, not a loud screech—that indicates proper air incorporation.
As the milk expands, lower the pitcher to keep the tip submerged, creating a whirlpool that mixes air and milk evenly. Stop steaming when the pitcher feels too hot to hold for more than 3 seconds (around 150°F).
For handheld frothers, use short bursts of blending, then tap the container to release large bubbles. Swirl the milk gently before pouring to integrate foam. Practice stretching the milk for only 2–3 seconds initially, then focus on heating without adding more air.
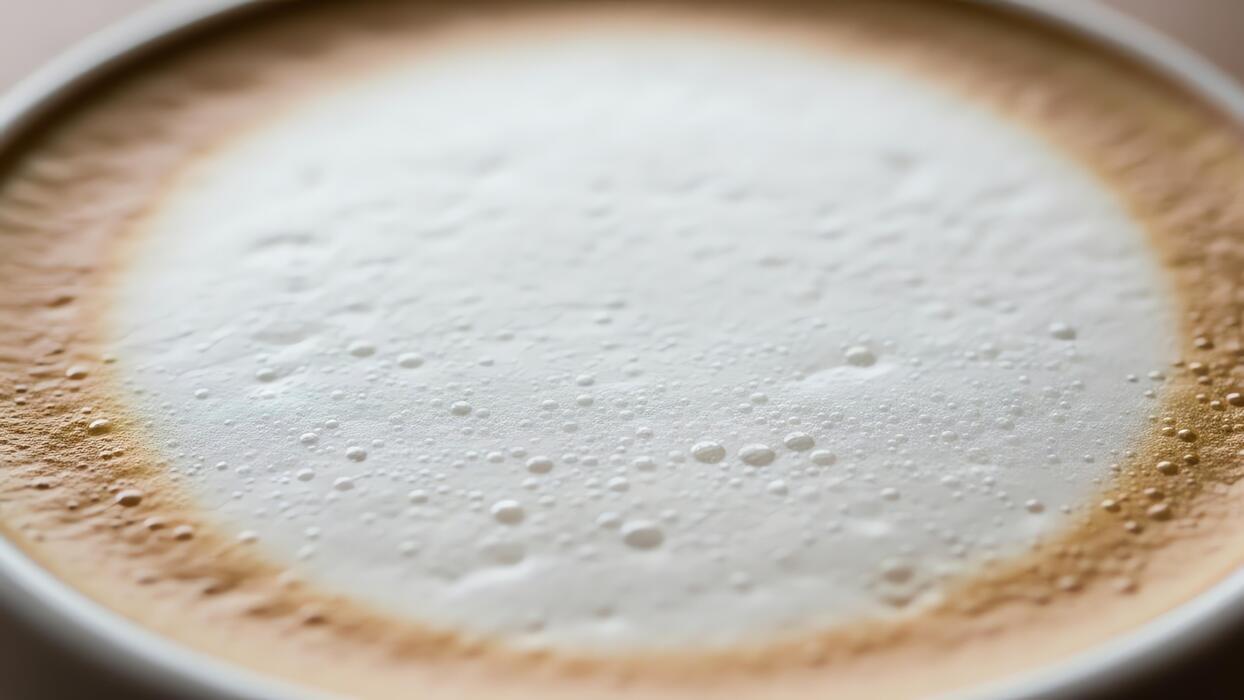
The result is glossy, paint-like foam that clings to a spoon—ideal for latte art and that signature Starbucks mouthfeel.
Best Milk and Cream Options for Starbucks-Style Foam
Whole milk vs. non-dairy alternatives (oat, almond, soy)
For Starbucks-style foam, whole milk is the gold standard due to its balanced fat content (3.25%) which creates a stable, velvety microfoam. If you prefer non-dairy, oat milk (especially barista blends) mimics dairy’s texture best, producing creamy foam with a neutral taste.
Almond milk yields thinner, less stable foam that separates quickly—opt for unsweetened varieties to avoid graininess. Soy milk can froth well if you choose a brand with added stabilizers (like calcium carbonate), but it may curdle in hot coffee.
To improve non-dairy results, shake the carton vigorously before frothing, use cold milk, and avoid ultra-filtered options (e.g., Fairlife) as they lack the protein needed for foam structure. For thick cold foam, whole milk remains unbeatable, but oat milk is your closest plant-based substitute.
Always test your frother’s settings: non-dairy milks often require longer frothing times.
Why heavy cream and 2% milk work best for cold foam
Starbucks’ signature cold foam relies on heavy cream (36-40% fat) for its thick, spoonable texture, while 2% milk provides the liquid base to prevent it from becoming too dense. The fat in heavy cream traps air bubbles effectively, creating a stable foam that holds its shape for 10-15 minutes.
Mixing 2 parts heavy cream with 1 part 2% milk replicates the Starbucks recipe—the cream adds richness, and the 2% ensures the foam isn’t clumpy. Avoid skim milk (too watery) or half-and-half (too thin).
For extra stability, chill your cream and milk to 35°F before frothing, and use a cold frother or French press (pump 30-40 times). This blend works for both sweet and savory cold brews.
If you want a dairy-free version, coconut cream (not milk) mixed with oat milk mimics heavy cream’s fat content but may separate in hot drinks.
How to adjust fat content for thicker foam
To achieve Starbucks-level thick foam, fat content is your lever: higher fat = denser, creamier foam. Start with whole milk (3.25% fat) for standard froth; for extra thickness, blend 2 tablespoons heavy cream per cup of whole milk (raises fat to ~10%).
For non-dairy, barista oat milk (often 3-4% fat) outperforms low-fat versions—add 1 teaspoon coconut oil while frothing to boost thickness. If your foam is too airy, reduce frothing time (over-frothing breaks bubbles) or use a higher-fat milk like half-and-half (12% fat) for cold foam.
For hot drinks, low-fat milk (1-2%) produces larger, less stable bubbles; add 1 tablespoon dry milk powder per cup to increase protein for better structure. Always test with a thermometer: milk froths best at 150°F for hot foam and 40°F for cold foam.
Adjust fat gradually—too much heavy cream makes foam greasy rather than silky.
How to Make Starbucks Pumpkin Cream Cold Foam
Ingredients for the pumpkin spice flavor
To create that signature Starbucks pumpkin cream cold foam, you’ll need a few key ingredients that replicate the brand’s rich, spiced flavor. Start with 2 tablespoons of pumpkin purée (not pumpkin pie filling) for authentic taste and color. Add 1 tablespoon of vanilla syrup—homemade or store-bought—to mimic Starbucks’ sweet base.
For the spice blend, combine ¼ teaspoon each of ground cinnamon, nutmeg, and a pinch of cloves. A dash of pumpkin pie spice can enhance depth. The creamy texture comes from ¼ cup heavy cream (or full-fat coconut cream for dairy-free) and 2 tablespoons of 2% milk to thin slightly.
For sweetness, stir in 1 teaspoon of brown sugar or maple syrup. If you want the signature orange hue, add a drop of orange food coloring (optional). Whisk all dry spices with the pumpkin purée first to avoid clumps, then blend in liquids.
This mix creates the exact pumpkin-spiced foundation that makes Starbucks’ foam so craveable.
Step-by-step mixing and frothing instructions
To achieve that velvety, cloud-like foam Starbucks is famous for, follow these precise steps. First, combine your pumpkin spice mixture (from the previous section) in a small bowl or jar. Use a handheld milk frother for best results—it aerates the cream perfectly.
If you don’t have one, a French press works: pour the mixture in, pump vigorously for 30 seconds. Start by frothing on low speed for 10 seconds to incorporate the pumpkin, then increase to high for 20-30 seconds until the foam thickens and doubles in volume.
The goal is soft peaks that hold their shape but still pour easily. For a stiffer foam (like Starbucks’ cold foam), chill the cream and bowl for 5 minutes before frothing. Avoid over-frothing, which can turn it buttery. If using a blender, pulse on low for 15 seconds—don’t over-blend.
The foam should be smooth, not bubbly. Let it rest for 30 seconds to stabilize before layering.
How to layer it on iced coffee or cold brew
Layering your pumpkin cream cold foam correctly ensures that Starbucks-style visual and sipping experience. Start with a tall glass filled with ice—use large cubes to slow dilution. Pour your cold brew or iced coffee to about ¾ full, leaving room for the foam.
The key is to gently pour the foam over the back of a spoon held just above the coffee’s surface. This technique prevents the foam from sinking and creates a distinct, creamy top layer. Pour slowly in a circular motion to spread evenly.
For a Starbucks-like finish, fill the foam to the brim of the glass—it should sit about ½ inch above the rim. If the foam starts to sink, it’s too thin; re-froth briefly. Optionally, sprinkle a pinch of pumpkin pie spice or cinnamon on top for garnish.
Serve immediately with a straw—the foam will slowly blend as you drink, delivering that sweet, spiced flavor in every sip. For a less sweet version, reduce the vanilla syrup by half.
Common Mistakes When Making Starbucks Foam
Using the wrong milk temperature
The most common mistake is starting with milk that is too hot or too cold. Starbucks baristas use cold milk (around 35-40°F) for cold foam, as cold milk traps air better and creates a thick, velvety texture.
If your milk is warm, the proteins break down, and you’ll get a flat, watery foam instead of the dense, creamy layer you want. For hot foam on drinks like lattes, steam milk to 150-155°F maximum; overheating scalds the milk and ruins the microfoam.
Always use a thermometer to check: cold foam needs milk straight from the fridge, while hot foam requires gentle heating. Pro tip: For cold foam, chill your frothing pitcher for 10 minutes beforehand.
This keeps the milk cold longer, giving you a thicker, more stable foam that sits perfectly on top of your iced drink without dissolving. Stick to these temperatures for consistent, Starbucks-quality results every time.
Over-frothing or under-frothing the mixture
Achieving the right foam texture is all about timing and technique. Over-frothing turns your milk into stiff, dry bubbles that collapse quickly, while under-frothing leaves it watery and thin.
For Starbucks-style cold foam, use a handheld frother or blender on low speed for 20-30 seconds until the mixture doubles in volume and has a smooth, pourable consistency—like melted ice cream. Avoid over-mixing, which incorporates too much air and creates large, unstable bubbles.
For hot foam, steam the milk until it reaches a silky, glossy microfoam with no visible bubbles; this takes about 10-15 seconds. Key tip: Tap the pitcher on the counter to pop any large bubbles, then swirl gently to integrate.
If your foam is too thick, add a splash of cold milk; if too thin, froth for 5-10 more seconds. Practice this balance to get that signature creamy layer every time.
Not sweetening the foam properly
Starbucks cold foam isn’t just milk and air—it’s sweetened to perfection, which many home baristas skip. Without sweetener, your foam will taste bland and separate from the drink. The secret is to add 1-2 pumps of vanilla syrup or a tablespoon of simple syrup directly to the milk before frothing.
This ensures the sweetness is evenly distributed throughout the foam, not just on top. For a sugar-free option, use stevia or monk fruit sweetener in the same amount.
Pro tip: For flavored foams like caramel or pumpkin, mix in 1 teaspoon of syrup or sauce before frothing to infuse the taste. Don’t forget to adjust sweetness to your drink—sweeter for iced coffees, lighter for matcha. Also, avoid granulated sugar, which won’t dissolve and leaves a gritty texture.
Sweetening the foam first guarantees a consistent, delicious layer that mimics the Starbucks experience perfectly.
Tips for Serving and Storing Homemade Starbucks Foam
How to layer foam on drinks without sinking
To achieve a perfect layered drink, start by gently pouring your cold or hot base liquid into the glass first, leaving about an inch of space at the top.
Use a spoon to slowly pour the foam over the back of the spoon onto the surface, which helps it float rather than sink. For cold foam, ensure it is thick and airy—whipped to soft peaks with a frother or blender—so it stays buoyant.
If your foam is too thin, it will mix into the drink; simply whip it longer or add a touch of heavy cream to stabilize. For hot drinks, use steamed milk foam that is dense and silky; tap the pitcher to remove large bubbles before spooning it on.
Always serve immediately, as foam begins to settle after a few minutes. Practice makes perfect, so don’t worry if the first attempt sinks—adjust your pouring speed or foam consistency next time.
Best ways to store leftover foam
If you have leftover Starbucks-style foam, refrigerate it in an airtight container for up to 24 hours, but note that it will lose some airiness. To revive it, re-whip the foam with a frother or whisk for 10-20 seconds until it regains volume.
For cold foam, add a splash of milk or cream before re-whipping to restore texture. Avoid freezing foam, as ice crystals will ruin the silky consistency. If you made a large batch, portion it into small jars to minimize air exposure.
For hot foam, store it in a thermos for up to 2 hours, but re-steaming is not recommended as it can become rubbery. Instead, make fresh foam daily for best results. Label the container with the date, and always check for separation or off-smells before using.
A quick trick: if foam separates, stir it gently before re-whipping—this can salvage the texture for your next coffee.
Creative variations: matcha, caramel, and chocolate foam
Elevate your homemade foam with simple flavor twists. For matcha foam, whisk 1 teaspoon of matcha powder with 2 tablespoons of hot water until smooth, then blend with 1/2 cup cold milk and a dash of vanilla syrup until frothy—perfect on iced lattes.
For caramel foam, mix 2 tablespoons of caramel sauce with 1/4 cup heavy cream and 1/4 cup milk, then whip until thick; drizzle extra caramel on top for a sweet finish.
For chocolate foam, combine 1 tablespoon of cocoa powder, 1 tablespoon of sugar, and 1/4 cup milk; heat gently to dissolve, then cool before frothing with cream for a rich, mocha-like layer. Adjust sweetness to taste, and use cold heavy cream for the best volume.
These variations work on hot or iced drinks, and you can even layer them—try a matcha-caramel swirl. Store any extra flavored foam separately, as sugars may alter texture. Experiment with ratios to find your perfect balance.
Frequently Asked Questions
What is Starbucks foam made of?
Starbucks foam is typically made from nonfat milk, which creates a thick, velvety texture when aerated with steam. The key is using cold milk and a steam wand to incorporate air, resulting in a stable microfoam.
How do I make Starbucks-style foam at home without a steam wand?
Heat nonfat milk in a saucepan or microwave until steaming (about 150°F), then use a French press or handheld milk frother to pump or blend until frothy. For best results, let the foam settle for 30 seconds before spooning it onto your coffee.
What type of milk does Starbucks use for foam?
Starbucks primarily uses nonfat milk for their standard foam because it produces the most volume and stable bubbles. However, you can use 2% or whole milk for a creamier foam, though it will be less airy.
How do I make cold foam like Starbucks?
To make cold foam, blend cold nonfat milk (or heavy cream for a richer version) in a frother or blender until thick and frothy, about 20-30 seconds. Use it immediately over iced coffee or cold brew, as it separates quickly.
Can I make Starbucks-style foam with almond or oat milk?
Yes, but barista editions of almond or oat milk work best as they contain stabilizers for better frothing. Shake the carton, heat slightly, then froth; non-dairy foams are thinner and less stable than dairy foam.
How do I get thick, creamy foam like Starbucks?
Use cold nonfat milk and a steam wand if available, tilting the pitcher to create a vortex while aerating. If using a frother, pulse in short bursts and let the foam rest to thicken. Avoid over-heating, which can deflate bubbles.
What is the difference between hot foam and cold foam at Starbucks?
Hot foam is steamed milk with air incorporated for a warm, velvety texture used on lattes, while cold foam is cold milk frothed into a thick, airy layer for iced drinks. Cold foam uses a blender or frother, not steam.
Conclusion
Mastering Starbucks-style foam at home is simpler than you think. Key takeaways: use cold, high-fat milk, aerate it well with a frother or whisk, and microwave briefly for hot foam, or shake vigorously for cold foam. With a little practice, you can replicate that velvety texture and save money. So grab your milk and favorite mug—your perfect homemade latte is just a froth away.