How To Make Cold Brew From Beans
If you are tired of watery iced coffee and want that smooth, chocolatey flavor instead, learning how to make cold brew from beans is a total game changer. You do not need fancy equipment or a barista certification to master this at home. This guide will show you exactly how to transform your favorite whole beans into a rich concentrate with minimal effort.
What is cold brew and why use whole beans?
The difference between cold brew and iced coffee
Understanding the distinction between these two methods is the first step in learning how to make cold brew from beans properly. While iced coffee is simply standard drip coffee brewed with hot water and then chilled or poured over ice, cold brew is an entirely different process.
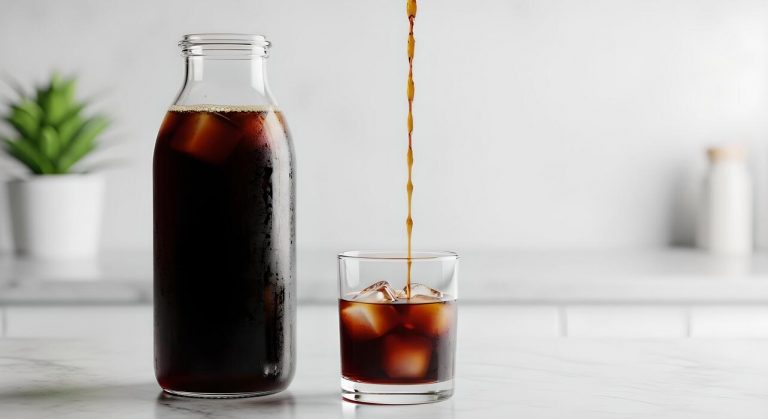
To create a true cold brew, you must steep coarsely ground whole beans in room temperature or cold water for a duration of 12 to 24 hours. This extended contact time replaces heat as the extraction catalyst, resulting in a concentrated coffee syrup that is exceptionally smooth.
Unlike iced coffee, which often tastes watered down as the ice melts, cold brew maintains a robust body and a rich, chocolatey profile.
By starting with whole beans, you ensure that the volatile oils remain trapped inside until the moment you are ready to brew, providing a fresher taste and deeper aroma that heat-based brewing simply cannot replicate.
Mastering this slow infusion method allows you to enjoy a bold beverage that stays fresh in the refrigerator for up to two weeks.
Benefits of grinding your own beans at home
When you want to know how to make cold brew from beans with professional results, the secret lies in the grind consistency. Purchasing pre-ground coffee is often a mistake for this method because most commercial grounds are too fine, leading to a bitter, over-extracted, and cloudy final product.
By using a burr grinder at home, you can achieve the specific extra-coarse texture resembling sea salt, which is ideal for a long immersion. Whole beans act as a protective vessel for delicate flavor compounds; once coffee is ground, it begins to oxidize rapidly, losing its unique character within minutes.
Grinding your own beans right before adding water ensures you capture the maximum complexity of the roast.
Furthermore, controlling the grind size allows you to customize the filtration process, making it much easier to strain the solids through a mesh filter or cheesecloth without leaving sediment at the bottom of your pitcher.
This hands-on approach guarantees a crisp, clean cup every time you brew, highlighting the specific notes of your chosen single-origin or blend.
Why cold water extraction creates less acidity
The science behind cold brew explains why it is the preferred choice for those with sensitive stomachs or a preference for mellow flavors.
Traditional hot brewing methods use near-boiling water to quickly extract solubles, but this high temperature also pulls out acidic oils and bitter tannins that can be harsh on the palate. In contrast, using cold water prevents these specific chemical compounds from ever dissolving into the liquid.
By opting for a slow, cold-water extraction, you reduce the total acid content by approximately 60% to 70% compared to hot coffee.
This process highlights the natural sweetness and nutty undertones of the whole beans, creating a beverage that is naturally smooth and requires less sugar or dairy to be palatable.
Because the chemical profile of the coffee is fundamentally altered by the lack of heat, the resulting brew is much more stable and less prone to turning sour over time.
Learning how to make cold brew from beans allows you to leverage this gentle extraction technique to produce a stomach-friendly, highly caffeinated drink that showcases the bean’s true essence.
Best coffee beans for cold brew

Light vs. dark roast profiles
When choosing the best coffee beans for cold brew, the roast profile is the most significant factor in determining the final taste. Most enthusiasts recommend a dark roast because the long steeping process excels at extracting deep, chocolatey, and nutty notes without the harsh bitterness often found in hot brewing.
Darker beans are more porous, allowing water to penetrate easily during the twelve to twenty-four-hour soak. However, if you prefer a tea-like consistency with bright acidity, a light roast can offer surprising floral and citrus complexities.
The cold extraction method tends to mellow out the sharp acids of lighter beans, resulting in a refreshing and nuanced beverage. For a classic, bold cold brew that stands up well to milk or cream, look for labels indicating a medium-dark roast profile.
This middle ground provides a heavy body and a smooth finish, making it the most reliable choice for beginners learning how to make cold brew from scratch at home.
Single origin vs. coffee blends
Deciding between single origin beans and coffee blends depends entirely on your flavor goals. A coffee blend is often the superior choice for cold brew because it is specifically engineered for consistency and balance.
Roasters combine beans from different regions to ensure a reliable flavor profile that features low acidity and high sweetness, which are the hallmarks of a great cold brew. Blends are also typically more affordable, making them ideal for a brewing method that requires a high coffee-to-water ratio.
On the other hand, single origin beans allow you to explore the unique terroir of a specific region, such as the fruity notes of Ethiopian Yirgacheffe or the earthy tones of Sumatran coffee.
While single origins can be more expensive, they offer a sophisticated tasting experience for those who drink their coffee black. Ultimately, using a high-quality blend ensures your batch remains smooth and flavorful, providing a solid foundation for your daily caffeine fix without any unexpected flavor shifts.
How freshness impacts the final flavor
Freshness is a critical component when learning how to make cold brew from beans, though the rules differ slightly from traditional hot brewing. For the best results, you should use freshly roasted beans that have degassed for at least three to five days after roasting.
Using beans that are too fresh can lead to excessive bubbling during the initial soak, which may interfere with even saturation. Conversely, stale beans will produce a flat, woody flavor that lacks the vibrant sweetness characteristic of a good brew.
It is essential to grind your beans immediately before brewing to preserve the delicate aromatic oils that disappear shortly after the bean is broken. Aim for a coarse, even grind size similar to sea salt; this prevents over-extraction and ensures the water flows freely between the particles.
By prioritizing beans that were roasted within the last month and maintaining a consistent coarse grind, you will achieve a clean, crisp concentrate that showcases the true potential of your selected coffee variety.
Essential equipment for home brewing
Choosing the right coffee grinder
To transform whole beans into the perfect cold brew, your most critical piece of equipment is a quality burr grinder. Unlike standard blade grinders that shatter beans into uneven shards, a burr grinder ensures a consistent extra-coarse grind, which is essential for the long steeping process.
This specific texture resembles sea salt and allows water to flow freely between particles, preventing the over-extraction and bitterness often caused by fine sediment. When selecting a grinder, look for one with adjustable manual or electric settings that can reliably produce large, uniform grounds without generating excessive heat.
Investing in a burr mill allows you to unlock the natural sweetness and chocolatey notes of your beans while ensuring your filter does not become clogged during the final stage.
Starting with freshly ground beans rather than pre-ground coffee significantly enhances the aromatic profile and freshness of your finished concentrate, making the grinder the foundation of any successful home setup.
Glass jars and cold brew makers
The vessel you choose for steeping serves as the heart of your brewing operation. While specialized cold brew systems are available, a large glass Mason jar or a dedicated glass carafe is often the best choice for beginners and experts alike.
Glass is a non-reactive material, meaning it will not leach metallic or plastic flavors into your coffee during the twelve to twenty-four-hour immersion period.
Ensure your container has a wide-mouth opening to make adding your coarse grounds and pouring water easy, and a tight-sealing lid to prevent the coffee from absorbing stray odors from your refrigerator.
If you prefer a more integrated solution, look for systems with built-in mesh cylinders that hold the grounds in the center of the water. Regardless of the specific brand, the goal is to provide ample space for agitation, allowing every coffee particle to be fully saturated.
Choosing a transparent vessel also helps you monitor the deepening color and extraction progress of your brew.
Filtering tools for a clean cup
Achieving a smooth, sediment-free finish requires effective filtering tools to separate the saturated grounds from your liquid gold. Many enthusiasts opt for dual-layer filtration, starting with a stainless steel mesh sieve to remove large particles and finishing with a high-quality paper or cloth filter.
Paper filters are excellent for trapping fine oils and micro-grounds, resulting in a crisp, bright flavor profile that highlights the bean’s origin. Alternatively, a reusable nut milk bag or organic cotton filter offers a sustainable way to strain large batches quickly while maintaining a heavy, velvety body.
It is vital to ensure your filtering equipment is thoroughly cleaned and rinsed before use to avoid introducing any papery or stale tastes.
By taking the time to properly strain your concentrate, you eliminate the grit that can lead to a chalky mouthfeel, ensuring your final drink is a refined and refreshing extract. This final step is what distinguishes a professional-grade home brew from a muddy, amateur attempt at the process.
How to grind coffee beans for cold brew
Why a coarse grind size matters
When learning how to make cold brew from beans, the most critical factor is achieving a coarse grind size similar to sea salt. Unlike traditional hot brewing methods that rely on quick extraction through heat, cold brew uses a long immersion process that typically lasts between twelve and twenty-four hours.
If you use a fine grind, the water will extract flavors too rapidly, leading to an over-extracted and bitter profile that ruins the smooth, chocolatey notes typically associated with this method.
Furthermore, fine particles are notoriously difficult to filter out, often resulting in a cloudy and silty beverage that leaves an unpleasant residue in your mouth. By keeping the grind coarse, you ensure that the water can slowly penetrate the coffee particles at a steady rate.
This controlled extraction process highlights the natural sweetness of the beans while minimizing the acidity, resulting in a clean, refreshing concentrate that serves as the perfect base for your favorite iced coffee drinks.
Visual guide to the perfect texture
To get the best results when grinding your own beans, you should aim for a texture that mimics coarse kosher salt or cracked peppercorns. When you look at the grounds, you should see distinct, chunky pieces rather than a uniform powder.
If you are using a burr grinder, which is highly recommended for consistency, start at the highest numerical setting and adjust downward until you reach a rugged consistency.
If you only have a blade grinder, use short, rhythmic pulses instead of holding the button down to prevent the beans from turning into dust. Periodically shake the grinder to ensure an even distribution of particles.
A great way to test your grind is to rub a small amount between your fingers; it should feel gritty and sharp rather than soft or flour-like.
Achieving this specific tactile texture ensures that the water flows freely around the coffee during the long steeping period, allowing for a balanced saturation that produces a rich, full-bodied cold brew concentrate every single time.
Common grinding mistakes to avoid
One of the most frequent errors beginners make is using a standard drip coffee setting, which is far too fine for the extended immersion time required for cold brew. This mistake often leads to a brew that tastes harsh and astringent rather than mellow.
Another pitfall is grinding the beans too far in advance; once coffee is ground, it begins to oxidize rapidly, losing the volatile oils that provide flavor and aroma. For the freshest taste, always grind your beans immediately before adding them to your filtered water.
Additionally, many people suffer from inconsistent particle sizes caused by low-quality blade grinders. When you have a mix of fine dust and large chunks, the dust over-extracts and creates bitterness while the chunks under-extract, leading to a weak and sour flavor profile.
Investing in a conical burr grinder can solve this issue by providing a uniform grind. Finally, avoid over-filling your grinder, as this prevents the blades or burrs from processing the beans evenly, resulting in a subpar extraction that fails to capture the true potential of your coffee.
The perfect cold brew ratio and recipe

Standard coffee-to-water measurements
To create a versatile cold brew concentrate that works perfectly over ice or mixed with milk, the golden standard is a 1:4 ratio by weight. This means for every 1 cup of coarsely ground coffee beans, you should use 4 cups of filtered water.
If you prefer a ready-to-drink beverage that does not require dilution, a 1:8 ratio is more appropriate. Using a kitchen scale is the most reliable method to ensure consistency, as volume measurements can vary based on the bean density and roast level.
For a standard 32-ounce French press, aim for roughly 3 ounces of coffee beans. Always prioritize high-quality, fresh beans and use filtered water to avoid any off-flavors from chlorine or minerals found in tap water.
Achieving this precise balance ensures that the resulting brew is bold and flavorful without being overly acidic or watery, providing a professional-grade base for your morning caffeine fix.
Step-by-step brewing instructions
Begin by setting your grinder to the extra-coarse setting; the texture should resemble sea salt or peppercorns to prevent a cloudy, bitter result. Place your grounds into a large glass jar or a dedicated cold brew maker.
Slowly pour your room temperature or cool filtered water over the grounds, ensuring every particle is fully saturated. Instead of vigorous stirring, use a long spoon to gently fold the mixture to avoid over-agitation, which can lead to unwanted bitterness.
Seal the container tightly to prevent the coffee from absorbing any odors from your refrigerator. Once the steeping process is complete, filter the concentrate through a fine-mesh sieve followed by a paper coffee filter or a nut milk bag to remove all sediment.
This dual-filtration method results in a silky-smooth mouthfeel and a clean finish. Store the finished liquid in a sealed carafe in the fridge, where it will stay fresh and delicious for up to two weeks.
How long to steep for maximum flavor
Timing is the most critical variable when extracting flavor from cold grounds, as the process relies on time rather than heat. For a rich and chocolatey profile, the ideal steeping window is between 12 and 18 hours at room temperature.
If you prefer to steep your coffee in the refrigerator to keep it chilled, you should extend the duration to 20 to 24 hours because the cold environment slows down the extraction process.
Be careful not to exceed the 24-hour mark, as over-extraction can pull out woody, bitter tannins that mask the natural sweetness of the beans.
If you find the flavor too intense, remember that you are likely tasting a concentrate that is meant to be diluted with equal parts water or cream. Experimenting within these timeframes allows you to find your personal sweet spot.
Once you hit the desired strength, strain the coffee immediately to stop the brewing process and preserve the low-acid, mellow characteristics unique to cold brew.
How to filter and store your concentrate
Best methods for removing coffee grounds
Once your coarse coffee beans have steeped for the required duration, the first step in achieving a smooth concentrate is selecting a reliable filtration method. Most home brewers prefer using a fine-mesh sieve lined with a paper filter or a dedicated nut milk bag to catch every fine sediment.
If you want a cleaner, tea-like clarity, pouring the liquid through a standard pour-over dripper is highly effective. To avoid a bitter aftertaste, ensure you do not squeeze or press the grounds during the filtration process, as this forces unwanted oils and tannins into your final brew.
For those using a French press, simply depressing the plunger works, but passing the liquid through a secondary cloth filter will further refine the texture. Always prioritize a slow, gravity-fed filtration process to maintain the integrity of the flavor profile.
By being patient during this stage, you ensure that your cold brew concentrate remains free of grit, resulting in a professional-grade beverage that is ready for dilution or immediate enjoyment.
Storage tips to keep it fresh for two weeks
Maintaining the quality of your cold brew starts with choosing the right container, preferably an airtight glass carafe or Mason jar. Glass is superior to plastic because it does not absorb odors or leach chemicals that could alter the delicate notes of the coffee beans.
Once filtered, you should refrigerate the concentrate immediately to slow down the oxidation process, which is the primary cause of flavor degradation. It is important to keep the container sealed tightly between uses to prevent the coffee from absorbing the scents of other foods in your fridge.
If you find yourself with an excess amount, consider freezing small portions into ice cubes to use for iced coffee later without diluting the strength.
While the concentrate is technically shelf-stable for a short period, consistent cold storage is the only way to ensure it remains vibrant for up to fourteen days.
Labeling your container with the brew date helps you track freshness and ensures you always consume the highest quality batch before it begins to fade.
Signs that your cold brew has gone bad
While cold brew has a relatively long shelf life compared to hot coffee, it will eventually lose its peak flavor and eventually spoil. The most obvious indicator is a significant change in the aroma, shifting from a rich, nutty scent to something sour, dusty, or overly acidic.
If you notice a visible film on the surface or any cloudiness that does not settle, these are clear signs of mold or bacterial growth, and the batch should be discarded immediately.
Taste is another major giveaway; if the concentrate lacks its signature sweetness and instead tastes metallic or fermented, the oils in the beans have likely gone rancid. Over time, the chemical compounds break down, leading to a flat and unappealing mouthfeel that no amount of milk or sugar can fix.
To prevent wasting your hard-earned brew, always perform a quick sniff test before pouring a glass. Staying vigilant about these sensory changes ensures you only consume coffee that is safe and delicious, keeping your home brewing experience both healthy and consistently satisfying.
Tips for serving and customizing your drink
How to dilute concentrate with water or milk
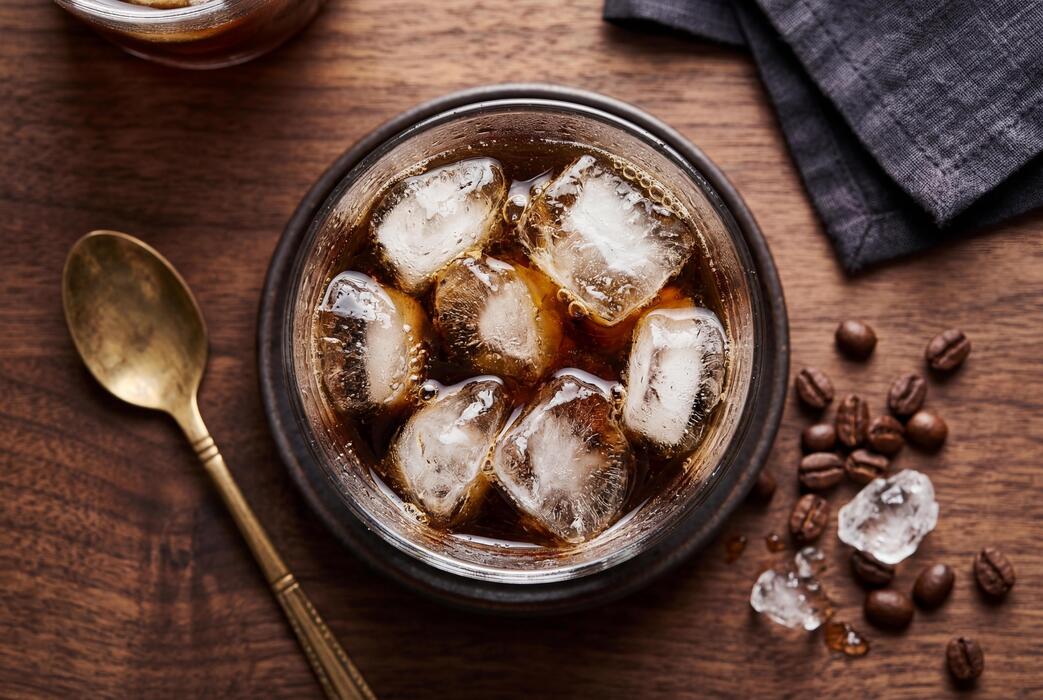
Since making cold brew from beans results in a potent concentrate, finding your ideal dilution ratio is essential for a balanced flavor. A standard starting point is a one-to-one ratio, mixing equal parts coffee concentrate and your liquid of choice.
If you prefer a crisp and refreshing beverage that highlights the bean’s origin notes, dilute the mixture with filtered cold water and plenty of ice.
For those who enjoy a richer, more velvety mouthfeel, substituting water with whole milk, oat milk, or almond milk creates a latte-like consistency that tempers the coffee’s natural acidity.
Keep in mind that the ice will slowly melt and further dilute the drink, so you may want to start with a slightly stronger pour if you plan to sip slowly.
Experimenting with these proportions allows you to customize the strength and body to your exact preference, ensuring that every glass is perfectly tailored to your palate and caffeine tolerance.
Best ways to sweeten cold coffee
When sweetening cold brew, the low temperature makes it difficult for granulated sugar to dissolve, often leaving a gritty residue at the bottom of your glass.
To avoid this, the most effective solution is using a simple syrup, which is a liquid sweetener made by dissolving equal parts sugar in hot water and cooling it. This integrates seamlessly into the cold liquid, providing an even sweetness throughout the drink.
If you are looking for healthier or more complex alternatives, consider using maple syrup or agave nectar, as these natural liquids blend effortlessly into cold coffee while adding unique woody or floral undertones.
For a richer, caramel-like finish, honey can work well if you whisk it into a small amount of room-temperature coffee before adding the rest of the cold liquid and ice.
By choosing liquid-based sweeteners, you ensure a smooth texture and consistent flavor profile from the first sip to the very last drop.
Creative flavor additions and syrups
Customizing your cold brew with creative infusions can transform a basic morning caffeine fix into a sophisticated cafe-style treat. You can elevate the profile of your coffee by adding a few drops of pure vanilla extract or almond extract directly into the glass for a fragrant aroma without added sugar.
For those who enjoy spicy notes, a pinch of ground cinnamon or cardamom stirred into the concentrate can provide a warming contrast to the icy temperature.
If you want to experiment with more modern trends, try topping your drink with cold foam made from frothed heavy cream and a hint of sea salt to create a savory-sweet balance.
Additionally, incorporating homemade fruit syrups, such as blackberry or orange zest infusions, can highlight the fruity acidity found in many light-roast coffee beans. These small additions allow you to play with different flavor dimensions, making each batch of cold brew a unique and customizable experience for your taste buds.
Frequently Asked Questions
What is the best grind size for cold brew beans?
You should use an extra-coarse grind, similar to the consistency of sea salt or peppercorns. This prevents the coffee from becoming over-extracted and bitter during the long steeping process and makes it easier to filter.
How do I grind beans for cold brew if I don’t have a grinder?
If you don’t have a grinder at home, you can use the industrial grinders found at most grocery stores set to the ‘French Press’ or coarsest setting. Alternatively, you can pulse beans in a blender briefly, though this creates an uneven grind that may affect clarity.
What is the ideal coffee-to-water ratio for cold brew?
A standard ratio is 1:8 for a ready-to-drink brew or 1:4 if you are making a concentrated base. For example, use 1 cup of coarsely ground beans to 4 cups of cold, filtered water for a strong concentrate.
How long should I steep the coffee beans in water?
The ideal steeping time is between 12 to 24 hours at room temperature or in the refrigerator. Steeping for less than 12 hours results in a weak flavor, while exceeding 24 hours can pull out harsh, woody notes from the beans.
Do I need to use specific types of beans for cold brew?
While any coffee bean works, medium or dark roasts are generally preferred as they offer chocolatey, nutty notes that shine in cold water. Light roasts can be used but may result in a more acidic, tea-like profile that some find too bright for cold brew.
How do I filter the grounds after steeping?
You can strain the mixture through a fine-mesh sieve lined with cheesecloth or a paper coffee filter. If you are using a French Press, simply press the plunger down slowly to separate the grounds from the finished liquid.
Conclusion
Making cold brew at home is a simple yet rewarding process that transforms ordinary beans into a smooth, low-acid masterpiece. By prioritizing a coarse grind and maintaining a patient 12 to 24-hour steep time, you can achieve professional results in your own kitchen. This customizable method allows you to experiment with different roasts and ratios until you find your perfect cup. Embrace the journey, start brewing today, and enjoy the refreshing taste of homemade perfection.