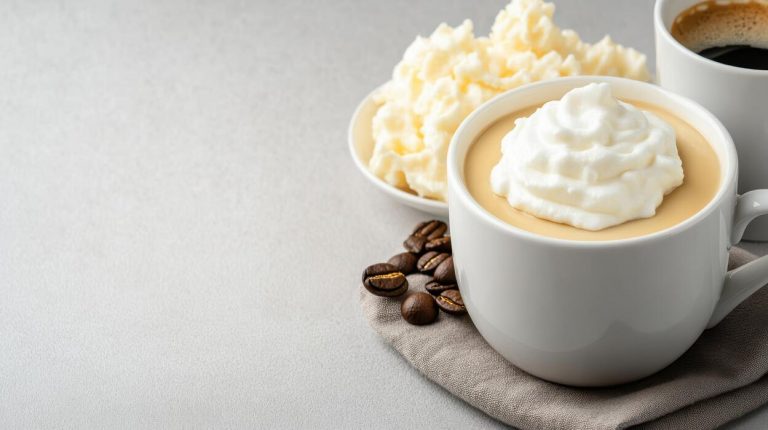
How To Make Iced Coffee Foam
Wondering how to make iced coffee foam that’s thick, stable, and actually stays on top of your drink instead of dissolving into a watery mess? You’re in the right spot. Whether you want a dairy-free option using instant coffee and sugar or a velvety cold foam from milk, I’ll break down the exact ratios, tools, and techniques so you nail that café-style finish every time—no fancy machine required.
What Is Iced Coffee Foam and Why Make It
Definition of iced coffee foam
Iced coffee foam is a light, airy layer of frothed liquid that sits on top of cold coffee drinks, adding a creamy texture without heat. Unlike traditional steamed milk, this foam is created by aerating cold milk, cream, or non-dairy alternatives using a handheld frother, blender, or jar shake.
The key is to use cold ingredients and froth until the mixture doubles in volume, forming stiff peaks that float on iced coffee. For best results, start with full-fat milk or heavy cream for a thicker, stable foam, or use oat milk for a dairy-free version.
To make it, pour cold milk into a narrow container, submerge the frother, and blend for 20–30 seconds until frothy. Pour over ice and coffee immediately to prevent separation. This foam adds a velvety mouthfeel and visual appeal, making your iced coffee feel like a café treat.
Experiment with flavored syrups or vanilla extract to customize the taste.
Benefits of adding foam to cold coffee
Adding foam to cold coffee transforms a simple drink into a luxurious experience with multiple practical benefits. First, the foam acts as an insulating layer, keeping your iced coffee cold longer by reducing direct contact with warm air.
Second, it provides a smooth, creamy texture that balances the bitterness of coffee, making it more palatable for those who dislike strong acidity. Third, the foam traps tiny air bubbles that release coffee aromas gradually, enhancing the sensory experience with each sip.
For home baristas, it’s a quick way to impress guests without specialized equipment—just a frother or blender. Health-wise, you can control sweetness and fat content by choosing skim milk or plant-based options. Additionally, the foam allows for creative flavor additions like cinnamon, cocoa powder, or caramel drizzle.
To maximize benefits, froth the milk just before serving and use a wide glass to showcase the distinct layers. This simple upgrade elevates a basic iced coffee into a café-quality beverage.
Difference between hot foam and cold foam
Hot foam and cold foam differ in preparation, texture, and application. Hot foam is made by steaming milk to 150–160°F, creating microfoam with tiny bubbles that blend into espresso for drinks like lattes. It’s dense, silky, and dissolves quickly into hot coffee.
In contrast, cold foam is made by frothing cold milk (35–40°F) until stiff peaks form, resulting in a light, fluffy layer that floats on top of iced coffee without melting. Cold foam holds its shape longer, offering a distinct texture contrast between the foam and cold liquid.
Key differences include: hot foam requires a steam wand or stove, while cold foam uses a handheld frother, blender, or jar shake. Hot foam is best for hot beverages, whereas cold foam is designed for iced drinks to avoid dilution.
For DIY cold foam, use heavy cream or whole milk for stability; hot foam works with any milk. Understanding this helps you choose the right technique: steam for warmth, froth for chill. Master both to expand your coffee repertoire.
Best Ways to Make Iced Coffee Foam at Home

Using a milk frother for quick foam
For the fastest and most consistent iced coffee foam, an electric milk frother is your best bet. Start with cold milk or a dairy alternative like oat or almond milk, as cold liquids froth better and stay stable.
Pour the milk into the frother’s pitcher, submerge the wand, and activate it for 15–30 seconds until you see thick, airy foam. For extra volume, use whole milk or barista blends which have higher protein content. Once frothed, spoon the foam over a glass filled with ice and chilled coffee.
This method works with both handheld and countertop frothers, and you can customize by adding a dash of vanilla or cinnamon before frothing. The key is to not over-froth, as too much air can make the foam dry and separate quickly.
Clean the frother immediately after use to prevent residue buildup. This technique yields a café-style foam in under a minute, perfect for busy mornings.
Whisking by hand for no-equipment foam
If you don’t have a frother, a simple wire whisk or a French press can create excellent iced coffee foam with a little elbow grease. For whisking, use a metal or silicone whisk and a narrow bowl to concentrate the motion.
Pour cold milk (or cream for richer foam) into the bowl, tilt it slightly, and whisk vigorously in a circular motion for 2–3 minutes until frothy. Alternatively, use a French press: add cold milk, pump the plunger rapidly up and down for 30–60 seconds until foam doubles in volume.
Both methods rely on incorporating air quickly; using whole milk or half-and-half yields thicker foam. For best results, chill the milk and whisk beforehand. Spoon the foam over iced coffee immediately, as it settles faster than machine-made foam.
This zero-tech approach is perfect for travel or minimalist kitchens, and it’s surprisingly effective with practice.
Blender method for thick foam
For ultra-thick, velvety foam, a countertop blender is a game-changer. Add cold milk (or a plant-based milk with stabilizers) to the blender—about ½ cup per serving. Blend on high for 20–30 seconds until the milk doubles in volume and becomes airy and frothy.
For an even thicker consistency, add a tablespoon of heavy cream or a small scoop of ice cream before blending. The blender’s powerful blades create a microfoam that holds its shape well, ideal for topping iced lattes or cold brews.
Pour the foam over ice and coffee slowly to avoid disturbing the layers. This method works best with a tall, narrow blender cup to maximize aeration. Cleanup is quick—just rinse immediately.
The blender method is especially useful for making larger batches for guests, and you can experiment with flavors like chocolate syrup or matcha powder blended in for a flavored foam.
How to Choose the Right Milk for Foam

Whole milk vs. skim milk for foam texture
For the best iced coffee foam, start by understanding that whole milk creates richer, creamier foam due to its higher fat content (around 3.25%). The fat stabilizes the air bubbles, giving you a velvety microfoam that holds its shape beautifully over ice.
However, whole milk can be slightly heavier and may not produce as much volume. In contrast, skim milk whips up into a larger, stiffer foam with more airy volume because it lacks fat to weigh down the bubbles.
This makes it ideal for a tall, frothy top on your iced coffee, but the foam tends to be less stable and can collapse faster as it sits. For a balanced approach, try 2% milk, which offers a middle ground with decent foam stability and a lighter texture.
If you want a thick, latte-style foam for iced drinks, go with whole milk. For a dramatic, high-volume froth that looks impressive, skim milk is your best bet. Always use cold milk straight from the fridge for the best results.
Non-dairy options like oat or almond milk
When choosing non-dairy milk for iced coffee foam, oat milk is the top performer for creating a thick, stable foam. Its natural starches and gums help produce a creamy texture that closely mimics dairy, making it ideal for frothing on ice.
Look for barista blends, which often have added oils or stabilizers for even better foam. Almond milk can work, but it tends to produce a thinner, more watery foam that separates quickly unless you use a barista version. For best results, shake the carton well before frothing.
Soy milk is another solid choice, as its protein content allows for a decent foam, though it can be slightly grainy. Avoid coconut milk, as it rarely foams well and can leave an oily layer. A key tip: always use unsweetened, unflavored varieties to avoid altering the coffee’s taste.
For perfect non-dairy foam, heat the milk slightly (not hot) before frothing, as cold plant milks can be less cooperative. Remember that non-dairy foams are generally less stable, so serve your iced coffee immediately after frothing.
Tips for getting foam with low-fat milk
Getting good foam with low-fat milk (like 1% or skim) is all about technique and temperature. First, use a high-powered frother—either an electric handheld wand or a steam wand—to incorporate maximum air quickly.
Start with cold milk straight from the refrigerator, as cold temperatures help proteins bond and create a sturdier foam. When frothing, hold the wand just below the surface to pull in air for the first 10–15 seconds, then submerge it deeper to swirl and stabilize the bubbles.
This two-step method yields a thick, airy foam despite the low fat. Another trick is to add a pinch of xanthan gum (about 1/8 teaspoon per cup) to low-fat milk before frothing. This natural thickener mimics the stabilizing effect of fat, giving you a creamier, longer-lasting foam.
Alternatively, shake the milk vigorously in a sealed jar for 30 seconds, then microwave it for 15 seconds—this creates a quick foam for iced coffee. Finally, pour the foam over ice immediately to prevent it from deflating. With these tips, low-fat milk can still deliver a satisfying froth.
Step-by-Step Guide to Make Cold Foam
Chill your milk and tools first
For the best cold foam consistency, start with everything ice-cold. Pour heavy cream or whole milk (for the richest foam) into a chilled metal bowl or a cold frothing pitcher. If you’re using an electric frother, place the whisk or wand in the freezer for 5 minutes beforehand.
Cold ingredients whip up faster and hold their shape longer, preventing the foam from deflating. For a dairy-free option, use cold oat milk or coconut cream—these also froth well when chilled. Measure about ¼ cup of milk per serving; this yields enough foam to top a tall iced coffee.
Remember: warm milk will not create stable cold foam, so avoid leaving your milk on the counter. If your milk is room temperature, pop it in the freezer for 10 minutes or use ice cubes in a sealed bag to cool it down quickly.
A cold base is your secret to a silky, airy foam that sits beautifully on your iced coffee.
Froth until soft peaks form
Once your milk and tools are chilled, it’s time to froth. Use a handheld milk frother, a French press, or an electric whisk for best results. Submerge the frother just below the surface and move it in an up-and-down motion for 30–60 seconds.
You’re aiming for soft peaks—the foam should hold its shape when you lift the frother but still be creamy and pourable. Avoid over-frothing, which turns the foam into stiff, buttery clumps.
If using a French press, pump the plunger vigorously for about 45 seconds, tilting the press to incorporate more air. For a sweet, stable foam, add 1 teaspoon of simple syrup or a dash of vanilla extract before frothing. The sugar helps stabilize the bubbles.
When the foam doubles in volume and looks like cloudy, thick whipped cream, stop. It should be smooth, not grainy. This step is key to achieving that luxurious, café-style top layer on your iced coffee.
Pour foam over ice and coffee
Now, assemble your drink. Fill a tall glass with ice cubes (preferably large ones to slow dilution) and pour your freshly brewed cold coffee or chilled espresso over them. Leave about an inch of space at the top for the foam.
Using a spoon, gently scoop the cold foam onto the coffee, starting from the center and working outward. The foam should float on top due to its airy texture—if it sinks, it’s under-frothed or too warm.
For a layered effect, pour the foam slowly over the back of a spoon to keep it separate. Finish with a dusting of cinnamon, cocoa powder, or a drizzle of caramel for extra flavor.
The foam will gradually blend into the coffee as you drink, creating a smooth, creamy sip every time. Serve immediately, as cold foam loses its structure over time. This technique works for iced lattes, cold brews, or even iced matcha lattes.
Tips for Thick and Stable Iced Coffee Foam

Use cold milk straight from the fridge
The temperature of your milk is crucial for achieving a thick, stable foam. Always use cold milk straight from the fridge—ideally at 4°C (40°F) or lower. Cold milk froths better because the fat globules are firmer, allowing them to trap air more effectively and create a dense microfoam.
For the best results, opt for whole milk (3.25% fat) or a barista-grade oat milk, as these have the ideal protein and fat balance for stability. Avoid warm or room-temperature milk, as it produces larger, short-lived bubbles that collapse quickly over ice.
Before frothing, chill your frothing pitcher or jar in the freezer for 5 minutes. Then, pour the cold milk into the chilled container and froth using a handheld frother, French press, or steam wand.
The goal is to create a velvety, glossy foam that sits thick on top of your iced coffee without separating. Remember, cold milk is the foundation—skip this step, and your foam will be thin and watery.
Add a pinch of salt or sugar for stability
To transform thin, bubbly foam into a thick, creamy layer that lasts, add a small stabilizer. A pinch of salt or a teaspoon of sugar works wonders. Salt reduces the surface tension of the milk, allowing proteins to form a tighter network that holds air bubbles longer.
Just ½ teaspoon of fine sea salt per cup of milk can prevent your foam from deflating within minutes. Alternatively, sugar acts as a binder—it dissolves and helps thicken the foam structure, especially when used with whole milk.
For a savory-sweet twist, try a pinch of salt plus a dash of vanilla sugar. Stir the stabilizer into the cold milk before frothing to ensure even distribution. This simple trick is especially helpful for low-fat or non-dairy milks, which naturally produce less stable foam.
The result: a luxurious, spoonable foam that sits proudly on your iced coffee, resisting melting and blending for longer sips. Experiment with amounts to match your taste, but avoid overdoing it—too much salt or sugar can overwhelm the coffee flavor.
Avoid over-frothing to prevent bubbles
Over-frothing is a common mistake that leads to large, unstable bubbles instead of creamy microfoam. When you froth too aggressively—either with a steam wand or handheld frother—you incorporate too much air, creating a frothy top that quickly separates and collapses.
The key is to froth just until the milk doubles in volume and appears glossy with small, uniform bubbles. For a handheld frother, submerge it just below the surface and pulse for 10–15 seconds, tilting the pitcher to create a gentle whirlpool.
Stop as soon as the foam reaches a thick, yogurt-like consistency. Over-frothing also warms the milk, which thins the foam and reduces stability over ice. To test, lift the frother—if the foam drips slowly like honey, it’s perfect; if it’s stiff and peaks, you’ve gone too far.
If you accidentally over-froth, tap the pitcher on the counter to burst large bubbles, then let it rest for 30 seconds before pouring. This patience ensures a smooth, dense foam that holds its shape and enhances your iced coffee experience without a bubbly mess.
Flavor Variations for Iced Coffee Foam
Vanilla sweet cream foam recipe
To make a vanilla sweet cream foam, start with 2 tablespoons of heavy cream, 2 tablespoons of whole milk, and 1 tablespoon of vanilla syrup. Combine these in a tall jar or use a milk frother. For a dairy-free version, substitute with full-fat oat milk and vanilla extract.
Froth vigorously until the mixture doubles in volume and forms soft peaks—this takes about 30 seconds with an electric frother or 2 minutes with a handheld whisk. The key is to chill your bowl and cream beforehand for a thicker, more stable foam.
Pour it over your iced coffee slowly; it will float on top, creating a creamy layer. Adjust sweetness by adding more or less syrup, or try sugar-free vanilla for a lighter option. This foam works best with cold brew or strong iced coffee to balance the sweetness.
Store any leftover foam in the fridge for up to 2 days, but re-froth before using to restore texture.
Caramel or mocha flavored foam
For caramel flavored foam, mix 2 tablespoons of heavy cream, 1 tablespoon of milk, and 1.5 tablespoons of caramel sauce. Froth until thick and glossy. For a mocha twist, substitute caramel with 1 tablespoon of chocolate syrup and 1 teaspoon of instant espresso powder for a deeper coffee kick.
Use a hand frother or blender for best results—blend on low for 15 seconds to avoid over-whipping. The foam should be lighter than whipped cream but denser than milk froth. Drizzle extra caramel or chocolate sauce inside the glass before adding coffee for a layered effect.
For a lower-calorie version, use almond milk and sugar-free syrups. This foam pairs wonderfully with iced lattes or cold brew, adding a decadent, dessert-like finish. Remember to froth just before serving to maintain the airy texture; it will deflate if left too long.
Experiment with ratios to suit your taste, starting with less syrup and adjusting upward.
Spiced foam with cinnamon or nutmeg
A spiced foam brings warmth to iced coffee. Combine 2 tablespoons of heavy cream, 2 tablespoons of milk, and 1/4 teaspoon of ground cinnamon plus a pinch of nutmeg. Add 1 teaspoon of brown sugar or maple syrup for sweetness.
Froth until thick, then dust the top with extra cinnamon for aroma. For a bolder spice, include a dash of cardamom or pumpkin pie spice. Use a milk frother or whisk vigorously—the foam should be airy and stable.
This variation works well with cold brew or iced coffee with a splash of vanilla. To enhance flavor, gently warm the milk and spices before frothing, but let it cool completely before adding to iced coffee to avoid melting the ice.
For a dairy-free option, use coconut cream, which complements the spices beautifully. The foam adds a holiday-inspired twist year-round and can be adjusted by reducing spice for a milder taste. Serve immediately for the best texture and visual appeal.
Common Mistakes When Making Iced Coffee Foam
Using warm milk for cold foam
The biggest mistake is reaching for warm or room-temperature milk to make cold foam. Cold foam requires ice-cold milk to create stable, velvety microfoam that floats beautifully on your iced coffee.
Warm milk will not whip into thick foam because the proteins are less stable at higher temperatures, leading to a thin, watery layer that sinks immediately. Always start with milk straight from the fridge, ideally whole milk or barista blend oat milk for the richest texture.
For extra chill, place your frothing pitcher in the freezer for 10 minutes beforehand. This cold environment helps the milk trap air effectively, forming a dense, spoonable foam that holds its shape. If you only have warm milk, chill it rapidly in an ice bath before frothing.
Remember: cold milk is non-negotiable for achieving that thick, creamy cold foam that sits proudly on top of your iced coffee.
Frothing too long and breaking the foam
Over-frothing is a common pitfall that turns perfect cold foam into a watery mess. When you froth milk for too long, you break down the protein structure, causing the foam to collapse and separate into liquid and large, unstable bubbles.
The ideal cold foam should be thick, smooth, and pourable, similar to melted soft-serve ice cream. Using a handheld frother, stop after 20–30 seconds when you see the milk double in volume and form soft peaks. For a French press, pump gently 10–15 times—any more will over-aerate.
If you notice the foam becoming stiff or chunky, you have gone too far. To rescue broken foam, let it rest for a minute, then gently swirl the pitcher to reincorporate some liquid. However, prevention is best: froth in short bursts and check consistency frequently.
Perfect cold foam should cling to a spoon and slowly slide off, not drip like water.
Pouring foam over hot coffee instead of iced
A critical error is adding cold foam to hot coffee, which causes immediate melting and loss of texture. Cold foam is designed to float on cold or iced beverages; hot coffee will break down the foam’s structure, turning it into a thin, lukewarm layer within seconds.
Always pour your cold foam over fully chilled iced coffee with plenty of ice. The ice keeps the drink cold, allowing the foam to stay thick and creamy as it slowly cascades into the coffee.
If you prefer a warm coffee with foam, make steamed milk foam instead, which holds up to heat. For iced coffee, assemble your drink first: fill a glass with ice, add coffee or cold brew, then gently spoon the cold foam on top to avoid sinking.
This method preserves the foam’s airy consistency and gives you that beautiful layered look with every sip. Remember: cold foam loves cold coffee.
Frequently Asked Questions
What is iced coffee foam?
Iced coffee foam is a frothy, creamy layer made by frothing milk or cream and adding it to cold coffee. It is often sweetened and flavored, similar to the foam on a hot cappuccino but served over ice.
How do I make iced coffee foam without a machine?
You can make foam by shaking cold milk in a sealed jar vigorously for 30-60 seconds, or by using a handheld milk frother, a French press, or even a whisk. For best results, use cold milk and shake until it doubles in volume.
What type of milk works best for iced coffee foam?
Whole milk or 2% milk creates the richest foam due to its fat content. Non-dairy options like oat milk or barista blend almond milk also work well, but skim milk produces lighter, airier foam.
Can I make iced coffee foam with cold milk?
Yes, cold milk is actually ideal for making foam for iced coffee because it froths better and stays stable over ice. Avoid warm milk, as it can melt the ice and dilute the coffee.
How do I make sweet iced coffee foam?
Add a teaspoon of sugar, vanilla syrup, or honey to the milk before frothing. You can also use flavored creamers or a dash of cinnamon for extra taste. Stir the sweetener in well before frothing.
Why won’t my iced coffee foam get thick?
Thin foam may result from using low-fat milk, not shaking or frothing long enough, or using milk that is too warm. Try using whole milk, shake for at least 30 seconds, and ensure the milk is cold.
How do I add foam to iced coffee without it sinking?
Pour the foam gently over the back of a spoon onto the coffee to create a layer, or spoon it on top after pouring the coffee. Use thick foam and pour slowly to prevent it from mixing in.
Can I make iced coffee foam with instant coffee?
Yes, you can make a frothy foam by whisking instant coffee, sugar, and a little hot water until thick and creamy (like Dalgona coffee), then spooning it over cold milk and ice.
Conclusion
Mastering iced coffee foam elevates your daily brew into a café-quality treat. Remember, the key is using cold milk and a good frother—whether manual, electric, or a jar—to achieve that thick, airy top. Don’t be afraid to experiment with flavors like vanilla or caramel. Now, grab your ingredients and practice. Your perfect, creamy iced coffee is just a few shakes away. Cheers to your homemade refreshment!