How To Make Cold Brew Without A Machine
You do not need an expensive machine or fancy gadgets to enjoy smooth, cafe-quality coffee at home. If you have a jar, some water, and your favorite grounds, you are already halfway there. Making cold brew without a machine is surprisingly simple and often tastes better than the store-bought version. In this guide, we will show you exactly how to master the soak-and-strain method using everyday kitchen tools.
What is cold brew and why it tastes better
The difference between cold brew and iced coffee
Understanding the distinction between these two beverages is essential when learning how to make cold brew without a machine. While iced coffee is simply hot coffee brewed quickly and poured over ice, cold brew relies on time rather than heat to extract flavor.
By steeping coarse grounds in room temperature water for 12 to 24 hours, you create a concentrated essence that is never exposed to boiling temperatures. This lack of heat prevents the beans from releasing certain bitter oils and acidic compounds that typically characterize a standard drip brew.
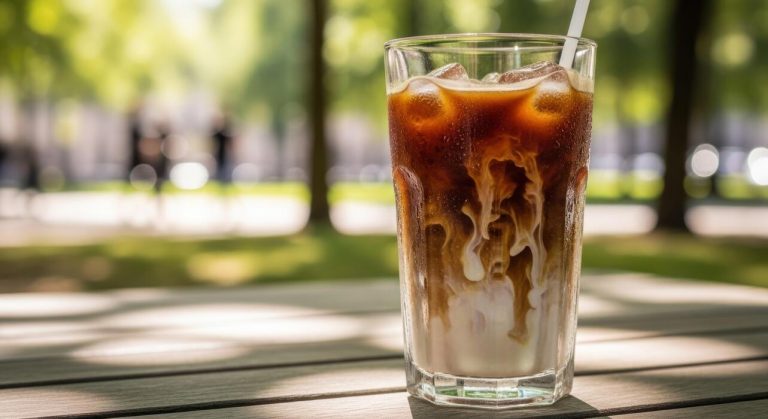
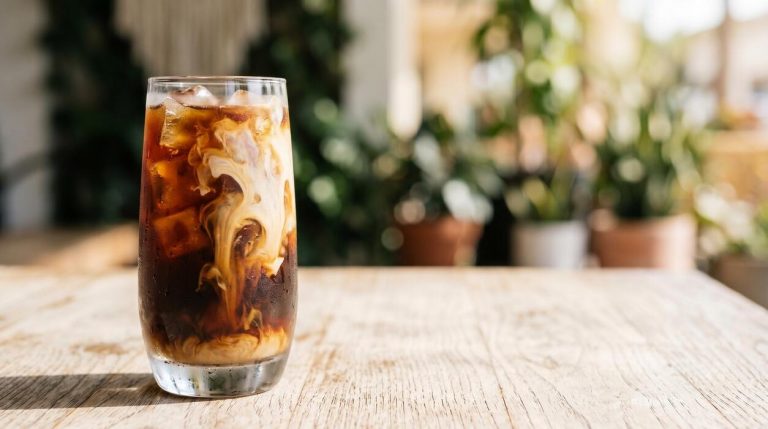
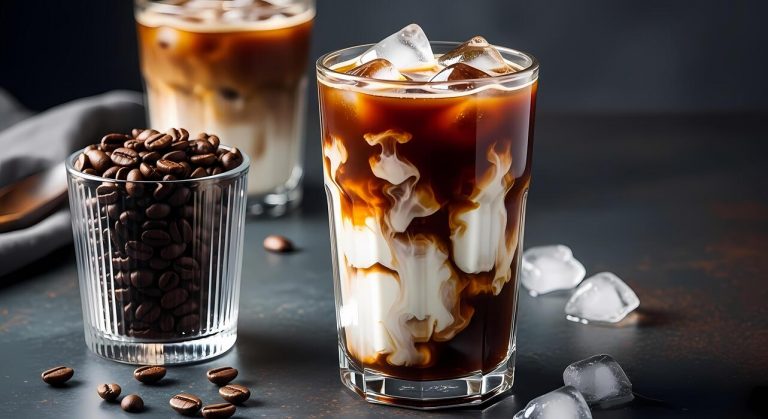
When you skip the specialized equipment and use a simple mason jar or pitcher, you are allowing the slow infusion process to work its magic naturally. The result is a bold, smooth liquid that maintains its integrity even when diluted with water or milk.
This manual approach proves that you do not need expensive gear to achieve a professional-grade beverage that far surpasses the watery profile of traditional iced coffee.
Why low acidity matters for your stomach
One of the most significant benefits of mastering cold brew at home is the dramatic reduction in acid levels. Scientific studies suggest that cold brewing results in a beverage that is roughly 60 to 70 percent less acidic than hot-brewed alternatives.
For individuals with sensitive stomachs or acid reflux, this makes cold brew a life-changing alternative that allows them to enjoy caffeine without discomfort. Because you are using a long steeping process at cool temperatures, the chemical reaction that normally produces harsh acids never occurs.
This gentle extraction method ensures that the final drink is incredibly smooth and easy on the digestive system. When you prepare this manually using a basic fine-mesh strainer or cheesecloth, you are effectively crafting a stomach-friendly concentrate that retains all the caffeine benefits without the digestive drawbacks.
Choosing this method ensures that every sip is as soothing as it is energizing, proving that the best health-conscious coffee solutions often require nothing more than patience and a simple glass container.
Natural sweetness and flavor profiles
The flavor profile of cold brew is inherently superior because the cold water extraction highlights the natural sugars and chocolatey notes of the coffee bean. Heat often masks these subtle nuances by bringing out charred or sour characteristics, but the cold method preserves the bean’s original integrity.
When you make cold brew without a machine, you allow the water to slowly draw out mellow, caramel-like flavors that are often lost in high-speed brewing cycles.
This inherent sweetness means you can often reduce or entirely eliminate added sugars and creamers, making it a healthier choice for your daily routine. By using a ratio of one part coffee to four parts water, you create a rich syrup-like base that tastes remarkably decadent on its own.
The manual filtration process ensures that you control the clarity of the drink, resulting in a clean and crisp finish that highlights the unique origin of your beans. Ultimately, the lack of bitterness allows the complex, sweet undertones to shine through, providing a gourmet experience using only basic kitchen staples.
Essential supplies you already have at home

Choosing the right glass jar or container
To begin your cold brew journey without a machine, you must select a suitable vessel from your kitchen cabinets. A large glass Mason jar is the gold standard because glass is non-porous and will not leach unwanted metallic or plastic flavors into your concentrate during the long steeping process.
Ensure the container has a tight-fitting lid to prevent the coffee from absorbing odors from other items in your refrigerator, such as onions or leftovers. If you do not have a Mason jar, a clean glass pitcher or even a French press carafe works perfectly well.
The size of the container determines your batch yield, so aim for something that holds at least 32 ounces to allow ample room for both the coarse coffee grounds and the filtered water.
Always verify that the vessel is completely clean and dry before adding your ingredients to ensure the final brew remains fresh and free from any bacterial contamination during the twelve to twenty-four hour extraction period.
Filter options: Cheesecloth, fine mesh, or paper
Since you are avoiding specialized machinery, you can rely on common household items to separate the grounds from your liquid gold. A standard fine-mesh sieve is a great first step, but it often allows fine sediment to pass through, resulting in a cloudy cup.
To achieve a professional, crisp finish, layer the sieve with two or three layers of cheesecloth, which traps smaller particles while allowing the natural oils to pass through for a rich mouthfeel.
If you prefer a lighter body and a very clean profile, a spare paper coffee filter or even a clean flour sack towel can be used as a makeshift strainer. Simply drape your chosen material over a second jar and pour the mixture through slowly.
Avoid squeezing the cloth or filter at the end, as this can force bitter tannins and fine silt into your beverage. Taking your time during this manual filtration step ensures that your homemade cold brew is smooth, sediment-free, and incredibly refreshing to drink.
Why a digital scale improves your results
While it is tempting to use standard measuring cups, a simple digital kitchen scale is the most effective tool you already own for achieving consistency. Cold brew relies on a specific coffee-to-water ratio, typically ranging from 1:4 for a strong concentrate to 1:8 for a ready-to-drink beverage.
Measuring by weight rather than volume is superior because different coffee beans have varying densities and roast levels; a cup of dark roast weighs significantly less than a cup of light roast.
By using a scale, you can precisely replicate your favorite recipe every single time you brew, eliminating the guesswork that leads to weak or overly bitter coffee.
If you do not have a scale, you can use a standard measuring cup, but try to be as consistent as possible with your scoops.
However, the accuracy of measuring in grams allows you to fine-tune the strength of your brew to your exact preference, ensuring that every batch you make at home tastes just as good as one from a high-end specialty cafe.
The best coffee beans and grind size for cold brew

Why extra coarse grind is non-negotiable
When making cold brew without a machine, the most critical factor for success is using an extra coarse grind that resembles sea salt or peppercorns.
Because cold brew relies on a long immersion process rather than pressure or heat, a fine grind will over-extract, leading to a bitter and harsh flavor profile that ruins the signature smoothness of the drink.
Furthermore, since you likely will be straining your mixture through a simple mesh sieve or cheesecloth, fine particles will pass through the filter, resulting in a cloudy and silty texture at the bottom of your glass.
A coarse grind allows for a slow, gentle extraction of oils and caffeine over twelve to twenty-four hours, ensuring the water saturates the grounds evenly without clogging your makeshift filtration system.
By maintaining this specific texture, you guarantee a clean, crisp concentrate that highlights the natural sweetness of the bean while making the cleanup process significantly easier for home brewers.
Dark roast vs. light roast results
Selecting the right roast profile is essential for achieving your desired flavor when brewing in a jar or pitcher. Most enthusiasts recommend a dark roast for cold brew because the long extraction process excels at pulling out rich notes of chocolate, molasses, and toasted nuts while minimizing acidity.
Darker beans are also more porous, making them easier for cold water to penetrate over time. On the other hand, using a light roast will produce a much brighter, tea-like beverage with distinct floral and fruity undertones.
While refreshing, light roasts can sometimes taste sour if not steeped long enough, as their denser structure resists extraction in cold temperatures. If you are looking for that classic, bold coffee house taste that pairs perfectly with milk or cream, a medium-to-dark roast is your best bet.
However, if you prefer a complex and acidic profile enjoyed black, experimenting with a light roast can offer a unique and sophisticated alternative to traditional recipes.
Freshly ground vs. pre-ground coffee
While convenience often points toward buying a bag of pre-ground coffee, the quality of your manual cold brew will improve drastically if you use freshly ground beans.
Coffee begins to oxidize and lose its aromatic compounds the moment it is ground; since cold brew is all about capturing subtle flavors, using beans ground seconds before immersion ensures a vibrant and aromatic result.
If you do not own a burr grinder, many local cafes or grocery stores allow you to use their professional equipment—just be sure to select the coarsest setting available.
If you must use pre-ground coffee, try to find a brand specifically labeled for cold brew or French press to avoid the standard ‘drip’ grind, which is far too fine.
Using freshly roasted whole beans ensures that the natural oils remain intact, providing a velvety mouthfeel and preventing the stale, flat taste often associated with older grounds. Ultimately, the freshness of your source material is the primary driver of the final beverage’s depth and complexity.
Step-by-step guide to making cold brew in a jar
Measuring your coffee-to-water ratio
To achieve a smooth and balanced cold brew without specialized equipment, start by determining your ideal coffee-to-water ratio. For a versatile concentrate that works well with milk or water, a 1:4 ratio is highly recommended.
This translates to using one cup of coarsely ground coffee beans for every four cups of filtered water. Using a coarse grind is critical because fine grounds can lead to over-extraction, resulting in a bitter taste and a muddy texture that is difficult to filter later.
If you prefer a lighter, ready-to-drink beverage immediately, you can adjust the ratio to 1:8. Always use filtered water at room temperature to ensure the cleanest flavor profile possible.
Accurate measurement at this stage ensures that your final brew remains consistent in strength and acidity, providing a professional-grade foundation for your homemade caffeine fix without needing any expensive machinery.
The mixing and steeping process
Once your ingredients are measured, pour the coarse coffee grounds into a clean, wide-mouth glass jar. Slowly add the water, ensuring all the grounds are fully saturated.
Instead of shaking the jar vigorously, use a long spoon to gently stir the mixture, making sure there are no dry pockets of coffee trapped at the bottom. Secure the lid tightly to prevent any refrigerator odors from seeping into your brew.
Place the jar in a cool, dark spot on your counter or directly into the refrigerator for 12 to 24 hours. Steeping at room temperature typically takes less time, while the fridge method produces a slightly mellower flavor.
The extended steeping time is what replaces the heat of traditional brewing, allowing the water to slowly extract the rich oils and caffeine while leaving behind the harsh, acidic compounds found in hot coffee.
How to filter without making a mess
Filtering is the most important step when making cold brew in a jar to ensure a silky, sediment-free finish. Since you are not using a machine, you can create a DIY filtration system using a fine-mesh sieve lined with a paper coffee filter, cheesecloth, or a clean flour sack towel.
Place the lined sieve over a second clean jar or carafe and pour the mixture through slowly. Avoid the temptation to squeeze the filter or press down on the grounds, as this will force fine particulates and bitter tannins into your final drink.
If the filter becomes clogged, simply replace it with a fresh one and continue the process.
For the clearest results, you might consider a double-filtration method, passing the liquid through the filter a second time to remove any remaining micro-grounds, resulting in a professional-looking concentrate that is incredibly smooth on the palate.
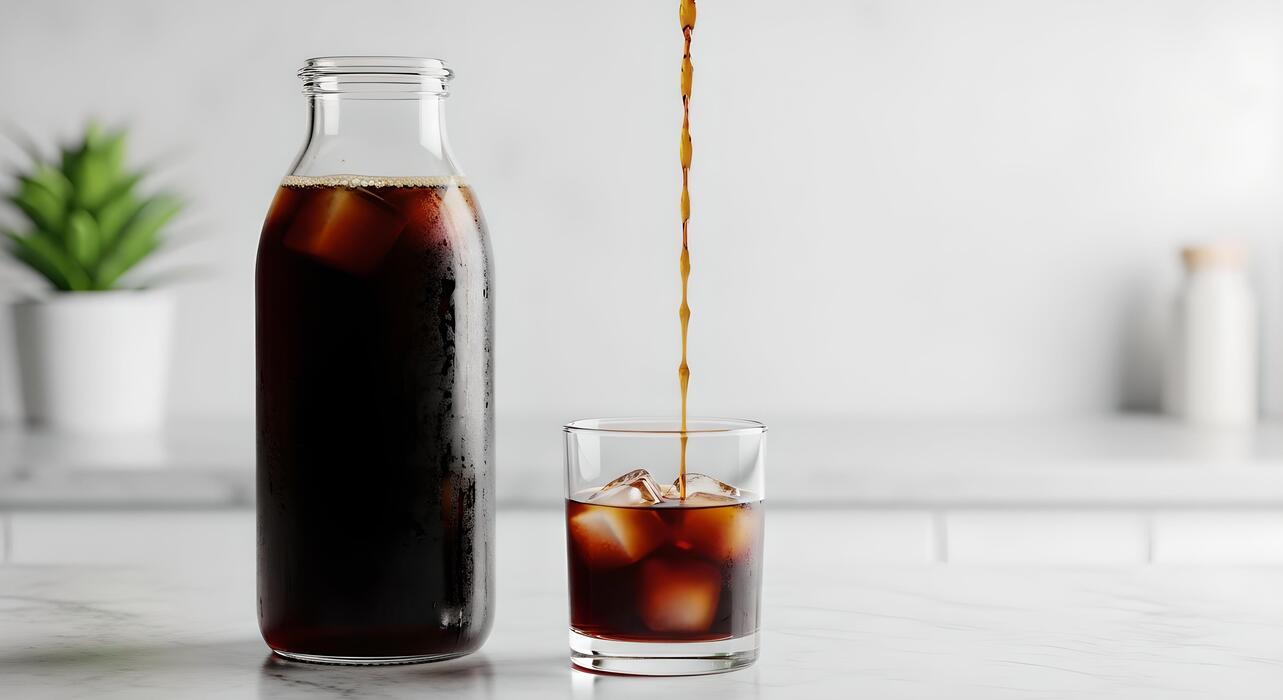
Storing your concentrate for freshness
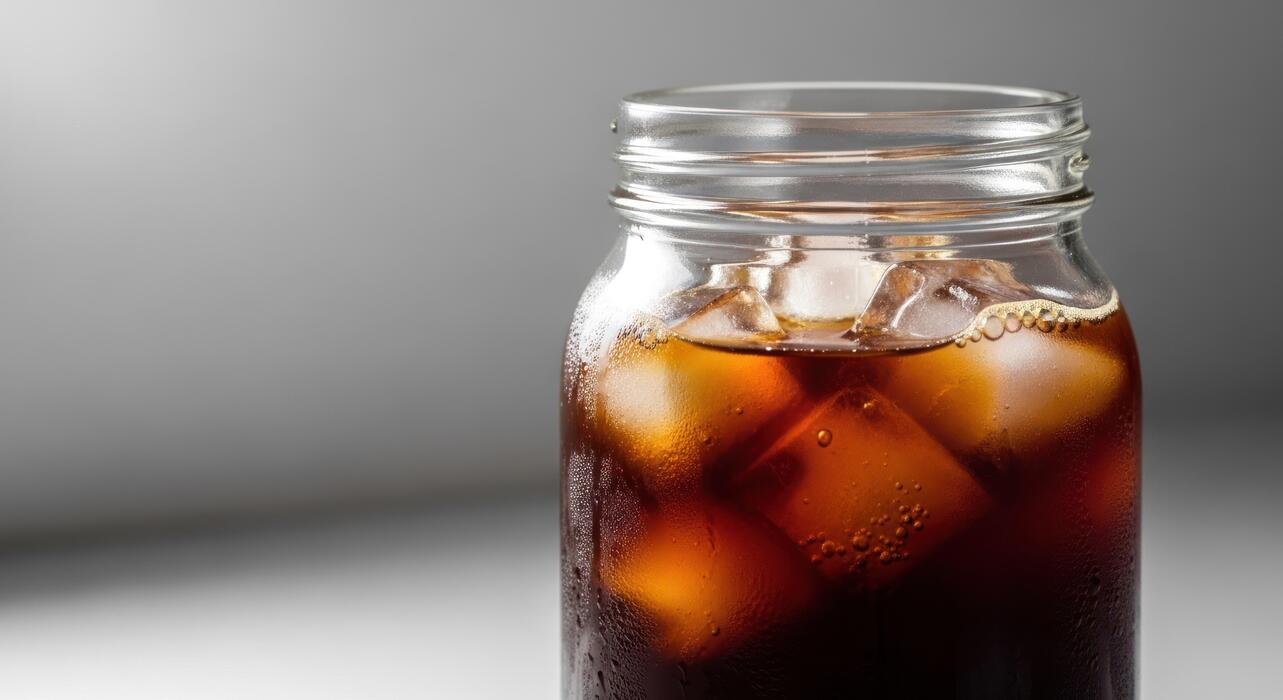
After successful filtration, transfer your cold brew into a sealed glass container or an airtight mason jar for long-term storage. When kept in the refrigerator, your cold brew concentrate will remain fresh and flavorful for up to two weeks.
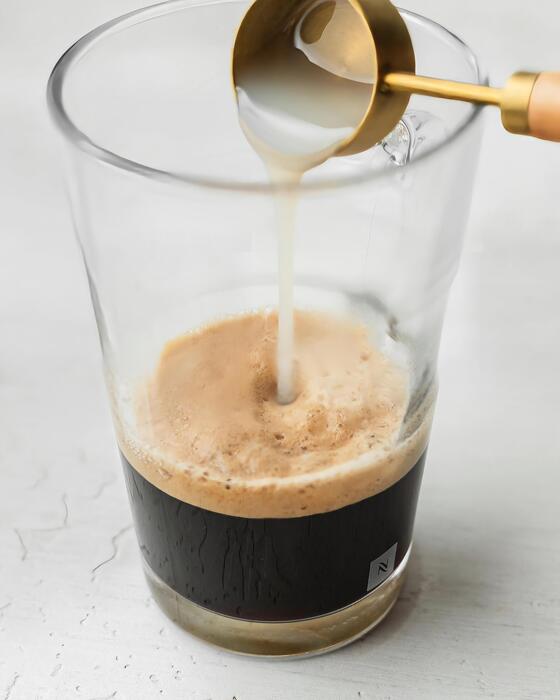
It is important to keep the container tightly sealed to maintain the integrity of the flavor profile and prevent oxidation. Because this is a concentrated liquid, you should dilute it with equal parts water or milk when you are ready to serve.
If you find you have made too much, you can freeze the concentrate in ice cube trays to use in future iced coffees, preventing your drink from becoming watered down as the ice melts.
Labeling your jar with the brewing date is a smart habit to ensure you are always consuming the freshest batch possible for the best taste experience.
Alternative DIY methods using common kitchen tools
The French Press shortcut
Using a French press is perhaps the most convenient way to prepare cold brew because it serves as both the steeping vessel and the filtration system.
To begin, add your coarsely ground coffee beans to the bottom of the carafe using a standard ratio of one part coffee to four parts cold filtered water. Stir the mixture gently to ensure all grounds are fully saturated, then place the lid on top without depressing the plunger.
Leave the unit on your counter or in the refrigerator for approximately twelve to twenty-four hours. Once the steeping process is complete, slowly press the plunger down to separate the concentrate from the spent grounds.
This method is highly effective because the built-in metal screen filters out the largest particles while allowing natural oils to remain, resulting in a rich and full-bodied flavor profile. It eliminates the need for messy transfers between bowls and keeps your kitchen counters clean throughout the entire preparation process.
Using a fine mesh sieve and paper filter
If you do not own a dedicated coffee maker, you can easily utilize a large mixing bowl and a standard fine mesh kitchen sieve.
Start by combining your coffee grounds and water in a glass jar or bowl, covering it tightly with plastic wrap to maintain freshness during the long steep.
After the coffee has sat for at least fifteen hours, set your mesh strainer over a clean pitcher and line it with a dampened paper coffee filter or a double layer of cheesecloth. Slowly pour the steeped mixture through the filter to catch the fine sediment.
This two-step filtration process is essential for achieving a crisp and sediment-free beverage that mimics professional café quality. While it requires a bit more patience than other methods, using basic kitchen tools ensures that anyone can enjoy a smooth concentrate without investing in expensive equipment.
Make sure to pour slowly to avoid overflowing the filter, as the fine particles can slow down the drainage process significantly.
The nut milk bag technique
For those seeking the easiest cleanup possible, a nut milk bag or muslin cloth acts as a giant tea bag for your coffee. Simply place your grounds inside the bag, cinch the drawstring tightly, and submerge the entire pouch into a pitcher filled with cold water.
This ‘immersion’ style allows for even extraction because the water can circulate freely around the grounds. When the brewing time is over, you simply lift the bag out and squeeze it gently to extract every drop of concentrated flavor.
This method is particularly beneficial because it leaves virtually zero sludge at the bottom of your container, providing a remarkably clean finish on the palate. Since the bag is reusable, this is also the most eco-friendly DIY option for your morning routine.
Once finished, you can turn the bag inside out to compost the grounds and rinse the fabric for your next batch. It is a foolproof solution that guarantees a smooth and low-acid cold brew every single time.
Common mistakes that ruin homemade cold brew
Steeping for too long or too short
Timing is the most critical variable when you are learning how to make cold brew without a machine. Because you are using room temperature or cold water rather than heat, the extraction process happens much slower, but it still has a definitive peak.
A common mistake is pulling the brew too early, resulting in a thin, sour liquid that lacks the signature chocolatey depth of a true concentrate. Conversely, leaving the grounds to soak for over twenty-four hours leads to over-extraction, which introduces woody, bitter tannins that ruin the smooth profile.
To achieve the perfect balance in a simple mason jar, aim for a steeping window of 12 to 18 hours at room temperature.
If you prefer steeping your mixture in the refrigerator, you should extend that time slightly to 20 or 24 hours because the cold environment slows down the chemical breakdown of the coffee solubles. Always set a timer to ensure you filter the concentrate at the ideal moment for flavor.
Using hot or tap water instead of filtered
When you are brewing manually without the assistance of a specialized machine, the quality of your base liquid becomes significantly more apparent in the final glass. Many beginners make the error of using hot water to speed up the process or simply filling their container with unfiltered tap water.
Using hot water technically turns the recipe into an iced coffee rather than a cold brew, which oxidizes the oils and creates an acidic bite that many people try to avoid.
Furthermore, tap water often contains chlorine, minerals, and fluoride that can impart a chemical aftertaste or metallic tang to your coffee concentrate during the long immersion period. To ensure a professional result at home, always use filtered or bottled spring water at room temperature.
This provides a clean canvas that allows the natural sweetness and nuanced notes of the coffee beans to shine through without any interference from municipal additives or harsh temperatures that scorch the delicate grounds.
Grinding your beans too fine
The texture of your coffee grounds is the foundation of a successful batch when using the immersion method in a jar or pitcher. A frequent error is using a fine or medium grind, similar to what you would use for a standard drip machine or espresso.
Fine particles have too much surface area for a long soak, which leads to over-extraction and a muddy flavor profile that is difficult to fix.
Additionally, small particles are incredibly hard to remove without a machine’s specialized pressurized filters; they will clog your cheesecloth or fine-mesh sieve, leaving a gritty, silty residue at the bottom of your cup. To avoid this frustration, you must use a consistent extra-coarse grind that resembles sea salt or peppercorns.
This specific texture allows the water to flow freely around the particles, extracting the sugars and caffeine slowly while making it easy to strain through a simple cloth. Using the right coarse setting ensures your homemade concentrate remains clear, bright, and completely sediment-free.
Tips for serving and flavoring your brew
How to dilute concentrate correctly
Since manual cold brew methods typically produce a potent concentrate, mastering the dilution ratio is the most critical step for a balanced cup. For a standard drink, start with a 1:1 ratio of coffee concentrate to filtered water or milk, which preserves the smooth, chocolatey profile while making it palatable.
If you prefer a bolder, espresso-like kick, try a 2:1 ratio, keeping the concentrate dominant. Always remember that adding ice will further dilute the drink as it melts, so you might want to start with a slightly stronger base than usual.
To avoid a watered-down experience, many enthusiasts recommend using coffee ice cubes made from leftover brew.
Temperature also plays a role in flavor perception; if you are serving it hot, use boiling water to dilute the concentrate, which instantly brings the beverage to the perfect drinking temperature without over-extracting the grounds or introducing the bitterness typically associated with traditional drip methods.
Homemade simple syrups and creamers
Elevate your DIY cold brew by crafting custom sweeteners and creamers that dissolve perfectly in cold liquids.
Traditional granulated sugar often sinks to the bottom, so a homemade simple syrup is the superior choice; simply simmer equal parts water and sugar until dissolved, then add vanilla bean or cinnamon sticks for infused depth.
For those seeking a richer texture, create a salted caramel creamer by whisking heavy cream with a touch of sea salt and maple syrup.
If you prefer plant-based options, oat milk blended with a soaked date provides a natural sweetness and creamy mouthfeel that complements the low acidity of cold brew perfectly.
You can also experiment with brown sugar and molasses to create a deep, toffee-like syrup that enhances the natural nuttiness of medium-roast beans.
Storing these additives in glass jars in your refrigerator ensures you have a barista-quality flavoring station ready for your morning routine without needing any expensive machinery or store-bought chemicals.
Creative cold brew cocktail ideas
Your handmade cold brew concentrate serves as a versatile base for sophisticated non-alcoholic mocktails and spirited evening drinks alike.
For a refreshing afternoon pick-me-up, try a Cold Brew Tonic, which combines concentrate with tonic water and a squeeze of lime over plenty of ice; the effervescence highlights the fruity notes often hidden in dark roasts.
If you are hosting a gathering, a Cold Brew Martini is a crowd favorite; shake your concentrate with vodka and a coffee liqueur for a frothy, indulgent treat that skips the bitterness of hot espresso.
For a unique twist, incorporate muddled mint and agave to create a caffeinated version of a mojito, or stir in a dash of orange bitters and a cherry for a coffee-based take on an Old Fashioned.
These creative applications prove that you do not need a machine to produce a high-end beverage experience; a simple jar and a bit of imagination can transform basic grounds into a complex, multi-layered cocktail base.
Frequently Asked Questions
What equipment do I need to make cold brew without a machine?
You only need a large glass jar or pitcher, a stirring spoon, and a straining tool like a fine-mesh sieve, cheesecloth, or a paper coffee filter. A grinder is helpful if you are starting with whole beans to ensure a coarse consistency.
What is the best coffee-to-water ratio for DIY cold brew?
A standard ratio is 1 cup of coarsely ground coffee to 4 cups of filtered water. This creates a balanced brew that can be enjoyed as-is or diluted with ice, milk, or extra water depending on your strength preference.
How long should cold brew steep on the counter or in the fridge?
For the best flavor extraction without bitterness, let the grounds steep for 12 to 24 hours. Steeping at room temperature usually takes closer to 12-15 hours, while refrigerating during the process may require the full 24 hours.
How do I strain cold brew coffee using household items?
Place a coffee filter or a clean piece of cheesecloth inside a fine-mesh strainer over a clean bowl or carafe. Slowly pour the mixture through to catch all the fine sediment, ensuring a smooth and clean final cup.
Can I use regular pre-ground coffee for cold brew?
While you can use pre-ground coffee, it is typically a medium grind which may result in a slightly cloudier or more bitter brew. If using pre-ground coffee, reduce the steeping time slightly to avoid over-extraction.
How long does homemade cold brew stay fresh?
Once strained and stored in an airtight container in the refrigerator, homemade cold brew will stay fresh and flavorful for up to two weeks. After this period, the flavor may begin to degrade or become overly acidic.
Conclusion
Making cold brew at home is a simple, cost-effective process that requires no expensive machinery. By focusing on a coarse grind, a patient steeping time, and a reliable filtration method like a French press or cheesecloth, you can achieve a smooth, low-acid concentrate. Don’t be afraid to experiment with different beans and ratios; your perfect, refreshing glass of homemade cold brew is just a night’s sleep away.