How To Make Ice Drip Coffee
How to make ice drip coffee is a question that often leads to confusion about equipment, ratios, and brew time. You want a smooth, concentrated cold brew without bitterness, not just watered-down iced coffee. You’re in the right place to master it.
What Is Ice Drip Coffee and How Does It Work
The cold brew vs. ice drip coffee difference
Understanding the distinction between cold brew and ice drip coffee is crucial for mastering your brewing technique. While both use cold water, their methods and results differ significantly. Cold brew involves steeping coarse coffee grounds in cold water for 12–24 hours, producing a concentrate that’s smooth but often heavy-bodied.
Ice drip coffee (also called Kyoto-style) uses a slow, controlled drip of ice-cold water over a bed of medium-fine grounds, typically taking 3–8 hours. The key difference is extraction: ice drip uses a continuous fresh water supply, creating a cleaner, more aromatic cup with brighter acidity and less bitterness.
For best results, use a dedicated ice drip tower or a DIY setup with a dripper and ice reservoir. Start with a 1:10 coffee-to-ice ratio, grind to a medium-fine consistency, and adjust drip speed to about 1 drop per second.
This method yields a lighter, tea-like brew that highlights delicate flavor notes, perfect for hot days.
Key equipment for ice drip brewing
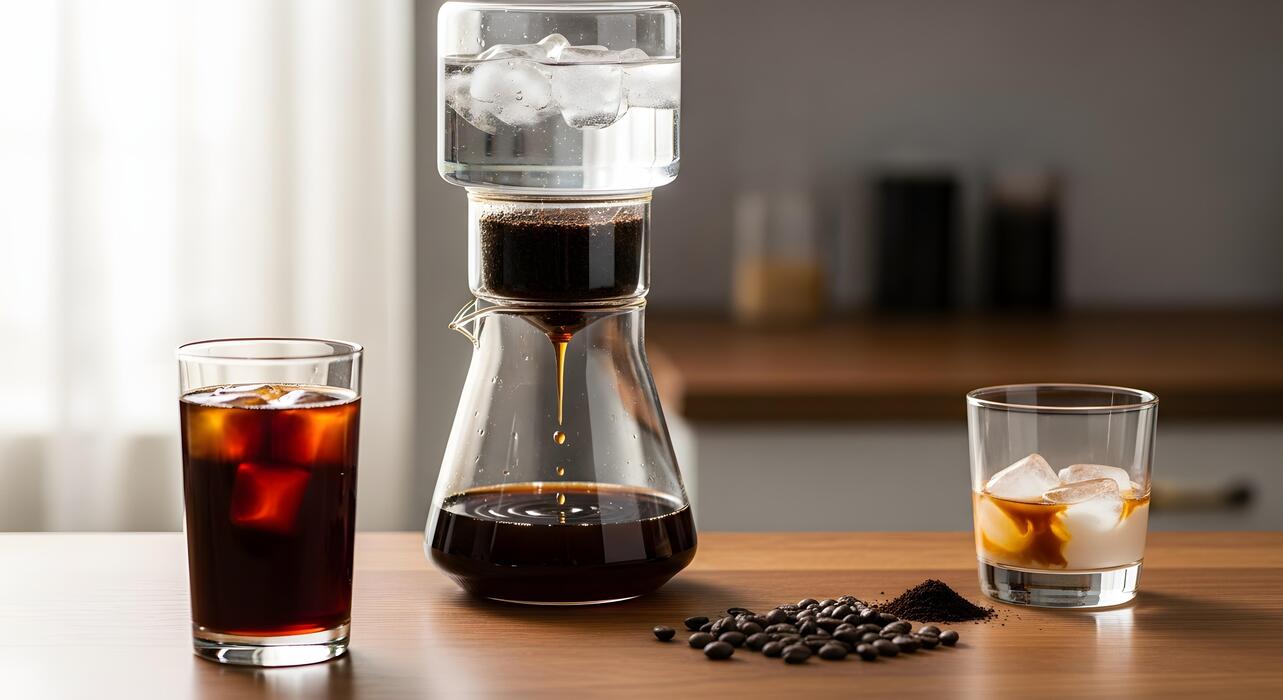
To make ice drip coffee effectively, you need specific gear that controls water flow and extraction. The essential equipment includes a drip tower or cold drip system with three chambers: an ice reservoir, a middle chamber for coffee grounds, and a collection vessel.
Popular options are the Hario Mizudashi or a Yama cold drip tower. You’ll also need a burr grinder for consistent medium-fine grounds (similar to pour-over consistency), a scale for precise ratios, and filter paper or a metal mesh to prevent sediment.
For DIY, use a glass carafe, a dripper (like a V60), and a water bottle with a controlled drip spout. Key tips: chill all components before brewing to maintain temperature, and use filtered water for purity.
Assemble the tower with a 1:10 coffee-to-ice ratio, place a paper filter in the basket, and add grounds evenly. Adjust the drip valve to 1–2 drops per second for optimal extraction. This setup ensures a smooth, consistent brew without over-extraction.
Why ice drip coffee tastes smoother
Ice drip coffee’s exceptional smoothness comes from its gentle, slow extraction process. Unlike hot brewing, which can extract harsh compounds like tannins and chlorogenic acid, the cold water in ice drip brewing selectively pulls out sweet and fruity flavors while minimizing bitterness.
The controlled drip rate (1–2 drops per second) ensures even saturation of grounds, preventing channeling and over-extraction. Additionally, the cold temperature slows chemical reactions, resulting in a lower total dissolved solids content, which creates a lighter, more delicate mouthfeel.
The slow process also allows for greater aromatic complexity, as volatile compounds are preserved without heat degradation. For the smoothest results, use freshly roasted, medium-light beans, and grind to a medium-fine consistency. Let the brew drip for 3–8 hours, then refrigerate for 24 hours to mellow flavors further.
Serve over ice or neat. This method produces a clean, crisp cup with subtle sweetness and zero bitterness, ideal for those sensitive to acidic coffee.
Best Equipment for Making Ice Drip Coffee at Home
Top ice drip coffee makers under $50
For a budget-friendly entry into ice drip coffee, the Hario Mizudashi is a top choice at around $30. This cold brew pot uses a fine mesh filter and produces a smooth, concentrated brew by steeping coarsely ground coffee in cold water for 8-12 hours.
Another excellent option is the Takeya Cold Brew Coffee Maker, often under $25, which features a durable carafe and a reusable filter. Both are simple to use: add coffee, fill with cold water, and refrigerate.
For a true drip-style, the Cold Bruer (around $45) offers a slow-drip mechanism that mimics the traditional Kyoto method, using a valve to control water flow over ice and coffee grounds. These makers are perfect for beginners, requiring no electricity and minimal cleanup.
To get the best results, use a medium-coarse grind and filtered water. Remember, the key is patience—let it brew undisturbed for the full recommended time to extract rich, low-acid flavors.
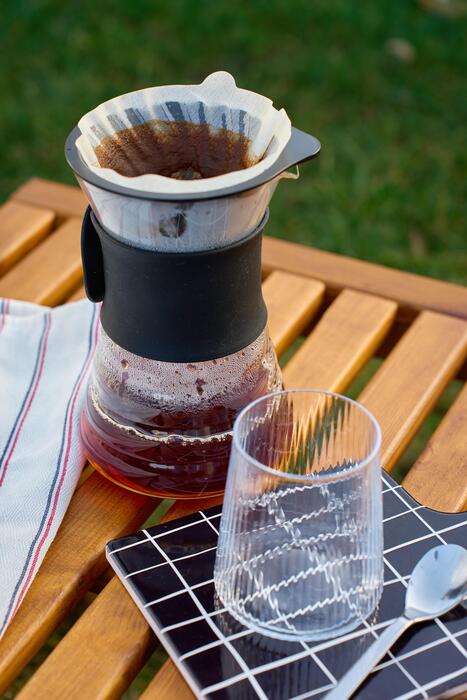
DIY setup with a pour-over cone and ice
You can create a simple ice drip system using a pour-over cone like the Hario V60 or a Melitta cone. Start by placing a carafe or large mug on a scale. Fill the cone with a paper filter and add medium-fine ground coffee (about 30g for 500ml of final coffee).
Top the coffee with 200g of ice cubes directly in the cone. Slowly pour 300g of hot water (just off boil) over the ice and coffee, ensuring all grounds are saturated. The ice melts and drips through the coffee, chilling it instantly while extracting flavors.
This method yields a bright, clean cup with controlled strength. For consistency, use a gooseneck kettle for precise pouring and a digital scale to measure water and ice. Experiment with the coffee-to-ice ratio; a 1:15 ratio (coffee to total water) is a good starting point.
This DIY approach is cost-effective and lets you customize the brew without specialized gear.
Essential accessories: filters, carafes, and scales
To perfect your ice drip coffee, invest in high-quality paper filters (like Hario V60 or Chemex) to remove oils and sediment for a cleaner taste. Reusable metal filters are an eco-friendly alternative but allow more oils.
A thermal carafe (e.g., Zojirushi or Contigo) keeps your brew cold for hours without diluting it with ice. For precise measurements, a digital scale with 0.1g accuracy is essential—try the Hario V60 Drip Scale or a budget-friendly AWS scale.
Also, a gooseneck kettle (electric or stovetop) ensures even water distribution over the coffee bed. Don’t forget a burr grinder (like the Baratza Encore) for consistent grind size; uneven grounds lead to over- or under-extraction. Finally, a timer or smartphone app helps track brew time, especially for slow-drip methods.
These accessories streamline the process, ensuring repeatable, high-quality results every time you brew.
How to Set Up Your Ice Drip Coffee Maker
Step-by-step assembly instructions
Begin by thoroughly cleaning all glass components and the metal filter with warm water. Assemble the base, then place the decanter or receiving vessel on it. Fit the middle chamber (ice reservoir) securely onto the decanter, ensuring it sits level.
Next, attach the drip chamber above it; this holds the coffee grounds. Place the filter paper or metal mesh filter into the bottom of the drip chamber, then add your coarse-ground coffee (typically a 1:5 coffee-to-water ratio). Gently tap the chamber to level the grounds.
Fill the ice reservoir with fresh, cold water and add ice cubes to the top. Finally, position the drip nozzle over the coffee bed and adjust the valve to a slow, steady drip—about 1-2 drops per second.
Place the entire setup in a cool, dark spot (like your countertop away from sunlight) and let gravity work its magic. Check the decanter every hour to ensure the drip rate remains consistent.
Choosing the right coffee grind size
For ice drip coffee, grind size is critical for balanced extraction. Use a coarse grind, similar to sea salt or raw sugar—avoid fine or medium grinds that can over-extract and cause bitterness.
The ice melt dilutes the coffee, so a coarse grind slows water flow, allowing gentle, even extraction of oils and flavors. If the grind is too fine, the water will pool, leading to stalling or clogging, and you’ll get a harsh, muddy brew.
Too coarse, and the water rushes through, producing weak, under-extracted coffee. Use a burr grinder for consistent particle size; blade grinders create uneven grounds. For a standard 500ml batch, aim for 50-60 grams of coffee.
Experiment with slight adjustments: if your brew tastes sour or thin, grind slightly finer; if bitter or muddy, grind coarser. Always use freshly ground beans within 15 minutes of brewing for peak aroma.
Adjusting drip rate for perfect extraction
The drip rate directly controls extraction time and flavor. Start with a slow drip of 1-2 drops per second (about 40-60 drops per minute). This allows the ice to melt gradually, saturating the coffee bed for 4-6 hours of brewing.
If the drip is too fast (more than 3 drops per second), the water won’t extract enough, resulting in weak, watery coffee. If too slow (less than 1 drop per second), the brew may over-extract, becoming bitter and over-concentrated.
To adjust, turn the valve knob clockwise to slow the drip, counterclockwise to speed it up. Monitor the coffee bed: it should remain evenly moist but not flooded. If you see dry spots, the drip is too fast; if pooling occurs, it’s too slow.
For a smoother, milder cup, aim for a slower drip (1 drop per second); for bolder flavor, slightly faster (2 drops per second). Check the decanter after 30 minutes and fine-tune as needed—small adjustments make a big difference.
Coffee-to-Water Ratio for Ice Drip Brewing
Standard ratio for balanced flavor
For a balanced and smooth ice drip coffee, start with a 1:10 coffee-to-water ratio (by weight). This means for every 1 gram of coffee, use 10 grams of total water (ice + room-temperature water). For a typical 500ml batch, use 50 grams of coffee and 500 grams of total water.
Since ice dilutes the brew, this ratio ensures the final coffee is neither too watery nor overly strong. Always weigh your coffee and water for consistency; a digital scale is essential. Use a medium-coarse grind similar to sea salt to prevent over-extraction during the slow drip.
The standard ratio works best with a drip rate of 40-60 drops per minute over 3-4 hours. This yields a clean, nuanced cup with balanced acidity and sweetness—ideal for enjoying black or with a splash of milk.
How to adjust for stronger or milder coffee
To customize strength, adjust the coffee-to-water ratio while keeping the total water (ice + room-temperature) fixed. For a stronger brew, increase coffee to a 1:8 ratio (e.g., 62.5g coffee to 500g water). This extracts more solubles, resulting in a bolder, more concentrated flavor—perfect for adding milk or ice.
For a milder cup, use a 1:12 ratio (e.g., 41.7g coffee to 500g water), which produces a lighter, tea-like body. Avoid changing the grind size drastically; stick to medium-coarse.
You can also adjust the drip rate: slower drips (30-40 drops/min) extract more, while faster drips (60-70 drops/min) yield a weaker brew. Taste your first batch and tweak the ratio by 5-10% next time. Always note your adjustments for repeatable results.
Measuring ice and water correctly
Accurate measurement of ice and water is crucial because ice melts during brewing, affecting the final strength. For the 1:10 ratio, split the total water into two-thirds ice and one-third room-temperature water. For 500g total water, use 330g of ice and 170g of room-temperature water.
The ice goes into the carafe, and the room-temperature water fills the drip chamber above the coffee. This balance ensures the ice melts gradually, chilling the brew without over-diluting. Use filtered water for best taste, and weigh everything with a digital scale—don’t rely on volume measurements.
If using a standard ice cube tray, 1 cube is roughly 15-20g, but weighing is more precise. For larger batches, maintain the same ratio: e.g., 660g ice + 340g water for 1 liter total. Proper measuring guarantees consistent, delicious results every time.
Tips for Choosing Coffee Beans for Ice Drip
Best roast levels for ice drip
For ice drip coffee, medium roasts are the ideal starting point because they balance acidity, sweetness, and body without becoming overly bitter when diluted by ice.
Light roasts can taste too sharp or sour in cold extraction, while dark roasts may turn harsh or ashy due to prolonged contact with water. A medium roast offers chocolatey, nutty, or fruity notes that shine through the chilled brewing process.
If you prefer a bolder flavor, try a medium-dark roast with low acidity—avoid full-city or French roasts unless you enjoy intense, smoky profiles. Experiment with a single-origin medium roast from Ethiopia or Colombia to experience bright, clean flavors, or go for a balanced blend like a Guatemalan-Honduran mix.
Remember that ice drip uses cold water over several hours, so the roast level directly impacts the final taste. Always grind your beans coarsely to prevent over-extraction, and adjust the roast level based on your preference for sweetness versus bitterness. Start with a medium roast, then tweak from there.
Single-origin vs. blend recommendations
Choosing between single-origin and blended beans for ice drip depends on the flavor profile you want. Single-origin beans highlight unique tasting notes like floral, citrus, or berry from a specific region, making them perfect for those who enjoy distinct, complex flavors in cold brew.
For example, an Ethiopian Yirgacheffe can offer jasmine and lemon zest, while a Colombian Huila brings caramel and apple. However, single-origin coffees can sometimes be one-dimensional in ice drip, where the slow extraction may mute subtle nuances.
Blends, on the other hand, provide balance and consistency by combining beans from different origins to create a smooth, chocolatey, or nutty profile that holds up well to dilution. For ice drip, a blend of Brazilian and Costa Rican beans delivers a rich, sweet body with low acidity.
If you’re new to ice drip, start with a medium-roast blend for a forgiving, crowd-pleasing cup. As you gain experience, try single-origin beans from Kenya or Panama for vibrant acidity and fruitiness. Always buy from reputable roasters who provide roast dates and tasting notes to guide your choice.
Freshness and storage tips
Freshness is critical for ice drip coffee because the slow extraction amplifies stale or off flavors. Always buy whole beans and grind them just before brewing to preserve volatile oils and aromas. Look for beans roasted within the past 2–4 weeks—check the roast date on the bag.
Avoid pre-ground coffee, as it loses freshness rapidly. Store your beans in an airtight, opaque container at room temperature, away from heat, light, and moisture. Do not refrigerate or freeze them, as condensation can introduce humidity and degrade quality.
For ice drip, use beans within 1–2 weeks of roasting for optimal flavor. If you must store longer, portion beans into small, vacuum-sealed bags and freeze only once; thaw before opening to avoid moisture damage. Grind coarsely and use filtered water to prevent off-tastes.
Rotate your stock by buying smaller quantities more frequently, and always sniff your beans—they should smell sweet and aromatic, not sour or musty. Proper storage ensures your ice drip coffee stays bright, clean, and free of bitterness or flatness.
Common Ice Drip Coffee Mistakes to Avoid
Grind size errors that ruin flavor
One of the most common mistakes in ice drip coffee is using the wrong grind size. If your grind is too fine, you’ll over-extract the coffee, leading to bitter, harsh flavors that overpower the delicate cold brew profile.
Conversely, a grind that’s too coarse results in under-extraction, producing a weak, sour, and watery brew lacking complexity. For ice drip, aim for a medium-coarse grind, similar to raw cane sugar or sea salt.
This allows water to flow through the coffee bed at an optimal rate, extracting the full range of flavors without bitterness. Invest in a quality burr grinder for consistent particle size; blade grinders create uneven grounds that lead to unpredictable extraction.
Always adjust your grind based on your specific dripper and desired strength—test small batches first. Remember, the goal is a smooth, rich concentrate, so dialing in grind size is your most powerful tool for flavor control.
Drip rate too fast or too slow
Controlling the drip rate is essential for balanced extraction in ice drip coffee. A common error is setting the drip rate too fast, which forces water through the grounds without enough contact time, resulting in a weak, under-extracted brew that tastes flat and acidic.
On the other hand, a drip rate that’s too slow can cause over-extraction, making the coffee bitter and muddy, while also extending the brewing time unnecessarily. Aim for a steady rate of 40–60 drops per minute, or about 1–2 drops per second, using the valve on your dripper to fine-tune.
Monitor the flow consistently—ambient temperature and grind size can affect the rate, so adjust as needed. If using ice in the carafe, remember that it melts slowly, so a balanced drip ensures the final concentrate has the right strength.
Patience pays off: a slow, consistent drip yields a clean, sweet, and complex coffee that highlights subtle notes without flaws.
Not pre-wetting the coffee grounds
Skipping the pre-wetting (or blooming) step is a frequent mistake that compromises ice drip coffee quality. Dry coffee grounds contain trapped carbon dioxide, which creates an uneven extraction if not released first.
When you skip blooming, water channels through the grounds unpredictably, leaving some areas over-extracted and others untouched, resulting in a brew that’s both bitter and sour.
Always pre-wet the grounds with a small amount of room-temperature water (just enough to saturate them evenly) and let them sit for 30–60 seconds before starting the drip. This allows the coffee to degas, ensuring uniform saturation and consistent extraction throughout the brewing process.
Use filtered water at room temperature for blooming to avoid shocking the grounds. This simple step unlocks the full flavor potential of your coffee, yielding a smoother, more balanced concentrate. Don’t rush it—pre-wetting is a small investment for a big payoff in clarity and taste.
How to Serve and Store Ice Drip Coffee
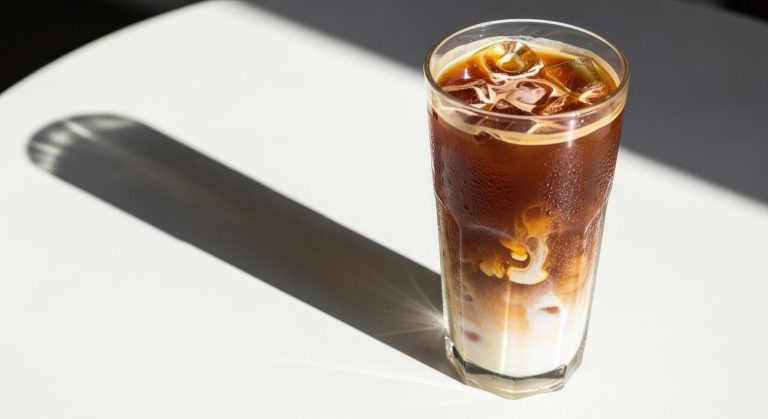
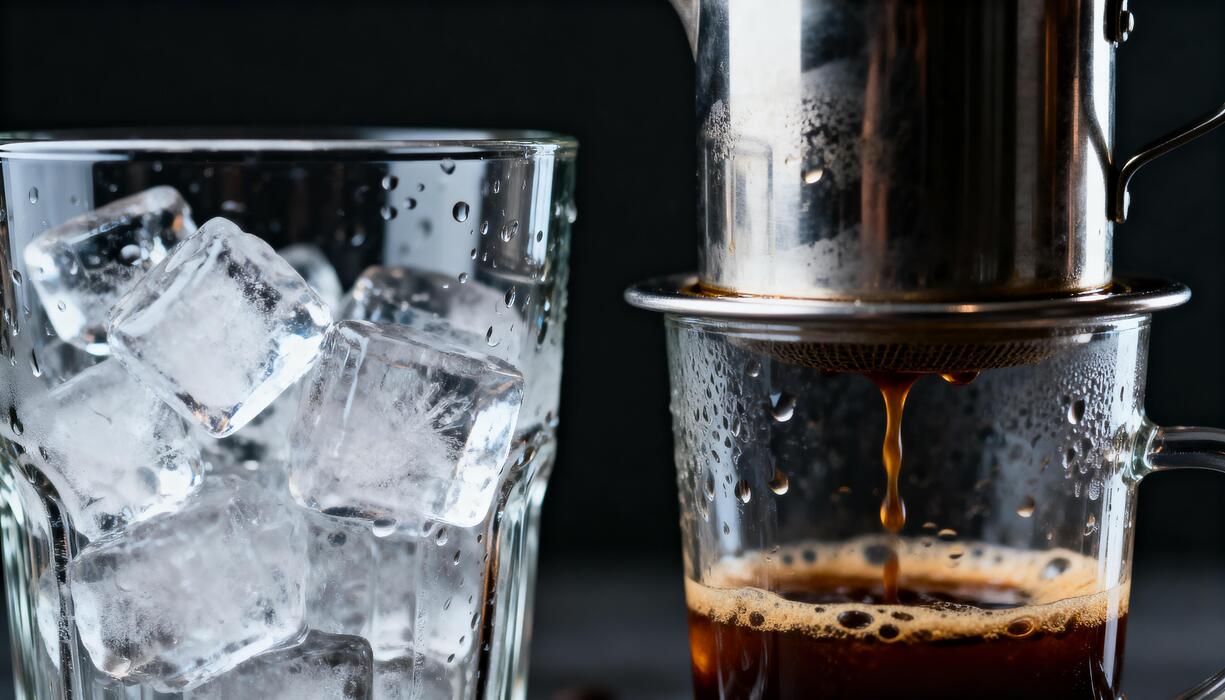
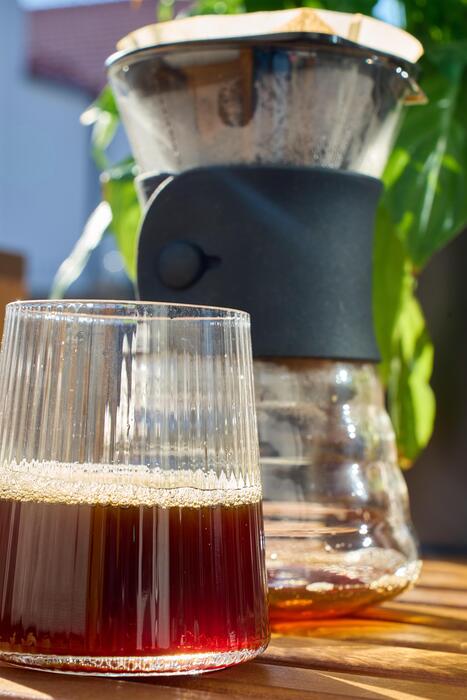
Best ways to serve over ice
For the best experience, serve ice drip coffee immediately over fresh ice to preserve its delicate flavor profile. Use large ice cubes or ice molds to slow dilution, ensuring the coffee stays robust as it chills.
Fill a glass with ice, then pour the coffee slowly to avoid shocking the cold brew’s balance. Avoid adding ice directly to the drip chamber—always serve in a separate vessel. For a crisp, clean taste, consider serving it black first to appreciate the slow-extracted notes of chocolate or fruit.
If you prefer a colder drink, chill the glass beforehand or use coffee ice cubes made from leftover drip. The key is to maintain the smooth, low-acid character that ice drip coffee is known for, so never serve it over crushed ice, which melts too fast.
This method highlights the craftsmanship of the brewing process.
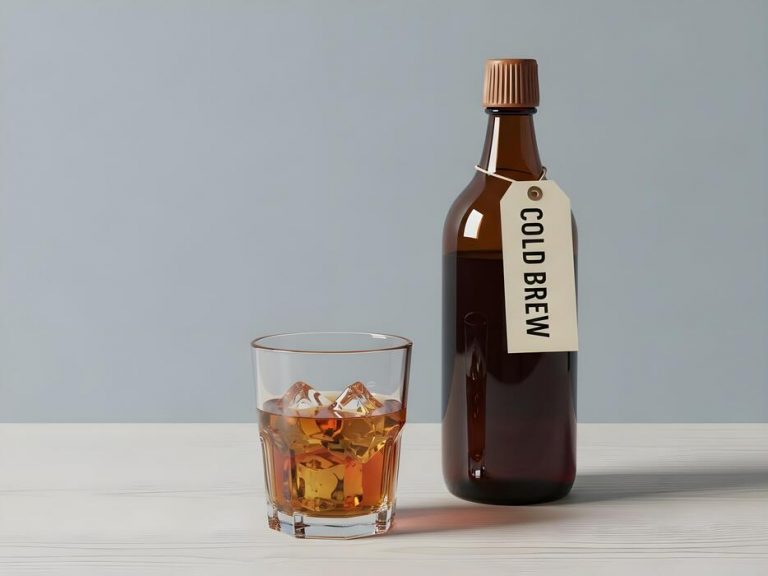
Storage tips for up to 2 weeks
To keep your ice drip coffee fresh for up to two weeks, store it in an airtight glass container in the refrigerator. Avoid plastic, which can absorb odors and alter the flavor. Use a dark or opaque bottle to block light, a major cause of flavor degradation.
Fill the container to the brim to minimize oxygen exposure, which stales the coffee. Before refrigerating, let the drip cool to room temperature for no more than 30 minutes, then seal tightly. Label with the brewing date to track freshness.
For best quality, consume within 7–10 days, though it remains safe for 14 days if kept below 40°F. Never freeze ice drip coffee, as freezing damages its smooth texture. When serving, pour only what you need and return the rest to the fridge immediately.
This storage method preserves the complex, velvety notes that make ice drip special.
Flavor variations with milk or syrups
Elevate your ice drip coffee with simple flavor twists. Add a splash of cold milk or oat milk for a creamy, mellow drink—start with 1–2 tablespoons per 6 oz of coffee to avoid masking the subtle extraction.
For a dairy-free option, coconut milk adds a tropical note, while almond milk keeps it light. Syrups work beautifully: vanilla or caramel syrup (1–2 teaspoons) complements the coffee’s natural sweetness, or try lavender syrup for floral complexity. Stir gently to avoid breaking the ice.
For a richer treat, add a scoop of vanilla ice cream for an affogato-style dessert. Always add syrups before the ice to dissolve evenly. Experiment with cinnamon or nutmeg sprinkled on top for warmth. These variations enhance, not overwhelm, the clean, concentrated flavor of ice drip coffee.
Remember to taste as you go—balance is key to preserving the brew’s artistry.
Frequently Asked Questions
What is ice drip coffee?
Ice drip coffee, also known as Kyoto-style or Dutch coffee, is a cold brewing method where ice water slowly drips over coffee grounds, extracting flavor over several hours. This produces a smooth, concentrated coffee with low acidity, often served over ice.
How do I make ice drip coffee at home without a special tower?
You can make a DIY ice drip setup using a large funnel, a container with a slow-drip valve (like a glass bottle with a controlled spout), or even a regular drip coffee maker. Fill the top with ice and water, place coffee grounds in a filter below, and let it drip slowly over 4-12 hours into a carafe.
What coffee grind size is best for ice drip coffee?
Use a medium-coarse grind, similar to what you’d use for a pour-over or French press. Too fine can lead to over-extraction and bitterness, while too coarse may result in weak, under-extracted coffee.
How long does it take to brew ice drip coffee?
Brewing typically takes 4 to 12 hours, depending on the drip rate and amount of coffee. Aim for about 1-2 drips per second for optimal extraction.
What is the ideal coffee-to-water ratio for ice drip coffee?
A common ratio is 1 part coffee to 4-6 parts water by weight (e.g., 60 grams coffee to 300-360 grams ice water). Adjust based on your taste preference for strength.
Do I need to pre-wet the coffee grounds for ice drip?
Yes, lightly pre-wet the grounds with a small amount of cold water (about 10-20% of the total water) to ensure even saturation and blooming. This helps prevent channeling and improves extraction.
Can I use regular ice cubes instead of filtered water for ice drip coffee?
Yes, but use filtered or bottled water for the best taste. Tap water’s minerals or chlorine can affect flavor. Ensure the ice is fully melted during the drip process to maintain consistent flow.
How do I store and serve ice drip coffee after brewing?
Store the concentrated coffee in a sealed container in the refrigerator for up to 2 weeks. Serve it over ice, and dilute with water or milk to taste, as it’s typically stronger than regular cold brew.
Conclusion
Making ice drip coffee at home is a rewarding blend of patience and precision. Key takeaways include using a coarse grind, maintaining a steady drip rate of one drop per second, and letting the brew rest overnight for optimal flavor extraction. The result is a smooth, low-acidity concentrate perfect for hot days. Embrace the slow process—your taste buds will thank you for this refreshing, café-quality treat.