How To Make Nitro Coffee At Home
You do not need a fancy cafe setup to enjoy that velvety, cold-brew goodness. If you are wondering how to make nitro coffee at home, you have come to the right place. Achieving that signature creamy head and cascading bubbles is easier than you think. From choosing the right beans to infusing nitrogen, you will be sipping professional-quality nitro in minutes.
What is Nitro Coffee and Why Drink It?
The Difference Between Nitro and Standard Cold Brew
To successfully make nitro coffee at home, you must first understand its foundation. While standard cold brew is simply coffee grounds steeped in room temperature water for twelve to twenty-four hours, nitro coffee takes this base and infuses it with pure nitrogen gas.
Standard cold brew is often served over ice and can have a sharp, acidic profile depending on the bean roast. In contrast, the nitro version is typically served straight from a pressurized keg or specialized whipped cream charger without ice to preserve its unique properties.
The primary difference lies in the carbonation process; whereas soda uses carbon dioxide which creates large, acidic bubbles, nitrogen creates micro-bubbles that do not dissolve as easily. This results in a beverage that remains stable and frothy for a longer duration.
When you prepare this at home using a nitro infuser, you are essentially transforming a flat, cold concentrate into a dynamic, pressurized elixir that mimics the mouthfeel of a stout beer.
How Nitrogen Changes the Texture and Flavor
The magic of making nitro coffee at home lies in the physical transformation of the liquid. When nitrogen is forced into the cold brew under high pressure, it creates a cascading effect and a thick, foamy head known as the crema.
These tiny bubbles are significantly smaller than those found in sparkling water, which provides a velvety, creamy texture that glides over the palate. Beyond the tactile experience, nitrogen significantly alters your perception of flavor.
Because nitrogen is less soluble than carbon dioxide, it reduces the perceived bitterness and acidity of the coffee. This chemical interaction highlights the natural sweetness and nutty undertones of the beans, often making the coffee taste as though it has been enhanced with cream or sugar.
By mastering the infusion process with a pressurized dispenser, you can achieve a luxurious mouthfeel and a naturally sweet profile without adding any caloric additives, providing a gourmet cafe experience directly from your own kitchen counter with minimal effort.
Health Benefits of Nitro Coffee
Choosing to brew nitro coffee at home offers several wellness advantages that appeal to health-conscious drinkers. Because the nitrogen infusion naturally enhances the sweetness and creates a rich, creamy consistency, most enthusiasts find they no longer need to add processed sugars or heavy dairy creams.
This makes nitro coffee an excellent tool for those following keto, vegan, or low-calorie diets. Furthermore, the cold brewing process used for the base is inherently lower in acid than traditional hot brewing methods.
This makes the final drink much gentler on the digestive system and reduces the likelihood of acid reflux or stomach irritation. Additionally, nitro coffee often contains a higher caffeine concentration than standard drip coffee because of the long steeping time and the way the body absorbs the pressurized liquid.
By making it yourself, you control the quality of the water and the purity of the coffee beans, ensuring a clean, antioxidant-rich beverage that boosts metabolic rate and mental focus without the typical crash associated with sugary energy drinks.
Essential Equipment for Home Nitro Brewing
Choosing the Right Whipped Cream Siphon
To achieve that signature velvety texture when learning how to make nitro coffee at home, your most critical investment is a high-quality whipped cream siphon. While high-end nitro keg systems exist, a handheld siphon is the most accessible and space-efficient tool for beginners.
Ensure you select a model constructed from food-grade stainless steel, as aluminum variants can sometimes react with the acidity of the coffee and alter the flavor profile over time.
Look for a siphon with a minimum capacity of 500ml, which allows enough headspace for the gas to integrate properly with the liquid.
Additionally, prioritize models that include multiple decorative nozzles and a cleaning brush, as keeping the dispensing valve free of coffee residue is essential for maintaining a consistent, foamy pour. A durable gaskets system is also vital to prevent gas leaks during the infusion process.
By choosing a robust, stainless steel siphon, you create a pressurized environment that forces nitrogen into the cold brew, resulting in that iconic cascading effect and a creamy mouthfeel without adding any dairy.
Nitrogen (N2) vs. Nitrous Oxide (N2O) Cartridges
The choice of gas is the defining factor in the flavor and texture of your homemade beverage. For authentic results, you must use pure Nitrogen (N2) cartridges, which produce the tiny, micro-bubbles responsible for the classic ‘Guinness-style’ head and silky finish.
While Nitrous Oxide (N2O) chargers are more commonly found in grocery stores for making whipped cream, they tend to add a slightly sweet, chemical aftertaste and create larger bubbles that dissipate quickly. If you want the true cafe experience, search specifically for 2g N2 chargers designed for coffee or cocktails.
These cartridges are pressurized differently than standard whipped cream chargers, so ensure your siphon is compatible with the specific brand of nitrogen bulb you purchase. Using the correct gas ensures that the coffee remains bold and crisp rather than becoming overly airy or unnaturally sweet.
Always check that the cartridges are 100% recyclable steel to minimize environmental impact. Mastering the gas infusion is the secret step that transforms standard chilled coffee into a professional-grade nitro brew with a thick, long-lasting foam topper and a smooth, rounded body.
Best Containers for Storing Cold Brew Base
Before you can infuse your drink with gas, you need a high-quality concentrate, which requires the best containers for storing cold brew base to maintain freshness.
Oxygen is the enemy of coffee, so you should utilize airtight glass carafes or mason jars to prevent oxidation and the absorption of refrigerator odors. Avoid plastic containers, as they are porous and can leach flavors into your brew over the long steeping period.
For the best results, use UV-protected amber glass bottles if your fridge has internal lighting, as light can degrade the delicate oils in the coffee. Ensure the container has a silicone or rubber seal to create a complete vacuum-like environment.
When storing your base, leave as little headspace as possible at the top of the bottle to further reduce air exposure. A well-stored concentrate can stay vibrant for up to two weeks, allowing you to pull a fresh nitro pour whenever the craving strikes.
Preparing your base in batch-sized glass growlers makes it easy to measure out exactly what your siphon needs, ensuring a perfect ratio of coffee to nitrogen every single time you brew at home.
How to Make the Perfect Cold Brew Base
Best Coffee Beans for Nitro Infusion
To achieve the signature creamy texture of nitro coffee at home, selecting the right origin and roast profile is the first critical step. Look for medium to dark roast beans with low acidity levels, as the nitrogen infusion process significantly enhances the natural sweetness and body of the coffee.
Beans from regions like Sumatra, Brazil, or Nicaragua are ideal because they offer chocolatey, nutty, and earthy notes that pair perfectly with the velvety micro-foam created by the nitro charger. Avoid high-acid light roasts, which can taste overly sour or metallic when carbonated or nitrogenated.
For the best results, always prioritize freshly roasted whole beans and grind them to a very coarse consistency, similar to sea salt, just before you begin the brewing process. This coarse grind ensures a clean extraction without the sediment that can clog your nitro dispenser nozzle.
Starting with high-quality, flavorful beans ensures your base has enough depth to stand up to the dilution of ice and the textural change of the gas.
Ideal Water-to-Coffee Ratios
Creating a powerful concentrate is essential for nitro coffee because the nitrogen bubbles thrive in a dense, viscous liquid. A 1:4 or 1:5 water-to-coffee ratio by weight is the industry standard for a robust cold brew base that maintains its integrity after being chilled and pressurized.
For example, using one pound of coffee to two quarts of filtered water will produce a thick syrup-like concentrate.
If you prefer a slightly lighter body that is ready to drink straight from the keg, you can stretch the ratio to 1:8, but keep in mind that the creamy mouthfeel is most prominent with higher concentrations.
Using filtered water is non-negotiable, as tap water minerals can interfere with the delicate oils and nitrogen solubility. Always measure your ingredients using a digital kitchen scale rather than volume scoops to ensure absolute consistency between batches.
This precision allows you to replicate the exact strength required to balance the nitrogen’s thinning effect, resulting in a professional-grade pour that mimics your favorite high-end coffee shop experience every single morning.
Steeping Times for Maximum Smoothness
Patience is the secret ingredient when preparing a base specifically for nitro infusion, as the goal is to minimize bitterness while maximizing flavor extraction.
For a room temperature steep, aim for a window of 12 to 16 hours to extract the full spectrum of sweetness without pulling out the harsh tannins found in the bean’s core.
If you prefer to steep your cold brew in the refrigerator to keep it food-safe and stable, extend the time to 18 to 24 hours to compensate for the slower extraction rate at lower temperatures.
Over-steeping beyond 24 hours can lead to oxidized, woody flavors that become unpleasantly amplified once the nitrogen is introduced. Once the time is up, use a dual-filtration method—first a metal mesh to remove large grounds, then a paper filter to catch fine silts.
This ensures a perfectly clear liquid that won’t obstruct the tiny valves of your nitro canister. Achieving this level of clarity and smoothness is what allows the cascading effect and thick head of foam to form beautifully upon pouring.
Step-by-Step Guide to Infusing Coffee with Nitrogen
Preparing the Siphon and Cold Brew
To begin your journey toward a professional-grade beverage, ensure your cold brew concentrate is properly filtered and chilled to near-freezing temperatures.
Start by pouring your cold brew into a high-quality whipped cream dispenser or dedicated nitro siphon, filling it only to the indicated maximum fill line to allow sufficient space for gas expansion.
It is vital to use a fine-mesh filter or paper filter during the brewing process to remove any sediment or oils that might clog the delicate nozzle of your infusion device.
Once the liquid is inside, securely screw on the siphon head, ensuring the rubber gasket is perfectly seated to prevent any pressure leaks. This preparation phase is the foundation of a successful infusion, as colder liquids absorb nitrogen much more efficiently than room-temperature options.
By keeping every component chilled, you guarantee a smoother texture and a more stable foam structure once the gas is introduced, setting the stage for a velvety mouthfeel that defines the authentic nitro experience.
Charging the Device and Shaking Techniques
Once your siphon is sealed and ready, insert a single 2g or 8g nitrogen (N2) or nitrous oxide (N2O) charger into the holder and twist it until you hear the characteristic hiss of gas entering the chamber.
After the gas is fully released, vigorously shake the canister for approximately thirty to sixty seconds to facilitate the infusion process.
This physical agitation is necessary because nitrogen does not dissolve easily in water; the shaking force helps disperse the tiny bubbles throughout the coffee, creating the creamy micro-foam texture you desire.
For a more intense cascading effect, some enthusiasts prefer to let the canister rest in the refrigerator for five minutes before giving it a final, short shake.
If you are using pure nitrogen cartridges, you may need to use two chargers depending on the size of your vessel to achieve the optimal pressure levels for a rich, Guinness-like consistency.
Always keep the nozzle pointed away from your face during this stage to ensure safety while the internal pressure stabilizes for the final pour.
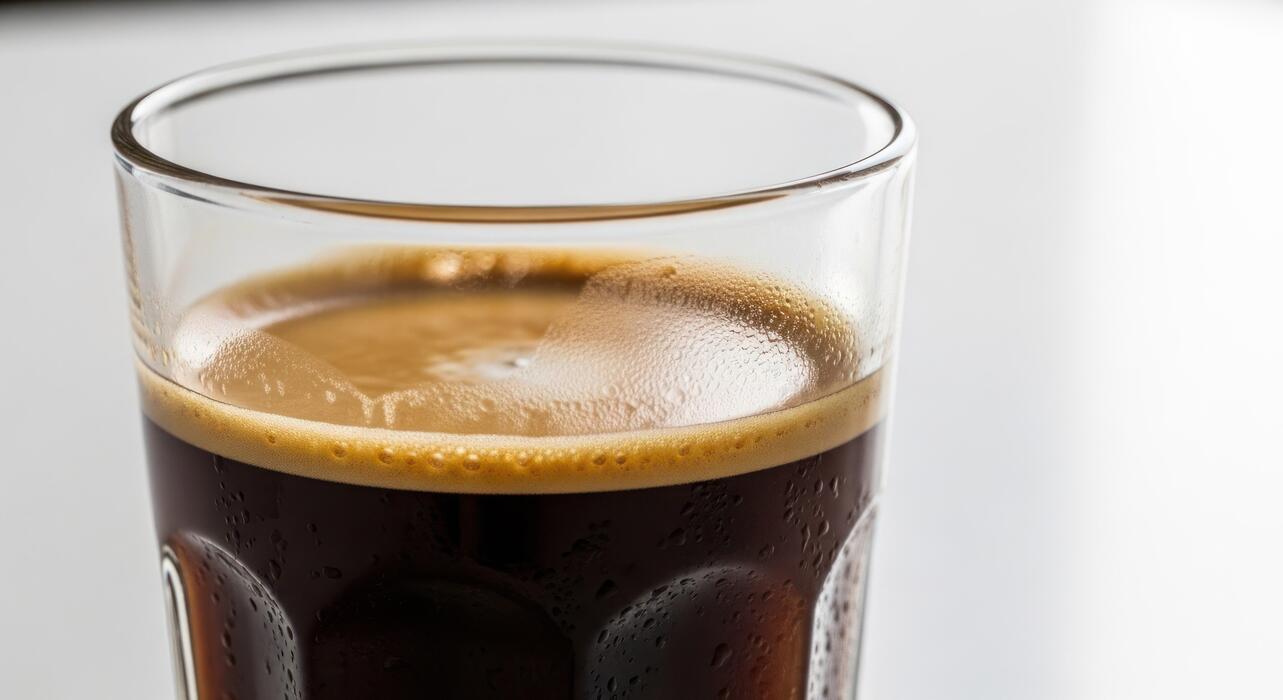
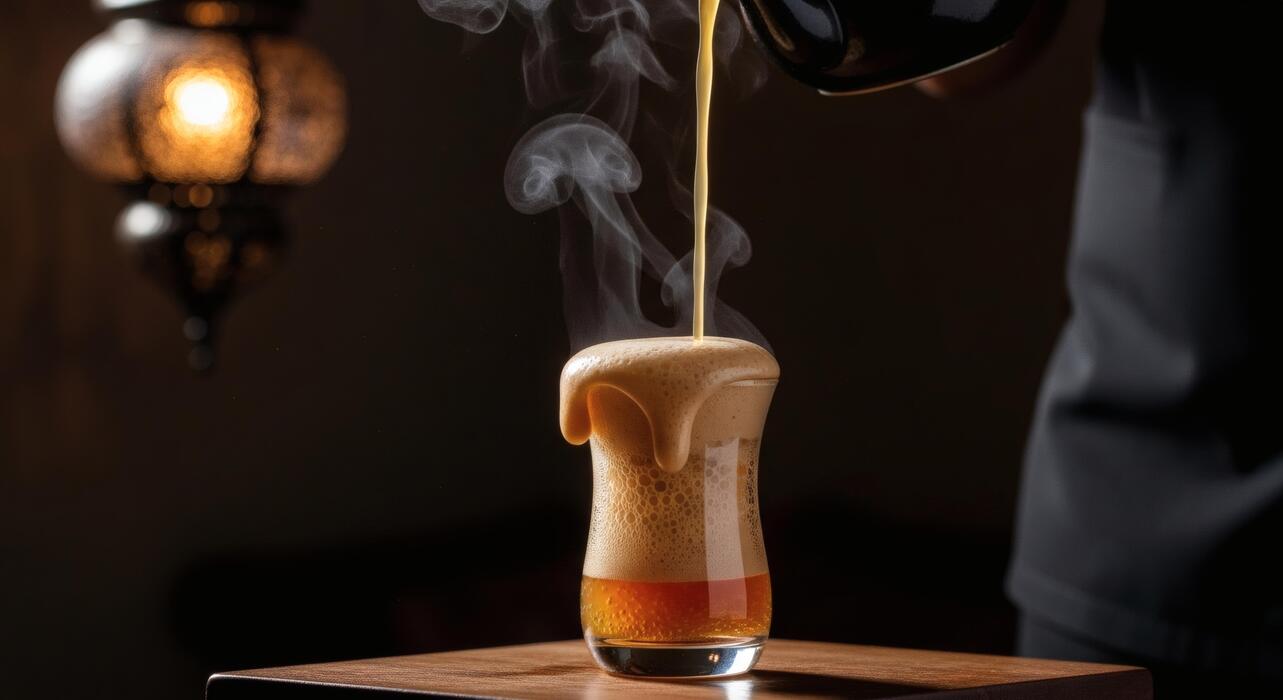
The Proper Way to Pour for a Thick Head
The final step in mastering nitro coffee at home is the pour, which requires a specific technique to maximize the visual cascade and the density of the foam head.
Hold your glass at a slight forty-five-degree angle and depress the trigger gently to initiate a steady, controlled flow against the side of the glass. As the glass fills, gradually straighten it to an upright position, allowing the nitrogen bubbles to surge from the bottom to the top.
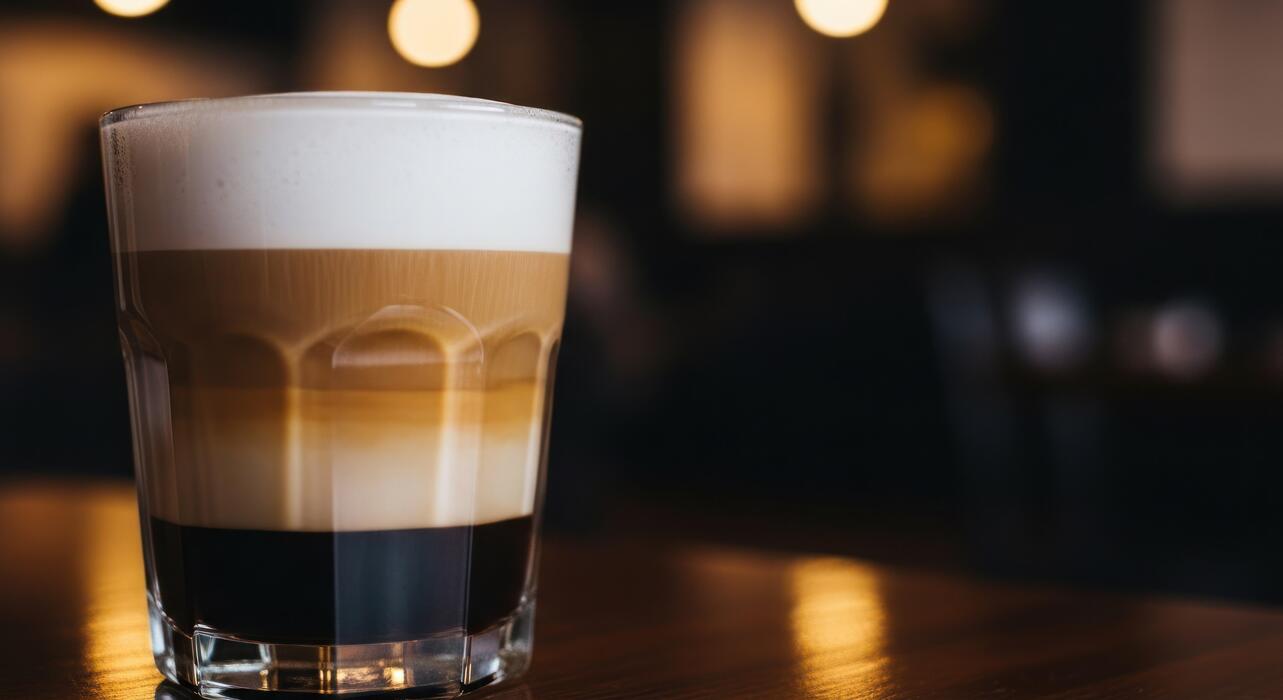
This movement creates the iconic reverse-cascade effect where the creamy foam settles into a thick, white layer on the surface of the dark coffee. For the best results, use a clear tulip glass or a pint glass to fully appreciate the aesthetic transformation.
Avoid adding ice directly to the glass if possible, as it can disrupt the bubble structure; instead, rely on the pre-chilled coffee and siphon to maintain the ideal serving temperature.
Serving immediately ensures you enjoy the peak sweetness and silky texture that nitrogen infusion provides, delivering a cafe-quality beverage right in your own kitchen.
Alternative Ways to Make Nitro Coffee Without a Siphon
Using a Portable Nitro Keg System
For those who want a professional experience without a bulky siphon, a portable nitro keg system is the ultimate solution. These mini-kegs, often holding 64 ounces, utilize small nitrogen or nitrous oxide cartridges to carbonate your cold brew under high pressure.
To start, fill the keg with filtered cold brew concentrate, leaving enough headspace for gas expansion. Once you seal the lid and charge the unit with a cartridge, give the keg a vigorous shake for about thirty seconds to help the gas dissolve into the liquid.
This method is superior because the specialized stout faucet features a restrictor plate that forces the coffee through tiny holes, creating the iconic cascading effect and thick microfoam head. It is a set-it-and-forget-it method that keeps your coffee fresh and creamy for several days in the refrigerator.
While it requires an initial investment, it is the most reliable way to achieve authentic, cafe-quality texture at home without needing a complex commercial setup or a traditional handheld siphon.
Handheld Milk Frother Hacks
If you are looking for a budget-friendly alternative that requires zero specialized equipment, a handheld milk frother can mimic the velvety mouthfeel of nitro coffee. While this technique does not technically infuse nitrogen gas into the liquid, it introduces tiny air bubbles that create a remarkably similar sensory experience.
Begin by pouring cold brew concentrate into a tall glass, ensuring the coffee is chilled to maximize foam stability. Submerge the whisk head of the frother just below the surface and turn it on, moving it up and down to incorporate air and create a dense froth.
For an even creamier result, try frothing a small amount of milk or cream separately and folding it into the coffee. This hack works best when you use a high-quality concentrate, as the natural oils in the beans help hold the structure of the bubbles.
It is a quick, low-cost solution for those who want a bubbly, aerated texture in seconds without having to buy expensive gas canisters or heavy stainless steel hardware.
The French Press Aeration Method
The French Press aeration method is a clever DIY technique that utilizes the fine mesh screen of a standard coffee plunger to simulate a nitro infusion. Start by filling your French press about one-third full with cold brew.
Place the lid on top and rapidly pump the plunger up and down for approximately thirty to sixty seconds. This action forces the coffee through the mesh filter at high speed, breaking up the liquid and integrating air to create a silken foam.
Once the coffee has doubled in volume and looks pale and creamy, pour it immediately into a glass. The result is a drink with a lighter body and a foamy crown that closely resembles the output of a nitrogen tap.
To get the best results, ensure your coffee is ice-cold, as colder liquids hold onto aerated bubbles much more effectively than room-temperature brews. This method is highly effective because most coffee enthusiasts already own a French press, making it a zero-cost entry point into the world of home-brewed nitro-style beverages.
Tips for Customizing Your Nitro Coffee
Adding Syrups and Flavors Without Ruining the Foam
To maintain the iconic velvety texture of your homemade nitro cold brew, the timing of your flavor additions is critical. Always stir your syrups or liquid sweeteners into the base concentrate before you charge the dispenser with nitrogen gas.
Adding heavy syrups after the pour can cause the delicate micro-foam bubbles to collapse prematurely, leaving you with a flat drink. For the best results, stick to simple syrups or concentrated extracts like vanilla or caramel that dissolve instantly without leaving a grainy residue.
Avoid using thick sauces or honey directly in the glass, as these dense liquids will sink to the bottom and disrupt the beautiful cascading effect that defines the nitro experience.
If you prefer a spiced profile, try steeping cinnamon sticks or cacao nibs directly in your cold brew grounds during the initial twenty-four-hour brewing process.
This infuses the flavor into the molecular structure of the coffee, ensuring every sip is consistently aromatic while keeping the luxurious foam head completely intact and stable.
Best Milk and Creamer Pairings
One of the greatest benefits of nitro coffee is its natural creaminess, which often eliminates the need for dairy. However, if you prefer a richer profile, selecting the right whitener is essential for preserving the nitrogen-infused mouthfeel.
High-fat options like heavy cream or half-and-half provide a decadent layer that complements the tiny bubbles, creating a texture similar to a stout beer.
For those seeking plant-based alternatives, oat milk is the superior choice because its natural proteins and fats mimic the density of dairy, allowing it to blend seamlessly without curdling.
Avoid thin liquids like skim milk or almond milk, as their high water content can dilute the nitrogen effect and make the coffee feel thin or watery.
To achieve a professional aesthetic, try pouring a small amount of chilled cream over the back of a spoon after the glass is filled; this creates a striking visual marbling effect while ensuring the cream sits gently atop the nitro foam rather than sinking and displacing the gas.
Serving Temperatures and Ice Recommendations
The fundamental rule for serving nitro coffee at home is to keep everything as cold as possible to maximize nitrogen solubility. Unlike standard iced coffee, nitro is traditionally served without ice in the glass.
Adding ice cubes creates turbulence that forces the nitrogen gas out of the liquid, which quickly destroys the signature cascading visual and the creamy texture you worked hard to create.
Instead, ensure your coffee concentrate and your dispenser are thoroughly chilled in the refrigerator for at least four hours before pressurized dispensing. For the ultimate experience, place your glassware in the freezer for fifteen minutes prior to pouring to help maintain a low temperature throughout the drinking process.
If you absolutely must have an ice-cold beverage on a hot day, consider using large whiskey-style ice spheres rather than small cubes; the smaller surface area of a single large sphere reduces the rate of gas agitation, allowing you to enjoy a colder temperature for longer without sacrificing that essential, smooth-as-silk nitro finish that home brewers crave.
Common Nitro Coffee Mistakes and How to Fix Them
Why Your Coffee Isn’t Getting a Creamy Head
The hallmark of great nitro coffee is that thick, velvety microfoam head, but achieving it requires the right temperature and gas saturation. If your coffee comes out flat, the most common culprit is using warm liquid.
Nitrogen dissolves much more effectively in cold liquids, so ensure your cold brew is chilled to at least 38°F before charging the canister. Additionally, many home brewers forget to shake the canister vigorously after inserting the Nitrogen (N2) or Nitrous Oxide (N2O) cartridge.
Shaking helps the gas integrate with the lipids in the coffee to create those tiny bubbles. Another fix is to check your pressure; if you are using a keg system, ensure your PSI settings are high enough to force the gas into the liquid.
Finally, always pour with the nozzle completely open and the canister held vertically upside down. This ensures the maximum amount of gas is released through the restrictor plate, resulting in that iconic, creamy cascading effect you crave.
How to Prevent Clogged Siphon Nozzles
Nothing ruins a morning routine faster than a clogged nitro siphon that sputters or refuses to pour. This issue is almost always caused by fine coffee sediment passing through your initial filtration process.
Even the smallest particles can lodge themselves in the tiny holes of the foaming nozzle or the restrictor plate. To fix this, you must double-filter your cold brew using both a metal mesh and a secondary paper filter before pouring it into your dispenser.
Paper filters are essential because they catch the fines and oils that mesh filters miss. If you are already experiencing a clog, disassemble the nozzle and soak the components in warm, soapy water or a dedicated espresso machine cleaner to dissolve any buildup.
In the future, avoid overfilling the canister beyond the maximum fill line, as this leaves insufficient head space for the gas to expand, which can force liquid and sediment into the valve assembly prematurely, leading to mechanical failure and inconsistent pours.
Fixing Bitter or Over-Extracted Cold Brew
Nitro infusion tends to amplify the existing flavors of your coffee, which means any bitterness in your base cold brew will become even more pronounced. If your nitro coffee tastes harsh or metallic, you likely over-extracted the beans during the initial steeping phase.
To fix this for your next batch, try using a coarser grind size, similar to sea salt, which slows down the extraction process. Additionally, monitor your brew time; most cold brews peak between 12 and 18 hours.
Steeping for 24 hours or longer often pulls out unwanted tannins and bitter compounds. If you have already made a bitter batch, you can dilute the concentrate with a small amount of filtered water before charging it with nitrogen. This softens the profile without losing the creamy mouthfeel.
Using high-quality, freshly roasted beans with chocolatey or nutty profiles rather than bright, acidic roasts also helps, as these smoother notes are better suited for the creamy texture of nitrogen infusion.
Frequently Asked Questions
What is nitro coffee and how does it differ from regular cold brew?
Nitro coffee is cold brew coffee infused with nitrogen gas, which creates a rich, creamy texture and a thick foam head similar to a stout beer. While regular cold brew is smooth and sweet, the nitrogen infusion adds a velvety mouthfeel without needing dairy or sugar.
What equipment do I need to make nitro coffee at home?
To make nitro coffee at home, you typically need a dedicated whipped cream dispenser or a specialized nitro cold brew keg system. You will also need nitrogen (N2) or nitrous oxide (N2O) chargers to provide the pressure and carbonation effect.
Can I use a whipped cream dispenser to make nitro coffee?
Yes, a whipped cream dispenser is the most affordable way to make nitro coffee at home. Simply fill the canister with cold brew coffee, seal it, charge it with one nitrogen charger, shake it briefly, and dispense it into a glass.
What is the best type of coffee to use for nitro cold brew?
A concentrated cold brew made from medium to dark roast beans works best, as the chocolatey and nutty notes pair well with the creamy texture. Ensure the coffee is filtered thoroughly through paper to prevent sediment from clogging your dispenser.
Do I use Nitrogen (N2) or Nitrous Oxide (N2O) cartridges?
While N2O (nitrous oxide) is easier to find and provides a sweet creaminess, pure Nitrogen (N2) is preferred for authentic nitro coffee as it creates smaller bubbles and a more persistent foam head. Check if your device is compatible with both before purchasing.
How do I get the perfect ‘cascade’ effect when pouring?
To achieve the iconic cascading bubbles, ensure your cold brew is as cold as possible before charging. Shake the dispenser vigorously for 30 seconds after charging and hold the nozzle at a slight angle against the glass while pouring.
Conclusion
Making nitro coffee at home is a rewarding process that combines the patience of cold brewing with the excitement of kegging. Don’t be afraid to experiment with different beans and pressure settings to find your perfect pour. Now that you have the knowledge, grab your charger and start crafting your own creamy nitro cold brew today.