How To Do Nitro Cold Brew At Home
Craving that velvety, pub-style pour without the coffee shop price tag? You are in the right place. Learning how to do nitro cold brew at home is surprisingly simple once you have the right tools. We will show you how to infuse your favorite beans with nitrogen to achieve that signature creamy foam and smooth finish fast.
What is nitro cold brew and why make it at home?
The difference between regular cold brew and nitro
To master how to do nitro cold brew at home, you must first understand that while both start with a base of coffee grounds steeped in cold water for 12 to 24 hours, the finishing process is what sets them apart.
Regular cold brew is typically served over ice, resulting in a refreshing but standard liquid consistency that highlights the bean’s acidity. In contrast, nitro cold brew is infused with nitrogen gas through a pressurized valve, creating a distinct cascading effect similar to a Guinness stout.
This aeration process eliminates the need for ice, as the drink is served chilled and sparkling with tiny bubbles. By making it yourself, you can control the strength of the concentrate and ensure the base is filtered perfectly before charging it with gas.
Learning this distinction allows you to appreciate the creamy mouthfeel and natural sweetness that occurs when nitrogen molecules displace oxygen, transforming a standard beverage into a luxurious, frothy experience without adding any dairy or artificial sweeteners.
How nitrogen gas changes the texture and flavor
The magic of brewing at home lies in how nitrogen gas physically alters the chemical perception of your coffee. Nitrogen is largely insoluble in water, which means it creates much smaller bubbles than the carbon dioxide found in soda.
These microscopic bubbles provide a velvety, thick texture that coats the tongue, effectively masking the bitterness often associated with lower-quality beans. Furthermore, the infusion process creates a persistent foam head that traps aromatic compounds, enhancing the sensory experience of every sip.
Because the nitrogen bubbles hit the taste buds differently, many home brewers find the coffee tastes naturally sweeter, allowing them to eliminate added sugars and creamers entirely.
When you use a home nitro keg or whipped cream charger, you are essentially performing a physical transformation that reduces perceived acidity while maximizing the smooth finish.
This results in a drink that feels like a dessert but maintains the clean profile of black coffee, providing a sophisticated caffeine kick that is far superior to standard iced options.
Cost savings of DIY vs. coffee shop prices
One of the most compelling reasons to learn how to do nitro cold brew at home is the significant financial advantage. A single glass of nitro at a premium coffee shop can easily cost five to seven dollars, whereas a DIY setup pays for itself in just a few months.
By purchasing coffee beans in bulk and using a reusable nitrogen infuser, your cost per serving drops to less than one dollar. Even when accounting for the price of nitrogen cartridges, the savings are substantial over time.
Most home systems allow you to prepare large batches of concentrate that stay fresh in the refrigerator for up to two weeks, meaning you can enjoy café-quality beverages daily without the daily expense. Additionally, you avoid the hidden costs of travel and impulse purchases at the counter.
Investing in a home nitro kit empowers you to customize your flavor profile using high-quality single-origin beans that would be even more expensive in a retail setting, giving you a luxury experience at a fraction of the commercial price.
Essential equipment for home nitro cold brew
Whipped cream dispensers and nitro siphons
For most beginners, a whipped cream dispenser or dedicated nitro siphon is the most accessible entry point for making nitro cold brew at home. These handheld devices operate by filling a pressurized canister with cold brew concentrate and then injecting a gas charger to aerate the liquid.
To achieve the best results, you should ensure your coffee is thoroughly chilled and filtered through a fine mesh or paper filter to prevent any sediment from clogging the nozzle.
Once the canister is sealed, insert the charger, shake the device vigorously for about thirty seconds to encourage gas absorption, and dispense with the nozzle pointed downward. This method is highly favored because it is cost-effective and space-saving, making it perfect for small kitchens.
While the capacity is typically limited to one liter or less, it provides an excellent way to experience the signature velvety micro-foam and cascading aesthetic of professional nitro coffee without requiring a massive upfront investment in commercial-grade draft equipment.
Nitrogen (N2) vs. Nitrous Oxide (N2O) cartridges
Choosing the correct gas charger is critical for achieving the authentic texture associated with nitro cold brew. Pure nitrogen (N2) cartridges are the industry standard for creating the tiny, persistent bubbles that produce a creamy mouthfeel and a beautiful cascading effect in the glass.
Nitrogen is relatively insoluble in water, which is why it creates such a distinct, thick head of foam. On the other hand, many home users mistakenly reach for nitrous oxide (N2O) cartridges, which are commonly used for making whipped cream.
While N2O will technically carbonate and pressurize your coffee, it often adds a faintly sweet or metallic aftertaste and results in larger bubbles that dissipate quickly. For a true coffee shop experience, always look specifically for 2g or 8g nitrogen chargers.
Using the correct gas ensures that the delicate flavor profile of your cold brew remains untainted while providing the smooth, stout-like body that distinguishes nitro coffee from standard iced coffee preparations.
Dedicated home nitro keg systems
If you are a frequent consumer, investing in a dedicated home nitro keg system offers the most professional and consistent results. These systems, often referred to as ‘mini-kegs,’ typically range from two to five liters and feature a pressurized tap handle similar to those found in craft breweries.
The primary advantage of a keg system is its ability to maintain pressure over several days, allowing you to enjoy fresh nitro coffee on demand without preparing a new canister every time.
Most home units utilize a stout faucet with a restrictor plate, which is essential for forcing the nitrogen-infused coffee through tiny holes to create the iconic creamy head.
While these setups require more counter space and a higher initial cost, they are built with durable stainless steel and are much easier to clean than smaller siphons.
For the ultimate enthusiast, a mini-keg setup provides the necessary volume and pressure to mimic a high-end cafe experience, ensuring your home-brewed coffee is always served with the perfect texture.
How to brew the perfect cold brew concentrate
Best coffee beans for nitro infusion
To achieve that signature velvety texture at home, you must start with the right raw materials. When preparing a concentrate specifically for nitrogen infusion, look for medium to dark roast coffee beans with low acidity.
Since the nitrogen gas enhances the perception of sweetness and creaminess, beans with flavor profiles featuring chocolate, molasses, or toasted nuts perform exceptionally well. Avoid light roasts with high citrus notes, as the nitrogen bubbles can sometimes make floral acidity taste unpleasantly sharp rather than refreshing.
Freshness is paramount; ensure your beans were roasted within the last two weeks to preserve the volatile oils that contribute to a stable foam head. For the best results, use a coarse grind size resembling sea salt.
This specific grind ensures a slow, even extraction that prevents the bitter tannins from overpowering the smooth, buttery mouthfeel that defines a high-quality nitro cold brew experience. Quality beans are the foundation of a professional-grade beverage.
The ideal coffee-to-water ratio
Precision is the secret to a concentrate that stands up to the dilution of ice or the addition of nitrogen gas. For a robust nitro base, the industry standard is a 1:4 or 1:5 coffee-to-water ratio by weight.
This means if you are using 250 grams of coarse coffee grounds, you should add approximately 1,000 to 1,250 grams of filtered water. Using a digital kitchen scale is highly recommended over volumetric measurements like cups, as coffee density varies significantly between different roasts.
This concentrated strength is vital because the process of kegging or using a whipped cream dispenser to infuse nitrogen can slightly mellow the flavor profile. By starting with a high-strength concentrate, you ensure the final glass maintains a bold coffee backbone underneath the thick, cascading micro-foam.
Always use filtered water to ensure no chlorine or mineral off-flavors interfere with the clean taste of your brew, allowing the natural sweetness of the concentrate to shine through perfectly.
Step-by-step steeping and filtering process
Begin by combining your coarse grounds and filtered water in a large glass jar, stirring gently to ensure all grounds are fully saturated. Seal the container and let it steep at room temperature for 12 to 18 hours; avoid exceeding 24 hours to prevent over-extraction and bitterness.
Once the time has elapsed, the filtration stage is critical for nitro success. First, pass the liquid through a stainless steel mesh to remove large particles, then perform a secondary filtration using a paper filter or fine cloth.
This step is essential because any remaining sediment can clog the small valves of your nitro infuser or keg system. After filtering, you will have a clean, sediment-free concentrate ready for the nitrogen charger.
Chill the liquid thoroughly before infusion, as cold liquids absorb nitrogen much more effectively than room temperature ones. Once chilled, pour the concentrate into your nitro pitcher or dispenser, charge it with a nitrogen cartridge, and shake vigorously to create that iconic, creamy pour.
Step-by-step guide to infusing coffee with nitrogen
Preparing the dispenser and filling with coffee
To begin your home nitro journey, start with a high-quality whipped cream dispenser or a dedicated nitro cold brew keg. Ensure the vessel is thoroughly cleaned and chilled, as nitrogen dissolves much more effectively in cold liquids.
Measure out roughly 12 to 16 ounces of your favorite cold brew concentrate or ready-to-drink coffee, making sure it has been double-filtered through a paper filter. This step is critical because even the smallest coffee grounds or sediment can clog the dispenser’s nozzle, leading to a messy and uneven pour.
Pour the filtered coffee into the canister, but be extremely careful not to fill it past the maximum fill line indicated on the side. Leaving adequate headspace for gas expansion is vital for the pressurization process to work correctly.
Once filled, securely screw on the dispenser head, ensuring the rubber gasket is perfectly seated to create an airtight seal. This preparation phase sets the foundation for a professional, cafe-quality beverage right in your own kitchen.
Charging the canister with gas
Once your dispenser is sealed, place a single 8g Nitrous Oxide (N2O) or pure Nitrogen (N2) cartridge into the charger holder. For a authentic creamy texture, pure nitrogen is preferred, though N2O is more common for home whipped cream siphons.
Twist the holder onto the canister’s intake valve until you hear a sharp ‘hiss’ sound, which indicates the gas has been successfully released into the chamber. Immediately after charging, you must shake the canister vigorously for at least 30 to 60 seconds.
This physical agitation is what forces the gas to integrate with the coffee molecules, creating the micro-bubble suspension responsible for that signature velvety mouthfeel. If you are using a larger keg system, you may need to repeat this with a second cartridge depending on the volume of liquid.
After shaking, let the canister rest in the refrigerator for a few minutes. This brief cooling period helps the pressure stabilize, ensuring that the first glass you pour is perfectly carbonated and not just a spray of foam.
The secret to a thick, cascading foam head
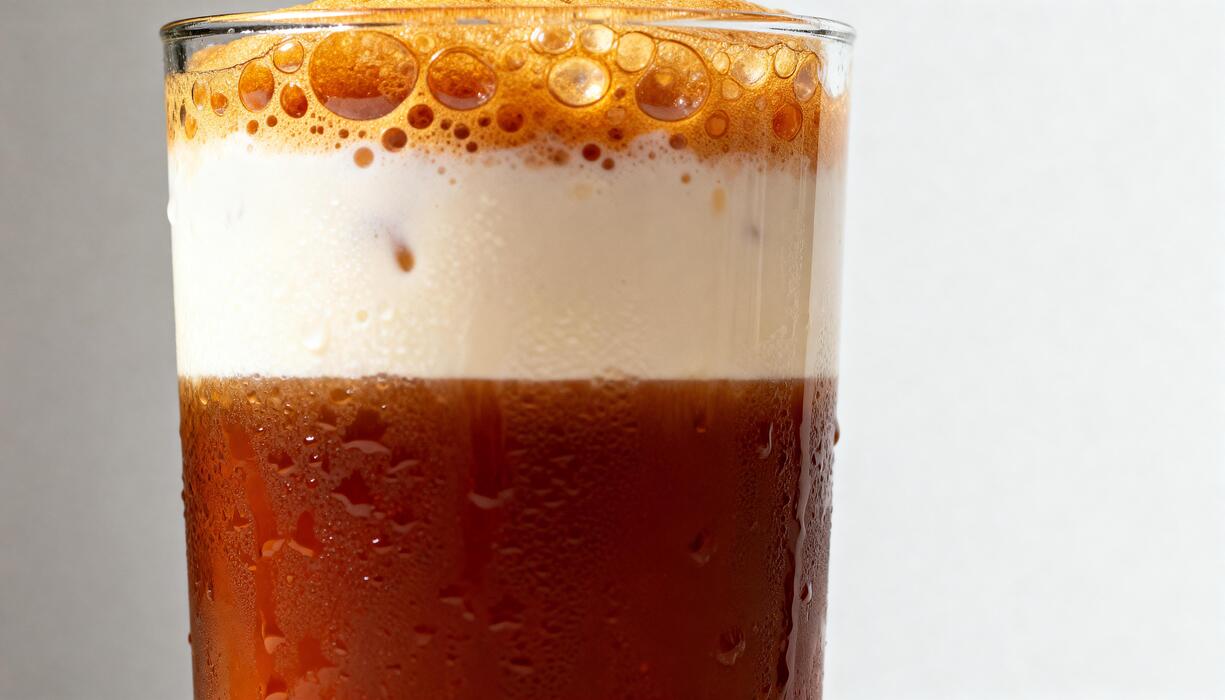
The final step to achieving that iconic visual effect is all about the technique used during the pour. Hold a clear glass at a slight 45-degree angle and depress the trigger or handle gently at first, then fully open it to maintain high pressure.
For the most dramatic cascading micro-bubbles, aim the nozzle against the side of the glass. As the glass fills, slowly straighten it up to allow the nitrogen to settle and rise to the top.
The ‘secret’ to a long-lasting, thick foam head is ensuring the coffee is as close to freezing as possible before you even begin the charging process. If the liquid is too warm, the gas will escape almost instantly, leaving you with flat coffee and no head.
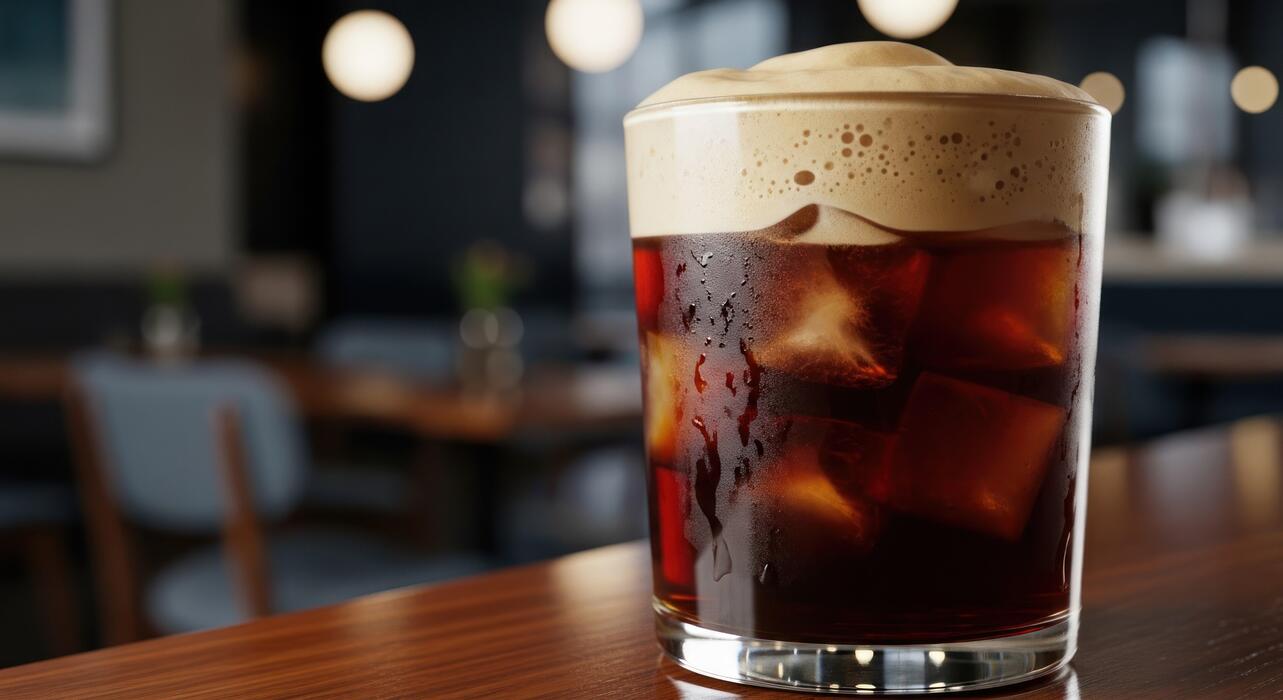
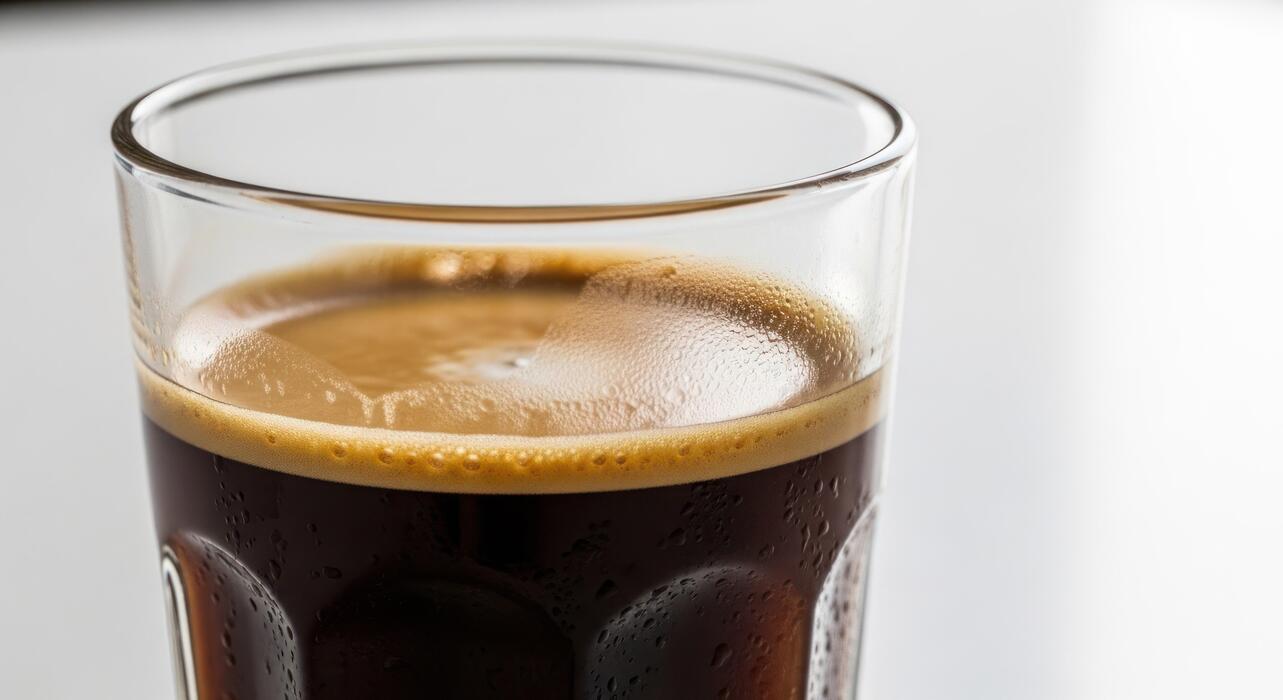
Once poured, wait about thirty seconds to watch the reverse-cascade effect settle into a beautiful, creamy white layer resting atop the dark coffee. This layer should be dense and rich, mimicking the texture of a stout beer, providing a natural sweetness without the need for any added sugar or dairy.
Common mistakes to avoid when making nitro coffee

Using the wrong water temperature
One of the most frequent errors when preparing nitro cold brew at home is using water that is either too warm or excessively cold during the initial extraction phase. To achieve the signature smooth profile, you must use filtered, room-temperature water or slightly chilled water between 60°F and 70°F.
If the water is too hot, it will extract bitter tannins and acidic oils that clash with the creamy texture of the nitrogen. Conversely, using ice-cold water during the steeping process can lead to under-extraction, resulting in a weak, watery base that fails to support a thick foam head.
For the best results, ensure your concentrate is thoroughly chilled in the refrigerator before adding it to the dispenser.
Nitrogen gas dissolves much more effectively in cold liquids, so starting with a cold base is essential for achieving that iconic cascading effect and a velvety mouthfeel that defines a professional-grade home brew experience.
Over-filling the infusion chamber
It is tempting to fill your nitro dispenser to the brim to maximize your yield, but over-filling the canister is a critical mistake that prevents proper aeration. Nitrogen gas requires adequate headspace to expand and pressurize the liquid effectively.
If there is no room for the gas to occupy, the nitrogen will not integrate into the coffee, leaving you with a flat drink and a disappointing lack of foam.
Most home dispensers have a maximum fill line that typically leaves about one-third of the vessel empty; always adhere strictly to these volume markers to ensure safety and quality.
By leaving enough empty space, you allow the gas to build sufficient pressure to force the coffee through the restricted nozzle, which creates the tiny bubbles necessary for a creamy texture.
Remember that the gas needs room to move; crowding the chamber results in a thin pour that lacks the luxurious, stout-like consistency that nitro lovers crave.
Inadequate shaking or agitation
Simply charging the canister with a nitrogen cartridge is not enough to create a perfect brew; you must actively facilitate the infusion through vigorous movement. Many beginners forget to shake the dispenser for at least 30 to 60 seconds after releasing the gas into the chamber.
This physical agitation is what forces the nitrogen molecules to bond with the coffee oils, creating the stable micro-bubbles required for a long-lasting head.
If you skip this step, the gas will simply sit on top of the liquid and escape rapidly when the trigger is pulled, resulting in a splashy, inconsistent pour.
For the most professional results, shake the canister upside down to ensure the gas travels through the entire volume of the liquid. This process ensures that every sip has a consistent, silky texture.
Proper agitation transforms a standard cold brew into a professional-grade beverage by ensuring the nitrogen is fully emulsified within the coffee before it reaches your glass.
Tips for serving and flavoring your nitro brew
The best glassware for the visual cascade
To fully appreciate the mesmerizing visual effect of your homemade nitro cold brew, you must select the right vessel.
The iconic cascading effect, where tiny nitrogen bubbles slowly sink and swirl, is best viewed in a clear, tall glass with a slight inward curve, such as a classic tulip or a high-quality pilsner glass.
Avoid wide-rimmed mugs or opaque ceramics, as these hide the beautiful separation between the dark coffee and the thick, creamy head. Before pouring, ensure your glass is spotlessly clean and free of soap residue, which can prematurely break down the delicate nitrogen bubbles.
Many enthusiasts also recommend pre-chilling your glassware in the freezer for a few minutes. This prevents the glass from warming the liquid upon contact, allowing the nitrogen to remain suspended for a longer duration.
Watching the dark coffee gradually transition into a velvety brown swirl is half the experience, making the right glass an essential tool for any home barista.
Adding syrups and milks without ruining the foam
One of the biggest challenges when flavoring nitro cold brew at home is maintaining that signature silky microfoam. If you add heavy syrups or cold milk directly on top of the pour, the weight can collapse the nitrogen structure instantly.
To avoid this, always incorporate your sweeteners and flavorings into the base cold brew before you charge it with nitrogen or pour it into the glass.
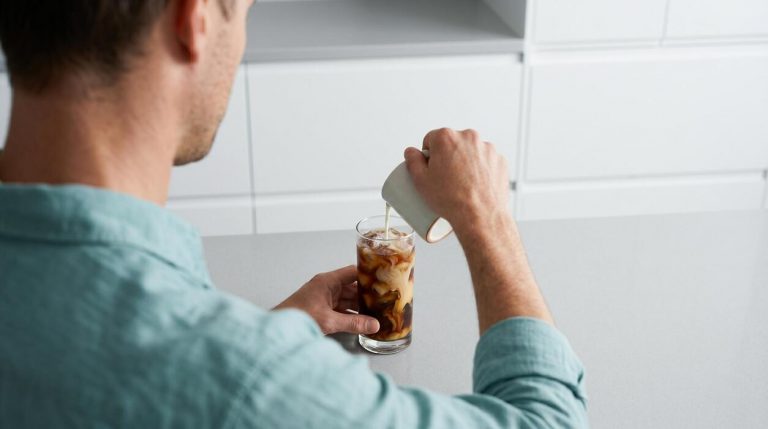
If you prefer adding milk, try a very light splash of oat milk or cream at the very bottom of the glass before pouring the nitro over it. This allows the liquids to integrate naturally without crushing the foam head.
For those who love flavored lattes, consider using a simple syrup instead of thick sauces, as thinner liquids preserve the delicate mouthfeel. If you must add something after the pour, use a long bar spoon to gently stir the bottom layers while leaving the top foam undisturbed.
This ensures a balanced flavor profile while keeping the texture intact.
Temperature control for the smoothest pour
Temperature is the most critical variable when mastering the perfect nitro pour in your kitchen. Nitrogen gas dissolves much more efficiently into liquids at lower temperatures, so your cold brew concentrate should be stored at approximately 35 to 38 degrees Fahrenheit before serving.
If the coffee is too warm, the nitrogen will escape too quickly, resulting in large, aggressive bubbles rather than the desired velvety texture. Furthermore, your nitro canister or kegging system should also be kept as cold as possible during the infusion process.
If you are using a handheld whipped cream dispenser, keep the entire unit in the refrigerator for at least an hour after charging to allow the gas to fully integrate with the oils in the coffee.
A cold environment ensures that when you finally depress the trigger, the pressure release creates a consistently smooth and creamy mouthfeel. Never use ice cubes in the glass, as they disrupt the nitrogen flow; instead, rely on the chilled liquid and glass to maintain the perfect drinking temperature.
How to clean and maintain your nitro equipment
Daily rinsing and deep cleaning steps
To maintain the pristine flavor of your nitro cold brew, you must prioritize daily rinsing after every use. Start by releasing any remaining pressure through the tap, then fill the keg with warm water and a specialized beverage line cleaner.
Shake the canister vigorously to ensure the solution coats all interior surfaces before flushing it through the dispensing nozzle. This prevents coffee oil buildup and mold growth, which can ruin future batches.
For a monthly deep clean, disassemble the tap handle and the stout spout to soak them in a mixture of hot water and citric acid or powdered brewery wash. Use a small nylon brush to scrub the narrow channels where biofilm often accumulates.
Rinse all components thoroughly with fresh water to ensure no chemical residue remains. By keeping the internal pathways sterile, you guarantee that every pour remains creamy, sweet, and free from the metallic or sour off-flavors that result from neglected equipment maintenance routines at home.
Replacing gaskets and O-rings
The integrity of your nitro system relies heavily on the condition of its rubber gaskets and O-rings, which create the airtight seal necessary for nitrogen infusion. Over time, these seals can become brittle, cracked, or compressed, leading to frustrating gas leaks or messy liquid drips.
Inspect these components every few months by applying a thin layer of food-grade silicone lubricant to keep the rubber supple and resilient.
If you notice a hissing sound or a loss of pressure during the infusion process, it is likely time to swap out the main lid seal or the internal valve rings. Always keep a spare parts kit on hand specifically designed for your model to avoid downtime.
When installing new rings, ensure they are seated perfectly flush within their grooves without any twisting. Maintaining these small but vital parts ensures your home setup can handle the high-pressure environment required to produce that signature cascading effect and thick, velvety micro-foam head every single time you brew.
Safe storage for gas cartridges
Properly managing your nitrogen or nitrous oxide supplies is a critical safety aspect of learning how to do nitro cold brew at home. Always store your uninterrupted gas cartridges in a cool, dry place away from direct sunlight or heat sources like stoves and radiators.
High temperatures can cause the internal pressure of the canisters to rise to dangerous levels, potentially leading to accidental discharge or rupture. It is equally important to ensure that the storage area is well-ventilated to prevent any concentrated gas buildup in the event of a slow leak.
Before inserting a new cartridge into your dispenser, check the nozzle for debris and ensure the threads are clean to prevent cross-threading. Never attempt to remove a cartridge while the system is still pressurized; always purge the keg completely first.
By following these safe handling protocols, you protect your equipment from damage and ensure a consistent, high-quality nitrogenation process that delivers the professional-grade texture and flavor profile you expect from a premium nitro coffee.
Frequently Asked Questions
What equipment do I need for nitro cold brew at home?
To make nitro cold brew at home, you typically need a whipped cream dispenser or a dedicated nitro cold brew keg system. You will also need Nitrogen (N2) or Nitrous Oxide (N2O) chargers to infuse the coffee with those signature tiny bubbles.
Can I make nitro cold brew without a specialized machine?
While a pressurized dispenser is the standard method, you can mimic the texture by shaking cold brew concentrate vigorously in a mason jar or using a French press to froth the coffee. However, for the authentic cascading effect and creamy mouthfeel, a nitrogen-charged dispenser is necessary.
How do I infuse the cold brew with nitrogen?
Fill your dispenser with filtered cold brew concentrate, seal it tightly, and insert a nitrogen charger into the holder. Shake the canister for about 30 seconds to ensure the gas dissolves into the liquid, then dispense immediately into a glass.
Should I use N2 or N2O chargers for my coffee?
Pure Nitrogen (N2) is preferred for the classic ‘Guinness-style’ cascade and creamy head without changing the flavor. Nitrous Oxide (N2O) chargers, commonly used for whipped cream, are easier to find and work well but may add a very slight sweetness to the brew.
What is the best coffee-to-water ratio for nitro cold brew?
A strong concentrate works best, usually a 1:4 or 1:8 ratio of coffee grounds to water. Since the nitrogen infusion adds a perceived creaminess, starting with a bold, smooth concentrate ensures the flavor isn’t lost during the dispensing process.
Do I need to add milk or cream to nitro cold brew?
One of the main benefits of nitro cold brew is that the nitrogen bubbles create a creamy, velvety texture and a sweet perception on the palate. Most people drink it black because the process naturally mimics the mouthfeel of added dairy.
Conclusion
Masterfully crafting nitro cold brew at home is both a rewarding and cost-effective endeavor. By focusing on a high-quality cold brew base and utilizing a dedicated nitro infuser, you can achieve that signature velvety texture and cascading foam right in your kitchen. Don’t be afraid to experiment with different coffee beans and pressure settings to find your perfect pour.