How To Make Cold Brew In Pitcher
Making a smooth, refreshing batch of cold brew doesn’t require fancy equipment when you have a simple pitcher in your kitchen. If you are tired of bitter morning coffee, this method is the ultimate game-changer for your routine. In this guide, we will show you exactly how to make cold brew in a pitcher with perfect ratios and zero fuss.
Best Coffee Beans and Ratios for Pitcher Cold Brew
Choosing the Right Roast Profile
When making cold brew in a pitcher, selecting the right coffee beans is the foundation of a successful batch.
For the best results, you should prioritize medium to dark roast profiles, as these beans contain the oils and solubility necessary to produce a rich, chocolatey flavor during the long steeping process.
Light roasts often possess delicate floral or acidic notes that can become muted or unpleasantly sour when brewed with cold water over several hours. Darker roasts, however, develop deep caramel and nutty undertones that thrive in a low-acid environment.
Look for beans labeled with tasting notes of cocoa, brown sugar, or molasses to ensure your pitcher cold brew has that signature smooth finish.
Additionally, because the cold brewing process is incredibly forgiving, you do not always need to use expensive single-origin beans; a high-quality freshly roasted blend often provides a more balanced and consistent profile for daily drinking. Always check the roast date to ensure maximum freshness before you begin.
Why Coarse Grinds Matter Most
The texture of your coffee grounds is the most critical technical factor when learning how to make cold brew in a pitcher. You must use a consistent extra-coarse grind, which should resemble the texture of sea salt or cracked peppercorns.
Using a fine or medium grind will lead to over-extraction, resulting in a bitter, astringent taste that ruins the mellow profile cold brew is famous for.
Furthermore, fine particles are notoriously difficult to filter out of a pitcher, often leaving a gritty silt or cloudy sediment at the bottom of your container.
A coarse grind allows water to flow freely around the large surface area of the coffee, facilitating a slow and gentle extraction of flavors without pulling out harsh tannins.
If you are grinding at home, use a burr grinder rather than a blade grinder to achieve the uniformity needed for a clean cup. This structural integrity ensures that after the sixteen-hour steep, your final concentrate remains vibrant, crisp, and easy to strain through a mesh filter.
The Ideal Coffee-to-Water Ratio
Achieving the perfect strength requires a specific mathematical approach to your pitcher setup. For a versatile concentrate that you can dilute later, the gold standard is a 1:4 coffee-to-water ratio by weight.
This means for every one cup of coarse grounds, you should add four cups of filtered water to your pitcher. If you prefer a ready-to-drink version that is less intense, a 1:8 ratio is often recommended for a lighter, smoother experience.
Using a digital scale is the most accurate way to measure, but if you are using volume, aim for approximately one ounce of coffee for every eight ounces of water. Once the steeping period is complete, you will have a potent base that can be customized.
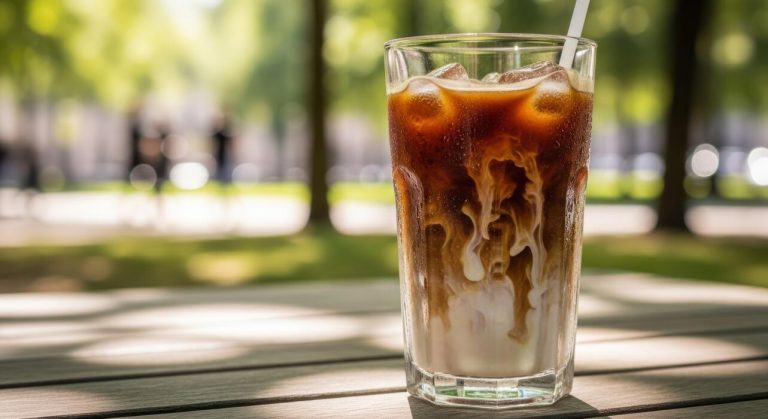
You can serve it over ice, mix it with equal parts water, or add your favorite milk. Remember that using filtered water is just as important as the ratio itself, as it prevents mineral buildup or chlorine from masking the natural sweetness of the beans.
Consistency in these measurements ensures every pitcher is perfect.
Essential Equipment for Making Cold Brew at Home

Selecting the Best Glass or Plastic Pitcher
When learning how to make cold brew in a pitcher, the material of your vessel significantly impacts the flavor profile and maintenance of your coffee.
A borosilicate glass pitcher is widely considered the gold standard because it is non-porous and resistant to thermal shock, ensuring that no residual oils or odors from previous batches linger to ruin your fresh brew. Glass is also completely BPA-free and easy to sanitize in a dishwasher.
Alternatively, if you prefer a more durable and lightweight option for a busy kitchen, high-quality BPA-free plastic pitchers offer excellent impact resistance and portability.
Regardless of the material, you must ensure the pitcher features an airtight seal or a secure lid to prevent the coffee from absorbing unwanted odors from other food items in your refrigerator during the long fourteen to twenty-four hour steeping period.
Choosing a pitcher with a wide mouth will also make it much easier to stir the grounds and clean the bottom surfaces thoroughly after use.
Filter Options: Mesh Bags vs. Paper Filters
The filtration method you choose for your pitcher cold brew will define the body and clarity of your final beverage.
Using reusable fine-mesh nylon or stainless steel bags is an eco-friendly and convenient approach that allows more of the coffee’s natural oils to pass through, resulting in a rich, full-bodied mouthfeel.
These bags are designed to sit directly in the pitcher, making the removal of grounds simple and mess-free once the brewing cycle is complete. On the other hand, if you prefer a crisp, clean cup with zero sediment, disposable paper filters are the superior choice.
Paper filters are highly effective at trapping fine particulates and bitter oils, yielding a bright and smooth concentrate. Many home brewers find that a hybrid approach works best, using a mesh sleeve for the initial steep and then performing a secondary pour through a paper filter to achieve professional-grade clarity.
Whichever you choose, ensure the filter is large enough to allow the water to circulate freely around the coarse coffee grounds.
Measuring Tools for Consistency
To master how to make cold brew in a pitcher, you must move beyond guesswork by utilizing precise measuring tools for every batch.
A digital kitchen scale is the most essential piece of equipment for achieving a consistent brew, as measuring coffee by weight rather than volume accounts for different bean densities and roast levels.
Aiming for a standard 1:4 or 1:5 coffee-to-water ratio by weight ensures that your concentrate is strong enough to be diluted with milk or water later without tasting weak.
If you do not have a scale, using a standardized set of measuring cups can work, but you must be diligent about leveling off your scoops.
Additionally, a clear pitcher with integrated volume markings on the side allows you to monitor exactly how much water you are adding, which is crucial for replicating your favorite recipes.
Maintaining a consistent ratio is the secret to avoiding batches that are either too watery or unpleasantly bitter, giving you a reliable caffeine kick every single morning.
Step-by-Step Guide to Brewing in a Pitcher

Mixing the Coffee and Water
To begin your cold brew journey, start by selecting a high-quality, coarse grind that resembles sea salt to prevent over-extraction.
Add the coffee grounds directly into your pitcher using a standard ratio of one part coffee to four parts water for a strong concentrate, or one to eight for a ready-to-drink beverage.
Slowly pour filtered, room-temperature water over the grounds in a circular motion to ensure every particle is thoroughly saturated. Use a long-handled spoon to gently stir the mixture, breaking up any dry clumps or air pockets that might hinder extraction.
It is crucial to leave about an inch of headspace at the top of the pitcher to allow for natural expansion of the beans. Covering the pitcher with a tight lid or plastic wrap is essential to prevent odors from contaminating the flavor profile.
By focusing on a consistent ratio and gentle mixing, you establish the perfect foundation for a smooth, low-acid coffee experience that highlights the unique notes of your chosen beans.
Steeping Times for Room Temp vs. Fridge
The location of your pitcher during the steeping process significantly dictates the final flavor and caffeine intensity. If you choose to steep at room temperature on the counter, the extraction process happens more rapidly, typically requiring only 12 to 15 hours to reach peak flavor.
This method often results in a bolder, more robust profile. Conversely, steeping in the refrigerator slows down extraction, necessitating a longer duration of 18 to 24 hours to achieve the same strength. Refrigerated steeping is favored for producing a cleaner, brighter taste with more subtle floral or fruity nuances.
Regardless of the environment, avoid exceeding the 24-hour mark, as this can lead to the extraction of bitter tannins and woody flavors that ruin the smooth finish. Monitor the time closely and consider a shorter steep if you are using a finer grind.
Finding the balance between temperature and time allows you to customize the brew strength to your specific palate while maintaining a refreshing, crisp quality.
Straining and Filtering the Concentrate
Once the steeping time is complete, the final step is to separate the liquid gold from the spent grounds. Carefully pour the mixture through a fine-mesh sieve to catch the largest particles, then follow up with a secondary filtration using a paper filter or a clean nut milk bag.
This dual-stage process is vital for achieving a sediment-free, professional-grade clarity. Do not press or squeeze the grounds during this stage, as doing so forces bitter oils and fine silt into your beverage, resulting in a cloudy appearance and harsh aftertaste.
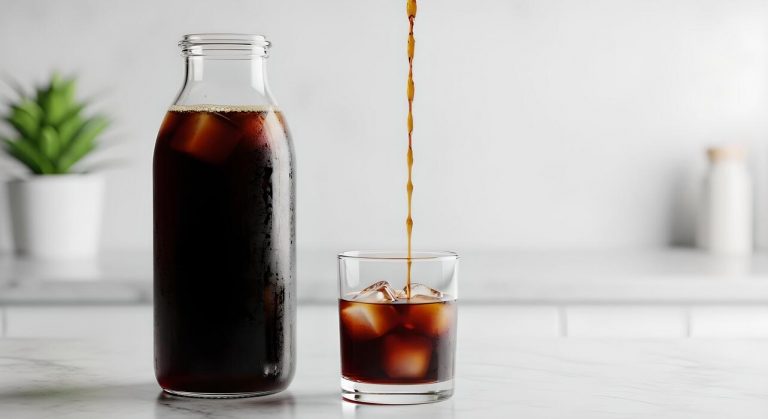
Let gravity do the work to ensure the smoothest possible texture. After filtering, you are left with a potent cold brew concentrate that can be stored in the refrigerator for up to two weeks.
When you are ready to serve, dilute the concentrate with water, milk, or ice according to your personal preference. Properly filtered cold brew provides a versatile base for various drinks, allowing you to enjoy a cafe-quality beverage right from your own kitchen pitcher.
Common Mistakes to Avoid When Using a Pitcher
Using Fine Grinds by Accident
The most frequent error when learning how to make cold brew in a pitcher is selecting a fine or medium grind size. Because the immersion process lasts for many hours, fine particles extract far too quickly, resulting in a muddy texture and an overly harsh taste profile.
To achieve a clean and smooth cup, always use a coarse, pebble-like grind similar to sea salt. This specific texture allows water to flow freely around the beans without clogging your pitcher’s built-in filter or making the final concentrate cloudy.
If you only have pre-ground coffee intended for drip machines, you will likely end up with a gritty sediment at the bottom of your pitcher. For the best results, invest in a quality burr grinder to ensure consistency across every batch.
Using the correct coarse setting ensures that the water extracts the sweet, chocolatey notes of the coffee without pulling in the bitter silt that ruins the refreshing experience of homemade cold brew.
Over-Steeping and Bitter Flavors
Many beginners believe that leaving coffee grounds in the pitcher for several days will result in a stronger, better concentrate. However, over-steeping is a major mistake that leads to an unpleasant, woody, or acidic flavor profile.
The ideal window for cold brewing at room temperature is typically between 12 to 18 hours, while refrigerated brewing can extend up to 24 hours. Once you pass the 24-hour mark, the water begins to extract organic compounds that are better left behind, turning your smooth beverage into something bitter.
To prevent this, set a timer immediately after adding water to your pitcher to track the duration accurately. If you find the flavor too weak, try increasing the coffee-to-water ratio next time rather than extending the steeping clock.
Once the time is up, remove the filter core or strain the liquid into a clean vessel to stop the extraction process entirely. This discipline guarantees a balanced, mellow profile that characterizes high-quality cold brew coffee.
Improper Storage Techniques
Once you have successfully brewed your batch, how you store it in the pitcher is critical for maintaining freshness. A common mistake is leaving the finished concentrate in an unsealed pitcher or keeping it in the fridge for too long.
Exposure to oxygen is the enemy of flavor, as it causes the coffee to oxidize and take on a stale, metallic taste.
Always ensure your pitcher has an airtight seal or lid to lock in the aroma and prevent the coffee from absorbing odors from other foods in your refrigerator, like onions or leftovers. Additionally, remember that while cold brew lasts longer than hot coffee, it still has a shelf life.
For the peak tasting experience, you should consume your concentrate within 7 to 10 days. If you notice a sour smell or a significant change in clarity, it is time to discard the batch and start fresh.
Proper storage ensures that every glass you pour from your pitcher remains as vibrant and delicious as the first.
How to Dilute and Serve Your Cold Brew

Mixing with Water or Milk
Since cold brew made in a pitcher is typically a heavy concentrate, the first step is finding your ideal balance. For a standard black coffee experience, a 1:1 ratio of concentrate to filtered water is the professional starting point.
If you prefer a smoother, creamier beverage, swap the water for dairy milk or plant-based alternatives like oat or almond milk. The richness of the cold brew stands up well against fats, preventing the drink from tasting thin.
Always pour the concentrate into your glass first before adding the liquid mixer to ensure even integration. If the result feels too intense, continue adding small increments of liquid until the profile matches your preference.
Remember that cold brew is significantly less acidic than hot coffee, so you might find you need less dilution than expected to enjoy the natural chocolatey and nutty notes.
Keeping a pre-mixed carafe in the fridge can save time during busy mornings while maintaining a consistent flavor profile for every single serving you pour.
Adding Sweeteners and Syrups
One common mistake when sweetening cold brew is using granulated sugar, which often fails to dissolve in cold liquids and settles at the bottom. Instead, use a simple syrup or liquid sweetener to ensure the flavor is distributed uniformly throughout the pitcher.
You can easily make your own by dissolving equal parts sugar and hot water, then cooling it before use. For those looking for more complexity, flavored syrups like vanilla, caramel, or hazelnut pair exceptionally well with the mellow profile of pitcher-brewed coffee.
If you prefer natural options, honey or agave nectar are excellent choices, though they should be whisked into a small amount of room-temperature concentrate before being added to the chilled glass.
For a unique twist, consider adding a pinch of sea salt to your sweetened brew; this helps to cut through any lingering bitterness and enhances the natural sweetness of the beans.
Always taste your brew before sweetening, as the low-acid immersion process naturally highlights the inherent sugars within the coffee grounds themselves.
Serving Over Ice Without Dilution
To prevent your cold brew from becoming watery as you drink it, the best strategy is to use large, slow-melting ice cubes or specialized coffee ice. Standard small cubes have a high surface area and melt rapidly, quickly ruining the texture of your carefully prepared pitcher brew.
A professional tip is to freeze some of your cold brew concentrate in an ice tray; as these cubes melt, they actually strengthen the beverage rather than weakening it. When pouring, fill your glass with ice first, then add the concentrate and any mixers.
This helps rapidly chill the liquid without causing immediate melt-off. If you are serving a crowd from a large pitcher, consider using a chilled double-walled glass to maintain the temperature for longer periods.
For the ultimate refreshing experience, ensure your pitcher has been refrigerated for at least four hours before serving.
This ensures that the base liquid is already at an optimal temperature, meaning the ice only has to maintain the coldness rather than doing the heavy lifting of cooling down a room-temperature concentrate.
Tips for Keeping Your Cold Brew Fresh
Shelf Life in the Refrigerator
Once you have successfully mastered how to make cold brew in pitcher containers, understanding the timeline for peak freshness is essential for the best tasting experience. Generally, a concentrated cold brew batch will maintain its optimal flavor profile for seven to ten days when kept strictly refrigerated.
If you have already diluted the concentrate with water or milk, that window shrinks significantly to about two to three days. To maximize this duration, always keep your pitcher tightly sealed with a lid to prevent the coffee from absorbing surrounding food odors or oxidizing prematurely.
Oxygen is the primary enemy of fresh coffee, so choosing a pitcher with an airtight silicone seal is highly recommended. For the absolute best results, try to consume your brew within the first week.
If you find you have made too much to finish, you can freeze the leftovers into ice cubes to use for future iced coffees without watering them down. Proper temperature control ensures every glass remains crisp and bold.
Signs Your Cold Brew Has Gone Bad
Even when stored correctly in a high-quality pitcher, cold brew will eventually lose its vibrancy and begin to degrade.
The first indicator that your batch is past its prime is a noticeable shift in aroma; fresh cold brew should smell nutty or chocolatey, but spoiled coffee often develops a sour, dusty, or even metallic scent.
Visually, you should look for any unusual cloudiness or sediment that appears fuzzy, which could indicate mold growth, especially if the pitcher was not perfectly sterile. When it comes to taste, old cold brew will lose its characteristic sweetness and develop an unpleasant acidic tang or a flat, cardboard-like bitterness.
If you take a sip and the flavor feels thin or overly vinegary, it is time to discard the batch and start over.
Trust your senses over the calendar; if the brew looks, smells, or tastes off in any way, it is safer to brew a fresh pitcher than to risk an upset stomach or a bad morning drink.
Cleaning Your Pitcher to Prevent Odors
Maintaining a pristine brewing vessel is a critical step in the process of learning how to make cold brew in pitcher sets that consistently taste great. Coffee beans contain natural oils that can cling to the walls of plastic or glass containers, eventually turning rancid and ruining future batches.
After every use, you must thoroughly wash your pitcher with warm, soapy water, paying close attention to any rubber gaskets or filter mesh where residue tends to hide.
For a deeper clean, a mixture of white vinegar and water or a specialized coffee equipment cleaner can help break down stubborn buildup and neutralize lingering coffee smells. Avoid using abrasive sponges that could scratch the interior, as these tiny grooves can harbor bacteria over time.
Always ensure the pitcher is completely dry before starting your next brew to prevent trapped moisture from creating off-flavors. A clean environment is the foundation of a high-quality concentrate, ensuring that the only thing you taste in your glass is the pure, smooth profile of your favorite coffee beans.
Ways to Customize Your Pitcher Cold Brew Recipe
Infusing with Cinnamon or Vanilla
One of the simplest ways to elevate your pitcher cold brew is by infusing aromatics directly into the grounds before the steeping process begins. To add a warm, woody depth, try placing a cinnamon stick or a half-teaspoon of ground cinnamon into your pitcher alongside the coffee.
If you prefer a smoother, floral profile, a split vanilla bean or a dash of pure vanilla extract works wonders to round out the natural acidity of the beans.
Because cold brew is a long extraction process, these flavors meld seamlessly with the coffee oils, resulting in a sophisticated beverage that tastes gourmet without the need for sugary syrups. Ensure you stir the mixture thoroughly to distribute the spices evenly throughout the water.
This method ensures that every glass poured from your pitcher carries a consistent, subtle fragrance that enhances the beverage’s natural sweetness. By customizing your brew at the start, you create a signature house blend that is both refreshing and aromatic.
Making Nitro-Style Coffee at Home
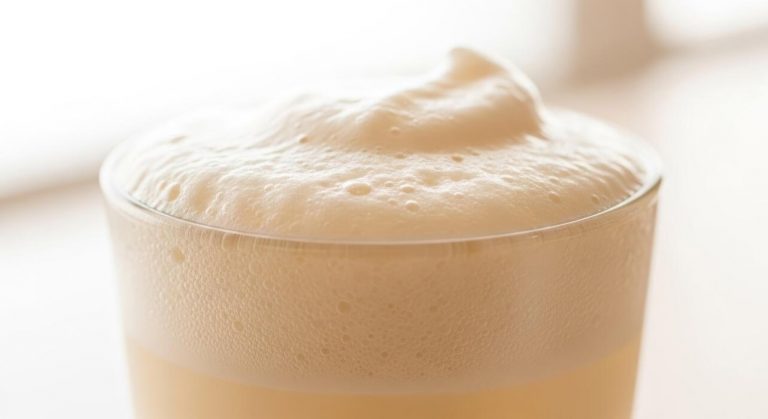
You do not need a professional tap system to enjoy the creamy, velvety texture of nitro-style coffee from your homemade pitcher brew. Once your cold brew concentrate is ready and filtered, you can mimic the iconic micro-foam texture using a simple handheld milk frother or a standard French press.
To achieve this, pour your cold brew into a separate container and use the frothing wand at a slight angle to incorporate tiny air bubbles, creating a thick, cascading head of foam. Alternatively, pumping the plunger of a French press rapidly for thirty seconds will aerate the liquid beautifully.
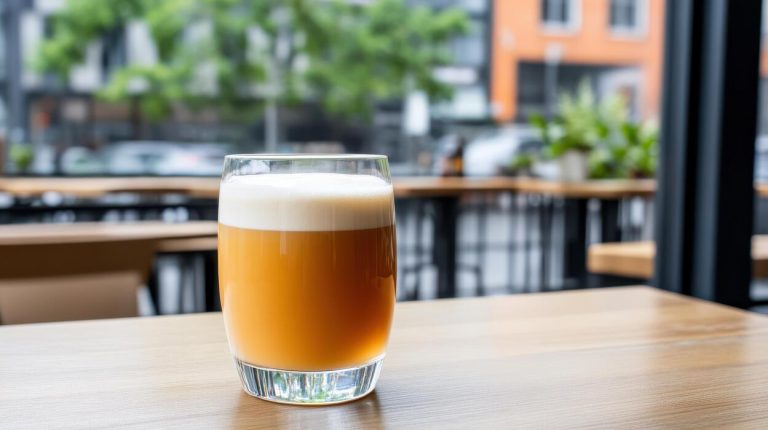
This technique changes the mouthfeel of the coffee, making it feel heavier and smoother on the palate without adding any dairy or fats. Serving this aerated version immediately in a chilled glass preserves the tiny bubbles, giving you that luxurious, draft-pour experience right in your kitchen.
It is a fantastic way to impress guests using the basic batch you already have chilling in your refrigerator.
Creating Seasonal Flavor Variations
Your pitcher cold brew can easily be adapted to match the changing seasons by incorporating fresh ingredients during or after the brewing cycle.
For a bright summertime treat, consider adding fresh orange zest or a few sprigs of mint to the pitcher; the citrus oils provide a zesty brightness that cuts through the richness of dark roasts.
As the weather cools, transition to an autumnal profile by stirring in pumpkin spice blends or a hint of nutmeg to your filtered concentrate.
During the winter months, a small amount of cocoa powder or a piece of dark chocolate dissolved into the brew creates a decadent, mocha-like experience that feels festive and indulgent.
The key is to experiment with ratios, starting with small amounts of seasonal additives so they do not overpower the coffee’s core flavor. Using your pitcher as a canvas allows you to rotate these profiles monthly, ensuring your caffeine routine never feels stagnant or boring while utilizing seasonal pantry staples.
Frequently Asked Questions
What is the best coffee-to-water ratio for a cold brew pitcher?
A standard ratio is 1 cup of coarsely ground coffee to 4 cups of cold, filtered water. If you prefer a stronger concentrate to mix with milk or water later, use a 1:2 or 1:3 ratio.
How long should I let cold brew steep in the pitcher?
For optimal flavor, let the coffee steep at room temperature or in the refrigerator for 12 to 24 hours. Steeping for less than 12 hours may result in a weak, acidic brew, while going over 24 hours can lead to bitterness.
Do I need a special filter to make cold brew in a pitcher?
You can use a pitcher with a built-in mesh infuser, or simply mix the grounds directly in the water. If mixing directly, you will need to strain the coffee through a fine-mesh sieve, cheesecloth, or a paper coffee filter before serving.
Should I use coarse or fine coffee grounds for pitcher cold brew?
Always use a coarse grind, similar to the consistency of sea salt. Fine grounds can make the coffee over-extracted and bitter, and they are much harder to filter out of the pitcher, often leaving sediment at the bottom.
Should I steep the cold brew in the fridge or on the counter?
Both methods work, but steeping in the refrigerator is recommended for a cleaner, crisper taste. If you steep on the counter at room temperature, the extraction happens faster, so you should aim for the shorter end of the 12-24 hour window.
How long does pitcher-made cold brew stay fresh?
Once the grounds are filtered out, cold brew can be stored in a sealed pitcher in the refrigerator for up to 7 to 10 days. For the best flavor, try to consume it within the first week.
Conclusion
Making cold brew in a pitcher is a simple, cost-effective way to enjoy smooth, cafe-quality coffee at home. By following the right coffee-to-water ratio and allowing enough time for a slow steep, you can create a versatile concentrate that lasts for days. Now that you have mastered the basics, feel free to experiment with different beans and steeping times. Grab your favorite pitcher today and start brewing your own refreshing, low-acid coffee blend.