How To Make Vanilla Cream Cold Brew
If you are tired of spending five dollars at the coffee shop every morning, you have come to the right place. Learning how to make vanilla cream cold brew at home is surprisingly simple and tastes even better than the cafe version. In this guide, we provide a foolproof recipe that combines smooth coffee with a velvety, sweet foam. We will show you exactly how to achieve that perfect signature swirl in minutes so you can master this refreshing drink today.
What is Vanilla Sweet Cream Cold Brew?
The difference between cold brew and iced coffee
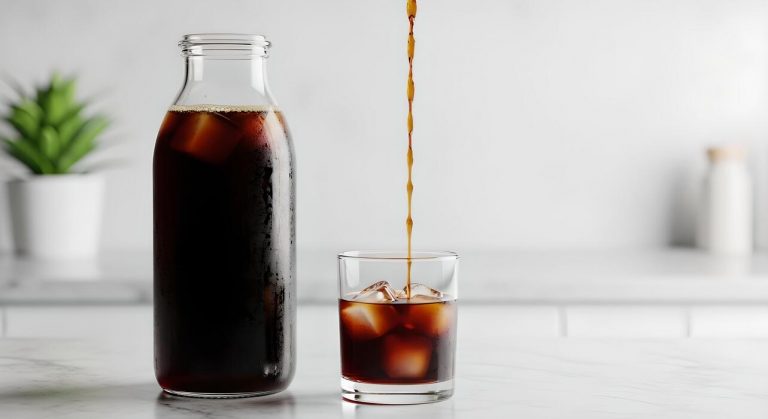
To make a perfect vanilla cream cold brew, you must first understand the foundation of the drink. Unlike traditional iced coffee, which is brewed hot and then quickly chilled over ice, cold brew is created by steeping coarse coffee grounds in room temperature water for twelve to twenty-four hours.
This extended extraction process results in a flavor profile that is significantly smoother, naturally sweeter, and much lower in acidity than its heat-extracted counterpart.
When you learn how to make vanilla cream cold brew at home, focusing on this slow-steeping method ensures that the coffee provides a robust, chocolatey base that won’t become watered down when ice is added.
Iced coffee often carries a bitter or sharp aftertaste because the heat releases oils and acids that can become unpleasant when cold.
By choosing a dedicated cold brew concentrate, you create a velvety liquid canvas that allows the delicate floral notes of the vanilla bean and the richness of the heavy cream to shine without being overpowered by burnt or sour notes.
Key ingredients in the vanilla cream topping
The secret to replicating that signature coffee shop texture lies in the specific ratio of your topping ingredients. To achieve the ideal consistency, you should combine heavy whipping cream, 2% milk, and high-quality vanilla syrup.
The mixture is lightly whisked or frothed until it reaches a thickened, pourable state often referred to as ‘sweet cream.’ Unlike stiff whipped cream, this topping is designed to cascade through the dark coffee in beautiful silken ribbons.
For the best results, use a pure vanilla extract or bean paste to ensure the flavor tastes authentic rather than artificial.
When you pour this mixture over your cold brew, the heavy cream provides the necessary fat for a luxurious mouthfeel, while the milk lightens the density so the cream can partially integrate with the coffee.
Adding a pinch of sea salt can also help to balance the sweetness of the syrup, making the entire beverage taste more complex and professional. Always ensure your ingredients are chilled before mixing to maintain the stability of the foam.
Why this drink is a fan favorite
This beverage has earned its status as a top-tier choice because it offers the perfect equilibrium between a bold caffeine kick and a decadent dessert-like experience. Fans love it because the natural sweetness of the cold brew complements the vanilla infusion, requiring less added sugar than a standard latte.
The visual appeal of the white cream swirling into the dark coffee creates an aesthetic experience that is just as satisfying as the taste itself. Furthermore, it is incredibly customizable; you can adjust the sweetness levels or use dairy-free alternatives like oat milk to suit your dietary needs.
Because the cold brew base is so potent, the drink maintains its integrity and strength even as the ice melts during a long commute or a slow morning at home. It provides a refreshing boost of energy without the heavy, syrupy finish found in many other flavored coffee drinks.
Mastering this recipe allows you to enjoy a premium cafe-quality luxury every day while saving money and controlling the quality of every single ingredient used.
Essential Equipment for Home Brewing
Best cold brew makers and pitchers
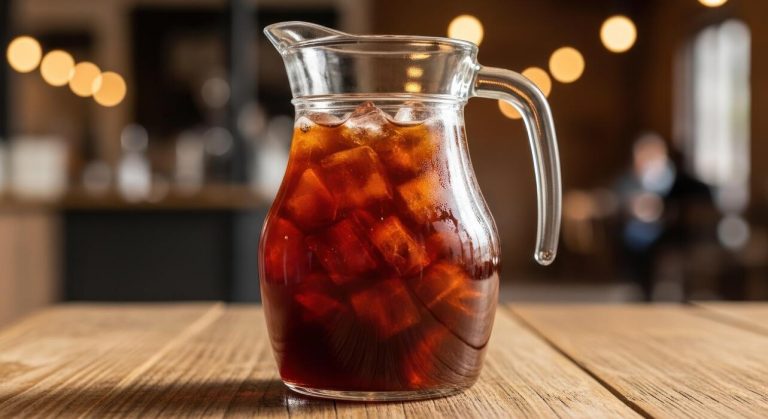
To achieve the smooth base required for a professional vanilla cream cold brew, investing in a dedicated steeping pitcher is a game-changer. Look for models featuring fine-mesh stainless steel filters that allow water to circulate freely around coarse grounds while preventing sediment from clouding your concentrate.
A high-capacity glass carafe is ideal because it maintains a clean flavor profile and fits easily inside your refrigerator door during the long twelve-to-twenty-four-hour extraction process.
When selecting your equipment, ensure the filter is long enough to reach near the bottom of the vessel, which allows for smaller batches if you only need a few servings.
Using a dedicated cold brew system simplifies the cleanup process significantly, as you can simply lift the filter out once the steeping time is complete.
This reliable setup ensures your coffee base remains low in acidity and naturally sweet, providing the perfect canvas for your homemade vanilla cream topping and helping you replicate the cafe experience right in your own kitchen.
Using a French press for cold brew
If you do not want to purchase a specialized pitcher, a standard French press is an excellent alternative for making cold brew concentrate. The built-in plunger mechanism acts as a built-in strainer, though you must be careful to use a very coarse grind to avoid a muddy texture.
Simply combine your coffee and cold filtered water in the carafe, stir gently to ensure all grounds are saturated, and place the lid on top with the plunger in the upright position.
After steeping for at least fifteen hours, slowly press the plunger down to separate the grounds from the liquid. For a truly polished vanilla cream cold brew, consider pouring the resulting liquid through a secondary paper filter to remove fine particles that the metal mesh might have missed.
This method is highly effective for beginners because it utilizes common kitchen gear while still producing a rich, bold concentrate that stands up well to the addition of heavy cream and sweet vanilla syrup for a luxurious finish.
Tools for frothing the vanilla cream
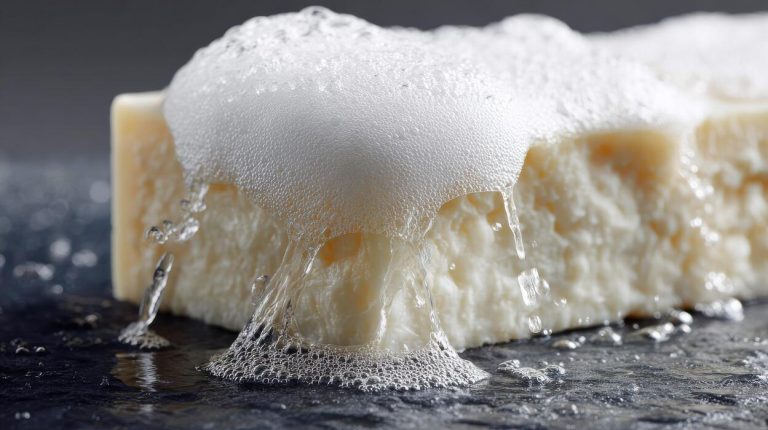
The defining characteristic of this beverage is the velvety, cloud-like layer of cream, which requires specific tools to master. A handheld milk frother, often called a power whisk, is the most efficient tool for aerating a mixture of heavy cream, milk, and vanilla syrup into a thick foam.
For those who prefer a more automated approach, an electric milk frother with a ‘cold foam’ setting can produce consistent results with the simple touch of a button.
If you lack electronic gadgets, a small mason jar works surprisingly well; just tighten the lid and shake the cream mixture vigorously for about sixty seconds until it doubles in volume.
Regardless of the tool you choose, the goal is to incorporate enough air to create a stable micro-foam that sits on top of the coffee rather than immediately mixing in.
This layered effect is crucial for the sensory experience of a vanilla cream cold brew, allowing the sweet cream to slowly cascade into the dark coffee concentrate as you sip.
How to Make the Perfect Cold Brew Base
Choosing the right coffee beans and roast
To craft a vanilla cream cold brew that rivals any high-end cafe, your journey begins with selecting the right bean. For cold extraction, medium to dark roasts are the gold standard because they possess the chocolatey, nutty, and low-acid profiles that pair beautifully with sweet cream.
Since cold brewing doesn’t use heat to pull out bright acidity, a light roast can often taste sour or thin rather than floral. Look for beans labeled with tasting notes of cocoa, caramel, or molasses to ensure a robust foundation that won’t be overshadowed by the vanilla syrup.
Furthermore, always prioritize coarsely ground coffee resembling sea salt; a fine grind will lead to over-extraction and a muddy, bitter liquid that ruins the smooth mouthfeel.
Using high-quality, freshly roasted beans ensures that your base has enough depth to cut through the heavy cream, resulting in a balanced drink that highlights the natural sweetness of the coffee alongside your added vanilla flavors.
The ideal coffee-to-water ratio
Mastering the strength of your vanilla cream cold brew requires a precise coffee-to-water ratio, typically favoring a concentrated approach.
A standard 1:4 or 1:5 ratio (one cup of coffee grounds to four or five cups of filtered water) creates a versatile concentrate that is powerful enough to maintain its character when diluted.
This high concentration is essential because you will eventually add ice, vanilla syrup, and a significant splash of cream, all of which can easily water down a weaker brew. When preparing your base, use filtered water at room temperature to ensure a clean taste free from chlorine or mineral interference.
Gently stir the grounds to ensure they are fully saturated, but avoid aggressive mixing which can release unwanted tannins.
This concentrated method allows you to customize each glass; if the flavor is too intense, you can simply add a splash of water, but starting with a strong, bold base is the secret to achieving that professional, velvety texture that defines the perfect homemade vanilla cream cold brew experience.
Steeping times for maximum flavor
Patience is the final ingredient in achieving the perfect cold brew base, as the extraction process relies on time rather than heat. For a smooth, low-acid profile that complements vanilla cream, aim for a steeping window of 12 to 18 hours.
If you steep for less than 12 hours, the flavor may be weak and underdeveloped; however, exceeding 24 hours often results in a woody, bitter taste that is difficult to mask.
For the most consistent results, steep your coffee at room temperature on the counter for the first 12 hours to accelerate the extraction of sweet compounds, then move it to the fridge if you prefer a slower finish.
Once the time is up, use a dual-filtration method—such as a mesh strainer followed by a paper filter—to remove all sediment. This ensures a crystal-clear concentrate that provides a sleek canvas for your vanilla cream.
By timing your brew perfectly, you capture the peak sweetness and richness of the beans, creating a professional-grade beverage that is naturally smooth and incredibly refreshing.
How to Make Homemade Vanilla Sweet Cream
The 3-ingredient vanilla cream recipe
To replicate the signature taste of a vanilla cream cold brew at home, you only need three simple ingredients: heavy cream, 2% milk, and vanilla syrup. The secret to the perfect texture lies in the ratio of fats to liquids.
Combine one cup of heavy whipping cream with half a cup of 2% milk and five tablespoons of vanilla syrup in a clean glass jar or pitcher. Using a mix of both heavy cream and milk ensures the topping is decadent without being overly thick or heavy.
Gently whisk or stir the components together until they are fully integrated. This homemade mixture creates a velvety, pourable liquid that cascades beautifully through your cold brew coffee. For the best results, always use cold dairy straight from the refrigerator to maintain stability.
You can store this prepared cream in an airtight container for up to five days, making it a convenient solution for your daily caffeine routine. This straightforward method delivers professional quality results in minutes.
How to make your own vanilla syrup
While store-bought syrups work well, creating a custom vanilla simple syrup elevates your cold brew to a gourmet level. Start by combining equal parts granulated sugar and water in a small saucepan over medium heat.
Stir the mixture constantly until the sugar has completely dissolved, then remove the pan from the heat to prevent over-reduction. Once the liquid is slightly cooled, stir in two teaspoons of high-quality pure vanilla extract or the seeds from one scraped vanilla bean for those characteristic black specks.
Using real vanilla bean provides a deeper, more complex flavor profile that complements the nutty notes of cold-steeped coffee. Allow the syrup to cool completely to room temperature before transferring it to a bottle.
Homemade syrup is not only more cost-effective than commercial brands, but it also allows you to control the sweetness level of your cream. Keep this syrup refrigerated to maintain its freshness and use it as the foundational flavoring agent for your sweet cream base to ensure a consistent, delicious taste.
Achieving the perfect pourable consistency
The hallmark of a great vanilla sweet cream is its ability to create a marbled effect when hitting the coffee. To achieve this, focus on gentle aeration rather than heavy whipping.
If you prefer a slightly thicker topping that sits on the surface, use a handheld milk frother for just five to ten seconds. You want the cream to be thickened and frothy, yet still liquid enough to pour easily from a pitcher.
Avoid over-mixing, as too much agitation will turn the mixture into stiff whipped cream, which won’t blend into the drink properly. When you are ready to serve, fill a glass with ice and your favorite cold brew concentrate, then slowly pour the sweet cream over the back of a spoon.
This technique helps the cream sit on top momentarily before it begins its slow, dramatic descent into the dark coffee below. This balance of density and fluidity ensures that every sip contains a perfect harmony of bold coffee and sweet, silky vanilla cream for a professional finish.
Step-by-Step Instructions to Assemble Your Drink
Preparing your glass and ice
To begin your vanilla cream cold brew journey, start by selecting a tall, heavy-bottomed glass that holds at least sixteen ounces to ensure enough room for all layers.
The foundation of a refreshing drink is the temperature, so you must use large, clear ice cubes that melt slowly to prevent dilution of your coffee’s rich profile. Fill your glass about three-quarters full with these high-quality cubes.
If you want an even more professional touch, consider using coffee ice cubes made from leftover cold brew to maintain a consistent flavor from the first sip to the very last drop.
Ensure your glass is clean and chilled if possible, as a cold vessel preserves the integrity of the beverage longer.
Taking these initial steps seriously creates the thermal mass necessary to keep the cream from mixing too quickly, allowing you to enjoy the distinct aesthetic of the cascading layers as you assemble the rest of the ingredients for this cafe-quality treat.
Adding the cold brew and sweetener
Once your ice is ready, pour your favorite cold brew concentrate or ready-to-drink coffee into the glass, leaving approximately two inches of space at the top for the cream. If using a concentrate, be sure to dilute it with filtered water according to your preferred strength before pouring.
Now is the time to introduce the vanilla element directly into the coffee base. Stir in one to two tablespoons of high-quality vanilla simple syrup directly into the cold brew.
Using a long bar spoon, stir vigorously for ten seconds to ensure the sweetener is fully integrated and doesn’t just settle at the bottom of the glass.
This step is crucial because it ensures every sip has a balanced sweetness that complements the natural chocolate and nutty notes of the cold brew.
By sweetening the coffee layer separately, you create a complex flavor profile that provides a beautiful contrast to the unsweetened or lightly sweetened cream topper you will add in the final assembly stage.
The secret to the perfect cream float
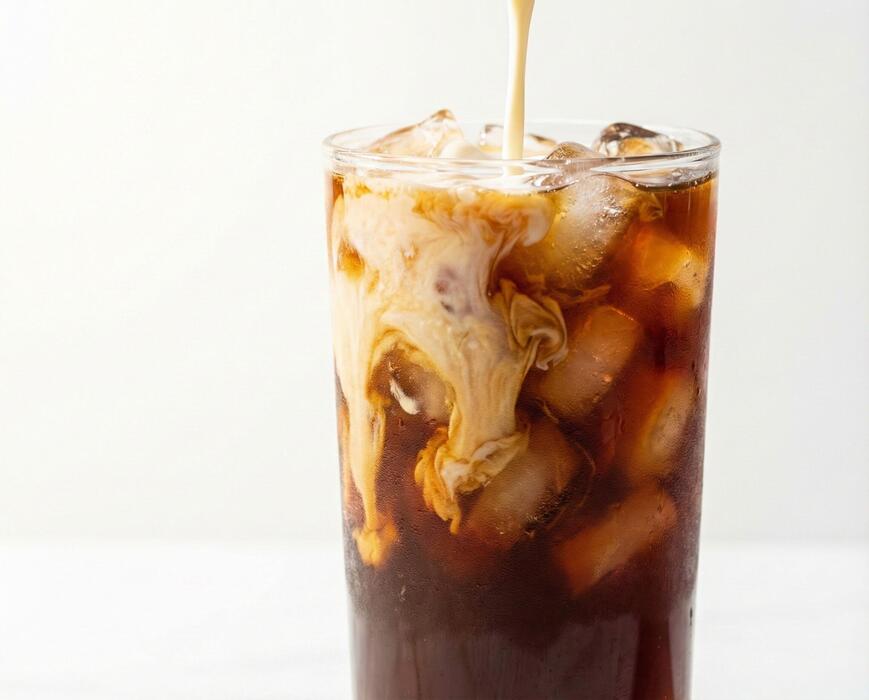
The final and most visually stunning step involves creating the signature cloud-like topper. In a separate small container, combine heavy cream with a splash of milk and a drop of vanilla extract.
For the perfect texture, froth the cream slightly using a handheld milk frother or a small whisk until it is thickened but still pourable.
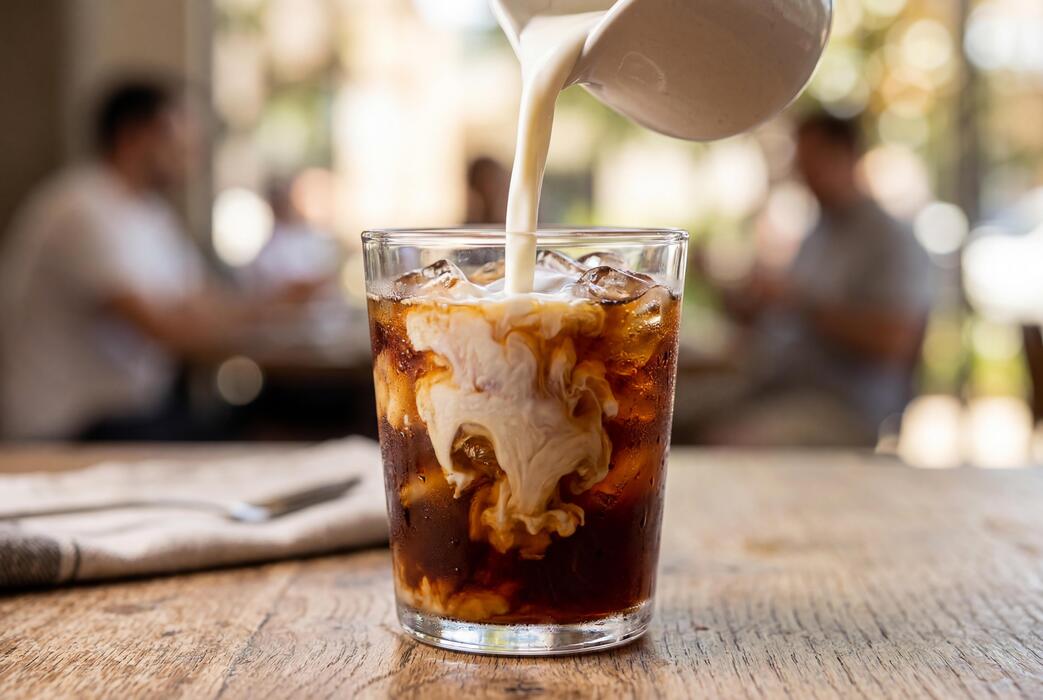
The secret technique to achieving that iconic marbling effect is to pour the cream slowly over the back of a spoon held just above the surface of the coffee.
This redirects the flow outward rather than downward, allowing the cream to sit gracefully on top before it begins its slow, beautiful descent into the dark brew. This layering method is not just for looks; it ensures you get a velvety mouthfeel with every sip.
Do not stir the drink after adding the cream; instead, let the natural movement of the liquid create a gradient of flavor that evolves as you drink, providing a luxurious experience that rivals any premium coffee shop.
Tips for Better Flavor and Texture
Why filtered water matters
The foundation of a high-quality vanilla cream cold brew begins with the quality of your water, as it makes up nearly 98% of the final beverage.
Tap water often contains minerals like chlorine, fluoride, or heavy metals that can impart a metallic or chemical aftertaste, masking the delicate floral and nutty notes of your coffee beans.
By using purified or filtered water, you ensure a clean canvas that allows the natural sweetness and complex acidity of the coffee to shine through during the long steeping process.
This is particularly important for cold brew because the extended contact time between water and grounds extracts flavors more slowly; any impurities in the water will become more concentrated over time. For the best results, use a charcoal filter or a dedicated water pitcher to remove odors and sediments.
This simple step creates a much smoother mouthfeel and prevents the vanilla cream from clashing with harsh, unfiltered tap flavors, resulting in a professional, cafe-quality finish at home.
How to store leftover cold brew and cream
To maintain the freshest flavor and texture for your homemade vanilla cream cold brew, proper storage of your components is essential. You should store your undiluted cold brew concentrate in an airtight glass container, such as a mason jar, in the back of the refrigerator where temperatures are most consistent.
This concentrate can stay fresh for up to two weeks, though it is best consumed within seven days for peak aroma. Conversely, the vanilla sweet cream topping should be stored separately and handled with more care due to its dairy content.
Because air exposure causes the cream to oxidize and lose its velvety texture, keep it in a tightly sealed bottle and give it a vigorous shake or quick froth before each use to reintegrate the ingredients.
Avoid mixing the cream into the coffee concentrate during storage, as the dairy will break down and ruin the shelf life of the coffee. Always check for any changes in scent or consistency before pouring to ensure a safe and delicious experience.
Adjusting sweetness and calorie count
Customizing your vanilla cream cold brew allows you to enjoy the indulgence while maintaining control over your nutritional goals. If you are looking to reduce the calorie count, consider swapping heavy cream for unsweetened almond milk or oat milk, which still provides a creamy texture with significantly fewer fats.
To manage the sweetness without sacrificing flavor, you can replace traditional granulated sugar or simple syrup with natural sweeteners like stevia, monk fruit, or erythritol. These alternatives dissolve easily in cold liquids and provide that signature vanilla punch without the glycemic spike.
Another effective technique is to increase the amount of pure vanilla extract while decreasing the syrup; this enhances the aromatic perception of sweetness without adding actual sugar.
If you prefer a richer profile but want to cut back on portions, try using a smaller amount of high-quality heavy cream and frothing it extensively to create a thick cold foam, which provides more volume and surface area coverage on your drink with fewer total milliliters of dairy used.
Common Mistakes to Avoid
Using the wrong grind size
One of the most frequent errors when preparing a cold brew base for your vanilla cream drink is using a grind that is too fine.
If you use standard drip coffee grounds or a powdery espresso grind, the water will over-extract the oils and acids, resulting in a bitter, muddy flavor that even the sweetest vanilla cream cannot mask.
To achieve a smooth and clean profile, you must use a coarse, pebble-like grind similar to sea salt. This allows the water to flow freely around the particles during the long immersion process, extracting the delicate chocolate and nutty notes without the harshness.
Additionally, fine grounds are notoriously difficult to filter out, often leaving a gritty residue at the bottom of your glass.
By switching to a dedicated coarse setting on your burr grinder, you ensure a clear, crisp concentrate that provides the perfect foundational balance for your velvety vanilla topping and creates a professional-quality beverage at home.
Over-steeping the coffee grounds
While it might be tempting to leave your coffee grounds soaking for days to create a stronger kick, over-steeping is a critical mistake that ruins the flavor profile.
Most enthusiasts recommend a window of 12 to 18 hours at room temperature or up to 24 hours if steeping in the refrigerator. Exceeding these limits leads to the extraction of tannins and woody compounds that create an unpleasant, astringent aftertaste.
This bitterness clashes harshly with the delicate floral notes of vanilla bean and the richness of the heavy cream. To avoid this, set a precise timer the moment you add water to your grounds.
Once the time is up, strain the concentrate immediately using a fine-mesh sieve or a paper filter. If you find the result too weak, do not increase the time; instead, adjust your coffee-to-water ratio to be more concentrated.
Mastering the timing ensures your vanilla cream cold brew remains refreshing, smooth, and naturally sweet without any burnt undertones.
Over-mixing the cream and coffee
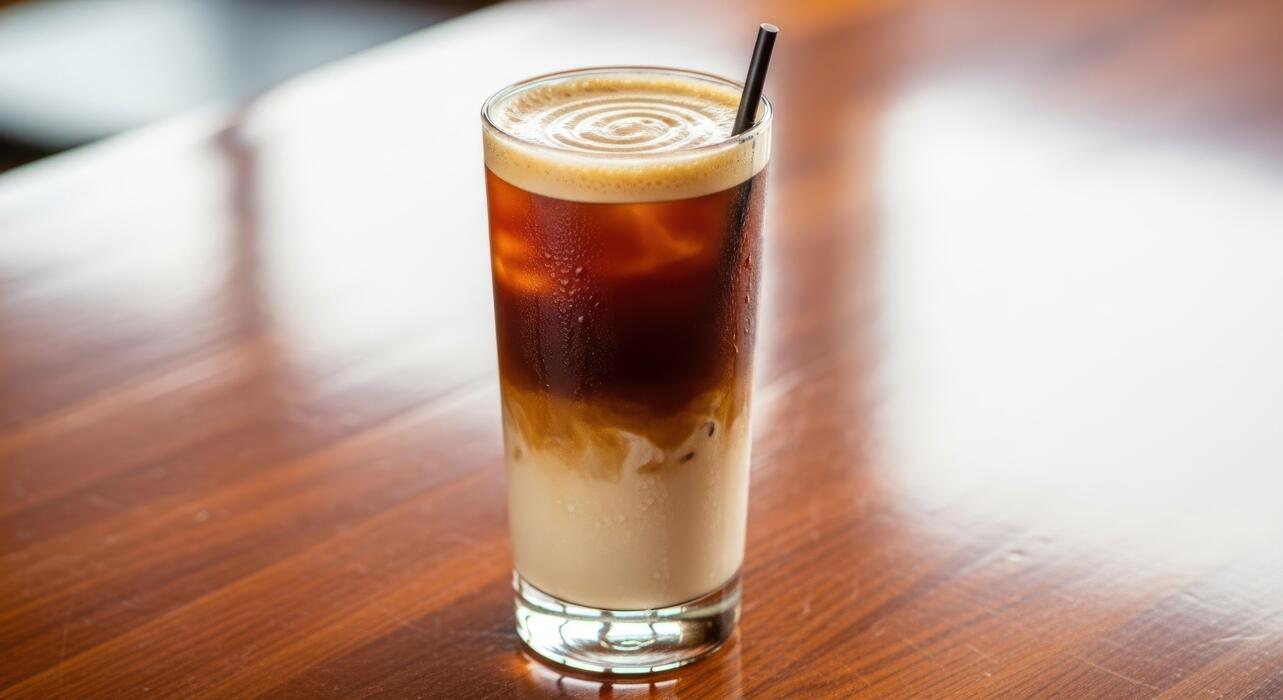
The visual appeal of a vanilla cream cold brew lies in the beautiful cascading effect of the cream hitting the dark coffee, but many people make the mistake of stirring it vigorously right away. Over-mixing destroys the distinct textural layers that define this specific drink.
The goal is to create a cold foam or a dense vanilla silken cream that sits momentarily on top before slowly bleeding into the brew. When you stir too much, you lose the experience of tasting the bold coffee concentrate through a layer of sweet, aerated cream.
Instead of using a spoon to incorporate everything into a uniform tan liquid, try pouring the vanilla mixture slowly over the back of a spoon to break the fall. This technique maintains the integrity of the foam and allows for a gradient of flavor that evolves with every sip.
Respecting the separation of ingredients ensures that you enjoy the luxurious mouthfeel of the cream and the robust kick of the cold brew simultaneously.
Frequently Asked Questions
What are the main components of a vanilla cream cold brew?
A vanilla cream cold brew consists of three primary layers: a smooth cold brew coffee base, a vanilla-flavored syrup, and a homemade vanilla sweet cream. The sweet cream is typically made by whisking together heavy cream, milk, and vanilla syrup until slightly thickened.
How do I make the vanilla sweet cream at home?
To make the signature sweet cream topping, mix 1/2 cup heavy cream, 1/4 cup 2% milk, and 2 tablespoons of vanilla syrup. For the best consistency, whisk or froth the mixture briefly until it is aerated but still pourable, rather than stiff like whipped cream.
Can I use store-bought cold brew for this recipe?
Yes, using a high-quality store-bought cold brew concentrate or ready-to-drink bottle is a great time-saver. Simply dilute the concentrate with water according to the package instructions before adding your vanilla syrup and cream.
How do I assemble the drink for the best presentation?
Start by filling a glass with ice and adding your desired amount of vanilla syrup, followed by the cold brew coffee. Slowly pour the vanilla sweet cream over the top; this allows the cream to cascade down through the coffee for a beautiful marbled effect.
How can I make a dairy-free vanilla cream cold brew?
You can create a vegan version by substituting the heavy cream and milk with full-fat oat milk or coconut cream mixed with almond milk. Use a handheld frother to achieve a similar creamy texture before pouring it over your cold brew.
Is it possible to make the vanilla syrup from scratch?
Absolutely, you can make a simple vanilla syrup by simmering equal parts sugar and water until dissolved, then stirring in a tablespoon of vanilla extract once cooled. This homemade version often tastes fresher and allows you to control the sweetness level.
Conclusion
Mastering the vanilla cream cold brew at home is both rewarding and cost-effective. By focusing on a smooth cold brew base and whisking together a velvety vanilla sweet cream, you can replicate this coffeehouse favorite in your own kitchen. Experiment with the sweetness levels to find your perfect balance. Now that you have the techniques, it is time to grab your ingredients and start brewing. Enjoy the process and the delicious, caffeinated results of your labor.