How To Make Cold Brew From Regular Coffee
You don’t need a fancy artisanal blend to enjoy a smooth, refreshing glass of iced coffee at home. If you are wondering how to make cold brew from regular coffee, you are in the right place. Using the beans already sitting in your pantry is actually the easiest way to get started.
Can you make cold brew with regular coffee?
The difference between cold brew and iced coffee
Understanding the distinction between these two beverages is essential when using standard coffee beans. Iced coffee is typically brewed hot at double strength and then poured over ice, which can often lead to a bitter or acidic profile due to the rapid temperature change and high-heat extraction.
In contrast, making cold brew involves steeping grounds in room temperature or cold water for an extended period, usually between twelve and twenty-four hours. This slow extraction process avoids releasing the acidic oils and bitter tannins that heat typically draws out.
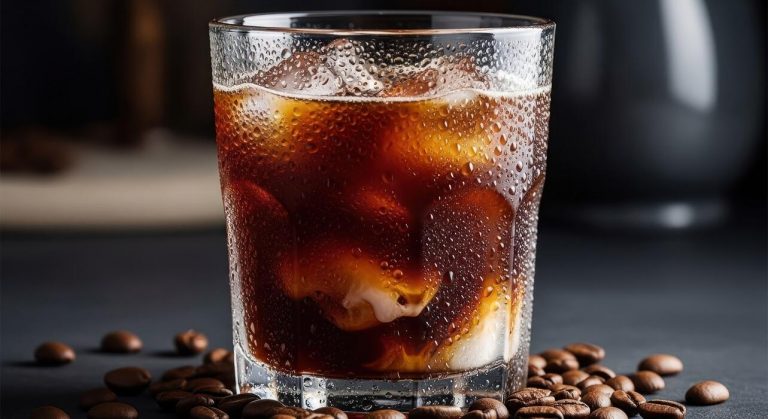
By using your regular coffee for cold brew, you create a smooth, low-acid concentrate that feels much heavier on the palate compared to the thin consistency of traditional iced coffee.
Because the chemical reaction differs so significantly, even the most basic supermarket coffee can be transformed into a velvety, chocolatey beverage that tastes far more expensive than it actually is, providing a refreshing alternative to standard hot-brewed methods.
Why standard drip coffee beans work perfectly
You do not need specialized ‘cold brew’ beans to achieve professional results at home; your everyday drip coffee beans are more than sufficient. The primary requirement for success is the grind consistency, as cold brewing works best with a coarse, sandy texture.
If you currently have pre-ground coffee intended for a drip machine, you can still use it by shortening the steep time to approximately eight to ten hours to prevent over-extraction and bitterness.
The immersion method is incredibly forgiving, allowing the inherent sweetness of standard beans to shine through without the harshness often found in hot brewing. Using regular coffee is a cost-effective solution for making large batches of concentrate that can stay fresh in your refrigerator for up to two weeks.
Simply maintain a consistent coffee-to-water ratio, such as one cup of grounds to four cups of water, to ensure that your standard pantry staples yield a rich, robust, and highly caffeinated brew every single time.
How roast levels affect the final flavor
When utilizing regular coffee for cold brew, the roast level plays a pivotal role in the final sensory experience. Dark roasts are the traditional favorite for this method because the long steeping time highlights deep notes of cocoa, molasses, and toasted nuts while minimizing any burnt or smoky aftertastes.
If you prefer something brighter, a medium roast provides a balanced profile with subtle hints of red fruit and caramel that remain crisp when served over ice.
While light roasts are less common for cold brew due to their high acidity, the cold extraction method actually mellows those sharp citrus notes, turning them into a delicate, tea-like floral experience.
Regardless of which regular bag you have in your kitchen, the absence of heat ensures that the delicate flavor compounds are preserved rather than scorched.
Experimenting with different roasts allows you to customize the strength and body of your drink, proving that versatile brewing techniques are more important than the specific label on your coffee bag.
The best coffee-to-water ratio for cold brew

Calculating the 1:4 ratio for concentrates
When learning how to make cold brew from regular coffee, mastering the concentrate method is the most efficient approach for long-term storage and versatility. The standard industry recommendation for a potent concentrate is a 1:4 ratio, which means using one part coffee grounds to four parts water.
This heavy concentration accounts for the lack of heat during the extraction process, ensuring that the cold water pulls enough flavor from your medium or coarse grounds over a twelve to twenty-four hour period.
By using this specific ratio, you create a robust liquid base that can be stored in the refrigerator for up to two weeks without losing its aromatic profile.
Because this result is highly concentrated, you should never drink it straight; instead, you will eventually dilute the final brew with equal parts water, milk, or cream.
This method is ideal for those using standard drip coffee because it masks minor inconsistencies in grind size while providing a rich, syrupy body that serves as a perfect foundation for iced lattes or specialty coffee drinks at home.
Finding the right balance for ready-to-drink coffee
If you prefer a simpler process that allows you to pour your beverage directly from the jar into your glass, a 1:8 or 1:10 ratio is the best solution for ready-to-drink cold brew.
Utilizing a 1:8 ratio provides a bold, full-bodied cup that stands up well to a few ice cubes, whereas a 1:10 ratio offers a lighter, more refreshing tea-like consistency that highlights the delicate floral notes often found in regular light-roast coffee.
To achieve this balance, simply combine your coffee and filtered water in a large pitcher and let it steep at room temperature or in the fridge. This approach is particularly helpful for beginners because it eliminates the guesswork of dilution after the brewing cycle is complete.
Remember that since you are using more water initially, the extraction happens slightly faster, so you should monitor the flavor profile around the twelve-hour mark to prevent over-extraction.
The result is a smooth, low-acid coffee that is ready to enjoy immediately after straining through a fine-mesh sieve or a standard paper filter, saving you time during your busy morning routine.
Measuring by weight vs. measuring by volume
To ensure consistent results when making cold brew from regular coffee, understanding the difference between weight and volume measurements is crucial for success. For the highest level of accuracy, it is always recommended to use a digital kitchen scale to measure your ingredients in grams.
Measuring by weight is superior because different coffee roasts have varying levels of density; a dark roast is puffier and takes up more space than a dense light roast, even if they weigh the same.
If you do not have a scale, you can measure by volume using standard measuring cups, generally aiming for one cup of grounds to four cups of water for a concentrate.
However, keep in mind that volume can be deceptive depending on how tightly the grounds are packed into the cup. To compensate for this, always level off your measuring scoops without pressing the coffee down.
While volume is convenient for a quick setup, switching to weight-based measurements will allow you to replicate your favorite batch perfectly every single time, ensuring your home-brewed coffee tastes exactly like a professional cafe product without the premium price tag.
How to grind regular coffee beans for cold brew

Why a coarse grind is essential
When transforming regular coffee beans into cold brew, achieving a coarse, sea-salt-like texture is the most critical step for success.
Unlike hot brewing methods that use pressure or high temperatures to extract flavor quickly, cold brew relies on a slow, cold immersion process that typically lasts between twelve and twenty-four hours.
If you use a fine grind, the water will over-extract the organic compounds, resulting in a bitter, astringent flavor profile that ruins the naturally sweet notes of the coffee.
Furthermore, fine particles are incredibly difficult to filter out of the finished concentrate, often leaving behind a muddy sediment that creates a gritty mouthfeel. By keeping the grind size large, you ensure that the water saturates the grounds evenly and slowly.
This specific geometry allows for a clean, mellow extraction that highlights the chocolatey and nutty undertones found in your favorite regular beans, while simultaneously making the final filtration process much smoother and more efficient for a professional-grade result.
How to use a home blade or burr grinder
To get the best results from regular beans, a conical burr grinder is the preferred tool because it produces uniform particles that extract at the same rate. Set your burr grinder to the highest or coarsest setting available to mimic the texture of heavy kosher salt.
If you only own a standard blade grinder, you can still achieve a decent cold brew grind by using a pulsing technique rather than holding the button down continuously. Shake the grinder vigorously between short, one-second bursts to ensure the beans are redistributed and chopped evenly.
Avoid grinding for too long, as heat from the blades can scorched the delicate oils in the beans before the brewing even begins. Once you see a chunky, consistent texture without large whole beans or excessive fine dust, you are ready to brew.
Consistently monitoring the size during the grinding process prevents the ‘muddy’ over-extraction that often occurs when home enthusiasts accidentally process their regular coffee beans into a fine espresso-style powder.
What to do if you only have pre-ground coffee
While whole beans are ideal for customization, you can still make excellent cold brew using standard pre-ground coffee typically found in grocery stores. Since most pre-ground coffee is medium-fine for drip machines, you must adjust your brewing technique to prevent bitterness.
The most effective solution is to shorten the steep time to approximately eight to twelve hours instead of the standard twenty-four. Because the smaller surface area of pre-ground coffee extracts much faster, a shorter duration prevents the release of harsh tannins.
Additionally, you should use a dual-filtration method to ensure clarity. First, pass the mixture through a fine-mesh sieve to remove the bulk of the grounds, then run the liquid through a paper coffee filter or cheesecloth to catch the silt.
This extra step is vital because the fine particles in regular pre-ground coffee tend to bypass standard mesh filters. By carefully managing the contact time and employing rigorous filtration, you can transform an ordinary bag of pre-ground coffee into a smooth, refreshing cold brew concentrate.
Step-by-step guide to making cold brew at home
Mixing your grounds and filtered water
To begin making cold brew from regular coffee, start by selecting a coarse grind setting to prevent a muddy texture. Since regular beans work perfectly, focus on the ratio: a 1:4 or 1:5 ratio of coffee to water is ideal for a strong concentrate.
Use a large glass jar or a French press as your vessel. Add your dry grounds first, then slowly pour over cold, filtered water to ensure a clean taste profile.
It is essential to use a long spoon to gently stir the mixture, ensuring every single coffee ground is fully saturated without over-agitating the sediment. Avoid using hot water at any stage, as cold brew relies on time rather than heat to extract flavors.
Once mixed, cover the container tightly with a lid or plastic wrap to prevent fridge odors from seeping into your brew. This initial preparation sets the foundation for a smooth, low-acid beverage that highlights the natural sweetness of your favorite regular coffee beans.
How long to steep for the best extraction
Patience is the secret ingredient when transforming regular coffee into a premium cold brew concentrate. For the best results, you should steep the mixture for 12 to 18 hours at room temperature or up to 24 hours if kept in the refrigerator.
Steeping on the counter typically accelerates the extraction process, resulting in a bolder, more robust flavor profile, while cold steeping in the fridge yields a lighter, crisper finish. Do not exceed the 24-hour mark, as over-extraction can lead to unpleasant bitterness and woody notes that ruin the smooth experience.
During this time, the water slowly dissolves the oils and caffeine from the grounds without the acidic bite associated with traditional drip methods. If you are using a lighter roast of regular coffee, aim for the longer end of the time spectrum to fully develop the complex floral notes.
Keep the container in a dark, cool spot away from direct sunlight to maintain a consistent temperature throughout the entire extraction period.
Filtering the concentrate without a mess
Once the steeping time is complete, the final step is to remove the grounds to leave behind a silky, sediment-free concentrate. If you used a French press, simply press the plunger down slowly to separate the liquid.
For those using a jar, the most effective method is to line a fine-mesh sieve with a paper coffee filter or a clean flour sack towel. Place the sieve over a clean carafe and pour the mixture through it slowly.
Avoid the temptation to squeeze the filter, as this forces fine particulates and bitter tannins into your drink, resulting in a cloudy appearance. If the flow slows down, replace the paper filter halfway through the process to maintain efficiency.
Once filtered, you are left with a potent coffee concentrate that can be stored in the refrigerator for up to two weeks. When you are ready to serve, simply dilute the concentrate with equal parts water or milk over ice for a professional-quality beverage made right in your own kitchen.
Equipment options for brewing with regular coffee

Using a simple mason jar or pitcher
One of the most accessible ways to transform your regular coffee into a smooth concentrate is by using a standard mason jar or glass pitcher. This method requires no specialized gear, making it perfect for beginners.
Start by adding your coarsely ground regular coffee directly into the container and pouring cold, filtered water over the top. A common starting ratio is one part coffee to four parts water, though you can adjust this based on your preferred strength.
Once the grounds are fully saturated, simply seal the lid and let the mixture steep on your counter or in the refrigerator for 12 to 24 hours.
The large surface area of a pitcher allows for even extraction, ensuring that the natural sweetness of the beans is highlighted while minimizing bitterness.
After the steeping period is complete, you will need to strain the liquid through a fine-mesh sieve or a cheesecloth to remove the sediment, resulting in a clean, refreshing cold brew concentrate that lasts up to two weeks.
Making cold brew in a French press
The French press is an exceptional tool for making cold brew because it features a built-in filtration system that simplifies the entire process. To begin, place your regular medium-to-coarse coffee grounds into the bottom of the carafe.
Slowly add room-temperature water, ensuring all grounds are moistened, and give it a gentle stir with a wooden spoon to prevent clumping.
Instead of pressing the plunger down immediately as you would for hot coffee, leave it in the upright position or cover the top with plastic wrap to keep it airtight. Let the coffee steep for at least 16 hours to extract the full flavor profile.
When you are ready to serve, slowly push the metal mesh plunger down to separate the grounds from the liquid. This method is highly effective because the plunger keeps the sediment at the bottom, allowing you to pour a rich and full-bodied concentrate directly into your glass.
It is a mess-free solution that utilizes equipment you likely already own in your kitchen.
Using nut milk bags or paper filters
For those who prefer a crisp, sediment-free cup of cold brew using regular coffee, employing nut milk bags or paper filters is the ideal solution.
You can create a ‘coffee sock’ by placing your grounds inside a reusable nut milk bag, tying it securely, and submerging it in a vessel of water.
This immersion technique allows for easy cleanup, as you can simply lift the bag out once the brewing time of 18 to 24 hours has passed.
If you do not have a specialized bag, you can brew the coffee loose in any container and then pass the final liquid through a standard paper coffee filter or a fine cloth.
This extra step is crucial for removing fine particulates that can make the brew taste muddy or overly acidic over time. Using these filtration methods ensures that the final product is exceptionally clear and bright, highlighting the subtle notes of your regular coffee beans.
It provides a professional-grade finish to your homemade beverage without the need for expensive, dedicated cold brew systems.
Tips for better tasting homemade cold brew
The importance of using filtered water
When making cold brew from regular coffee, the quality of your water is just as vital as the beans themselves because water makes up nearly 98% of the final beverage.
Tap water often contains minerals, chlorine, and other chemicals that can interfere with the delicate extraction process, leading to a metallic or chemical aftertaste.
To achieve a clean, crisp profile, you should always use filtered or bottled spring water to ensure no unwanted impurities mask the natural sweetness of your coffee grounds.
Since the cold brewing method relies on time rather than heat to extract flavor, any off-notes in the water will become more concentrated over the long steeping period.
By starting with a neutral, high-quality water base, you allow the subtle chocolatey and nutty notes of your regular coffee to shine through without interference.
This simple adjustment is the easiest way to elevate a standard batch into a professional-grade concentrate that tastes smooth and refreshing every single time you pour a glass.
Steeping on the counter vs. the refrigerator
The temperature at which you steep your coffee significantly impacts the extraction rate and the final flavor profile of your concentrate.
Steeping on the counter at room temperature generally takes between 12 to 16 hours and tends to produce a bolder, more rounded body because the slightly warmer environment accelerates the release of oils and soluble compounds.
Conversely, steeping in the refrigerator requires a longer duration, typically 20 to 24 hours, resulting in a much brighter, cleaner, and more delicate taste.
If you prefer a rich and robust brew that stands up well to heavy cream, room temperature is your best bet; however, if you enjoy drinking your coffee black and prefer a lighter mouthfeel, the fridge is ideal.
Regardless of the location you choose, ensure the container is tightly sealed to prevent oxidation and keep the grounds fully submerged throughout the process. Experimenting with both methods will help you find the perfect balance of strength and clarity for your specific regular coffee brand.
How to avoid bitter or sour flavors
Achieving the perfect balance in cold brew requires careful attention to your grind size and steeping duration to avoid common flavor defects.
If your coffee tastes unpleasantly sharp or sour, it is likely under-extracted, meaning the water didn’t have enough time to pull out the sugars; try extending your steeping time by a few hours in the next batch.
On the other hand, a dry or overly bitter finish indicates over-extraction, which often happens if the coffee steeps for too long or if the grind is too fine.
Since regular pre-ground coffee is typically a medium grind rather than the preferred extra-coarse, you must shorten the contact time to prevent the water from pulling out harsh tannins and bitter woody notes.
Additionally, always use a fine mesh strainer or a double-layer paper filter during the final step to remove all fine sediment, as leftover particles will continue to extract in the fridge, eventually turning your smooth concentrate into a bitter mess that loses its signature mellow appeal.
How to store and serve your cold brew
Keeping your concentrate fresh in the fridge
Once you have successfully strained your homemade cold brew made from regular coffee grounds, the key to longevity is proper storage.
Transfer your final concentrate into a clean, airtight glass container, such as a mason jar or a swing-top bottle, to prevent it from absorbing odors from other foods in your refrigerator. Because cold brew is a low-acid extraction, it stays flavorful much longer than traditionally brewed hot coffee.
For the best tasting results, store the undiluted concentrate in the coldest part of your fridge for up to two weeks. If you notice a significant change in the aroma or a sour profile, it is time to brew a fresh batch.
Keeping the liquid in its concentrated form helps preserve the complex flavor notes and caffeine kick until you are ready to drink it. Always ensure the lid is sealed tightly after every use to minimize oxygen exposure, which can lead to oxidation and a stale taste over time.
Creative ways to dilute and flavor your drink
Since you have created a powerful concentrate from your regular coffee beans, you have total control over the final strength of your glass. The standard recommendation is a one-to-one ratio of concentrate to water, but you can adjust this based on your personal preference for intensity.
To avoid watering down your beverage as you sip, consider freezing a small portion of your brew into coffee ice cubes; this ensures your drink remains bold until the very last drop.
Beyond plain water, you can experiment with adding creamers, nut milks, or a splash of sparkling water for a refreshing coffee soda. If you prefer a bit of sweetness, stir in a homemade simple syrup or a dash of cinnamon while the liquid is cold.
Because regular coffee can sometimes have bitter undertones when brewed this way, a tiny pinch of sea salt can help neutralize bitterness and enhance the natural chocolatey notes often found in medium or dark roasts.
Using cold brew for iced lattes and cocktails
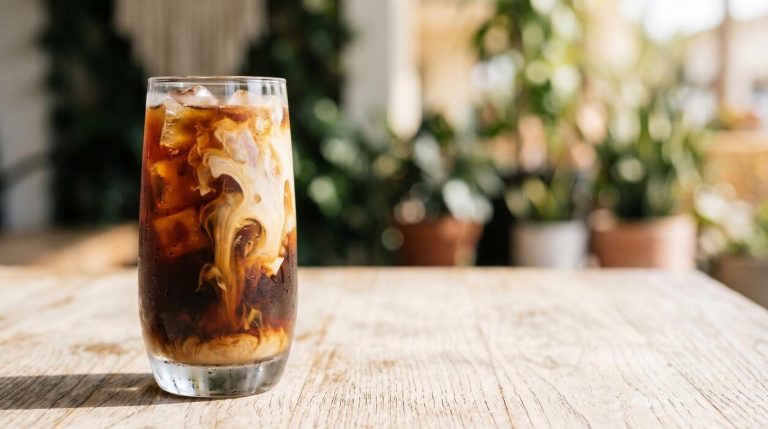
Your homemade cold brew concentrate is an incredibly versatile base for elevated beverages that go far beyond a basic morning cup. To craft a professional-style iced latte, pour one part concentrate over ice and top with two parts of your favorite frother-whipped milk or oat milk.
The dense texture of the cold brew provides a sturdy foundation that doesn’t get lost when mixed with dairy. For those looking to transition into evening refreshments, this concentrate serves as a perfect substitute for espresso in classic cocktails like the Espresso Martini.
Its smooth, low-acid profile blends seamlessly with vodka and coffee liqueur without the harshness of hot-brewed coffee. You can also use it to create a ‘Cold Brew Negroni’ or a coffee-infused tonic for a sophisticated twist.
By mastering the storage and serving of your regular coffee cold brew, you turn a simple pantry staple into a gourmet ingredient for any time of day, ensuring maximum utility from every batch you make.
Frequently Asked Questions
Can I use regular ground coffee to make cold brew?
Yes, you can use any regular coffee beans to make cold brew, regardless of the roast. However, the grind size is critical; you should ideally use a coarse grind to prevent the coffee from becoming overly bitter or cloudy during the long steeping process.
What is the best ratio for making cold brew with regular coffee?
A standard ratio for cold brew is 1 cup of coffee grounds to 4 cups of water. If you prefer a stronger concentrate that you can dilute later with milk or water, you can increase the ratio to 1 cup of grounds to 2 or 3 cups of water.
How long should I steep regular coffee for cold brew?
You should let the coffee steep at room temperature or in the refrigerator for 12 to 24 hours. Steeping for less than 12 hours may result in a weak flavor, while exceeding 24 hours can extract bitter tannins that ruin the smooth profile.
Do I need a special machine to make cold brew from regular coffee?
No special equipment is required; you can simply use a large glass jar or pitcher. After the steeping period is complete, you just need to strain the mixture through a fine-mesh sieve, cheesecloth, or a standard paper coffee filter.
Should I use light, medium, or dark roast coffee for cold brew?
While any roast works, most people prefer medium or dark roasts for cold brew because the cold extraction process highlights chocolatey and nutty notes. Light roasts can sometimes taste overly acidic or floral when brewed cold.
How do I filter regular coffee grounds out of cold brew?
If you don’t have a dedicated cold brew maker, you can pour the mixture through a coffee filter set inside a funnel or a fine-mesh strainer. For a cleaner cup without sediment, double-filtering through a paper filter is recommended.
How long does homemade cold brew stay fresh?
Stored in an airtight container in the refrigerator, cold brew concentrate can stay fresh for up to 7 to 10 days. If you have already diluted the coffee with water, it is best consumed within 3 to 5 days for optimal flavor.
Conclusion
Mastering the art of cold brew with regular coffee is a simple yet rewarding process. By using a coarse grind and allowing the grounds to steep patiently for eighteen to twenty-four hours, you unlock a smooth, low-acid beverage that rivals any coffee shop creation. Experiment with your water-to-coffee ratios to find your perfect strength. Now that you have the tools and techniques, grab your favorite beans and start brewing your own refreshing batch today.