Coffee Pod Holder Under Cupboard
If you’re searching for a coffee pod holder under cupboard, you’re likely tired of cluttered countertops and wasted cabinet space. The core question is: can you keep pods organized and accessible without sacrificing kitchen real estate? The answer is yes—and you’ve come to the right place. This guide cuts through the noise to show you the best space-saving, easy-to-install options that mount directly beneath your cabinets, freeing up your counters while keeping your morning routine smooth.
Why Install a Coffee Pod Holder Under Your Cupboard
Save counter space in small kitchens
In small kitchens, every inch of counter space is valuable for food prep, appliances, or decor. Installing a coffee pod holder under your cupboard immediately frees up that prime real estate by moving your pods off the counter.
This simple upgrade can make your morning routine more efficient and your kitchen feel more open. To maximize space, choose a slim, under-cabinet rack that mounts with strong adhesive or screws—no drilling into tile is needed.
Measure the clearance under your cabinets first to ensure the pods will slide in and out easily. You can also use a tiered holder to double the storage without increasing the footprint. This solution works especially well in galley kitchens or apartments where every square inch counts.
By mounting the holder, you eliminate clutter and create a dedicated spot that doesn’t interfere with other countertop tasks. For a quick install, opt for a magnetic pod holder if you have metal cabinets, or a rail system that attaches to the cabinet bottom.
This change alone can transform a cramped counter into a functional workspace.
Keep coffee pods organized and visible
An under-cabinet coffee pod holder turns a messy drawer or cabinet into a clear, organized display of your coffee options. You can instantly see what flavors or brands you have, which helps you grab your favorite without rummaging.
To keep things orderly, sort pods by roast or flavor and label rows with small chalkboard stickers or color-coded dividers. Many holders have a front-facing design that shows the pod brand, so you can easily spot a new variety you want to try.
Rotate older pods to the front to use them first and prevent stale coffee. If you have a single-serve machine, pair the holder with a small caddy for used pods underneath. For a neat look, choose a holder that matches your cabinet hardware—black or white finishes blend in seamlessly.
Check the pod diameter (Nespresso, Keurig, or universal) to ensure a snug fit. This system not only saves time but also reduces waste, as you’ll see what you have before buying duplicates. An organized pod holder makes your morning coffee selection feel like a curated experience.
Easy access for quick morning brewing
Mounting a coffee pod holder under your cupboard puts your pods right at eye level and within arm’s reach of your coffee maker. This eliminates the need to open drawers or cabinets when you’re half-awake, speeding up your morning routine.
For the best flow, install the holder directly above or beside your coffee machine so you can grab a pod, brew, and go in one motion. Choose a holder with a drop-down design or a simple slide-out tray that doesn’t require two hands.
Test the height to make sure you can easily pull a pod without bumping your head. If you have limited space, consider a holder that holds 20-30 pods—enough for a week’s worth of coffee.
To further streamline, keep a small bin for used pods nearby, or use a reusable pod to cut down on waste. Pro tip: Mount the holder at a slight angle so pods slide forward automatically.
This simple change can cut your morning prep time by minutes, making it easier to enjoy fresh coffee even on rushed days. With everything visible and accessible, you’ll never fumble for a pod again.
Top Materials for Under Cupboard Coffee Pod Holders
Sturdy metal and wire designs
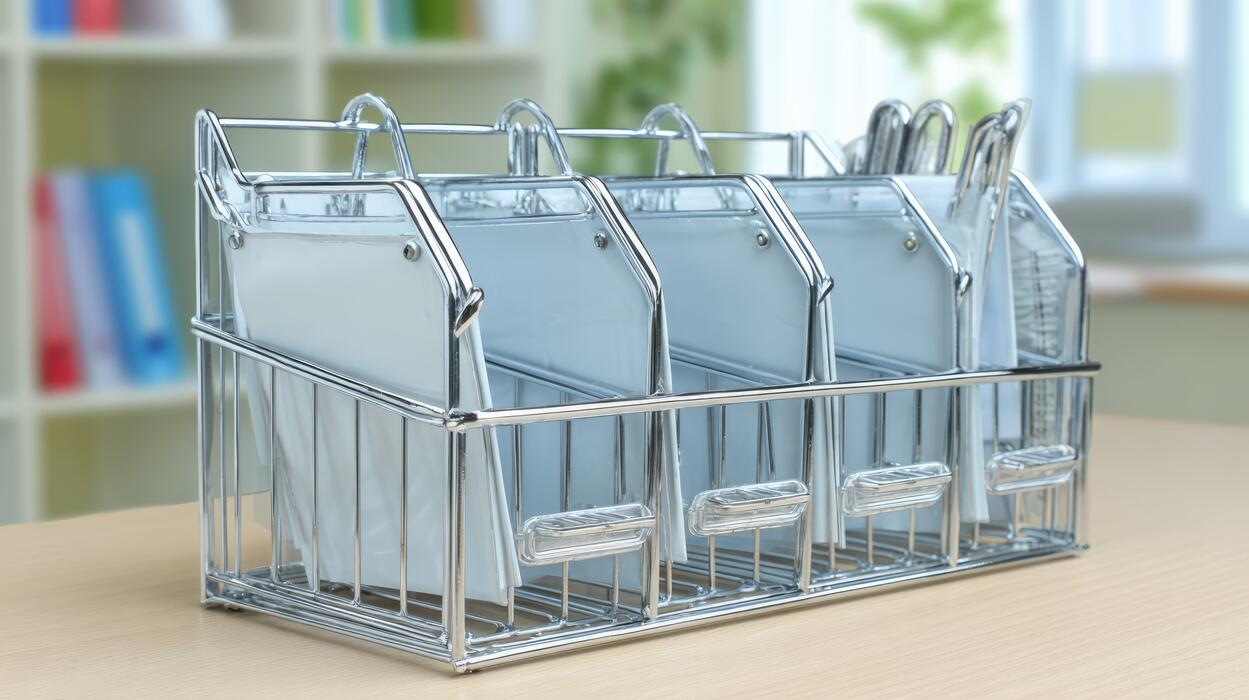
For a durable and long-lasting solution, sturdy metal and wire designs are a top choice. These holders, often made from stainless steel or coated iron, can handle the weight of multiple coffee pods without bending or sagging.
Look for models with a black or chrome finish to match your kitchen hardware. Many feature a slide-out drawer mechanism that keeps pods hidden but easily accessible. To install, simply use the included screws or strong adhesive strips to mount the holder under your cabinet.
Metal options are also easy to clean—just wipe them down with a damp cloth. For maximum efficiency, choose a design with individual slots for each pod, preventing them from rolling together. This material is ideal for busy kitchens where durability is key, and it pairs well with modern appliances.
Remember to measure your cabinet clearance before purchasing to ensure a proper fit.
Clear acrylic for a modern look
If you prefer a sleek, minimalist aesthetic, clear acrylic coffee pod holders are an excellent choice. Their transparent design creates a floating effect under your cupboard, making your space feel larger and less cluttered.
Acrylic is lightweight yet strong, and many models feature angled shelves that let pods slide forward for easy grabbing. This material resists moisture and is simple to maintain—just a quick wipe with a microfiber cloth keeps it clear.
For a polished look, choose a holder with rounded edges and a slim profile. Installation typically involves adhesive mounting strips, so no drilling is needed, making it perfect for renters. However, ensure the adhesive is rated for the weight of your pods.
Acrylic works best in modern or contemporary kitchens and complements stainless steel appliances. To avoid scratches, handle gently during cleaning and avoid abrasive materials.
Wood options for a warm aesthetic
For a cozy, inviting kitchen, wood coffee pod holders add a touch of natural warmth. Options range from bamboo to reclaimed wood, each offering a unique grain pattern that softens the look of your cabinetry.
Many wooden holders feature a built-in drip tray or a small drawer for storing used pods, combining function with style. To install, look for models with pre-drilled holes and mounting hardware for a secure fit. Wood is naturally insulating and can help absorb noise when pods are placed inside.
For longevity, choose a holder with a sealed finish to resist moisture and stains. Pair it with neutral-toned pods for a cohesive design. Wood complements farmhouse, rustic, or traditional kitchens beautifully. When cleaning, use a damp cloth and dry immediately to prevent warping.
This material offers a sustainable option if sourced from certified renewable forests.
How to Measure Your Space for a Perfect Fit
Check cupboard clearance height
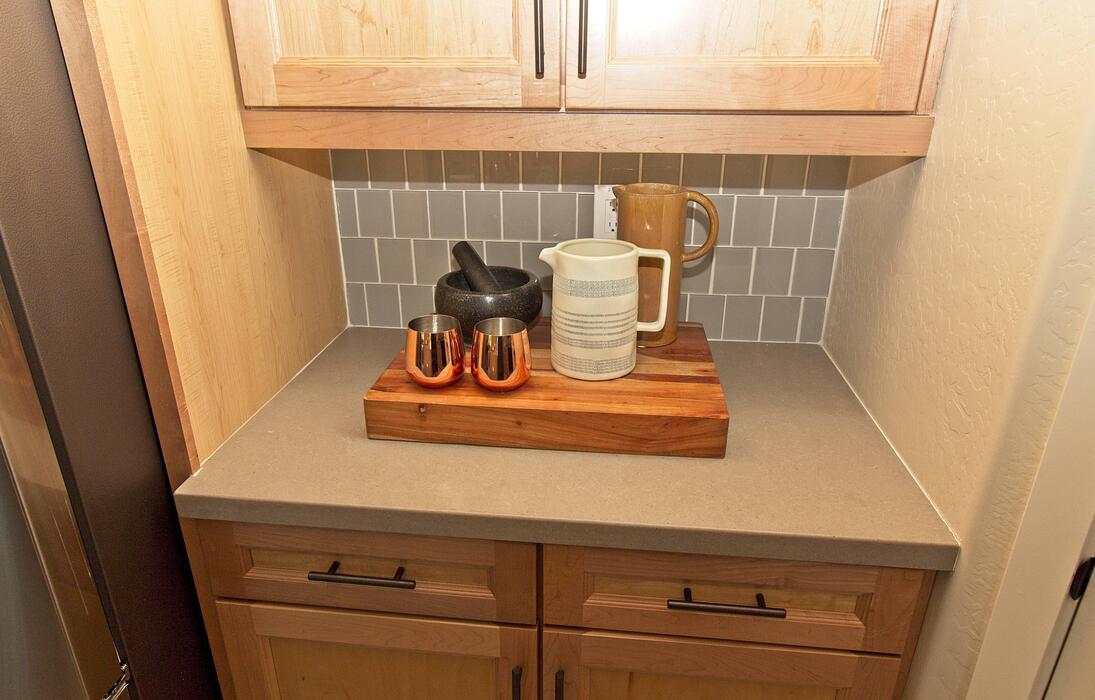
Before purchasing a coffee pod holder, ensure your under-cupboard space can accommodate its height. Use a tape measure to find the distance from the bottom of your cupboard to your countertop or any surface below. Subtract at least 0.5 inches for easy installation and removal of pods.
Most under-cupboard holders are 3 to 5 inches tall, but verify your specific model. If you have a shallow clearance, opt for a slim, low-profile design that mounts flush. Also, check if the holder’s mounting bracket adds extra height.
For a perfect fit, measure at multiple points since cabinets may not be perfectly level. If you plan to store larger pods or have a dispenser mechanism, add an extra inch to your clearance minimum.
This step prevents frustration and ensures the holder slides or clicks into place without scraping or blocking access. Remember, even a slight misjudgment can lead to a poor fit, so take your time and record measurements accurately. A well-measured space guarantees a seamless, functional addition to your kitchen.
Measure width for single or double rows
Next, determine the width of your under-cupboard area to decide between a single or double-row coffee pod holder. Measure the horizontal space from left to right under the cabinet, noting any obstacles like hinges, handles, or brackets.
Standard single-row holders are 10 to 12 inches wide, while double-row versions can span 20 to 24 inches. For a snug fit, leave at least 0.25 inches of clearance on each side to avoid rubbing.
If your space is narrow, a single-row holder is ideal and often holds 12 to 20 pods. For larger areas, a double-row model maximizes storage but requires careful alignment to avoid overhang. Consider whether you want a holder that mounts directly to the cabinet bottom or sits on the counter.
Also, measure the depth from front to back to ensure the holder doesn’t protrude too far. A compact design is best for tight kitchens. By precisely measuring width, you’ll choose a holder that fits perfectly and keeps your coffee station organized without wasted space.
Account for pod size variations
Finally, consider the different sizes of coffee pods you plan to store, as this affects your holder choice. Standard Nespresso or K-Cup pods are about 1.5 inches tall and 1.2 inches in diameter, but many brands offer larger or taller options like Vertuo pods or compostable ones.
Measure the height and diameter of your most-used pods to ensure they fit snugly in the holder’s slots. Some holders have adjustable compartments or universal designs, while others are brand-specific. For under-cupboard models, check that pods can be easily inserted and removed without tilting or jamming.
If you use a mix of sizes, look for a holder with flexible dividers or deeper slots to accommodate variations. Also, consider the weight—larger pods may require a sturdier mount. A good rule is to test one pod in the holder before mounting it.
This step prevents frustrating clogs or spills. By accounting for pod size variations, you’ll ensure a smooth, daily coffee routine with no wasted time or mess.
Step-by-Step Installation Guide for Under Cupboard Holders
Gather tools: drill, screws, level
Before starting, assemble all necessary tools to ensure a smooth installation. You will need a power drill with a screwdriver bit, measuring tape, a pencil, a level, and the mounting screws that came with your coffee pod holder.
If the holder requires wall anchors for drywall or tile, have those ready too. For under-cupboard installation, short screws (typically 1/2 to 3/4 inch) work best to avoid puncturing the cabinet top. A stud finder is optional but helpful for locating solid wood backing.
Clear the workspace by removing items from the cabinet below and wiping the underside clean. Double-check that your holder’s mounting bracket aligns with the cabinet’s lip or flat surface. Pro tip: Use a magnetic screw tray to keep small parts organized.
Having everything at hand prevents mid-project trips to the hardware store and reduces frustration. This preparation takes just 5 minutes but saves time later.
Mark and drill pilot holes safely
Position the holder against the cabinet underside, ensuring it is centered and level. Use a pencil to mark the screw holes through the bracket’s slots. For accuracy, hold the level across the bracket’s top edge; adjust until the bubble is centered.
Drilling pilot holes prevents wood splitting and ensures screws go in straight. Select a drill bit slightly smaller than your screw diameter (e.g., 1/16 inch for a 1/8-inch screw). Drill slowly at a 90-degree angle to the cabinet surface, stopping at the same depth as the screw length.
If mounting into drywall, switch to a masonry bit and insert plastic anchors first. Always wear safety glasses to protect from debris. Important: Avoid drilling into wiring or plumbing—check the area above the cabinet if possible. For metal cabinets, use self-tapping screws and a sharp bit.
Test-fit the bracket after drilling to confirm alignment before moving to the next step.
Secure holder and test weight capacity
Align the bracket with the pilot holes and drive screws in using a drill set to low torque to avoid stripping. Tighten until the bracket is flush but not over-torqued—stop when the screw head meets the metal. If using wall anchors, insert them before attaching the bracket.
Once mounted, attach the coffee pod holder according to its design (sliding, magnetic, or fixed). Immediately test weight capacity by placing a full pod sleeve or a few heavy pods inside. Gently pull downward to check for movement; the holder should feel solid and not sag.
If it wobbles, tighten screws slightly or add a second bracket for heavier loads. Pro tip: For extra security, apply a dab of thread-locking glue to screws. Finally, load all your pods and give a final tug. A properly installed holder will hold 20–30 pods without issue.
Enjoy your organized, clutter-free coffee station!
Best Ways to Organize Pods in Your Holder
Sort by flavor or brand for quick selection
To maximize efficiency in your under-cabinet coffee pod holder, group pods by flavor or brand. This simple method cuts down the time you spend searching for your morning brew. For example, dedicate one row or section to dark roasts, another to medium roasts, and a third to flavored options.
If you use multiple brands, keep each brand together so you can easily grab your preferred cup. This organization also helps family members or guests find what they want without rummaging. For a mixed-use holder, consider arranging pods from most-used to least-used, placing favorites at the front for easy access.
This system works well with both single-slot and tiered holders, ensuring every pod has a designated spot. By sorting upfront, you create a visual inventory that prevents buying duplicates and speeds up your daily routine.
Pair this with a quick weekly tidy to keep categories intact and maintain a clutter-free space.
Use labels or color coding
Enhance your under-cabinet pod holder with labels or color coding for instant identification.
Attach small adhesive labels to the holder’s edge or use a chalk marker on a clear section to mark categories like “Breakfast Blend” or “Decaf.” For a visual shortcut, apply colored dot stickers to both the holder and matching pods—red for strong, blue for mild, green for flavored.
This system is especially helpful in low-light under-cabinet areas, as colors are easier to spot than text. You can also use removable washi tape to create colored sections on the holder’s surface. If your holder has multiple tiers, assign a color per tier to streamline refilling.
This approach reduces decision fatigue and ensures everyone in the household can quickly locate their preferred pod. Update labels easily when you switch brands or flavors. By adding these visual cues, you transform a simple holder into an intuitive, time-saving tool that keeps your coffee station organized and accessible.
Rotate stock to use older pods first
Prevent stale coffee by rotating your pod stock in the under-cabinet holder. When you buy new pods, place them at the back or bottom of the holder, moving older pods forward or to the top.
This simple habit, often called “first in, first out,” ensures you use pods before their flavor declines. Check expiration dates occasionally and discard any that are past due.
If your holder has multiple rows, designate one row for “new arrivals” and another for “use now.” For vertical holders, slide newer pods underneath older ones. This method saves money by reducing waste and maintains consistent taste in every cup.
Pair rotation with a quick weekly glance to spot any forgotten flavors. You can also use a small date sticker on the holder to remind yourself when to rotate. By making this a routine, you’ll always enjoy fresh coffee and keep your pod collection efficient and clutter-free under the cupboard.
DIY vs. Store-Bought Under Cupboard Coffee Pod Holders
Pros of building your own custom holder
Building your own under-cupboard coffee pod holder offers unmatched customization for your specific kitchen layout and pod collection. You can tailor the dimensions to fit odd spaces between cabinets or above your coffee maker, maximizing vertical storage that store-bought options often waste.
DIY holders allow you to choose materials that match your decor, such as reclaimed wood for a rustic look or acrylic for a modern, minimalist feel. You can also design the pod capacity exactly to your consumption—whether you need space for 20 pods or 60.
A custom build lets you incorporate features like a magnetic front for easy access or a built-in drip tray to catch condensation. For frequent coffee drinkers, this approach saves money in the long run since materials like plywood or 3D-printed parts cost less than premium retail holders.
Additionally, you can add personal touches like engraved labels or LED strips for a premium look. However, weigh the time investment: a basic build takes 1-2 hours, while advanced designs may require a weekend.
If you enjoy woodworking or have leftover supplies, DIY is a rewarding way to solve storage clutter while adding a unique, functional piece to your kitchen.
Top rated store-bought options under $30
For a quick, no-fuss solution, several under-$30 store-bought under-cupboard coffee pod holders deliver reliable performance. The Simplehuman Under Cabinet Pod Holder (around $25) features a sleek, compact design with a strong adhesive mount that holds up to 20 standard pods.
Its spring-loaded mechanism ensures easy one-handed pod retrieval, ideal for busy mornings. Another top pick is the OXO Good Grips Pod Holder (under $20), which uses a no-drill adhesive strip and holds 18 pods vertically, saving cabinet space.
It’s made of durable, BPA-free plastic with a clear front for quick pod identification. For a budget-friendly option, the Keurig My K-Cup Universal Holder (around $15) works with most pod brands and includes a removable tray for cleaning.
All three options install in under 10 minutes with included mounting tape or screws. To ensure a secure fit, measure your cabinet overhang—most holders require at least 1.5 inches of clearance. Check weight limits (typically 5-10 lbs) to avoid sagging.
For high-humidity kitchens, choose stainless steel or coated finishes to prevent rust. These store-bought solutions offer instant organization without tools, perfect for renters or those short on time.
Tools and skills needed for DIY projects
Before starting a DIY under-cupboard coffee pod holder, assess your tools and skills to ensure a smooth build. Essential tools include a measuring tape, level, and pencil for marking cabinet placement.
For cutting materials, a circular saw or jigsaw works for wood, while a hacksaw is needed for metal or acrylic. You’ll also need a drill with bits for pilot holes and screws, plus a screwdriver for assembly. Sandpaper (120-220 grit) smooths edges, and wood glue or epoxy provides strong joints.
For a no-drill option, heavy-duty Command strips (rated for 5+ lbs) can mount lightweight holders. Basic skills required include accurate measuring to fit your pod dimensions—standard K-Cups are 1.9 inches tall and 1.5 inches wide, so allow 0.2-inch clearance per pod.
You should be comfortable cutting straight lines and drilling into cabinet bottoms (avoid wiring). If using wood, apply a water-resistant sealant to protect against steam. For beginners, start with a simple 2×4 board and dowel rods; advanced DIYers can add a sliding mechanism or LED lighting.
Practice on scrap material first, and always wear safety goggles. With patience, even novices can complete a functional holder in an afternoon.
Common Mistakes to Avoid with Under Cupboard Holders
Overloading beyond weight limits
It’s tempting to stock your under-cupboard coffee pod holder to its maximum, but exceeding the stated weight capacity can lead to catastrophic failure.
Most plastic or metal holders have a limit of 5 to 10 pounds, and loading them with heavy boxes or multiple sleeves of pods can cause the unit to detach from the cabinet. Check the manufacturer’s specifications before filling it completely.
A good rule of thumb is to fill it only to 80% capacity, especially if you have larger pods or heavier coffee boxes. This precaution not only protects your cabinet’s finish but also prevents pods from crashing down onto your counter or into your coffee maker.
For a safer setup, use a spring-loaded or adjustable holder that distributes weight evenly. If you must store many pods, consider a two-tier holder or a separate canister for overflow. Regularly inspect the mounting hardware for signs of stress, such as screws pulling away or adhesive weakening.
Remember, a secure holder is a safe holder—prioritize stability over storage volume to avoid a messy and potentially damaging spill.
Ignoring cupboard door swing clearance
A common oversight is failing to account for the full arc of your cupboard doors when installing a pod holder underneath. Even a slim holder can interfere with door hinges or cause the doors to bang against the pods, leading to frequent spills and damage.
Measure the clearance between the bottom of the cabinet and the top of the door’s swing path. For standard cabinets, you’ll need at least 2 to 3 inches of space to avoid contact. Install the holder slightly off-center if necessary, so it sits away from the hinge side.
Consider a holder with a low-profile design that hugs the cabinet bottom tightly. If your doors open inward (European-style), test the swing with the holder in place before drilling. A simple fix is to use a magnetic or slide-out holder that tucks away when not in use.
This not only prevents collisions but also keeps your coffee station organized and functional. Always simulate door movement with the holder loaded to ensure no obstruction—your morning routine shouldn’t include a door-pod collision.
Using weak adhesive strips instead of screws
While adhesive strips offer a quick, drill-free installation, they are often insufficient for the weight of coffee pods and the humidity of kitchen environments. Many pod holders come with adhesive pads that fail over time, especially under the constant pull of gravity and temperature changes near the stove or sink.
Screws provide a permanent, load-bearing solution that adhesive cannot match. If you’re renting or hesitant to drill, look for holders with heavy-duty industrial-grade adhesive rated for at least 15 pounds, but still check periodically for loosening.
For maximum safety, use the provided screws into cabinet studs or a solid wood base. If drilling isn’t an option, consider a magnetic holder on a metal cabinet or a clamp-on design that doesn’t rely on glue. Avoid double-sided foam tape, as it can leave sticky residue and fail suddenly.
A secure installation prevents accidents and keeps your coffee pods accessible without risk. Spend the extra 10 minutes to screw it in—your cabinets (and your morning) will thank you.
Frequently Asked Questions
What is the best way to mount a coffee pod holder under a cupboard?
The best way is to use a holder with adhesive strips or screws, depending on your cabinet’s material. For solid wood, screws provide the strongest hold, while adhesive strips work well for smooth surfaces and are renter-friendly.
How do I install a coffee pod holder under a cupboard without damaging the cabinet?
Use a holder with strong double-sided adhesive tape or command strips specifically designed for cabinets. Clean the surface thoroughly, press firmly, and wait 24 hours before loading pods to ensure a secure bond.
Will a coffee pod holder under a cupboard work with all pod sizes?
Most holders are designed for standard K-Cups, but some are adjustable or have wider slots to accommodate larger pods like Nespresso Vertuo or compostable pods. Check the product dimensions and slot width before purchasing.
How much weight can an under-cupboard coffee pod holder hold?
It depends on the mounting method and holder design. Adhesive-mounted holders typically support 2-5 pounds (about 20-30 pods), while screw-mounted holders can hold more. Always check the manufacturer’s weight limit.
Can I use an under-cupboard coffee pod holder in a rental apartment?
Yes, choose a holder that uses damage-free adhesive strips or suction cups. These can be removed without leaving residue or holes, making them ideal for rentals. Avoid screw-mounted options unless you have permission.
How do I clean a coffee pod holder mounted under a cupboard?
Most holders can be wiped down with a damp cloth or removed for washing if they’re designed with a detachable tray. Avoid harsh chemicals to prevent damage to the finish, and ensure the holder is dry before reattaching.
What should I consider when choosing a coffee pod holder for under a cupboard?
Consider the clearance height under your cupboard, the number of pods you want to store, the mounting method (adhesive vs. screws), and whether it fits your pod type. Also, check that the holder doesn’t obstruct cabinet doors or your workspace.
Conclusion
In summary, an under-cupboard coffee pod holder is a simple, space-saving solution that declutters your countertop and keeps your morning brew organized. By mounting pods within easy reach, you save time and reduce mess. Key takeaways include easy installation, maximized vertical storage, and quick access. Transform your kitchen workflow today—install a holder and enjoy a cleaner, more efficient coffee station every morning.