How To Make A Cold Latte
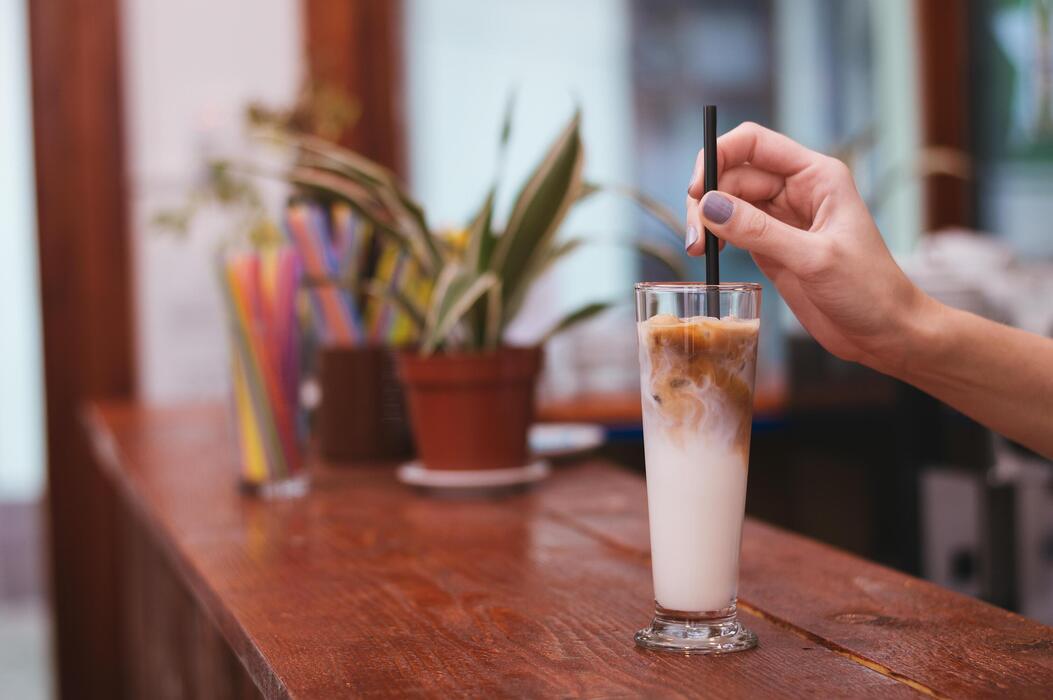
Craving a coffee shop quality drink without the high price tag? Learning how to make a cold latte at home is surprisingly simple and takes less than five minutes. Whether you prefer a classic version or something a bit sweeter, you only need three basic ingredients to get started. This guide provides a foolproof method for achieving that perfect, creamy balance every time.
What is a cold latte and how does it differ from iced coffee?
The main ingredients in a cold latte
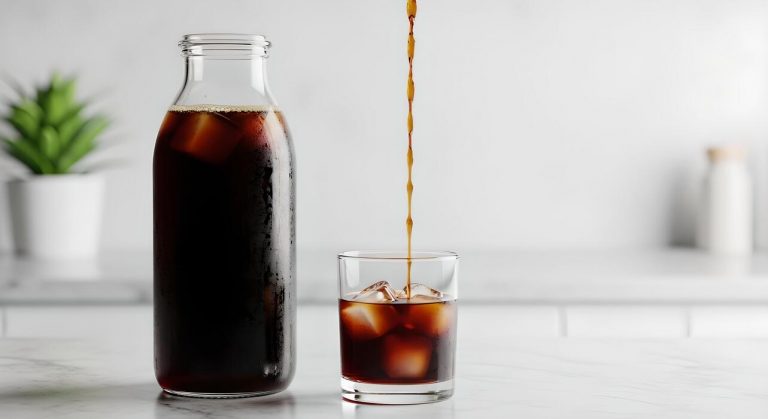
To master how to make a cold latte, you must first understand its core components: concentrated espresso, chilled milk, and ice. Unlike a standard iced coffee which relies on diluted drip coffee, a cold latte is defined by its high milk-to-coffee ratio.
You should begin by pulling two shots of high-quality espresso to ensure the flavor remains robust when mixed. Once your espresso is ready, fill a tall glass with fresh ice cubes to chill the beverage instantly. The final essential ingredient is roughly eight to ten ounces of your preferred milk.
While whole milk offers the creamiest profile, many baristas suggest oat or almond milk for a smooth, nutty finish that complements the acidity of the beans. If you prefer a sweeter profile, you can easily incorporate simple syrups or vanilla extract during the mixing phase.
By focusing on these high-quality ingredients, you ensure a balanced drink that tastes professional and refreshing every single time.
Espresso vs. brewed coffee bases
The primary difference between a cold latte and traditional iced coffee lies in the extraction method of the caffeine base. A cold latte uses pressure-extracted espresso, which provides a thick, syrupy body and a complex layer of crema that blends seamlessly with dairy.
In contrast, iced coffee is typically made from regular brewed coffee that has been cooled down, resulting in a thinner consistency and a more acidic profile.
When learning how to make a cold latte, it is crucial to use espresso because its intense concentration prevents the drink from tasting watery once the ice begins to melt.
If you do not own an espresso machine, a Moka pot or Aeropress can serve as a suitable substitute to create a strong coffee concentrate.
Choosing espresso over drip coffee ensures that the rich, roasted notes of the bean are not lost when you add large volumes of milk, providing that signature velvety mouthfeel that coffee lovers crave.
Why milk texture matters for cold drinks
While heat is absent in a cold latte, the texture of your milk is still the secret to a coffee-shop quality result. Most people simply pour cold milk over ice, but taking the extra step to slightly aerate or froth your milk can transform the entire experience.
Using a handheld milk frother for just ten seconds creates micro-foam that allows the milk to sit lighter on the palate, mimicking the silkiness of a hot latte. This aeration process helps the milk emulsify with the espresso, preventing the ingredients from separating into unattractive layers.
Furthermore, the fat content in the milk acts as a carrier for flavor; therefore, using cold-stretched milk enhances the natural sweetness without needing extra sugar. Whether you choose dairy or plant-based alternatives, focusing on a consistent, creamy texture ensures that every sip is cohesive.
Mastering this technique is the final step in elevating a basic cold beverage into a sophisticated, cafe-style latte that maintains its structure until the very last drop.
Essential tools and ingredients for the perfect cold latte
Choosing the right coffee beans and roast
To master how to make a cold latte, start by selecting high-quality coffee beans that can withstand dilution from ice. A medium to dark roast is generally the best choice because these beans possess bold, chocolatey, and nutty profiles that remain distinct even when mixed with cold milk.
Avoid light roasts, as their delicate acidity often becomes sour or unpleasantly sharp when served cold. For the freshest flavor, always prioritize whole bean coffee and grind it just before brewing to preserve the volatile aromatic oils.
If you are using a standard espresso machine, a fine grind is essential to create the concentrated base required for a latte. However, if you prefer making a cold brew concentrate as your base, use a coarse grind and steep for at least twelve hours.
This method results in a naturally sweeter, lower-acid profile that complements creamy textures perfectly. Investing in specialty-grade beans ensures your homemade beverage rivals any professional coffee shop quality.
Best types of milk and dairy-free alternatives
The texture of your cold latte depends heavily on your choice of liquid. For a classic, rich experience, whole milk is the gold standard because its high fat content provides a silky mouthfeel and balances the bitterness of the espresso.
If you are looking for plant-based options, oat milk is widely considered the superior alternative for chilled drinks due to its natural creaminess and ability to froth well without separating. Almond milk offers a lighter, nuttier finish but may lack the body of traditional dairy.
For those who enjoy a hint of sweetness, coconut milk can add an exotic flair, though it may slightly alter the primary coffee flavor. When preparing your drink, ensure the milk is thoroughly chilled before combining it with the espresso to maintain the ideal temperature.
Using a handheld milk frother on cold milk can also create a luxurious micro-foam topper, elevating the overall presentation and sensory experience of your refreshing homemade latte.
Must-have equipment for home baristas
Creating a professional-grade cold latte at home requires a few specific tools to ensure consistency and quality. The most critical component is a high-pressure espresso machine or a reliable Moka pot to produce a concentrated coffee shot.
To prevent your drink from becoming watery, use a large-capacity jigger to measure your syrups and milk ratios accurately. A handheld battery-operated frother is an affordable yet essential tool for aerating cold milk, giving your latte that signature velvety texture.
Additionally, consider using large silicone ice cube molds; bigger ice cubes melt much slower than standard ones, keeping your drink cold without diluting the flavor too quickly.
For the final assembly, a tall glass or a double-walled tumbler is ideal for maintaining the cold temperature while showcasing the beautiful layers of coffee and milk.
Keeping a long-handled stirring spoon nearby will help you incorporate any added sweeteners or flavors evenly throughout the beverage for a perfect sip every single time.
How to make a cold latte at home: A step-by-step guide
Brewing the perfect espresso shot
To start your cold latte journey, you must focus on the foundation: a high-quality espresso base. Begin by selecting freshly roasted coffee beans and grinding them to a fine consistency suitable for your machine.
If you do not own a professional espresso maker, a Moka pot or Aeropress serves as an excellent alternative for creating a concentrated brew. Aim to extract approximately two ounces of espresso, ensuring the flavor is bold enough to withstand dilution from ice and milk.
Once brewed, it is a professional secret to let the coffee cool slightly at room temperature for a minute before proceeding. This prevents the immediate melting of ice, which can lead to a watery, flavorless drink.
If you are in a hurry, placing the espresso in the freezer for two minutes can rapidly lower the temperature without compromising the integrity of the aromatic oils. Consistency in your brew strength ensures that every sip provides that signature caffeinated kick you expect from a premium cafe experience.
Mixing your coffee and sweeteners
The secret to a balanced cold latte lies in how you handle your flavorings and sweeteners while the coffee is still warm. Because sugar and thick syrups do not dissolve well in cold liquids, you should stir your sweetener directly into the hot espresso immediately after brewing.
Whether you prefer classic granulated sugar, honey, or flavored syrups like vanilla or caramel, this step ensures a smooth and consistent sweetness throughout the entire beverage. If you prefer using alternative sweeteners like stevia or agave, the same rule applies to prevent graininess at the bottom of your glass.
For those who enjoy a more modern twist, creating a homemade simple syrup by boiling equal parts water and sugar allows you to sweeten your latte even after it has been chilled. Experimenting with different flavor profiles during this phase allows you to customize the drink to your specific palate.
Remember that a little goes a long way, as the creamy nature of the milk will naturally mellow out the intensity of the coffee and sugar.
The right way to layer ice and milk
Finalizing your cold latte requires a specific assembly order to maintain the ideal temperature and texture. Start by filling a tall glass about three-quarters full with large ice cubes, as smaller chips melt too quickly and dilute the flavor profile.
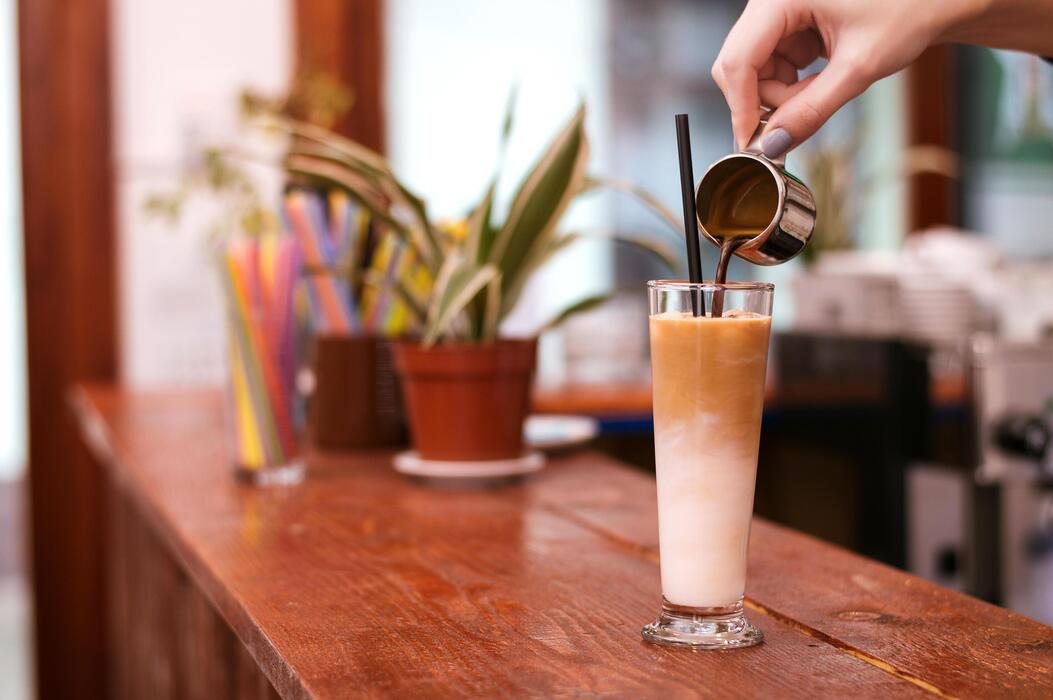
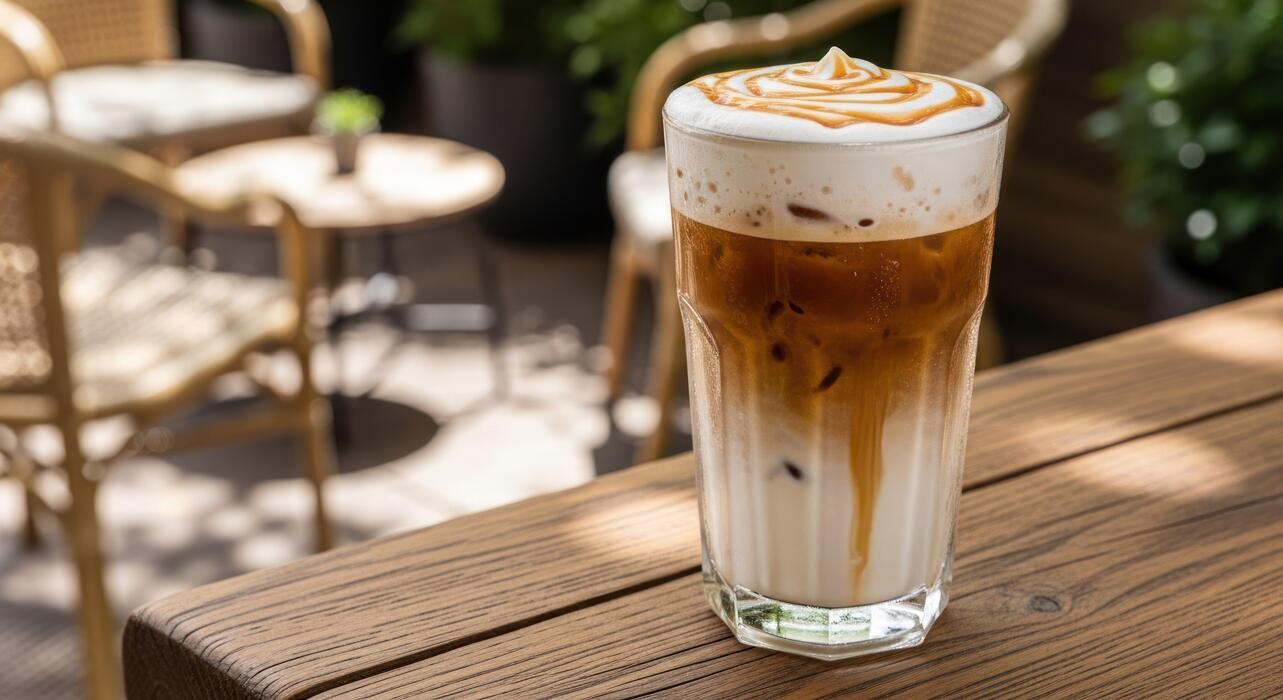
Pour your chilled or room-temperature espresso over the ice first, then follow with your choice of milk. Using cold whole milk or oat milk provides the best creamy consistency, which creates a beautiful marble effect as it mixes with the dark coffee.
For an elevated touch, you can use a handheld milk frother to aerate the cold milk for thirty seconds before pouring, giving your latte a luxurious, velvety microfoam top.
This layering technique not only makes the drink visually appealing for your morning routine but also ensures that the first sip is perfectly chilled. By following this structured approach, you achieve a professional-grade beverage that rivals any high-end coffee shop.
Enjoy your refreshing creation immediately to experience the contrast between the bold espresso and the silky, cold dairy or plant-based alternative.
Best ways to make espresso without an espresso machine
Using a Moka Pot for strong coffee
To craft a refreshing cold latte without a high-end machine, the Moka Pot is your best ally for creating a syrupy, intense base. Begin by filling the lower chamber with hot water to speed up the process and prevent burning the grounds.
Add finely ground coffee to the filter basket without tamping too firmly, as the steam pressure needs to pass through evenly. Place the pot on a medium-low heat setting and listen for the distinctive gurgling sound. Once the coffee fills the top chamber, immediately remove it from the heat.
To make it cold, pour the concentrated brew over a glass filled with extra ice to chill it instantly. Add your choice of cold milk or a dairy alternative, stirring gently to combine.
Using a Moka Pot ensures a bold flavor profile that stands up to dilution from melting ice, resulting in a professional-quality cold latte right in your own kitchen.
Making a cold latte with an AeroPress
The AeroPress is a versatile tool that mimics espresso by using manual pressure to extract deep flavors. For a cold latte, use the inverted method to allow for a longer steep time, which increases the body of the coffee.
Use a ratio of two rounded scoops of fine grounds to a small amount of water heated to 185°F. Stir the mixture for thirty seconds before plunging firmly into a sturdy glass. This creates a concentrated shot that serves as the perfect foundation.
Because the AeroPress uses a paper filter, your drink will have a clean finish without sediment. Pour this hot concentrate directly over a large glass of ice to drop the temperature rapidly. Top the glass with chilled milk and a splash of sweetener if desired.
The compact design of the AeroPress makes it the most efficient way to achieve a smooth and bright iced latte experience without needing bulky countertop equipment.
Using French Press concentrate as a base
While typically used for standard coffee, a French Press can produce a heavy-bodied concentrate ideal for cold lattes. Use a high coffee-to-water ratio, such as one part coffee to four parts water, to ensure the brew is strong enough. Use a coarse grind to avoid over-extraction and bitterness.
Let the coffee steep for four minutes before slowly pressing the plunger down. This method retains the natural oils of the beans, providing a rich mouthfeel that replicates the texture of real espresso. Once the concentrate is ready, pour it into a tall glass packed with ice cubes.
The key to a great cold latte here is the milk-to-coffee ratio; since the French Press produces a slightly less intense liquid than a Moka Pot, use a bit less milk to maintain the coffee’s prominence.
This approach is perfect for making multiple servings at once, allowing you to enjoy a chilled, caffeinated treat with minimal effort.
Tips for flavoring and sweetening your cold latte
How to make simple syrups at home
Creating your own custom syrups is the most effective way to ensure your cold latte is perfectly sweetened without any grainy residue. To begin, combine equal parts granulated sugar and filtered water in a small saucepan over medium heat.
Stir the mixture constantly until the sugar is completely dissolved, which prevents the liquid from becoming cloudy. Once it reaches a gentle simmer, remove it from the heat and let it cool to room temperature before transferring it to a glass jar.
You can easily infuse your syrup by adding vanilla beans, cinnamon sticks, or fresh lavender during the heating process to create a professional coffeehouse experience.
Using a simple syrup base is superior for iced drinks because the sugar is already in liquid form, allowing it to integrate seamlessly into cold espresso and milk.
Store your homemade creation in the refrigerator for up to one month, ensuring you always have a ready-to-pour sweetener available for your morning caffeine routine.
Natural sweeteners that dissolve in cold liquid
If you prefer to avoid refined sugars, several natural alternatives work beautifully in chilled beverages. Agave nectar is a top choice for cold lattes because of its low viscosity; it dissolves almost instantly in cold milk without requiring heat.
Another excellent option is liquid stevia or monk fruit drops, which provide intense sweetness without the added calories or glycemic impact. If you enjoy a richer, more complex profile, try using grade A maple syrup, which adds a delightful autumnal depth that pairs exceptionally well with oat or almond milk.
Unlike honey, which can seize and become sticky when hitting cold ice, maple syrup remains fluid and blends easily with a quick stir.
For those who enjoy a hint of floral notes, clover honey can be used if you first whisk it into the warm espresso shot before adding the ice and cold milk.
These natural options allow you to customize your sweetness levels while maintaining a smooth, consistent texture in every single sip.
Popular flavor combinations to try
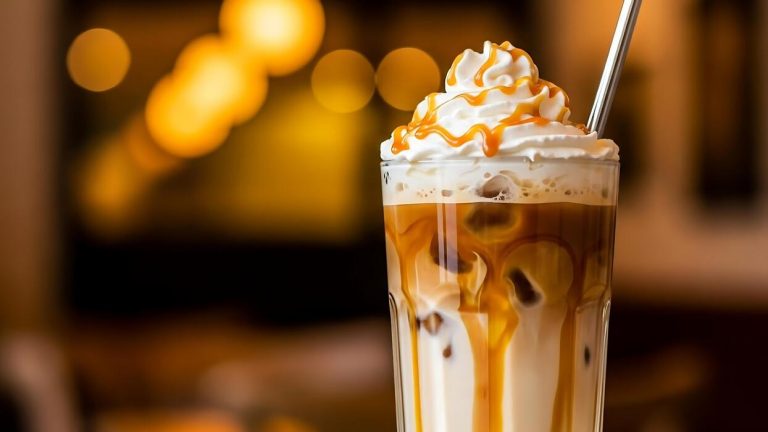
Elevating your cold latte involves experimenting with classic and contemporary flavor profiles that complement the acidity of the coffee. A timeless favorite is the Vanilla Bean and Sea Salt combination, where a hint of salt enhances the sweetness of the vanilla for a salted caramel-like finish.
For a more decadent treat, try a Mocha Mint latte by whisking high-quality cocoa powder into your hot espresso and adding a drop of peppermint extract before pouring it over ice.
If you prefer something lighter and more aromatic, the Honey and Lavender pairing offers a soothing, floral experience that is perfect for warm afternoons.
Another trending option is the Brown Sugar and Cinnamon latte; simply shake your espresso with a spoonful of brown sugar and a dash of cinnamon to create a frothy, spiced delight.
These curated flavor pairings transform a basic beverage into a gourmet treat, allowing you to mimic your favorite café orders from the comfort of your own kitchen.
How to get a creamy texture in a cold latte
Using a handheld milk frother for cold foam
To achieve a professional-grade creamy texture in your cold latte, a handheld milk frother is your most effective tool. Unlike traditional steaming which uses heat to expand proteins, frothing cold milk requires high-speed aeration to create a stable microfoam.
Start by pouring your chosen milk into a tall glass, leaving ample room for expansion. Submerge the frother whisk just below the surface and turn it on, moving the wand up and down to incorporate air and build volume.
Once the milk has doubled in size and looks velvety, gently tap the glass on the counter to pop any large bubbles. Pour this thick cold foam over your chilled espresso and ice.
This technique ensures that the milk doesn’t just dilute the coffee but provides a luxurious, silk-like mouthfeel that mimics a nitro brew.
For the best results, ensure your milk is straight from the refrigerator, as colder temperatures allow the fats to hold their structure much longer during the rapid whisking process.
The cocktail shaker method for extra froth
If you do not own specialized coffee equipment, utilizing a standard cocktail shaker is a brilliant alternative for creating a frothy cold latte. This method relies on vigorous agitation to emulsify the espresso and milk together, resulting in a consistent, creamy drink with a uniform layer of foam.
Begin by adding your espresso, milk, and sweetener into the shaker, then fill it halfway with ice cubes. Shake the mixture forcefully for at least twenty seconds until the exterior of the shaker feels frost-cold.
The physical action of the ice hitting the liquid breaks down the milk proteins, creating a dense and bubbly texture that is impossible to achieve by simply stirring with a spoon.
When you strain the mixture into your serving glass, you will notice a beautiful gradient and a frothy head of foam that stays intact.
This approach is particularly effective for those who enjoy a fully integrated flavor profile where the coffee and milk are perfectly blended into one smooth, refreshing beverage.
Why fat content affects your latte’s creaminess
The science behind a truly creamy cold latte lies primarily in the fat and protein content of your chosen dairy or plant-based milk. Whole milk is generally considered the gold standard because its high fat concentration provides a rich, heavy body that coats the palate.
When you agitate whole milk, the fats stabilize the air bubbles, creating a long-lasting foam that won’t immediately collapse into liquid. If you prefer plant-based alternatives, look for ‘barista edition’ labels, as these products contain added emulsifiers and healthy fats specifically designed to mimic the behavior of cow’s milk.
Lower-fat options like skim milk can create a stiff foam, but they often lack the satisfying richness that makes a latte feel indulgent. Choosing a milk with at least three grams of fat per serving ensures that your cold latte has enough structural integrity to feel creamy rather than watery.
Always remember that the higher the fat content, the smoother and more decadent your final drink will taste when served over ice.
Common mistakes to avoid when making cold lattes
How to prevent watered-down coffee
One of the most frequent errors when learning how to make a cold latte is pouring hot espresso directly over a full glass of ice cubes.
This immediate thermal shock causes the ice to melt rapidly, resulting in a weak, translucent beverage that lacks the robust character of a true latte. To solve this, you should always chill your espresso or concentrated coffee for a few minutes before assembly.
A professional trick is to use coffee ice cubes made from leftover brew, which ensures that as the ice melts, it actually adds more flavor rather than diluting the drink.
Additionally, consider using a higher coffee-to-water ratio during the initial brewing phase to compensate for the inevitable melting that occurs during consumption. By managing the temperature transition carefully, you maintain the rich, velvety texture and bold caffeine profile that defines a high-quality iced beverage.
Taking these extra steps prevents your drink from turning into flavored water within minutes of preparation.
The problem with adding sugar directly to ice
Granulated sugar does not dissolve well in cold liquids, leading to a gritty texture at the bottom of your glass while the rest of the drink remains bitter.
To avoid this common pitfall, you must create a simple syrup by dissolving equal parts sugar and hot water before you begin the cooling process. Alternatively, you can stir your sweetener into the hot espresso immediately after brewing, while the heat is sufficient to break down the crystals.
If you prefer alternative sweeteners like honey or agave, these also require vigorous mixing with warm liquid to ensure even distribution throughout the milk. Avoid adding dry powders like cocoa or cinnamon directly to the ice, as they will clump and create an unpleasant mouthfeel.
By ensuring your sweeteners are fully integrated into the liquid phase before adding the ice, you guarantee a consistent level of sweetness from the first sip to the very last drop without any sandy residue.
Why temperature order changes the taste
The sequence in which you combine your ingredients significantly impacts the final flavor profile and visual appeal of your cold latte. Many beginners make the mistake of adding ice last, which splashes the liquid and disrupts the layering process.
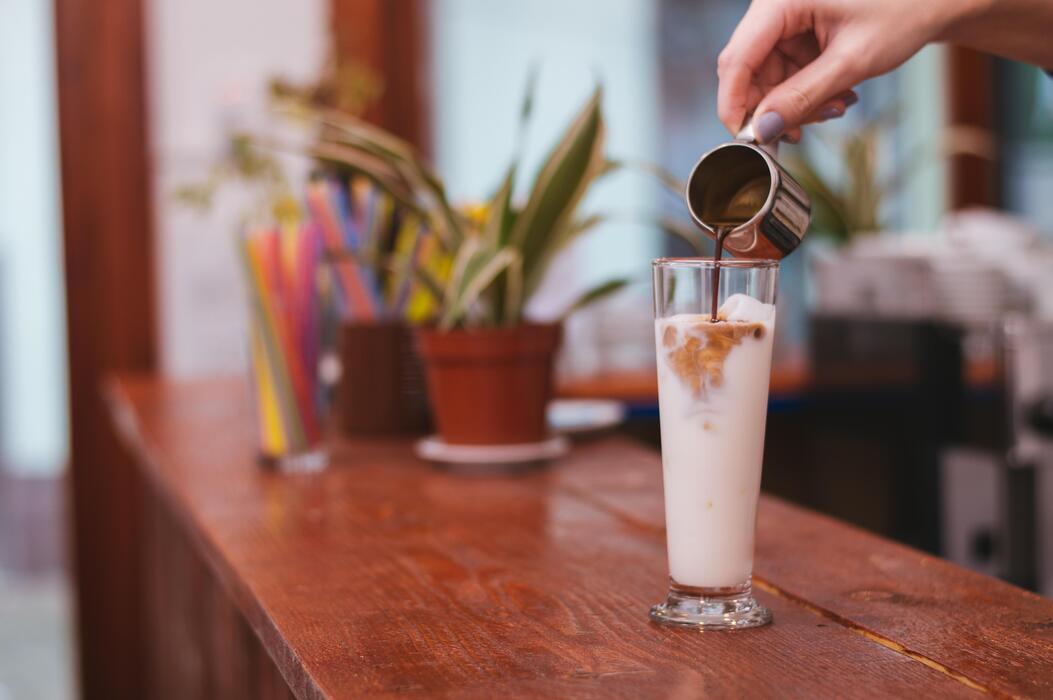
For a superior result, you should add the cold milk to the glass first, followed by the ice, and then gently pour the espresso over the top.
This method allows the coffee to slowly filter through the chilled milk, creating a beautiful marbled effect and preventing the espresso from scorching or becoming overly bitter upon contact with the ice.
Furthermore, keeping the milk chilled until the very last second ensures the proteins remain stable, providing a creamy consistency that balances the acidity of the beans. Understanding the physics of temperature order helps you achieve a cafe-quality drink where the nuances of the roast are preserved.
This strategic layering ensures every component remains at its optimal temperature throughout the entire drinking experience.
Frequently Asked Questions
What is the basic ratio for a cold latte?
A standard cold latte typically uses a 1:3 ratio of espresso to milk. For a standard glass, use 2 shots of espresso (about 2 ounces) and 6 ounces of cold milk poured over a full cup of ice.
Do I need to brew the coffee differently for a cold latte?
While you can use regular drip coffee, it is best to use concentrated espresso or cold brew concentrate so the flavor isn’t lost when diluted by ice. Ensure the coffee is slightly cooled before pouring it over ice to prevent rapid melting.
Can I make a cold latte without an espresso machine?
Yes, you can use a Moka pot, Aeropress, or very strong instant coffee to mimic espresso. Alternatively, use a cold brew concentrate which provides a smooth, bold base that pairs perfectly with cold milk.
How do I add sweetness or flavor to my cold latte?
It is best to mix syrups or sugar into the hot espresso before adding it to the ice and milk so they dissolve completely. You can also use liquid sweeteners like simple syrup, maple syrup, or honey which blend easily into cold liquids.
How can I make the milk frothy for an iced latte?
To get a creamy texture, you can use a handheld milk frother on cold milk for about 30 seconds before pouring it over your coffee. You can also shake cold milk in a mason jar for a similar aerated effect.
Which type of milk works best for cold lattes?
Whole milk provides the creamiest texture, but oat milk is a popular dairy-free alternative because it mimics the thickness of dairy. Almond and soy milk also work well but may have a thinner consistency.
Conclusion
Mastering the art of a cold latte at home is both simple and rewarding. By choosing quality espresso, frothing your milk to perfection, and experimenting with various syrups, you can create a cafe-quality beverage in your own kitchen. Enjoy the process and your refreshing homemade creation.