Latte Art Nespresso Aeroccino
Achieving beautiful latte art with a Nespresso Aeroccino is easier than you think. While this clever frother is known for stiff foam, you can definitely master silky microfoam perfect for pouring hearts and rosettes. This guide will show you exactly how to adjust your technique and milk levels to get that liquid-gold consistency. Whether you have the Aeroccino 3 or 4, we have the quick solutions you need to start pouring like a professional barista from your own kitchen.
Can You Really Make Latte Art with a Nespresso Aeroccino?
The Science of Aeroccino Microfoam
Achieving latte art with a Nespresso Aeroccino requires understanding how it manipulates milk proteins and fats. Unlike a traditional steam wand that uses high-pressure moisture to create a vortex, the Aeroccino relies on a magnetic whisk to incorporate air.
To get the best results, you must aim for ‘microfoam’ rather than ‘dry foam.’ This is achieved by using cold, fresh whole milk and stopping the cycle slightly early if the foam becomes too stiff.
Once the cycle finishes, immediately swirl the pitcher vigorously to integrate the bubbles back into the liquid milk. This creates a glossy, wet-paint consistency that is essential for pouring designs.
If the foam sits for even thirty seconds, it will separate, leaving you with a thick head of foam that simply ‘plops’ onto your espresso rather than gliding across the surface.
Mastering this timing is the most critical step in transforming standard Aeroccino output into a pourable medium for creative coffee designs.
Aeroccino 3 vs. Aeroccino 4 for Latte Art
When comparing models, the Aeroccino 4 is the clear winner for aspiring baristas due to its versatile texture settings.
While the Aeroccino 3 offers a single hot foam option that often produces a texture too stiff for intricate patterns, the Aeroccino 4 features a dedicated latte macchiato button designed for thinner, more fluid foam.
This specific setting mimics the texture produced by professional steam wands, making it significantly easier to pour hearts or rosettas. Additionally, the Aeroccino 4 includes a convenient handle and pouring spout, which are vital for the precision required in latte art.
If you are using an Aeroccino 3, you can still succeed by removing the wire coil from the whisk to reduce aeration, though this requires more manual agitation afterward.
Ultimately, the hardware improvements in the fourth generation provide a much more consistent foundation for those who prioritize the aesthetic presentation of their morning coffee over simple convenience.
Common Limitations and How to Overcome Them
The primary challenge with the Aeroccino is that it does not allow for ‘stretching’ and ‘rolling’ the milk simultaneously. To overcome this, you should transfer the heated milk into a dedicated stainless steel latte art pitcher immediately after the whisk stops.
This transfer process helps break down larger bubbles and gives you a tapered spout for better control over the flow rate. If the milk appears too thick, simply spoon off the top layer of stiff foam before you begin your pour.
Another professional tip is to tap the pitcher firmly on the counter to pop any remaining large bubbles, ensuring a silky finish. Remember that the temperature of an Aeroccino is fixed; therefore, you must work quickly before the milk proteins begin to stabilize and harden.
By combining these manual techniques with the machine’s automated heating, you can bypass the mechanical limitations of the device and produce impressive, cafe-quality latte art right in your own home kitchen.
Best Milk Choices for Aeroccino Latte Art

Why Whole Milk Works Best
For achieving professional results with your Nespresso Aeroccino, whole dairy milk is the gold standard due to its ideal ratio of fats and proteins. The proteins in cow’s milk act as stabilizers that encapsulate air bubbles, creating a structural framework known as microfoam.
Meanwhile, the fat content provides a rich, velvety mouthfeel and gives the foam a glossy sheen that is essential for high-contrast latte art patterns like hearts or rosettas. When using the Aeroccino, whole milk produces a dense and elastic texture that pours smoothly into your espresso base.
If you use skim or low-fat varieties, the foam often becomes too stiff and ‘dry,’ sitting on top of the coffee rather than blending seamlessly.
For the best results, ensure you use fresh, cold milk straight from the refrigerator, as this allows the Aeroccino whisk more time to incorporate tiny air bubbles before the milk reaches its peak temperature, resulting in a pourable consistency perfect for creative designs.
Best Plant-Based Milks for Frothing
If you prefer non-dairy options, selecting the right type is crucial for Nespresso Aeroccino success, as many plant milks lack the structural integrity to hold foam. Oat milk is the top recommendation for latte art because it mimics the creamy consistency of dairy better than any other alternative.
Specifically, look for ‘Barista Edition’ labels, which contain added stabilizers and healthy fats designed to withstand the heat and mechanical agitation of the frothing whisk.
Soy milk is another reliable contender, offering a high protein count that creates a thick, stable foam, though it can sometimes curd if the espresso is too acidic. Almond and coconut milks are generally more challenging because they tend to produce thin, watery foam that dissipates quickly.
To maximize your chances of success with plant-based options, avoid homemade versions which often lack the necessary emulsifiers. Stick to high-quality commercial brands that are formulated to create that crucial microfoam texture needed to draw intricate shapes on your morning latte.
The Importance of Milk Temperature
Temperature plays a pivotal role in the chemistry of milk frothing and the ultimate success of your latte art. The Nespresso Aeroccino is calibrated to heat milk to approximately 140-160 degrees Fahrenheit, which is the sweet spot for sweetness and stability.
At this temperature range, the lactose sugars in the milk are most perceptible, providing a natural sweetness that complements the Nespresso coffee notes. If the milk becomes too hot, the proteins denature and collapse, leading to a thin consistency that won’t hold a shape.
Conversely, if you are using the cold froth setting, the bubbles will be larger and less stable for pouring intricate designs. For the most consistent results, always start with chilled milk to extend the frothing cycle.
This extra time allows for the creation of finer microbubbles, which are the secret to that ‘wet paint’ look required for pouring. Once the Aeroccino cycle finishes, tap and swirl the pitcher immediately to integrate any larger bubbles and maintain a uniform, pourable texture for your art.
How to Prep Your Aeroccino for Perfect Foam

Choosing the Right Whisk Attachment
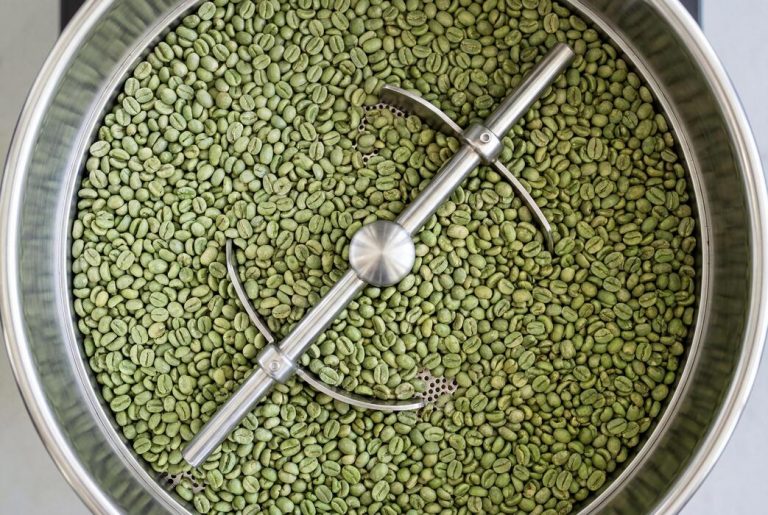
To achieve the silky microfoam required for latte art using a Nespresso Aeroccino, you must first select the correct whisk configuration. Most models come with a whisk that has a removable metal spiral ring. For latte art, the goal is a thinner, pourable consistency rather than a stiff, spoonable peak.
You should remove the metal spiral spring and use only the smooth plastic whisk base. This configuration creates a gentle vortex that incorporates smaller air bubbles, resulting in the liquid velvet texture known as microfoam.
If you leave the spring on, the device will introduce too much air, creating a dry froth that sits on top of the coffee instead of blending with it. Always ensure the whisk is firmly seated on the internal spindle before adding your milk.
Choosing high-protein milk, such as whole dairy or barista-edition oat milk, further assists the whisk in stabilizing those essential tiny bubbles for a professional finish.
The Secret to Stopping the Cycle Early
One of the most effective tricks for mastering latte art with an automated frother is manual intervention. The Aeroccino is programmed to run a full cycle until it reaches a specific temperature, but for the best pouring consistency, you should stop the cycle 5 to 10 seconds early.
By pressing the button to stop the spinning before the light turns off, you prevent the milk from becoming too stiff and separated. The milk should still be glossy and wet; if it looks like shaving cream, it has gone too far.
Once stopped, immediately tap the jug firmly on the counter to pop any large surface bubbles and swirl the milk vigorously in a circular motion. This ‘polishing’ technique keeps the milk and foam integrated into a homogenous mixture.
This fluid state is exactly what you need to control the flow from the spout, allowing you to create hearts or rosettas with precision and ease.
Cleaning Tips to Prevent Burnt Milk Residue
Maintaining a pristine interior is vital because any leftover protein buildup can interfere with the whisk’s magnetic rotation and ruin the flavor of your foam. To ensure your Aeroccino is always ready for latte art, you must rinse the jug with cold water immediately after every single use.
This sudden temperature shift helps loosen the milk solids before they can bake onto the non-stick coating. Use a soft, non-abrasive sponge or cloth to wipe the bottom and sides; never use metal scouring pads which can scratch the surface and cause future sticking.
Pay special attention to the small nub where the whisk sits, as residue often hides there and can create a ‘burnt’ taste in subsequent batches. If you notice a stubborn film forming, a quick soak with warm soapy water will restore the surface.
Keeping the sensor and base dry is equally important to ensure the heating element functions consistently for perfect, repeatable results every morning.
Step-by-Step Guide to Pouring Your First Heart
Prepping Your Nespresso Espresso Base
To achieve a successful heart, you must start with a dark, syrupy foundation. Use a Nespresso capsule with an intensity rating of eight or higher to ensure the crema is thick enough to support the milk.
Brew a single shot of espresso directly into a wide-mouthed latte bowl or rounded cup. If your espresso looks thin, the milk will simply sink to the bottom rather than resting on the surface.
While the machine brews, prepare your Aeroccino by removing the wire coil from the whisk to create microfoam instead of stiff peaks. Fill the Aeroccino exactly to the lower ‘max’ line and start the heating cycle.
Once finished, give the Aeroccino a firm tap on the counter and a vigorous swirl to integrate the bubbles. This creates a glossy, wet-paint texture that is essential for fluid movement.
Swirling the espresso base right before you begin the pour will break up any surface tension, allowing the white microfoam to glide effortlessly across the dark crema for maximum visual contrast.
The Transfer Technique: Using a Milk Pitcher
The biggest challenge with an Aeroccino is its wide pouring spout, which lacks the precision needed for detailed art. For the best results, you must transfer the heated milk into a dedicated stainless steel milk pitcher with a pointed spout.
Pour the milk steadily from the Aeroccino into the pitcher, ensuring you capture the silky microfoam that often settles at the bottom.
Once transferred, swirl the pitcher aggressively to keep the milk and foam from separating; if the milk sits for even ten seconds, it will become too stiff to pour a heart. Your goal is a homogenous, pourable consistency that looks like melted marshmallows.
If you see large bubbles, tap the pitcher firmly on a hard surface to pop them. Holding the pitcher correctly provides the leverage and control required for the delicate wrist movements of a heart.
This extra step bridges the gap between basic home equipment and professional barista tools, giving you the fluid dynamics necessary to manipulate the foam as it hits the espresso surface.
Hand Positioning and Pouring Speed
Begin by tilting your espresso cup at a 45-degree angle to create a deeper pool for the milk to enter. Hold the pitcher high, about three inches above the cup, and pour a thin, steady stream into the center of the espresso to pierce the crema and establish a base.
Once the cup is half full, lower the pitcher until the spout is almost touching the liquid surface. This change in height is the ‘drop’ that allows the white foam to stay on top. Increase your pouring speed slightly and watch for a white circle to appear.
Keep the pitcher centered and steady as the circle expands to fill the cup. To finish the heart, gently lift the pitcher back up to thin out the stream and draw a line through the center of the circle from top to bottom.
This ‘cut-through’ motion pulls the top of the circle down into the classic heart lobes. Maintaining a consistent flow rate is the secret to preventing the design from blurring or becoming a shapeless white blob.
Advanced Latte Art Patterns with Nespresso

How to Pour a Rosetta
To master the Rosetta with a Nespresso Aeroccino, you must first ensure your milk has a glossy, micro-foam texture rather than stiff peaks. Start by pouring your frothed milk from a height of about three inches into the center of your espresso to create a solid base.
Once the cup is half full, lower the pitcher spout as close to the surface as possible. This proximity is the secret to getting the white foam to fan out. Begin a rhythmic side-to-side wrist wiggle while slowly moving the pitcher toward the back of the cup.
As the layers form and you reach the edge, lift the pitcher slightly and draw a thin line of milk straight through the center of the pattern. This final motion creates the stem and pulls the leaves into the iconic symmetrical shape.
Remember that consistent speed and height are the most critical factors when using the Aeroccino’s slightly thicker foam for this delicate design.
Creating Multi-Layered Tulips
The multi-layered tulip is an advanced technique that requires precise control over the Aeroccino’s foam flow. Begin by pouring a small amount of milk to establish the crema base, then stop.
Lower the pitcher and pour a small circle of foam into the center, giving it a gentle push forward to create a crescent shape. Lift the pitcher to stop the flow, then repeat this action two or three times, stacking each new ‘petal’ behind the previous one.
The key with Nespresso milk is to avoid over-aerating, as bubbles that are too large will prevent the petals from separating cleanly. Aim for a ‘wet’ paint consistency that allows the white foam to slide across the espresso surface.
For a professional finish, ensure each layer is symmetrical before adding the next. Finally, lift the pitcher and cut through the center with a steady, thin stream to pull the layers into a cohesive tulip shape that sits perfectly atop your latte.
Using Etching Tools for Complex Designs
When the Aeroccino produces foam that is a bit too thick for free-pour art, etching becomes your best solution for complex designs. Start by pouring a simple heart or a solid white circle onto your Nespresso coffee.
Use a specialized etching tool or a simple toothpick to manipulate the foam and crema. You can drag the tool from the outside of the white circle toward the center to create starburst patterns, or move it in circular motions to develop intricate swirls.
If you want to add more detail, dip the tip of your tool into the dark espresso crema and use it as ‘ink’ to draw fine lines or animal shapes on the white foam surface.
This method is much more forgiving than free-pouring and allows for high-level customization like spiderwebs or floral accents. Always wipe your tool clean between every stroke to ensure the lines remain sharp and the contrast between the dark coffee and white milk stays vivid.
Troubleshooting Thin or Bubbling Foam
How to Fix Large Surface Bubbles
Large surface bubbles are the enemy of smooth latte art and usually indicate that the Aeroccino has introduced too much air too quickly. To achieve a silky microfoam, you must tap the milk jug firmly on the counter immediately after the heating cycle finishes to pop any visible large bubbles.
Once you have tapped the pitcher, swirl the milk vigorously in a circular motion to re-incorporate the foam with the liquid milk. This process, often called ‘polishing’ the milk, creates a glossy, wet-paint appearance that is essential for pouring intricate designs.
If bubbles persist, consider cleaning the magnetic whisk thoroughly, as any dried milk residue can disrupt the spinning motion and create uneven aeration.
Additionally, ensure you are using fresh, cold milk directly from the refrigerator, as warmer milk tends to develop unstable, soapy bubbles that break down quickly during the pour. Consistent swirling is the most effective way to maintain a uniform texture throughout the entire pitcher.
What to Do When Foam is Too Thick
The Aeroccino is famous for creating a very stiff, ‘spoonable’ foam which is perfect for cappuccinos but often too dense for flowing latte art.
If your foam is sitting on top of the coffee like a cloud, you need to remove the wire coil from the whisk attachment and use only the plastic ring base.
This significantly reduces the amount of air injected into the milk, resulting in a thinner, more fluid texture that behaves like liquid velvet.
Another pro tip is to stop the machine early by pressing the button manually before the cycle automatically ends; this prevents the foam from becoming overly aerated and dry.
If the milk still feels too thick, try pouring out the top layer of stiff foam into a separate cup before you begin your pour.
By using only the more fluid milk from the bottom of the Aeroccino, you will have much better control over the flow rate, allowing your patterns to spread across the crema surface more easily.
Adjusting Milk Volume for Better Texture
Proper volume management inside the Aeroccino is a critical factor that many users overlook when trying to master latte art. To get the best results, you should fill the milk precisely to the lower ‘max’ line indicated inside the canister.
Overfilling the device prevents the whisk from creating a proper vortex, which leads to uneven heating and inconsistent foam density. Conversely, using too little milk often causes the whisk to spin too fast, resulting in excessive froth that is impossible to pour into a heart or rosette shape.
For the best latte art results, use approximately 100ml to 120ml of milk, which provides enough volume for a standard latte cup while allowing the whisk to integrate air bubbles evenly.
If you find the texture is still too thin, try switching to a higher protein milk like whole dairy or a specialized ‘barista edition’ oat milk. These varieties are specifically formulated to hold their structure better when heated in the Aeroccino’s rapid-spin environment.
Essential Tools to Pair with Your Aeroccino
Why You Need a Stainless Steel Pitcher
To achieve professional latte art with your Aeroccino, transferring your foam into a stainless steel pitcher with a sharp spout is an absolute necessity. While the Aeroccino is excellent at creating microfoam, its wide rim makes controlled pouring nearly impossible.
By decanting the milk into a dedicated frothing jug, you gain the precision control required for intricate patterns like hearts or rosettas.
The stainless steel material also allows you to feel the temperature of the milk through the handle, while the tapered spout helps you get closer to the surface of the espresso crema. This proximity is critical for the foam to glide over the coffee rather than sinking to the bottom.
For the best results, ensure your pitcher is chilled before pouring in the warm Aeroccino foam. This slight temperature drop helps stabilize the bubbles, making the texture more elastic and easier to manipulate into seamless, high-definition designs that look as good as they taste.
Best Nespresso Capsules for High Contrast
The secret to striking latte art lies in the visual contrast between the white microfoam and the dark espresso base. For those using Nespresso machines, selecting high-intensity capsules like Napoli, Kazaar, or Ispirazione Ristretto is the best strategy.
These pods produce a thick, robust crema that acts as a canvas, supporting the weight of the milk without breaking. A weak or watery espresso will cause your art to blur and disappear into the drink.
To optimize the canvas, brew your chosen capsule as a short ristretto shot to concentrate the oils and colors. This creates a dark, syrupy foundation that allows the white foam from your Aeroccino to stand out with sharp, defined edges. Additionally, avoid flavored pods which often have thinner crema.
Sticking to dark roast blends with Robusta content will provide the structural integrity needed to hold complex shapes, ensuring your latte art remains visible until the very last sip of your morning beverage.
Thermometers and Cleaning Brushes
Precision and maintenance are the final pieces of the latte art puzzle when using the Aeroccino system. Incorporating a clip-on digital thermometer allows you to monitor the milk temperature, ensuring it stays between 140 and 155 degrees Fahrenheit.
Milk that is too hot will lose its sweetness and structural elasticity, making it difficult to pour delicate lines. Conversely, keeping your equipment pristine is vital for consistent foam quality.
Investing in a soft-bristled cleaning brush ensures you can remove every trace of milk residue from the Aeroccino’s whisk and non-stick interior without causing scratches. Even a tiny amount of leftover protein buildup can prevent the whisk from spinning at full speed, leading to inconsistent aeration and bubbly, poor-quality foam.
By using a dedicated cleaning kit, you protect the longevity of your device and guarantee that every batch of milk is perfectly textured for pouring. Consistent maintenance leads to consistent microfoam, which is the ultimate foundation for mastering professional-level coffee presentation at home.
Frequently Asked Questions
Can you make latte art with a Nespresso Aeroccino?
Yes, it is possible to create latte art with an Aeroccino, though it requires more technique than a traditional steam wand. The key is to achieve a wet, silky microfoam rather than a thick, stiff foam that sits on top of the coffee.
Which whisk attachment should I use for latte art?
You should use the whisk without the wire coil (the smooth plastic ring) for latte art. This creates a thinner, more pourable microfoam necessary for designs, whereas the spiral whisk creates a froth that is too airy and stiff to pour patterns.
How do I get the right milk consistency for latte art in an Aeroccino?
Fill the Aeroccino to the lower ‘max’ line and stop the cycle 5-10 seconds before it finishes automatically to prevent the milk from becoming too stiff. Immediately transfer the milk to a dedicated stainless steel milk pitcher with a spout to gain better pouring control.
Do I need a separate milk pitcher to do latte art with Nespresso?
Yes, a milk pitcher (jug) with a sharp spout is essential because the Aeroccino’s rim is too wide for detailed pouring. Transferring the milk also helps break up larger bubbles and allows you to swirl the milk to keep it integrated.
What is the best milk for latte art with an Aeroccino?
Whole milk generally produces the best results due to its fat and protein content, which creates a stable microfoam. If using plant-based options, ‘Barista Edition’ oat or soy milks are recommended as they are formulated to stretch and pour like dairy.
Why is my Aeroccino foam too thick for latte art?
The Aeroccino is designed to create ‘dry’ foam for cappuccinos by default. To fix this, ensure the spiral spring is removed from the whisk and try swirling the pitcher vigorously on the counter after heating to incorporate the foam back into the liquid.
Conclusion
Mastering latte art with your Nespresso Aeroccino is a rewarding journey that blends technique with creativity. By focusing on using fresh, cold milk and achieving the perfect microfoam consistency, you can transform your daily coffee into a visual masterpiece. Remember that consistency comes with practice and patience. Do not be discouraged by initial spills; instead, keep experimenting with different patterns. Start pouring today and elevate your home barista experience to a professional level.