How To Make Your Own Cold Foam
Want café-quality foam without the machine? how to make your own cold foam is simpler than you think. The core problem is achieving that silky, stable topping without it collapsing. You’re in the right place: all you need is cold milk, a jar or frother, and a quick technique. I’ll show you how to nail the texture, sweetness, and flavor every time, no barista skills required.
What Is Cold Foam and Why Make It at Home
Cold foam vs. steamed milk foam: key differences
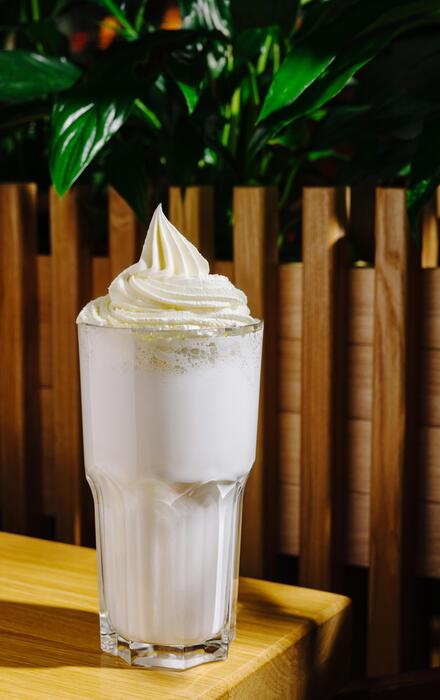
Understanding the difference between cold foam and steamed milk foam is crucial for making the perfect topping. Cold foam is created by frothing cold milk (typically nonfat or low-fat) using a cold frother, blender, or French press until it becomes thick, velvety, and pourable.
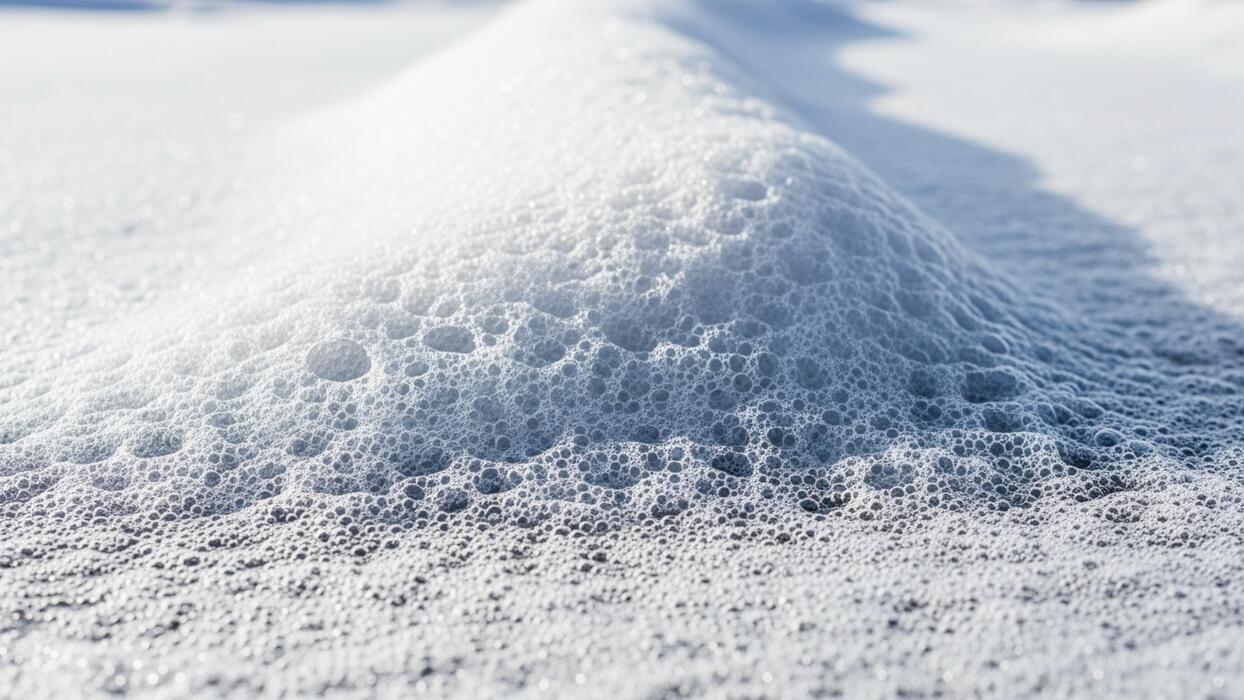
Unlike steamed milk foam, which relies on heat to denature proteins and create a stiff, airy structure, cold foam remains dense and creamy with smaller, more uniform bubbles. This makes it ideal for topping iced drinks, as it sits atop the beverage without melting quickly.
Steamed milk foam is produced by heating milk to around 150°F and aerating it with steam, resulting in a lighter, more voluminous foam that’s perfect for hot lattes and cappuccinos.
Cold foam, on the other hand, is never heated, so it retains a cool, silky texture that complements iced coffees and cold brews.
For the best homemade cold foam, use cold milk straight from the fridge and froth for 20–30 seconds until it reaches a smooth, thick consistency that slowly incorporates into your drink.
Benefits of homemade cold foam over store-bought
Making cold foam at home offers significant advantages over buying pre-made versions from coffee shops or stores. Cost savings are immediate: a single homemade batch uses pennies worth of milk and flavorings, while a store-bought cold foam latte can cost $5–$7.
Control over ingredients is another major benefit—you can avoid artificial stabilizers, gums, and preservatives often found in commercial products. Homemade cold foam also allows customization of flavor and sweetness; you can add vanilla extract, cinnamon, cocoa powder, or sugar-free syrups to match your taste.
Additionally, freshness matters—homemade foam is made seconds before serving, ensuring optimal texture and flavor that can’t be matched by shelf-stable alternatives. Dietary restrictions are easily accommodated: use oat milk, almond milk, or lactose-free milk for a vegan or low-lactose version.
Finally, no special equipment is needed—a simple handheld frother, blender, or jar with a lid works perfectly. By making your own, you also reduce single-use cup waste from takeout drinks and gain the satisfaction of crafting a café-quality topping at home.
Common ingredients used in cold foam recipes
The base of any cold foam is milk, but not all types froth equally. Nonfat (skim) milk is the most popular choice because its low fat content creates the thickest, most stable foam due to higher protein concentration.
2% milk produces a slightly thinner foam with a creamier taste, while whole milk yields a richer but less voluminous foam.
Non-dairy options like oat milk (barista blends work best), soy milk, or almond milk can be used, though they may require a longer frothing time or a stabilizer like xanthan gum (a pinch per cup) for better texture.
For flavor, simple syrups (homemade or store-bought) in vanilla, caramel, or hazelnut are common. Powdered flavors like cinnamon, cocoa, or matcha can be blended in before frothing for even distribution. Sweeteners such as honey, agave, or stevia can be added to taste.
For a savory twist, try a pinch of sea salt to balance sweetness. Always use cold ingredients—chilled milk and syrups—to achieve the best foam consistency, as warmth reduces protein stability.
Essential Tools and Ingredients for Cold Foam

Best milk options: dairy, oat, almond, and soy
The foundation of great cold foam is the milk you choose. For the thickest, most stable foam, opt for whole dairy milk due to its higher fat content (around 3.25%). It creates a rich, creamy texture that holds its shape beautifully.
If you prefer non-dairy, oat milk is your best bet—barista blends with added fats and stabilizers froth up incredibly well, mimicking dairy’s consistency. Almond milk can work but tends to be thinner and less stable; look for unsweetened varieties with added gums for better foam.
Soy milk is another solid alternative, producing a dense, velvety foam, especially if you choose a barista version. Avoid skim or low-fat milks for cold foam, as they create a watery, bubbly texture that collapses quickly.
Always use cold milk straight from the fridge for the best results—warm milk won’t froth properly for a cold topping. Experiment with these options to find your perfect foam base.
Sweeteners and flavorings to enhance your foam
Elevate your cold foam with simple sweeteners and flavorings that blend seamlessly. For sweetness, use a liquid sweetener like vanilla syrup, agave, or honey—granulated sugar won’t dissolve well in cold milk and can make the foam gritty. Start with 1-2 teaspoons per serving and adjust to taste.
Classic vanilla syrup is a go-to, but try caramel, hazelnut, or even a pinch of cinnamon for warmth. For a sugar-free option, use stevia or monk fruit drops designed for cold liquids. Flavor extracts like peppermint, almond, or coconut add a punch without extra calories—just a few drops are enough.
You can also infuse your milk with unsweetened cocoa powder or matcha before frothing for a flavored foam. Remember to add your sweetener and flavorings before frothing, so they incorporate evenly into the milk mixture. This ensures every sip of your cold brew is perfectly balanced and delicious.
Must-have gadgets: frother, blender, or mason jar
You don’t need expensive equipment to make cold foam at home. The most effective tool is an electric milk frother—either a handheld wand or a countertop model.
A handheld frother is affordable and quick: simply submerge it in a narrow cup of cold milk and blend for 20-30 seconds until frothy. A countertop frother with a cold setting is ideal for hands-free use and consistent results.
If you don’t have a frother, a blender works perfectly—pour your milk into a blender, cover, and blend on high for 30 seconds until thick and airy.
For a no-electricity option, use a mason jar with a tight-fitting lid: fill it halfway with cold milk, add your sweetener, seal, and shake vigorously for 45-60 seconds. The key is to use a narrow container for better aeration.
Whichever method you choose, always start with very cold milk and a clean, dry container to maximize foam volume and stability.
How to Make Cold Foam with a Milk Frother

Step-by-step guide for handheld frother
Start with ice-cold milk—whole milk creates the richest foam, but skim or oat milk works too. Pour the milk into a narrow, deep container (like a frothing pitcher or a tall glass) to just under halfway full.
Submerge the frother’s whisk fully, then turn it on and keep it just below the surface. Move it in a gentle, circular motion for 20–30 seconds until the milk doubles in volume and becomes light and airy.
Avoid lifting the frother out of the liquid too early, as that creates large bubbles. Once you see a thick, pillowy layer, stop frothing and tap the container gently to settle the foam. Spoon the cold foam directly onto your iced coffee or cold brew—it will sit beautifully on top.
For a sweeter touch, add a pump of vanilla syrup or a pinch of cinnamon to the milk before frothing. The key is to use cold milk and a deep container to get that dense, velvety texture that mimics café-style foam.
Tips for achieving thick, stable foam
To get thick, stable cold foam that doesn’t collapse quickly, choose milk with higher fat content—whole milk or heavy cream blends work best. If using non-dairy milk, opt for barista editions that contain added stabilizers like gums or carrageenan.
Chill your milk and frother cup in the freezer for 5 minutes before starting—cold temperatures help proteins bond for a sturdier foam. Froth in short bursts (15–20 seconds) rather than overmixing, which can break down the foam.
Add a small splash of simple syrup or a pinch of salt to strengthen the foam structure. Let the foam rest for 30 seconds after frothing to allow bubbles to stabilize. For extra fluffiness, use a double-frothing technique: froth once, let it sit for 10 seconds, then froth again briefly.
Store leftover foam in the fridge for up to 2 hours, but remember it’s best fresh. These tips ensure your foam stays creamy and cloud-like without turning watery.
Common mistakes to avoid when frothing cold milk
The biggest mistake is using warm or room-temperature milk—cold foam requires cold milk to achieve the right texture. Another error is overfilling your container; milk expands up to double its volume, so leaving too little space causes messy overflow.
Using a wide, shallow bowl instead of a tall container prevents the frother from fully submerging, leading to large, bubbly foam rather than a smooth microfoam. Frothing for too long (over 45 seconds) can actually break down the foam, making it thin and watery.
Don’t lift the frother out of the milk while it’s running—this splashes and creates uneven bubbles. Also, avoid using ultra-pasteurized milk with low fat content, as it produces less stable foam. Finally, skipping the step of tapping the container after frothing leaves large air pockets that ruin the silky texture.
By steering clear of these pitfalls, you’ll consistently create dense, stable cold foam that elevates your iced drinks.
How to Make Cold Foam Without a Frother
Using a mason jar and shaking method
For a simple, no-equipment approach, grab a mason jar with a tight-fitting lid and your milk of choice. Pour in cold milk, filling the jar only halfway to leave room for shaking. Add a splash of heavy cream or a tablespoon of sugar-free vanilla syrup to help stabilize the foam.
Secure the lid tightly and shake vigorously for 45-60 seconds, or until the milk doubles in volume and becomes frothy. The key is to use cold, high-protein milk (like whole or 2%) for best results.
Once shaken, remove the lid and microwave the jar for 15-20 seconds to set the foam, then spoon it over your iced coffee. This method yields a light, airy foam perfect for topping. For a dairy-free option, canned coconut milk (chilled) works surprisingly well.
Remember to shake in short bursts if your arm tires—the foam will still form.
Blender technique for quick cold foam
When you need cold foam in under a minute, a countertop blender or immersion blender is your fastest tool. Pour 1/4 cup of cold milk (whole or oat milk for richness) into the blender cup.
For extra creaminess, add a teaspoon of maple syrup or honey, or a pinch of salt to enhance flavor. Blend on high speed for 20-30 seconds, until the milk becomes thick and frothy with small bubbles. Avoid over-blending, which can create thin, watery foam.
The trick is to use ice-cold milk and a chilled blender jar if possible. Once blended, let the foam rest for 10 seconds to stabilize, then spoon it over your iced latte or cold brew. This technique works with any milk type, but almond milk may need a longer blend.
For a sugar-free version, use a drop of stevia. Clean the blender immediately to prevent residue.
French press hack for creamy foam
If you own a French press, you already have a perfect cold foam maker at home. Start by adding 1/3 cup of cold milk (whole milk or barista oat milk work best) to the carafe.
Press the plunger down just to the milk’s surface, then pump it up and down rapidly for 30-45 seconds. The fine mesh filter aerates the milk, creating a thick, velvety foam with microfoam consistency. For best results, use very cold milk and a chilled French press.
Add a splash of vanilla extract or cinnamon before pumping for flavor. Once foamy, let it sit for 20 seconds to let large bubbles settle, then pour directly over ice or spoon onto coffee. This method excels at producing dense, creamy foam that holds its shape.
Clean the plunger immediately to prevent milk residue. For a dairy-free alternative, coconut cream mixed with water yields similar results.
Best Ways to Flavor Your Cold Foam
Vanilla and caramel syrup recipes
Elevate your cold foam with classic vanilla and caramel syrups that are simple to make at home. For a vanilla syrup, combine 1 cup water and 1 cup sugar in a saucepan over medium heat, stirring until the sugar dissolves.
Remove from heat, stir in 2 teaspoons of pure vanilla extract, and let cool. For caramel syrup, melt 1 cup granulated sugar in a saucepan over medium heat until amber, then carefully whisk in 1/2 cup warm water and 1/4 cup heavy cream until smooth.
Add a pinch of salt to balance sweetness. To flavor your cold foam, add 1-2 tablespoons of your chosen syrup per 1/2 cup of heavy cream or milk before frothing. Start with less syrup and adjust to taste, as too much can prevent the foam from forming properly.
Use a milk frother or whisk vigorously until soft peaks form, then spoon over iced coffee or espresso for a sweet, creamy finish.
Spiced options: cinnamon, pumpkin, and nutmeg
Transform your cold foam into a cozy autumn treat with spiced flavors like cinnamon, pumpkin, and nutmeg. For a quick cinnamon foam, mix 1/2 teaspoon ground cinnamon into 1/2 cup heavy cream or milk before frothing.
For a pumpkin spice version, combine 2 tablespoons pumpkin purée, 1/2 teaspoon pumpkin pie spice (or a mix of cinnamon, nutmeg, and ginger), and 1 tablespoon maple syrup or honey with your cream. Blend thoroughly to avoid lumps, then froth until thick.
For a nutmeg-forward foam, whisk 1/4 teaspoon freshly grated nutmeg into the cream—fresh nutmeg offers a more aromatic, bold flavor than pre-ground. To ensure the spices incorporate evenly, use a small blender or whisk vigorously before frothing.
These spiced foams pair perfectly with iced lattes or cold brew, adding a warm, aromatic layer. Adjust spice amounts to your preference, starting with less to avoid overpowering the coffee. Store any leftover spiced cream in the fridge for up to 2 days.
Savory twists: salt and cocoa powder
Add depth and sophistication to your cold foam with savory twists like salt and cocoa powder. For a salted caramel-inspired foam, dissolve 1/4 teaspoon flaky sea salt in 1 tablespoon warm water, then mix into 1/2 cup heavy cream with 1 teaspoon vanilla extract before frothing.
The salt enhances sweetness and creates a balanced, gourmet flavor. For a chocolatey version, whisk 1 tablespoon unsweetened cocoa powder into the cream until smooth—use a sifter to prevent clumps—then add 1 tablespoon powdered sugar or honey for sweetness.
Experiment with ratios to find your ideal balance; start with less cocoa for a subtle hint or more for a rich, mocha-like foam. These savory foams work wonderfully over cold brew or espresso, cutting through bitterness with creamy, complex notes.
For extra richness, top with a sprinkle of cocoa powder or a few salt flakes after frothing. Store any unused foam in an airtight container in the fridge for up to 24 hours, but re-froth before serving for best texture.
Tips for Getting the Perfect Cold Foam Consistency
Fat content matters: whole milk vs. skim
The fat content of your milk is the single biggest factor in achieving perfect cold foam. Whole milk (3.25% fat) creates a rich, velvety foam with a luxurious mouthfeel because the fat globules help stabilize the bubbles. However, it can be slightly less voluminous than skim.
Skim or nonfat milk produces a much stiffer, airier foam with large, stable bubbles—ideal for a thick, meringue-like topping that sits proudly on your iced coffee. The trade-off is a thinner, less creamy taste.
For a balanced approach, try 2% milk which offers a happy medium: good volume with decent creaminess. If you want a dairy-free option, oat milk barista blends (with added oils and stabilizers) often outperform almond or soy milk, which can separate or produce thin foam.
Always use cold, fresh milk straight from the fridge for best results—warm milk won’t froth properly. Experiment with different fat percentages to find your perfect texture and flavor profile.
Temperature tricks for stable foam
Unlike hot foam, cold foam relies on temperature to build and hold its structure. Start with ice-cold milk (35-40°F) as the cold temperature slows down bubble collapse and keeps the foam rigid. If your milk is even slightly warm, the foam will be flat and watery.
Use a metal frothing pitcher chilled in the freezer for 10 minutes before starting—this maintains the cold temperature throughout frothing. When using a handheld frother, keep the tip just below the surface to incorporate air without creating large, unstable bubbles.
For a French press, pump the plunger quickly and steadily for 30-60 seconds, then pause for 10 seconds to let the foam settle before pumping again. If your foam is too runny, chill the milk longer or add a splash of heavy cream (which stabilizes the foam).
For over-frothed foam that’s too stiff, gently swirl the pitcher or stir in a tiny amount of cold milk to loosen it. Always use cold foam immediately—it loses volume and texture within 5-10 minutes.
How to fix runny or over-frothed foam
Runny cold foam usually means you haven’t incorporated enough air or the milk is too warm. Fix runny foam by frothing for an additional 20-30 seconds with the frother tip near the surface, or add a small splash of skim milk (which froths more easily) and re-froth.
If your foam is over-frothed—meaning it’s too stiff, dry, or has large, separated bubbles—you’ve introduced too much air or frothed too long.
Fix over-frothed foam by gently tapping the pitcher on the counter to collapse large bubbles, then swirl the foam or stir it with a spoon for 5-10 seconds to re-incorporate the liquid milk.
If it’s still too thick, add a teaspoon of cold milk and stir gently until it reaches a pourable, cloud-like consistency. For persistent issues, check your milk fat: skim milk over-froths easily, while whole milk rarely does. Also ensure your frother is clean—residue can destabilize foam.
When in doubt, let the foam rest for 30 seconds; it often settles into a smoother texture on its own.
How to Serve and Store Homemade Cold Foam
Best coffee and drink pairings for cold foam
Homemade cold foam pairs beautifully with a wide range of beverages, enhancing both texture and flavor. For coffee, it’s a classic match with cold brew, as the smooth, creamy foam complements the bold, low-acidity profile. Iced lattes also benefit greatly—try it with espresso over ice for a luxurious, café-style finish.
Beyond coffee, cold foam elevates matcha lattes by softening the earthy notes, and it adds a decadent touch to chai tea lattes with its subtle sweetness. For a refreshing twist, layer it on iced herbal teas like hibiscus or peach.
The key is to pair the foam with drinks that have a strong flavor base, as the foam itself is mildly sweet and airy. Avoid overly watery or delicate beverages where the foam might overwhelm. Experiment with flavored syrups in the foam—like vanilla or caramel—to match your drink’s profile.
Ultimately, cold foam shines when it contrasts or complements the main beverage, so don’t hesitate to get creative.
Layering cold foam on iced drinks without sinking
To keep cold foam floating beautifully on top of your iced drink, focus on density and technique. First, ensure your cold foam is thick and airy—whip it until it forms soft peaks that hold their shape. This structure is less dense than the liquid below, so it floats naturally.
Next, fill your glass with ice first, then pour in your base drink (like cold brew or milk) to about an inch from the rim.
For the best results, use a spoon to gently pour the foam over the back of it, letting it cascade onto the surface rather than plunging it in. Alternatively, dollop the foam with a spoon directly onto the center. Avoid stirring or shaking the drink after adding foam.
If your foam starts sinking, it may be under-whipped or too warm—chill the foam and drink components beforehand. Another trick is to add a thin layer of milk between the drink and foam, acting as a buffer. With practice, you’ll achieve that perfect, Instagram-worthy layer every time.
Storage tips: can you refrigerate cold foam?
Yes, you can refrigerate homemade cold foam, but with important caveats for best results. Store it in an airtight container immediately after whipping to prevent it from deflating or absorbing fridge odors.
Cold foam will hold its texture for up to 24 hours in the refrigerator, though it may lose some airiness. Before using, gently re-whip it with a frother or whisk for 10-15 seconds to restore volume and creaminess.
Avoid freezing, as ice crystals will destroy the foam’s structure and leave it watery. For optimal freshness, make small batches you’ll use within a day. If your foam separates or becomes runny, it’s best to discard it. To extend shelf life, use ultra-pasteurized milk or cream, which lasts longer.
Remember that flavored foams (with syrups or extracts) may alter stability, so test storage times. For busy mornings, prep the foam the night before and re-froth it in seconds—a time-saving hack that still delivers café-quality results.
Frequently Asked Questions
What is cold foam and how is it different from regular foam?
Cold foam is a creamy, frothy topping made by aerating cold milk, often with a frother or blender, without heating it. Unlike steamed milk foam used in hot lattes, cold foam stays cold and light, making it ideal for iced coffee and cold brew drinks.
What ingredients do I need to make cold foam at home?
You need cold milk (dairy or non-dairy like oat, almond, or soy), and optionally a sweetener (such as vanilla syrup, honey, or sugar) or flavorings (like cinnamon or cocoa powder). A small amount of heavy cream can be added for extra thickness.
What equipment can I use to make cold foam without a special machine?
You can use a handheld milk frother, a French press, a blender, or even a jar with a tight lid (shake vigorously). A handheld electric frother is the easiest and most effective option for creating thick, stable foam.
How do I make cold foam with a handheld frother?
Pour cold milk into a narrow cup or jar, submerge the frother tip just below the surface, and turn it on. Move it up and down gently for 15-30 seconds until the milk doubles in volume and becomes frothy. Sweeten or flavor before frothing if desired.
Can I make cold foam with non-dairy milk like oat or almond?
Yes, but results vary. Oat milk (especially barista blends) and soy milk froth well due to their protein and fat content. Almond milk is thinner and may produce less stable foam; adding a splash of heavy cream or using a higher-fat non-dairy milk can improve texture.
How do I get my cold foam to be thick and stable like Starbucks?
Use whole milk or a mix of milk and heavy cream for a richer texture. Chill the milk and equipment beforehand, and froth for a full 30 seconds until stiff peaks form. Adding a small amount of sugar or syrup helps stabilize the foam.
How do I add cold foam to my iced coffee without it sinking?
Pour your cold foam over the back of a spoon held just above the coffee’s surface to gently layer it on top. Avoid stirring; the foam should sit atop the drink. For best results, use thick, stable foam and serve immediately.
Can I make flavored cold foam, and what are some popular variations?
Yes, you can add syrups (vanilla, caramel, hazelnut), spices (cinnamon, pumpkin spice), or matcha powder before frothing. Popular variations include vanilla sweet cream cold foam, salted caramel, and chocolate cold foam for iced mochas.
Conclusion
Making your own cold foam is simple: just shake cold heavy cream or milk with a frother until thick and airy. The key is using full-fat dairy for richness and a pinch of sugar or vanilla for flavor. This homemade touch elevates any iced coffee, saving money and reducing waste. Experiment with different milks and syrups to create your perfect café-style treat at home.