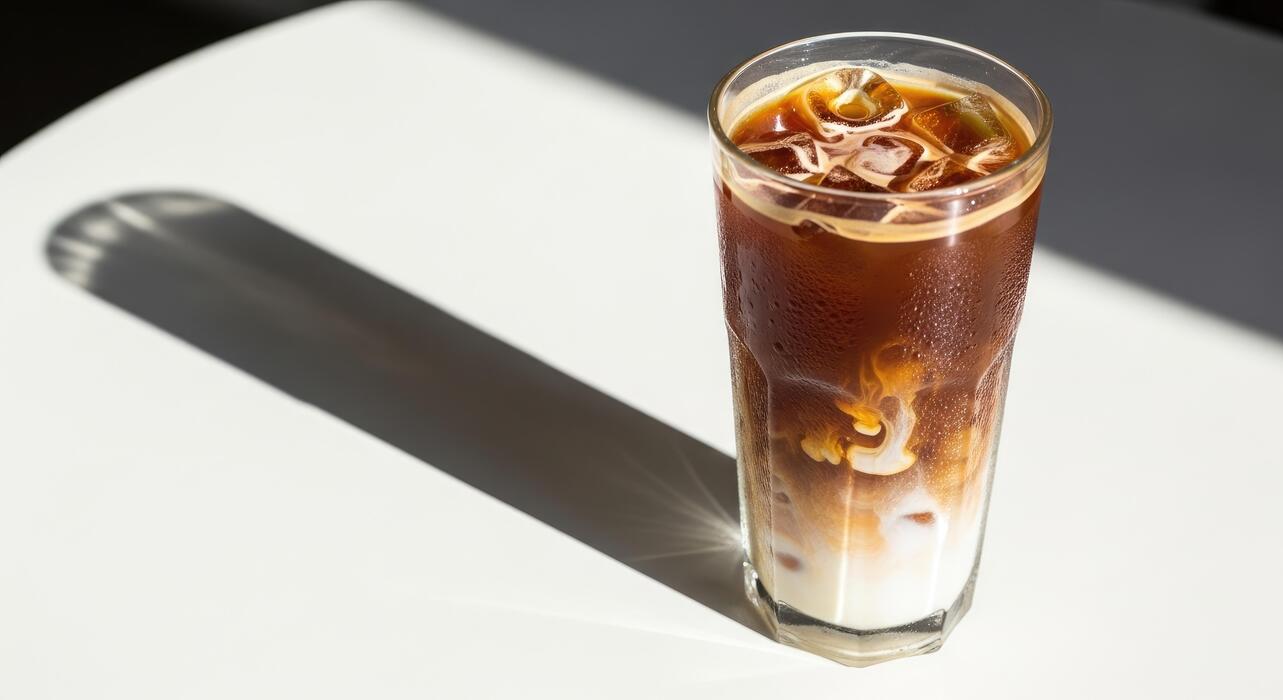
How To Make Perfect Iced Coffee At Home
How to make perfect iced coffee at home isn’t about dumping hot coffee over ice—that just gives you a watery, bitter mess. The real secret is cold brewing or flash-chilling a double-strength brew to lock in bold flavor without dilution. You’re in the right place to ditch sad, overpriced café versions and master crisp, rich iced coffee every single time.
Why Homemade Iced Coffee Beats Store-Bought
Cost savings compared to cafe iced coffee
Making iced coffee at home slashes your daily coffee budget. A typical cafe iced coffee costs $4–$6, while a homemade version using quality beans costs roughly $0.25–$0.50 per serving. That’s a savings of over $1,000 per year if you skip just one daily cafe visit.
To maximize savings, buy whole beans in bulk and grind them yourself—this preserves freshness and cuts cost per cup. Use a simple cold brew concentrate: steep coarse-ground coffee in cold water for 12–24 hours, then dilute with water or milk.
A single batch yields multiple servings, so you can prep a week’s worth in one go. Invest in a reusable filter and a large mason jar—these pay for themselves quickly. For hot-brew iced coffee, brew double-strength coffee (use twice the grounds) and pour over ice to avoid dilution.
Either method delivers cafe-quality results for a fraction of the price. Pro tip: Freeze leftover coffee in ice cubes to chill without watering down.
Control over flavor and sweetness levels
Store-bought iced coffee often comes pre-sweetened or with limited syrup options, leaving you stuck with someone else’s taste. At home, you’re the barista: adjust sweetness, milk type, and flavorings to perfection. Start with a base of strong coffee—cold brew or double-strength hot brew—then customize.
Use simple syrup (equal parts sugar and water, heated until dissolved) so it blends easily into cold drinks. Add vanilla extract, cinnamon, or cocoa powder for natural flavor twists. For sweetness, try honey, agave, or sugar-free alternatives like stevia. Control milk richness by choosing whole, oat, almond, or condensed milk.
Even the ice matters: use coffee ice cubes to prevent dilution, or add flavored ice cubes (e.g., mint or vanilla). Want a mocha? Stir in melted dark chocolate. Crave a vanilla latte? Add a splash of vanilla syrup. You can also adjust strength by tweaking the coffee-to-water ratio.
This level of customization ensures every cup matches your exact cravings, without extra charges for syrups or alternative milks.
Fresher taste with simple ingredients
Homemade iced coffee tastes noticeably fresher because you control the ingredients from start to finish. Store-bought versions often sit on shelves for weeks, losing volatile aromatics and developing stale, bitter notes. At home, you use freshly ground beans and pure water for a vibrant, clean flavor.
For the freshest taste, buy whole beans and grind just before brewing—this preserves essential oils and antioxidants. Use filtered water to avoid off-flavors from tap water. Simple ingredients like coffee, water, and milk (or your preferred milk) yield a pure, unadulterated drink.
Cold brew method extracts smoother, less acidic flavors because it steeps without heat, highlighting natural sweetness. Hot-brew iced coffee, when made with fresh beans and poured over ice, retains a bright, aromatic profile. Avoid pre-ground coffee or powdered creamers, which can taste flat.
For a truly fresh twist, add a pinch of sea salt to enhance flavor or a dash of vanilla extract. Pro tip: Brew in small batches and consume within 24 hours for peak freshness—your taste buds will thank you.
Best Coffee Beans for Iced Coffee
Light vs. dark roast: which works best cold
For iced coffee, light roasts often outperform dark roasts because they retain more acidity and fruity notes, which cut through ice without becoming bitter. Dark roasts can taste flat or ashy when chilled, as cold temperatures mute subtle flavors and emphasize harshness.
To test this, brew a light roast using a pour-over or AeroPress with a 1:16 coffee-to-water ratio, then pour over ice immediately to lock in brightness. Alternatively, a medium roast offers a balanced middle ground—try a Colombian or Ethiopian Yirgacheffe for citrusy, floral notes that shine cold.
Avoid over-extraction by using water just off the boil (200°F) and a finer grind than you’d use for hot coffee; this prevents bitterness while ensuring full flavor. For cold brew, light roasts yield a smooth, tea-like concentrate, while dark roasts can become muddy.
Pro tip: grind your beans coarse for cold brew (like sea salt) and fine for iced pour-over to maximize extraction speed.
Single-origin vs. blends for iced coffee
Single-origin beans (e.g., Kenya, Guatemala) deliver distinct, complex flavors that pop when iced—perfect if you enjoy tasting notes like berry, chocolate, or stone fruit. They require careful brewing to avoid over-extraction, so use a medium grind for hot iced coffee and a coarse grind for cold brew.
Blends are crafted for consistency and balance, often combining beans to create a smooth, chocolatey profile that stands up to milk or sweeteners. For iced lattes or mochas, a dark roast blend (like Espresso or Italian roast) provides bold body without acidity.
If you’re new to iced coffee, start with a blend from a reputable roaster (e.g., Counter Culture or Intelligentsia) for reliable results. For cold brew, single-origin beans from Brazil or Sumatra offer low acidity and nutty sweetness, while blends with robusta beans add crema and caffeine kick.
Always check roast date—fresh beans (within 2–4 weeks) ensure peak flavor, especially for iced methods where staleness is amplified.
Grind size tips for cold brew and hot brew methods
Grind size directly impacts extraction and flavor clarity in iced coffee. For cold brew, use a coarse grind (like kosher salt) to prevent over-extraction during the 12–24 hour steep. A fine grind creates muddy, bitter results.
For hot iced coffee (brewed hot then chilled), aim for a medium-fine grind (similar to table salt) for pour-over or drip—this balances extraction speed and prevents under-extraction. For an iced espresso or moka pot, grind fine (like powdered sugar) but avoid super-fine that clogs filters.
Adjust based on brew time: if your cold brew tastes sour, grind finer; if bitter, grind coarser. For hot methods, use a burr grinder for consistency; blade grinders produce uneven particles that lead to muddled flavors.
Pro tip: for flash-chilled iced coffee, grind slightly finer than your usual hot brew to compensate for dilution from ice. Always test with a small batch—tweak grind size until you get a smooth, balanced cup that’s neither weak nor harsh.
How to Make Iced Coffee with Hot Brew Method
Step-by-step hot brew and chill process
Start by brewing a double-strength batch of your favorite coffee using a standard drip machine, pour-over, or French press. Use twice the usual coffee grounds (e.g., 4 tablespoons per 6 ounces of water) to compensate for melting ice. Brew directly into a heatproof carafe or glass container.
While the coffee is still hot, immediately pour it over a full glass of ice—this rapid chilling locks in bright flavors and prevents oxidation. For an even faster chill, use a metal ice cube tray or pre-chill your serving glass. Stir gently for 10 seconds to ensure even cooling.
If you prefer less dilution, brew the double-strength coffee and let it cool to room temperature on the counter (about 30 minutes) before refrigerating. Never refrigerate hot coffee as it can cause condensation and a stale taste.
For a silky finish, strain through a fine-mesh sieve to remove any coffee grounds or sediment. Serve over fresh ice with milk, cream, or sweetener to taste.
Best brewing ratios for strong iced coffee
The key to perfect iced coffee is using a stronger brew ratio to account for melting ice. For hot brew iced coffee, aim for 1:8 coffee-to-water ratio by weight (e.g., 30 grams coffee to 240 grams water). This is double the typical 1:16 ratio for hot coffee.
If measuring by volume, use 2 tablespoons of ground coffee per 4 ounces of water. For a standard 16-ounce serving, brew 8 ounces of water with 4 tablespoons of coffee, then pour over 8 ounces of ice.
Adjust based on your ice preference: if you like less ice, reduce the ratio to 1:10; for extra bold flavor, go as strong as 1:6. Always use coarse or medium-coarse grind to avoid over-extraction and bitterness.
For milk-based iced drinks, use a 1:7 ratio so the coffee stands up to dairy. Experiment with your favorite beans—light roasts bring out fruity notes, while dark roasts offer chocolatey depth. Remember, the ice will dilute the coffee by about 20-30%, so starting strong ensures a balanced, refreshing result.
Avoiding bitterness when cooling hot coffee
Bitterness in iced coffee often comes from over-extraction during the hot brew or slow cooling that develops harsh compounds. To prevent this, brew with water just off the boil (195-205°F) and keep contact time short—3-4 minutes for drip or pour-over. Use a medium grind to avoid fine particles that over-extract.
Immediately after brewing, shock-cool the coffee by pouring it directly over a full glass of ice. This rapid drop in temperature stops the extraction process and locks in sweetness.
If you must refrigerate, cool the coffee to room temperature first (about 20-30 minutes) before chilling, as hot coffee in the fridge can absorb odors and turn stale. Avoid reheating or microwaving leftover coffee, which amplifies bitterness.
For an extra-smooth taste, add a tiny pinch of salt to the grounds before brewing—it neutralizes bitter notes. Finally, use filtered water to avoid metallic or off-flavors that become pronounced when cold.
Storing brewed coffee in an airtight container in the fridge for up to 24 hours also minimizes oxidation and bitterness.
How to Make Cold Brew Iced Coffee at Home
Simple cold brew recipe with coarse grounds
Start with high-quality, coarsely ground coffee beans—a medium or dark roast works best for a smooth, rich flavor. Use a ratio of 1 cup of coarse grounds to 4 cups of cold, filtered water for a balanced concentrate.
Place the grounds in a large jar or French press, then pour the water over them, stirring gently to ensure all grounds are saturated. Cover and let it steep at room temperature or in the refrigerator.
For an easy method, use a cold brew maker or a nut milk bag to contain the grounds, making cleanup simple. Avoid fine grinds, as they can over-extract and cause bitterness. The coarse texture allows for a slow, even extraction, resulting in a smooth, low-acid brew that’s perfect over ice.
Once steeped, strain the mixture through a coffee filter or fine-mesh sieve to remove all sediment, yielding a clean concentrate ready for the next steps.
Steeping time and water ratio tips
For the ideal cold brew, steep the coffee grounds for 12 to 24 hours at room temperature or in the fridge—longer steeping extracts more flavor and caffeine, but avoid exceeding 24 hours to prevent bitterness.
The optimal water-to-coffee ratio is 4:1 (4 cups water to 1 cup grounds) for a concentrate, or 8:1 for a ready-to-drink brew. Adjust based on your taste preference: a stronger ratio yields a richer concentrate for diluting, while a weaker ratio is simpler for immediate use.
Stir the mixture once or twice during steeping to ensure even extraction. Room temperature steeping tends to produce a slightly smoother flavor, while refrigeration slows extraction for a milder taste. Always use cold or room-temperature water—never hot, as heat alters the extraction process.
Experiment with steeping times; try 18 hours for a balanced brew, then adjust up or down by 2-hour increments to find your perfect strength.
Storing and diluting cold brew concentrate
After straining, store your cold brew concentrate in an airtight glass container in the refrigerator for up to two weeks—the flavor remains fresh and smooth.
To serve, dilute the concentrate with equal parts water or milk (1:1 ratio) for a standard strength, or adjust to your liking: use less water for a bolder iced coffee or more for a lighter drink.
Pour over a glass filled with ice cubes to chill and further dilute as the ice melts. For a creamy twist, substitute water with oat, almond, or whole milk.
Avoid adding sugar or flavorings to the concentrate; instead, sweeten each serving individually with simple syrup, vanilla extract, or a dash of cinnamon to maintain the base’s versatility. This method ensures you always have a quick, customizable iced coffee ready, perfect for busy mornings or refreshing afternoon breaks.
Store in small batches to prevent repeated temperature changes that can degrade quality.
Tips for Preventing Watery Iced Coffee
Using coffee ice cubes to maintain strength
A primary culprit behind watery iced coffee is standard ice cubes melting and diluting your brew. The most effective solution is to use coffee ice cubes. Simply pour leftover brewed coffee into an ice cube tray and freeze it solid.
When you prepare your iced coffee, these cubes will chill your drink without watering it down; as they melt, they actually reinforce the coffee’s strength and flavor. For best results, use coffee that is the same strength and flavor profile as your intended drink.
You can also experiment by freezing cold brew or espresso shots for an even more concentrated ice. To avoid flavor transfer, dedicate a specific tray solely for coffee.
This small prep step transforms your iced coffee experience, ensuring every sip is as bold and rich as the first, right to the very last drop.
Brewing double-strength coffee for dilution
If you prefer using regular ice or like a larger, colder drink, brew your coffee at double strength to compensate for inevitable dilution. This means using twice the amount of coffee grounds per the same volume of water you normally would.
For example, if your standard ratio is 2 tablespoons of grounds per 6 ounces of water, use 4 tablespoons for that same 6 ounces.
The resulting concentrated coffee will be robust and slightly intense on its own, but when poured over ice, the melting water will bring it down to a perfectly balanced strength. This method works exceptionally well with drip coffee, pour-over, or French press.
A good rule of thumb is to brew at double strength if your glass will contain roughly equal parts hot coffee and ice, ensuring your final drink is neither weak nor bitter.
Chilling coffee before adding ice
A surprisingly simple yet highly effective tip is to chill your brewed coffee completely before adding any ice. When hot coffee is poured directly over ice, the rapid temperature change causes the ice to melt quickly, leading to immediate dilution.
Instead, let your freshly brewed coffee cool to room temperature on the counter, then refrigerate it for a couple of hours until it’s thoroughly chilled. Alternatively, you can use a shallow dish to speed up cooling in the fridge. Once cold, pour this pre-chilled coffee over fresh ice.
This dramatically reduces the amount of ice that melts, preserving the intended strength and flavor profile of your coffee. This technique is especially useful for batch preparation, allowing you to enjoy a consistently strong, crisp, and refreshing iced coffee anytime without the guesswork.
Best Ways to Flavor Your Iced Coffee
Simple syrup vs. flavored syrups recipes
For a perfectly sweet iced coffee, simple syrup is your best friend because it dissolves instantly in cold liquid, unlike granulated sugar. Make a batch by combining equal parts water and sugar (white, brown, or coconut) in a saucepan, heating until dissolved, then cooling.
For flavored syrups, infuse your simple syrup with vanilla beans, cinnamon sticks, or citrus zest while simmering. Try a mocha syrup by whisking in cocoa powder or a caramel syrup by cooking sugar until amber before adding water.
Store homemade syrups in a sealed jar in the fridge for up to two weeks. For a quick hack, use liquid stevia or honey stirred directly into hot coffee before pouring over ice.
Avoid pre-made flavored creamers with artificial additives—crafting your own syrups lets you control sweetness and avoid preservatives, ensuring every sip is balanced and fresh.
Adding milk, cream, or non-dairy alternatives
The type of milk or cream you choose dramatically affects texture and flavor in iced coffee. For a classic, rich taste, use whole milk or half-and-half—pour it in after the coffee to prevent dilution.
If you prefer a lighter option, oat milk adds creamy body without overpowering, while almond milk keeps it nutty and low-cal. For a dairy-free twist, coconut milk lends tropical sweetness, and soy milk provides protein and thickness. Always shake or stir your milk alternative before adding, as separation occurs naturally.
To avoid watery coffee, freeze milk or coffee into ice cubes—they chill without diluting. For a frothy finish, use a handheld frother to foam warm oat or macadamia milk before adding to your glass.
Experiment with ratios: start with 2 tablespoons of cream per 8 ounces of coffee, then adjust to your preference.
Spices and extracts for unique twists
Elevate your iced coffee with spices and extracts that add depth without extra calories. Sprinkle cinnamon, nutmeg, or cardamom directly into the grounds before brewing for a subtle infusion, or stir a pinch into the finished drink.
For a bold kick, add a dash of cayenne or chili powder to contrast sweetness. Extracts like vanilla, almond, or peppermint are potent—use just 1/4 teaspoon per cup. Try lavender extract with oat milk for a floral note, or coconut extract for a tropical vibe.
For a DIY touch, steep whole spices (cloves, star anise) in hot coffee for 5 minutes before straining and chilling. Avoid pre-ground pumpkin spice blends that may contain sugar—make your own mix with cinnamon, ginger, and allspice.
These simple additions transform a basic brew into a gourmet treat, letting you customize flavor without complicated steps or expensive ingredients.
Common Iced Coffee Mistakes to Avoid
Using hot coffee directly on ice
Pouring freshly brewed hot coffee directly over ice is a classic mistake that leads to a watery, diluted brew. The heat rapidly melts the ice, altering the coffee-to-water ratio before you even take a sip.
Instead, cool your coffee to room temperature first by letting it sit for 10–15 minutes, or use the Japanese iced coffee method: brew strong coffee directly onto a full glass of ice. This locks in flavor and chill without excessive melting.
For best results, use double the usual coffee grounds to compensate for the dilution from ice, ensuring a bold, balanced taste that stays cold without losing intensity.
Over-extracting or under-extracting grounds
Iced coffee demands precise extraction since cold temperatures mute bitterness and acidity. Over-extracting—steeping grounds too long or using water that’s too hot—creates harsh, bitter notes that become even more pronounced when chilled. Under-extracting leaves a sour, weak cup.
Aim for a brew time of 4–6 minutes with water between 195–205°F (90–96°C). Use a medium-coarse grind for balanced extraction; too fine leads to over-extraction, too coarse to under-extraction. For cold brew, steep for 12–24 hours in the fridge.
Taste your coffee before chilling to adjust strength or flavor, ensuring a smooth, rich iced coffee every time.
Storing iced coffee too long in the fridge
Leaving iced coffee in the fridge for days invites stale, oxidized flavors and a flat, lifeless taste. Coffee’s volatile aromatic compounds degrade quickly, especially when exposed to air and light. Consume your iced coffee within 24 hours for peak freshness.
If you must store it, use an airtight container and keep it away from strong-smelling foods that can transfer odors. For longer storage, freeze leftover coffee into ice cubes—these can chill future batches without dilution. Alternatively, brew smaller batches more frequently to avoid waste.
Remember, fresh iced coffee tastes vibrant; old coffee loses its complexity and may develop unpleasant sour or metallic notes.
Frequently Asked Questions
What is the best coffee-to-water ratio for iced coffee?
Use a 1:8 coffee-to-water ratio when brewing hot coffee for iced coffee, as the ice will dilute it. For example, use 1 ounce (about 28 grams) of coffee grounds to 8 ounces of water.
Should I brew coffee hot or cold for iced coffee?
Both methods work, but hot brewing extracts more flavor quickly. For a smoother, less acidic taste, use cold brew by steeping coarse grounds in cold water for 12-24 hours. Hot brewing is faster and works well when you chill it immediately over ice.
How do I prevent iced coffee from getting watery?
Brew your coffee double-strength by using twice the amount of coffee grounds for the same water volume, then pour it over ice. Alternatively, make coffee ice cubes by freezing leftover coffee to avoid dilution as the ice melts.
What type of coffee beans are best for iced coffee?
Medium to dark roast beans are ideal for iced coffee because they hold up well to dilution and provide a bold, rich flavor. Light roasts can taste too acidic or sour when chilled.
How do I make iced coffee without a coffee maker?
Use the cold brew method: combine coarse coffee grounds with cold water in a jar (1:4 ratio), stir, and let it steep in the fridge for 12-24 hours. Strain through a fine mesh sieve or cheesecloth, then serve over ice.
Can I make iced coffee with instant coffee?
Yes, dissolve 1-2 tablespoons of instant coffee in a small amount of hot water, then pour it over a glass filled with ice and milk or water. Stir well for a quick, no-fuss iced coffee.
What is the best way to sweeten iced coffee?
Use simple syrup (equal parts sugar and water dissolved) or flavored syrups, as they mix easily into cold liquid. Avoid granulated sugar, which won’t dissolve well in cold coffee.
How long does homemade iced coffee last in the fridge?
Freshly brewed iced coffee stays good for up to 3-4 days in the fridge when stored in an airtight container. Cold brew can last up to 7-10 days. For best taste, consume within 24 hours.
Conclusion
Mastering homemade iced coffee is about controlling strength and temperature. Key takeaways: brew double-strength coffee to combat dilution, cool it completely before pouring over ice, and avoid hot coffee on ice for a bitter taste. Experiment with milk, sweeteners, or cold foam to customize. With these simple techniques, you can skip the café line and enjoy a refreshing, barista-quality drink from your own kitchen. Start brewing today!