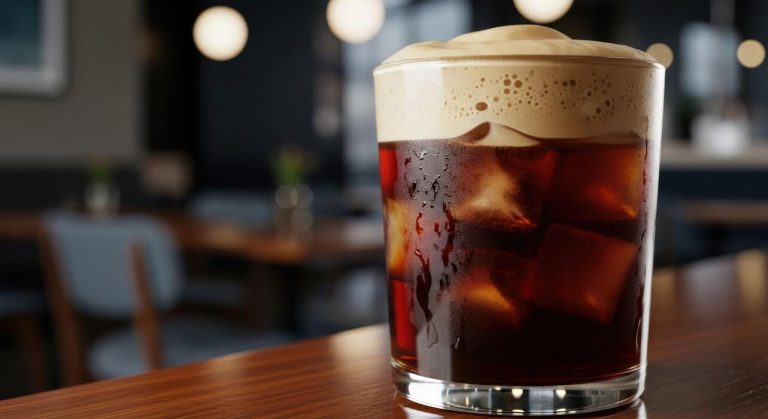
How To Make Iced Coffee Steps
You’re in the right place. The core problem is avoiding weak, diluted coffee while keeping it quick and refreshing. We cut through the fluff to give you a straightforward method—from brewing hot to chilling fast—so you nail that barista-level balance every time. Let’s get brewing.
Gather Your Iced Coffee Ingredients and Tools
Coffee beans or grounds to use
Start with fresh, high-quality coffee beans for the best flavor. For iced coffee, medium to dark roasts work well as they hold up against ice dilution. Choose coarse ground beans if using a French press or cold brew method, or medium-fine grind for hot brew methods like pour-over.
Whole beans ground just before brewing preserve oils and aromas. For convenience, pre-ground coffee labeled for cold brew is a reliable option. Use 2 tablespoons of coffee per 6 ounces of water as a baseline, adjusting to your taste.
Single-origin beans with chocolate or nutty notes shine when chilled, while light roasts can taste too acidic. Avoid stale or pre-ground coffee from bulk bins, as it loses flavor quickly. If you’re short on time, espresso grounds make a strong base for iced lattes.
Remember, grind size matters: too fine leads to bitterness, too coarse yields weak coffee. Experiment with different origins like Colombian or Ethiopian to find your favorite profile. Store beans in an airtight container away from light and heat to maintain freshness.
Water and ice cubes quality tips
Use filtered or bottled water for brewing to avoid off-flavors from tap water. Cold, fresh water extracts coffee evenly, so avoid hot tap water. For ice cubes, use filtered water or make coffee ice cubes by freezing leftover brewed coffee. This prevents dilution as they melt.
Large, clear ice cubes melt slower than small, cloudy ones, keeping your drink cold longer. Invest in silicone ice cube trays for easy release and uniform size. If using tap water, let it run cold before filling the kettle. Avoid distilled water as it lacks minerals needed for proper extraction.
For a flavor boost, freeze milk or cream into cubes for creamy iced coffee. Crushed ice works for quick chilling but melts faster. Always brew with hot water (195-205°F) for optimal extraction, then cool it down with ice. Measure water accurately to maintain coffee-to-water ratios.
Pre-chill your glass with ice water before pouring to keep the drink cold longer. Remember, water quality directly impacts taste, so prioritize clean, mineral-rich water for brewing and ice.
Milk, cream, or sweeteners options
Choose milk or cream based on your texture preference. Whole milk adds richness, while oat milk provides a creamy, dairy-free option. Almond milk is lighter but can separate, so shake well before use. Half-and-half or heavy cream makes a decadent iced coffee, but use sparingly to avoid overpowering the coffee.
For sweeteners, simple syrup dissolves instantly in cold liquid, unlike granulated sugar. Make your own by heating equal parts sugar and water until dissolved, then cool. Vanilla syrup adds flavor; just add vanilla extract to simple syrup. Honey or agave nectar work, but stir thoroughly as they are thicker.
Stevia or monk fruit sweeteners are calorie-free options that dissolve well. Flavored syrups like caramel or hazelnut turn your iced coffee into a treat. Condensed milk gives a Vietnamese-style sweetness. For a healthier twist, cinnamon or cocoa powder can be stirred in for natural sweetness.
Always add milk and sweetener gradually to taste, as cold coffee masks sweetness. Shake or stir vigorously to combine, or use a frother for a smooth finish.
How to Brew Strong Coffee for Iced Coffee

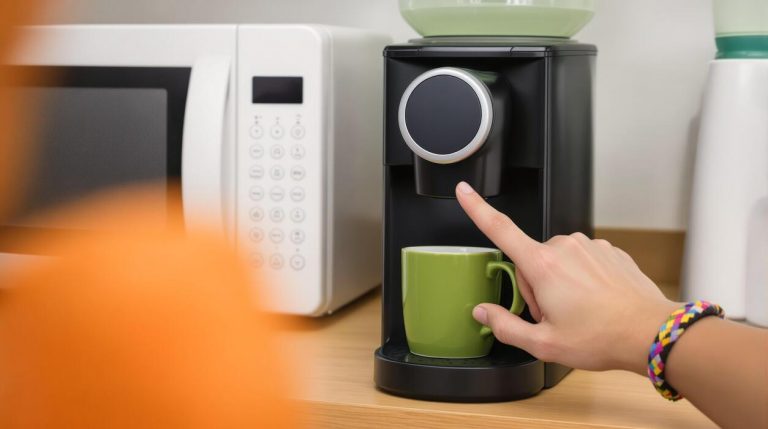
Use a drip coffee maker for iced coffee
To brew strong coffee for iced coffee using a standard drip machine, start by doubling the coffee grounds you normally use. For every 6 ounces of water, add 4 tablespoons of medium-coarse ground coffee instead of the usual 2.
This ensures the hot coffee won’t taste watery when poured over ice. Brew directly into a heatproof carafe, then immediately pour the hot coffee over a full glass of ice—this rapid chilling locks in bold flavor and prevents bitterness.
For an even stronger result, replace half the water with ice cubes in your carafe before brewing; the coffee will extract at full strength and cool instantly. Avoid letting the coffee sit hot for long, as it can become harsh. Serve over fresh ice with milk or sweetener to taste.
This method is fast, uses equipment you already own, and delivers a robust iced coffee perfect for busy mornings.
Cold brew method for smooth flavor
For an ultra-smooth, low-acid iced coffee base, cold brewing is ideal. Combine 1 cup of coarse-ground coffee with 4 cups of cold, filtered water in a large jar or pitcher.
Stir gently to ensure all grounds are saturated, then cover and let steep at room temperature for 12 to 24 hours—longer steeping yields stronger, more concentrated coffee. After steeping, pour the mixture through a fine-mesh sieve lined with a coffee filter or a nut milk bag to remove grounds.
The resulting concentrate is twice as strong as regular coffee, so dilute it with equal parts water or milk when serving over ice. Store the concentrate in the fridge for up to two weeks.
This method eliminates bitterness and acidity, making it perfect for those who prefer a naturally sweet, rich flavor without any sharpness. Enjoy it black or with a splash of cream.
Espresso shots for concentrated base
Using espresso as your base creates a rich, concentrated iced coffee with deep flavor and a velvety crema. Brew 2 to 3 double shots of espresso (about 2-3 ounces total) directly into a heatproof cup.
Immediately pour the hot espresso over a tall glass filled with ice cubes—the rapid cooling preserves the aromatic oils and prevents bitterness. For a classic iced latte, add 6 to 8 ounces of cold milk or a dairy-free alternative, then stir gently.
If you prefer a stronger coffee taste, use less milk or skip it entirely. You can also sweeten with simple syrup while the espresso is still hot for better dissolution.
Espresso-based iced coffee is ideal when you want a bold, intense flavor that stands up to milk and ice without becoming diluted. This method works best with an espresso machine, but a stovetop moka pot can also produce a similar concentrated brew.
Cool Your Coffee Quickly Without Dilution
Brew double strength and add ice
To make iced coffee without dilution, brew your coffee using twice the normal amount of grounds. For example, if you usually use 2 tablespoons per 6 ounces of water, use 4 tablespoons for the same water volume.
This creates a concentrated coffee that will maintain its flavor when poured over ice. Use hot water to brew as usual, then immediately pour the hot concentrate over a full glass of ice. The ice melts rapidly, cooling the coffee instantly while the extra strength compensates for the dilution.
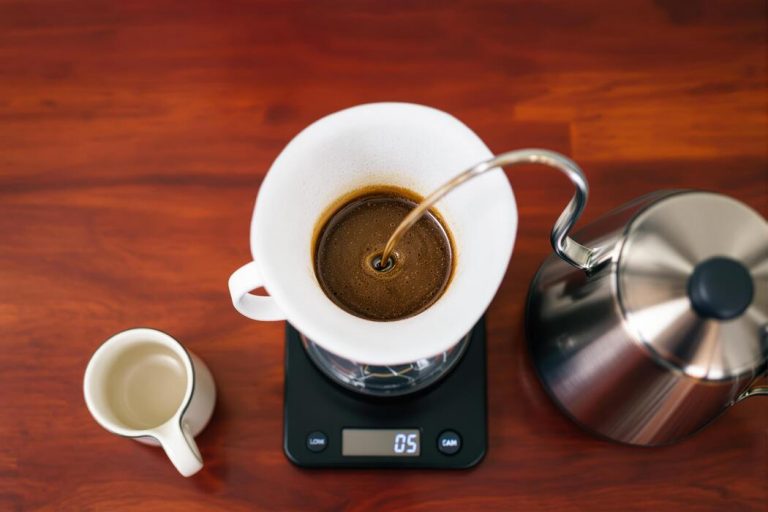
For best results, use a pour-over or French press to control strength precisely. Stir vigorously for 10 seconds to ensure even cooling and melting. This method yields a bold, refreshing iced coffee in under 5 minutes without waiting for chilling.
Adjust the coffee-to-ice ratio based on your preferred strength—more ice for a milder drink, less for a stronger kick. Avoid using pre-ground coffee meant for hot brewing; choose a coarse grind for French press or medium for drip to prevent bitterness.
Use coffee ice cubes to prevent watering down
Eliminate dilution entirely by freezing leftover coffee into ice cubes. Simply brew a batch of your favorite coffee, let it cool to room temperature, then pour it into an ice cube tray and freeze overnight.
Once solid, these coffee cubes can be added to any freshly brewed hot coffee, instantly chilling it without watering down the flavor. Use these cubes in place of regular ice for a pure, undiluted iced coffee experience.
For maximum impact, brew a stronger batch specifically for freezing, as the cubes will melt slightly and blend with your fresh coffee. Store coffee ice cubes in a sealed bag in the freezer for up to two weeks.
This method works perfectly for those who enjoy iced coffee daily, as you can prepare a large batch of cubes ahead of time. Experiment with adding milk, cream, or sweetener to the cubes before freezing for a customized flavor boost.
This technique ensures your iced coffee stays bold and rich from the first sip to the last.
Chill brewed coffee in the refrigerator
For a no-dilution approach, brew your coffee as usual and let it cool to room temperature before refrigerating. Pour the hot coffee into a heat-safe container, such as a glass pitcher or mason jar, and place it uncovered in the fridge for about 1-2 hours.
This gradual cooling preserves the coffee’s original strength and flavor profile. Avoid adding ice until serving to prevent any dilution. Once chilled, pour over ice cubes or serve straight from the fridge for a smooth, cold beverage.
For faster results, use a shallow pan to spread the coffee and increase surface area, cutting cooling time to 30 minutes. This method works best with medium or dark roasts, which maintain their character when cold. You can also add milk or sweetener before chilling for a ready-to-drink iced latte.
Refrigerated coffee stays fresh for up to 3 days, making it perfect for meal prep. Just remember to cover the container after cooling to prevent absorbing fridge odors. This technique delivers a clean, unaltered iced coffee experience without any compromise in taste.
Best Ways to Sweeten and Flavor Iced Coffee
Simple syrup dissolves easily in cold coffee
To sweeten iced coffee without gritty granules, always use simple syrup instead of granulated sugar. Make it at home by combining equal parts water and sugar (1:1 ratio) in a saucepan, heating until dissolved, then cooling. This liquid sweetener blends instantly into cold coffee, ensuring every sip is evenly sweet.
For a quick batch, shake sugar and warm water in a jar until dissolved. Store in the fridge for up to two weeks. Add 1-2 tablespoons per cup to start, then adjust to taste. To avoid dilution, let the syrup cool completely before adding to your iced coffee.
This method works with any sweetener, including honey or agave, but simple syrup remains the most reliable for smooth sweetness.
Flavored syrups like vanilla or caramel
Elevate your iced coffee with flavored syrups such as vanilla, caramel, or hazelnut for a café-style treat. Purchase sugar-free or regular versions at grocery stores, or make your own by infusing simple syrup with vanilla extract, caramel sauce, or cocoa powder.
Start with 1-2 tablespoons per 8-ounce serving and stir well before adding ice to ensure even distribution. For a creamy twist, combine syrup with a splash of milk or cream. Vanilla syrup pairs beautifully with cold brew, while caramel adds richness to iced lattes.
Experiment with seasonal flavors like peppermint or pumpkin spice. Remember that syrups can be sweet, so taste as you go to avoid overpowering the coffee’s natural notes. This simple addition transforms your iced coffee into a customizable, gourmet drink.
Spices like cinnamon or nutmeg to try
For a sugar-free flavor boost, sprinkle spices like cinnamon, nutmeg, or cardamom directly into your iced coffee. Ground cinnamon adds warmth without calories, while nutmeg offers a nutty, slightly sweet note. Start with 1/4 teaspoon per cup and stir thoroughly to avoid clumps.
For deeper flavor, brew coffee with whole spices like cinnamon sticks or star anise, then chill. A pinch of salt can also enhance sweetness perception. Combine spices with a splash of vanilla extract for a chai-inspired twist. These spices not only flavor but also provide antioxidants.
Adjust quantities to your preference, and consider blending them into cream or milk before adding to coffee. This approach keeps your drink healthy and aromatic, perfect for those avoiding added sugars.
Tips for Adding Milk or Cream to Iced Coffee

Whole milk for creamy texture
For a rich and velvety iced coffee, whole milk is your best friend. Its higher fat content (around 3.5%) creates a luxurious mouthfeel that stands up well to ice without becoming watery. To use it effectively, pour the milk first, then add your coffee to help it blend naturally.
A good ratio is 2 parts coffee to 1 part milk, though you can adjust to taste. For an extra creamy experience, try using barista-style whole milk, which is formulated to steam better and resist curdling in cold drinks.
Avoid pouring cold milk directly over hot coffee, as the temperature shock can cause separation. Instead, let your coffee cool slightly or use cold brew. Whole milk also adds a subtle sweetness, reducing the need for added sugar.
If you’re watching calories, you can mix whole milk with a splash of skim or 2% milk to lighten it while keeping some creaminess.
Remember to stir thoroughly after adding milk to ensure even distribution, and consider using a milk frother to create a microfoam that sits beautifully on top of your iced coffee.
Non-dairy alternatives like oat or almond milk
Non-dairy milks can be excellent choices for iced coffee, but they require some know-how to avoid curdling or separation. Oat milk is the top performer due to its creamy consistency and neutral flavor that complements coffee without overpowering it.
Look for barista editions that include stabilizers for better heat and acid resistance. Almond milk is lighter and lower in calories, but it can separate in acidic coffee—to prevent this, warm the almond milk slightly before adding or use a brand with added gums.
Coconut milk adds a tropical twist, while soy milk offers a protein-rich option that froths well. The key trick is to add the non-dairy milk first, then slowly pour your coffee over it to minimize shock. Stir gently and immediately.
If you’re using a cold brew, which is less acidic, these alternatives will blend more smoothly. For sweetness, choose unsweetened vanilla varieties to avoid artificial aftertastes. Always shake or stir the carton well before use, as non-dairy milks can settle.
Experiment with ratios starting at 1:1 coffee to milk, adjusting to your preference for creaminess without diluting flavor.
How to froth milk for iced lattes
Frothing milk for iced lattes creates a luxurious, café-quality texture that elevates your homemade drink. The goal is cold foam—thick, airy milk that sits on top of your iced coffee rather than mixing in. Start with cold milk (whole or non-dairy) straight from the fridge.
Use a handheld milk frother or a French press: pour milk into a narrow container, froth for 20–30 seconds until doubled in volume and soft peaks form. For a French press, pump the plunger vigorously for 30 seconds. The key is to avoid overheating—cold foam should remain chilled.
For best results, use barista oat milk or whole milk, as they create the most stable foam. Skim milk also froths well but produces a lighter texture.
Once frothed, spoon the foam over your iced coffee and ice, then slowly pour the remaining milk over the back of a spoon to layer. This technique keeps the foam distinct. For flavored lattes, add a pump of syrup before frothing.
Remember that cold foam dissipates faster than hot foam, so serve immediately. With practice, you’ll master that perfect, Instagram-worthy foam cap.
How to Assemble Your Iced Coffee Step by Step
Fill a glass with ice first
Start by selecting a tall glass and filling it completely with fresh ice cubes. This foundational step ensures your coffee stays cold without diluting too quickly. Use large, dense ice cubes if possible—they melt slower than crushed or small cubes, preserving the rich coffee flavor.
Fill the glass to the brim, leaving just enough room for the liquid ingredients. This prevents overflow when you pour the coffee. For an extra touch, consider using coffee ice cubes made from leftover brewed coffee; they add flavor as they melt instead of watering down your drink.
If you’re using a metal or insulated cup, pre-chill it briefly for even longer-lasting coldness. The goal is to create a thermal barrier so your iced coffee remains refreshingly cold from the first sip to the last.
Avoid skimping on ice—a generous amount is key to achieving the perfect temperature and texture. Once your glass is packed, you’re ready for the next step.
Pour coffee over ice slowly
Brew your coffee using a method that yields a concentrated brew, such as a French press, AeroPress, or espresso machine, to counteract dilution from the ice. Allow the hot coffee to cool slightly for 30–60 seconds before pouring.
Then, slowly and steadily pour the coffee over the ice, aiming for the center of the ice mound. Pouring gradually helps the coffee cool evenly without shocking the ice, which can cause cracking or excessive melting.
This technique also prevents splashing and ensures the coffee temperature drops rapidly, locking in bold flavors. For best results, use a double-strength brew—for example, use twice the coffee grounds you normally would for hot coffee. If you’re using drip coffee, brew it directly over the ice in a heatproof glass.
The slow pour creates a smooth integration, allowing the ice to chill the coffee without overwhelming it. You’ll notice the ice begins to melt slightly, but the rapid cooling preserves the coffee’s aromatic complexity. Take your time here—rushing can lead to a watery, lackluster drink.
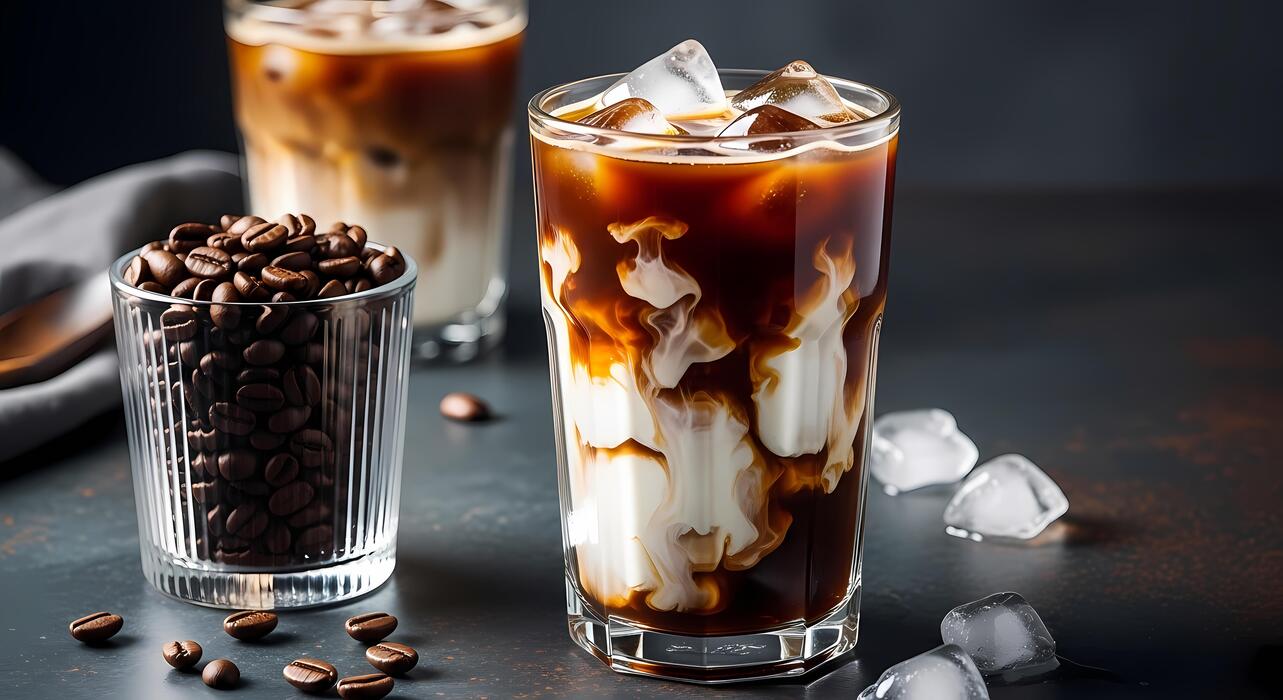
Add milk and sweetener to taste
Once your coffee is poured over the ice, it’s time to customize. Start with a small amount of milk, cream, or a dairy-free alternative like oat or almond milk—about 1–2 tablespoons for a standard 12-ounce glass. Stir gently to combine, tasting as you go.
For sweetness, use simple syrup, honey, or flavored syrups since they dissolve easily in cold liquids. Granulated sugar can leave a gritty texture, so opt for liquid sweeteners or make a quick simple syrup by dissolving equal parts sugar and hot water.
Add sweetener a teaspoon at a time, stirring thoroughly after each addition. Consider flavor enhancements like a pinch of cinnamon, a splash of vanilla extract, or a drizzle of caramel for variety. If you prefer a creamier texture, use whole milk or half-and-half.
For a dairy-free option, barista-style oat milk froths well and adds richness. Taste your coffee after each addition to achieve your perfect balance—remember, you can always add more but can’t take away. Finish with a straw and enjoy immediately for the best experience.
Common Iced Coffee Mistakes to Avoid
Using hot coffee directly on ice
Pouring freshly brewed hot coffee directly over ice is a common shortcut, but it often leads to a watery, bitter, or overly acidic drink. The heat rapidly melts the ice, diluting the coffee before it cools, while the sudden temperature shock can extract harsh compounds.
Instead, cool your coffee first by brewing it double-strength—use twice the usual coffee grounds per water volume. Let it cool at room temperature for 10–15 minutes, then refrigerate for 20–30 minutes before pouring over ice. This method preserves the coffee’s bold flavor and prevents excessive dilution.
For an even smoother result, try cold brewing overnight: steep coarse grounds in cold water for 12–24 hours, then strain. The result is a naturally sweet, low-acid concentrate that stays robust even when poured over ice.
Always use fresh, filtered water and medium-to-dark roast beans for the best iced coffee foundation.
Skipping the dilution factor
Even when using cooled coffee, many people ignore how ice melts and changes the taste. A standard 8-ounce hot coffee becomes a 12-ounce or larger drink when ice melts, watering down the flavor. To combat this, brew your coffee stronger than usual—use a 1:8 coffee-to-water ratio instead of 1:15.
This extra strength ensures that even after dilution, the coffee retains its body and richness. Another trick is to make coffee ice cubes: freeze leftover brewed coffee in an ice tray. These cubes chill your drink without watering it down, and they slowly release coffee flavor as they melt.
Alternatively, chill your entire batch of coffee in the fridge before serving, then add a few regular ice cubes for immediate cooling. Always taste your coffee before adding ice to gauge its strength, and adjust brewing ratios accordingly.
Remember, the goal is a balanced, refreshing iced coffee, not a watery shadow of your favorite hot brew.
Over-sweetening or under-brewing
Iced coffee can easily become either cloyingly sweet or disappointingly weak if you misjudge the brewing process. Under-brewing happens when you use standard hot-coffee ratios, resulting in a thin, acidic iced coffee that lacks depth.
To fix this, grind your beans a bit finer (but not espresso-fine) and extend the steeping time by 30 seconds to 1 minute if using a drip or French press. Over-sweetening often occurs because cold dulls our perception of sweetness, prompting you to add too much sugar, syrup, or cream.
Start with half the sweetener you’d normally use, then taste and adjust after the coffee chills. Use simple syrup (equal parts sugar and water, dissolved) instead of granulated sugar, as it blends instantly in cold liquid.
For a healthier approach, try natural sweeteners like honey or maple syrup, but remember they also need to be dissolved. A pinch of salt can also enhance sweetness without adding sugar. Balance is key: aim for a clean, bright flavor that lets the coffee’s natural notes shine through.
Frequently Asked Questions
What is the easiest way to make iced coffee at home?
The easiest method is to brew a strong cup of hot coffee using a drip maker or French press, then let it cool for 5-10 minutes. Pour the coffee over a glass filled with ice, and add milk or sweetener to taste.
How do I make iced coffee without diluting it with melted ice?
To avoid dilution, use coffee ice cubes made by freezing leftover coffee in an ice tray. Alternatively, brew double-strength coffee so that when the ice melts, the flavor remains robust.
What are the steps for making cold brew iced coffee?
First, coarsely grind coffee beans and combine them with cold water in a jar (use a 1:4 coffee-to-water ratio). Steep in the refrigerator for 12-24 hours, then strain through a fine-mesh sieve or cheesecloth. Serve the concentrate over ice with water or milk.
Can I use instant coffee to make iced coffee quickly?
Yes, dissolve 1-2 teaspoons of instant coffee in a small amount of hot water (about 2 tablespoons). Stir until fully dissolved, then pour over a glass of ice and add cold water, milk, or cream.
How do I make iced coffee with a French press?
Brew coffee in your French press using double the usual amount of grounds for a stronger flavor. After pressing, let the coffee cool to room temperature, then pour it over ice and add your preferred additions.
What is the best ratio of coffee to water for iced coffee?
For hot-brewed iced coffee, use a 1:15 coffee-to-water ratio (e.g., 2 tablespoons of coffee per 6 ounces of water). For cold brew, use a 1:4 ratio to create a concentrate that can be diluted with ice and milk.
How do I sweeten iced coffee without sugar dissolving poorly?
Make a simple syrup by dissolving equal parts sugar and hot water (e.g., 1 cup sugar to 1 cup water), then let it cool. Add this syrup to your iced coffee, as it blends easily even in cold liquid.
Should I add ice before or after pouring the coffee?
Always pour the coffee over the ice, not the other way around. This helps the coffee cool quickly and evenly, reducing the chance of the ice melting too fast and watering down your drink.
Conclusion
Mastering iced coffee at home is simple: brew strong coffee, cool it quickly, and pour over ice with your preferred milk or sweetener. The key takeaways are using double-strength coffee to prevent dilution and chilling before serving for peak flavor. Now, skip the expensive café lines and experiment with different beans or syrups. Enjoy the cool satisfaction of a drink made exactly your way.