How To Make Iced Coffee With Drip Coffee
Learning how to make iced coffee with drip coffee is simple, but most people end up with watery, bitter results. You’re here because you want a strong, rich cold coffee without buying special equipment. The secret is brewing double-strength coffee directly over ice. This locks in flavor as it chills, preventing dilution. Follow this guide to get café-quality iced coffee from your everyday drip machine.
Why Use Drip Coffee for Iced Coffee?
Benefits of drip coffee for iced drinks
Using drip coffee for iced drinks offers a quick and convenient method that doesn’t require hours of steeping. You can brew a full pot in minutes, then chill it immediately for a refreshing iced coffee.
The hot extraction process preserves bright acidity and complex flavor notes that cold brewing often mutes, giving you a more vibrant cup.
To avoid dilution, brew the coffee at double strength (use twice the grounds per water) so when you pour it over ice, the melting cubes bring it back to normal strength without watering down the taste.
This method also allows you to customize your brew strength easily—adjust the grind size or water ratio to match your preference. Finally, leftover drip coffee can be stored in the fridge for up to 3 days, making it ideal for meal prep.
Simply brew a batch in the morning, chill it, and have iced coffee ready whenever you need a cool caffeine boost.
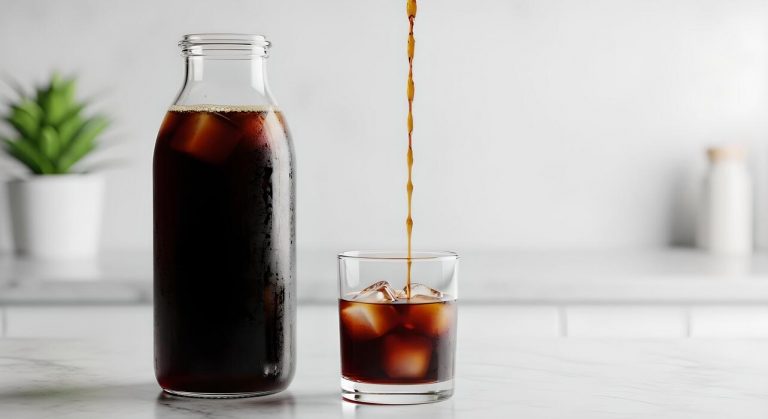
How drip coffee compares to cold brew
Drip coffee and cold brew are both excellent for iced drinks, but they produce distinctly different results. Drip coffee uses hot water to extract quickly, highlighting bright, fruity, and floral notes with a lighter body.
Cold brew, on the other hand, steeps grounds in cold water for 12–24 hours, resulting in a smooth, low-acid concentrate with a heavier mouthfeel. If you prefer a clean, crisp iced coffee with pronounced flavor nuances, drip is the better choice.
For a mellow, less acidic drink that’s easy on the stomach, cold brew wins. Drip coffee is also much faster—you can have iced coffee in under 10 minutes, while cold brew requires planning ahead. However, cold brew concentrate stores longer (up to two weeks) and can be diluted to taste.
Choose drip for immediate gratification and vibrant flavors, or cold brew for a smoother, batch-friendly option.
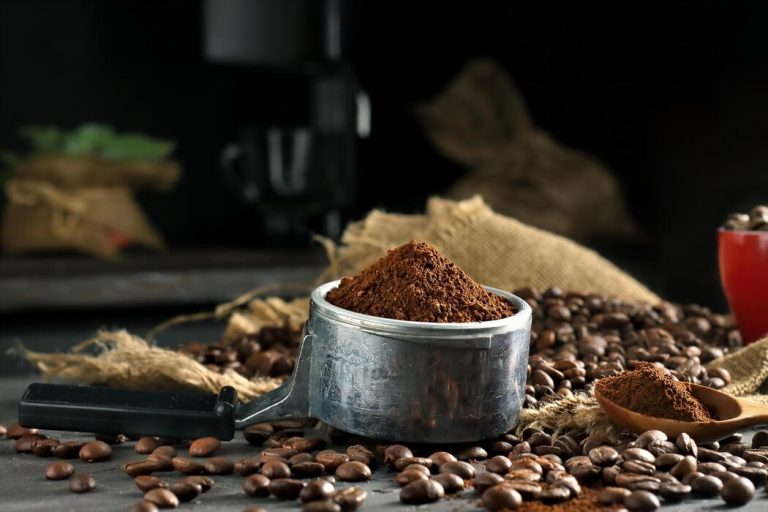
Best roast profiles for iced drip coffee
For iced drip coffee, medium roasts are often the sweet spot—they balance acidity and body, shining through the ice without becoming bitter or flat. Look for beans with flavor notes like chocolate, caramel, or stone fruit that hold up well when chilled.
Light roasts can be excellent if you enjoy bright, fruity acidity, but they may taste too tart over ice unless brewed strong. Dark roasts offer a bold, smoky profile that remains robust even when diluted, but they can turn bitter if over-extracted.
To optimize, choose a single-origin or blend that emphasizes sweetness and clarity. For a classic iced coffee, try a medium-dark roast from Central or South America—it provides a rich, nutty base with low bitterness. Experiment with Ethiopian or Kenyan beans for a more complex, winey flavor.
Remember to grind slightly finer than for hot drip to boost extraction, and use filtered water to keep the taste clean and refreshing.
How to Brew Drip Coffee for Iced Coffee
Double-strength brewing method
The key to avoiding watery iced coffee is to brew your drip coffee at double strength. Since ice will dilute the coffee as it melts, starting with a more concentrated brew ensures your final drink is robust and flavorful, not weak.
To do this, simply use twice the amount of coffee grounds you normally would for the same volume of water. For example, if your standard ratio is 2 tablespoons of grounds per 6 ounces of water, use 4 tablespoons for that same amount.
Brew your drip coffee as usual, but into a carafe or heatproof container. Once brewed, let it cool slightly before pouring over a full glass of ice. The hot coffee will melt some ice, but because the brew was stronger, the resulting coffee will be perfectly balanced.
This method works with any drip machine and is the most reliable way to get a crisp, full-bodied iced coffee without bitterness.
Adjusting water-to-coffee ratio
Precision in your water-to-coffee ratio is crucial for iced drip coffee. For a standard hot brew, the Specialty Coffee Association recommends a 1:16 ratio (1 gram of coffee to 16 grams of water). For iced coffee, you need to adjust this to account for dilution.
The most effective approach is to use a 1:8 to 1:10 ratio (e.g., 1 gram of coffee to 8-10 grams of water) when brewing. This means for every 8 ounces of water, use about 2 ounces (56 grams) of coffee grounds.
Calculate the total water needed for your batch, then halve the water volume while keeping the coffee amount the same as for a full-strength brew. Alternatively, brew a full pot but use half the water.
This concentrated brew will then be poured over ice, which melts and brings the ratio back to a balanced 1:16. Always use a kitchen scale for accuracy, as volume measurements can be inconsistent with different grind sizes. This simple adjustment prevents a watery, disappointing iced coffee.
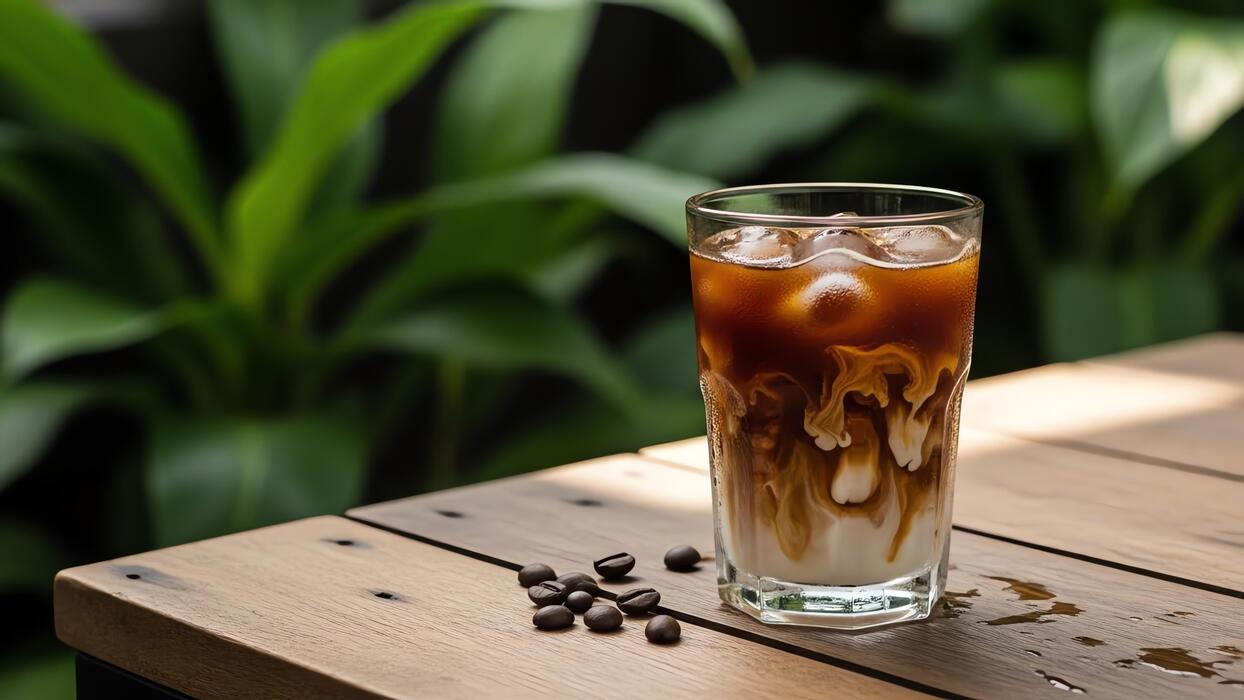
Brewing directly over ice
For a method that yields an instantly chilled and less acidic iced coffee, try brewing your drip coffee directly over ice. This technique, often called Japanese-style iced coffee, involves placing ice in the carafe before starting the brew cycle.
Begin by filling your carafe halfway with ice cubes (about 50% of the final desired volume). Then, use your standard coffee-to-water ratio but reduce the brew water by the amount of ice you added.
For instance, if you want 16 ounces of iced coffee, place 8 ounces of ice in the carafe and brew with only 8 ounces of water.
As the hot coffee drips onto the ice, it melts rapidly, shocking the coffee and locking in volatile aromatics and bright flavors that are often lost during cooling. The result is a smoother, cleaner, and more vibrant iced coffee with less bitterness.
This method works best with a medium-fine grind to ensure proper extraction in the shorter brew time. It’s a favorite among coffee enthusiasts for its superior flavor clarity and immediate drinkability.
Best Way to Cool Drip Coffee Quickly
Ice bath method for rapid cooling
To make iced coffee with drip coffee, the ice bath method is the fastest and most effective technique. Start by brewing your coffee at double strength—use twice the coffee grounds for the same amount of water—to account for dilution from ice.
Fill a large bowl or sink with ice and cold water, then place your coffee carafe or a heatproof container directly in the bath. Stir the coffee occasionally to maximize surface area contact with the cold environment.
Within 5 to 10 minutes, the coffee will drop to a drinkable temperature without becoming watery. Once cooled, pour the coffee over a glass filled with ice cubes for immediate refreshment. This method preserves the bold flavor profile while preventing bitterness from overheating.
For best results, use a metal container, as it conducts cold faster than glass. The ice bath is ideal when you need iced coffee quickly, such as for a morning rush or warm-weather gatherings.
Using a shallow container to speed cooling
Another effective way to cool drip coffee quickly for iced coffee is to transfer it to a shallow container. Pour the freshly brewed coffee into a wide, flat dish like a baking pan or a shallow glass tray.
The increased surface area allows heat to dissipate rapidly, reducing the temperature in just 5 to 10 minutes. This method works well without diluting the coffee, making it perfect for those who prefer concentrated flavor in their iced drinks.
For faster results, place the shallow container in the refrigerator or freezer, but monitor it closely to avoid freezing. Once cooled, pour the coffee over ice and add milk or sweeteners as desired. This technique is especially useful when you have limited ice or want to control the strength.
The shallow container approach is simple, requires no special equipment, and ensures your drip coffee transforms into a smooth, chilled beverage without bitterness.
Why room temperature cooling works
Letting drip coffee cool to room temperature before serving over ice is a deliberate and effective method for making iced coffee. As hot coffee sits, volatile aromatic compounds stabilize, reducing acidity and bitterness.
This gradual cooling, taking about 30 to 45 minutes, allows the flavors to mellow and harmonize, resulting in a smoother iced coffee. To speed up the process, pour the coffee into a room-temperature carafe or glass container and stir occasionally. Avoid covering it completely, as trapped heat slows cooling.
Once at room temperature, pour over a generous amount of ice for a balanced, refreshing drink that isn’t overly diluted. This method is ideal when you have time to plan ahead, such as brewing coffee in the morning for afternoon enjoyment.
The key is to brew at double strength to compensate for melting ice, ensuring your iced coffee remains bold and flavorful without tasting watered down.
How to Make Iced Coffee with Drip Coffee: Step-by-Step
Step 1: Brew strong drip coffee
To avoid watery iced coffee, double the coffee grounds you normally use for hot coffee. For every 8 ounces of water, add 4 tablespoons of ground coffee instead of 2. This compensates for the dilution from melting ice. Use a medium-coarse grind and cold, filtered water for best extraction.
Brew directly into a heatproof carafe or glass measuring cup. If your drip machine has a pause-and-serve feature, use it to catch the first half of the brew, which is richest in flavor. Avoid over-extraction by brewing only the amount you’ll use within a few hours.
This concentrated base ensures your iced coffee stays bold and flavorful.
Step 2: Cool the coffee properly
Hot coffee poured directly over ice can turn bitter and cause excessive melting. Cool your brew rapidly to preserve its taste. Pour the hot coffee into a shallow, wide container (like a baking dish) to increase surface area. Let it sit at room temperature for 10–15 minutes, stirring occasionally.
For faster results, place the container in an ice bath: fill a larger bowl with ice and water, then set the coffee dish inside. Stir every 2–3 minutes until the coffee reaches room temperature or slightly warm.
Never refrigerate hot coffee in a sealed container—it traps heat and creates condensation that dilutes flavor. Once cooled, transfer to a pitcher or jar. This step locks in the coffee’s bright notes and prevents a dull, flat taste.
Step 3: Pour over ice and serve
Fill a tall glass to the brim with large ice cubes—they melt slower than crushed ice, preserving your coffee’s strength. Pour the cooled coffee over the ice, leaving about an inch of room for milk or sweetener if desired.
For a creamy texture, add 2–3 tablespoons of whole milk, oat milk, or a splash of heavy cream. Stir gently to combine. Taste and adjust: add simple syrup, vanilla extract, or a pinch of salt to enhance flavors. Serve immediately with a straw or enjoy slowly as the ice melts.
For a pro tip, freeze leftover coffee into ice cubes so your drink never gets watery. This method delivers a crisp, refreshing iced coffee that’s perfectly balanced every time.
Tips for Avoiding Watery Iced Coffee
Use coffee ice cubes to prevent dilution
A top tip to keep your iced coffee strong and flavorful is to replace regular ice cubes with frozen coffee. Simply pour leftover drip coffee into an ice cube tray and freeze it overnight.
When you add these coffee cubes to your freshly brewed cup, they chill the drink without watering it down as they melt. This method ensures that every sip retains its bold coffee taste.
To make it even easier, consider brewing a double batch of drip coffee: one for immediate drinking and one for freezing. You can also add a splash of cream or a pinch of sugar to the cubes before freezing for a custom flavor boost.
For best results, use fresh, high-quality coffee and let the cubes freeze completely before use. This approach not only prevents dilution but also adds an extra layer of coffee richness to your iced drink, making it a perfect solution for hot days when you crave a robust, chilled coffee.
Brew with less water for concentrated flavor
To counteract the melting ice that naturally occurs in iced coffee, brew your drip coffee with about half the usual amount of water. This creates a concentrated, strong coffee that will maintain its flavor profile even after being poured over ice.
For example, if you normally use 6 ounces of water per serving, reduce it to 3 ounces for a more intense brew. This method works especially well with dark roasts, as their rich, robust notes shine through when diluted.
After brewing, let the concentrate cool slightly before pouring it over a glass filled with ice. You can also adjust the strength to your preference—experiment with a ratio of 1:1 or 2:1 coffee to water for optimal results.
This technique not only prevents watery coffee but also saves time since you can brew a smaller batch. Remember to stir well after adding ice to ensure even cooling and flavor distribution.
Add milk or cream after cooling
A common mistake that leads to watery iced coffee is adding milk or cream while the coffee is still hot.
Wait until your drip coffee has cooled to room temperature before incorporating any dairy or non-dairy alternatives. Hot coffee melts ice rapidly, and adding milk at that stage can accelerate dilution, resulting in a thin, weak drink.
Instead, brew your coffee, let it cool for 10-15 minutes, then pour it over ice. After the ice has partially melted and the coffee is chilled, stir in your desired amount of milk, cream, or plant-based milk.
This order ensures that the dairy integrates smoothly without overwhelming the coffee’s natural flavors. For an extra creamy texture, consider using cold milk straight from the fridge. You can also experiment with flavored syrups or a pinch of cinnamon after cooling to enhance the taste without risking a watery outcome.
This simple step keeps your iced coffee rich and satisfying from the first sip to the last.
Flavor Variations for Drip Iced Coffee
Vanilla or caramel syrup additions
Elevate your drip iced coffee with simple vanilla or caramel syrups for a sweet, café-style treat. To make vanilla syrup, combine equal parts sugar and water (e.g., 1 cup each) in a saucepan, add 1-2 teaspoons of pure vanilla extract, and simmer until the sugar dissolves.
For caramel syrup, use the same base but substitute vanilla with 1/2 cup of brown sugar and a pinch of salt, simmering until slightly thickened. Let the syrup cool completely before using. To assemble, brew a strong batch of drip coffee (double the grounds for intensity) and chill it.
Fill a glass with ice, pour the cold coffee over it, leaving room for milk or cream if desired. Add 1-2 tablespoons of your chosen syrup, stirring well to combine. Adjust sweetness to taste, and for a richer flavor, add a splash of heavy cream or oat milk.
This method transforms your basic iced coffee into a customizable, sweet refreshment that’s perfect for hot days, with the syrup lasting up to two weeks in the fridge.
Spiced iced coffee with cinnamon
Add warmth and complexity to your drip iced coffee with cinnamon and other spices for a cozy yet refreshing twist.
Start by brewing your drip coffee with a cinnamon stick placed in the coffee grounds before brewing, or stir in 1/4 teaspoon of ground cinnamon directly into the hot coffee after brewing. For deeper flavor, try adding a pinch of nutmeg or cardamom alongside the cinnamon.
Let the coffee cool to room temperature, then refrigerate until chilled. To serve, fill a glass with ice, pour the spiced coffee over it, and add a splash of vanilla almond milk or coconut milk for a creamy finish.
For extra sweetness, stir in a teaspoon of honey or maple syrup to complement the spices. This variation not only enhances the aroma but also offers antioxidant benefits from the cinnamon.
It’s an easy way to create a gourmet iced coffee at home without extra equipment, perfect for fall mornings or any time you crave a hint of spice.
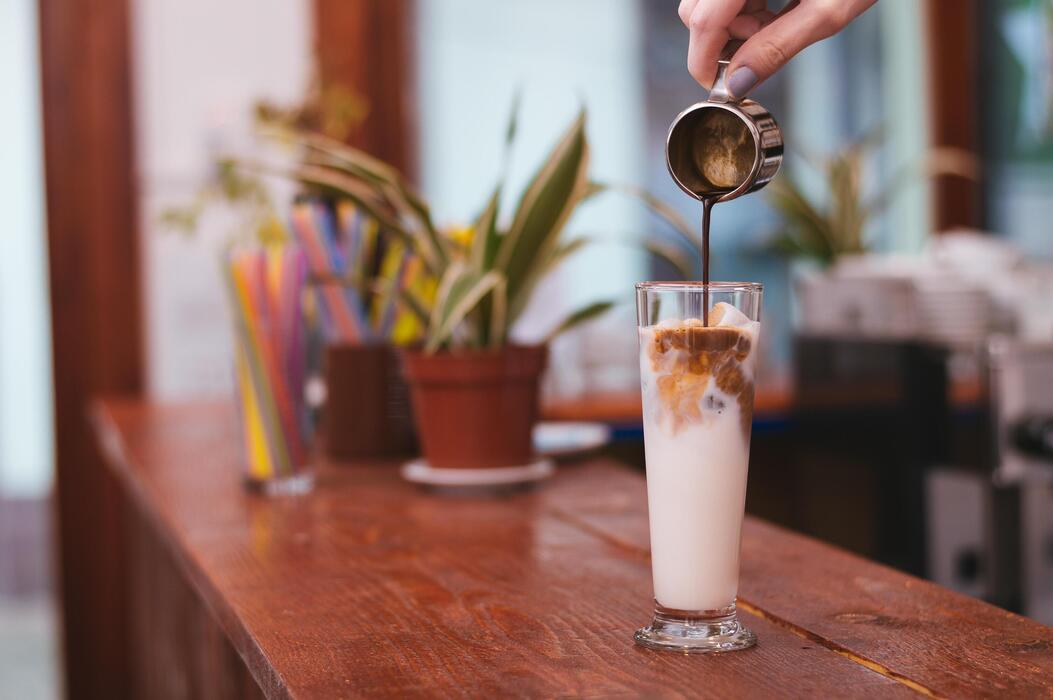
Creamy iced coffee with condensed milk
Transform your drip iced coffee into a rich, indulgent treat by using sweetened condensed milk for creaminess and sweetness in one step. Brew a strong pot of drip coffee (use a 1:1 coffee-to-water ratio for intensity) and let it cool completely.
For each serving, fill a tall glass with ice cubes, then pour the cold coffee over the ice, filling about three-quarters of the glass. Add 2-3 tablespoons of sweetened condensed milk, adjusting to your preferred sweetness level.
Stir vigorously until the condensed milk is fully incorporated, creating a velvety, smooth texture that balances the coffee’s bitterness. For a Vietnamese-style twist, use a dark roast coffee and add a splash of heavy cream or whole milk for extra richness.
This method requires no additional sugar or syrups, as the condensed milk provides both sweetness and creaminess. It’s a quick, satisfying way to make iced coffee that feels decadent, perfect for a dessert-like pick-me-up or a refreshing summer beverage with a silky mouthfeel.
Common Mistakes When Making Iced Coffee with Drip Coffee
Brewing at regular strength
A common mistake is brewing iced coffee at the same strength as hot coffee. When you pour hot coffee over ice, the ice melts and dilutes the brew, resulting in a weak, watery drink. To fix this, brew a double-strength batch.
Use twice the amount of coffee grounds for the same volume of water. For example, if you normally use 2 tablespoons per 6 ounces of water, use 4 tablespoons for that same amount. This ensures that even after the ice melts, your coffee remains bold and flavorful.
You can also brew directly into a heatproof carafe filled with ice, using half the water to maintain concentration. Experiment with ratios: start with a 1:8 coffee-to-water ratio instead of 1:16. This adjustment compensates for dilution and delivers a rich, satisfying iced coffee.
Remember, the goal is a balanced, not bitter, cup, so avoid over-extracting by keeping your brew time consistent.
Pouring hot coffee directly over ice
Pouring hot coffee straight onto ice causes rapid melting and uneven cooling, leading to a watery, less flavorful result. Instead, cool the coffee first before adding ice. Brew your double-strength coffee into a heatproof container, then let it sit at room temperature for 5-10 minutes.
For faster cooling, place the container in an ice bath—a bowl filled with ice and water—stirring occasionally until it reaches room temperature. This step preserves the coffee’s integrity by reducing thermal shock. Once cooled, pour it over fresh ice in a glass.
You can also pre-chill your mug or glass to maintain temperature longer. If you’re in a hurry, try the Japanese iced coffee method: brew directly onto a measured amount of ice in the carafe, using half the water to compensate.
This technique locks in aromatics and avoids the dull flavor from rapid dilution. Always use fresh, high-quality ice to prevent off-tastes.
Storing leftover coffee incorrectly
A frequent error is storing leftover iced coffee in the fridge without proper care, which leads to stale, bitter flavors. Coffee oxidizes quickly when exposed to air, especially after cooling. To preserve freshness, transfer leftover coffee to an airtight container immediately after brewing.
Glass jars or vacuum-sealed bottles work best—avoid plastic, which can absorb odors. Refrigerate it promptly, but never leave it at room temperature for more than two hours. For best taste, consume within 24 hours, as coffee loses its vibrant notes over time.
If you want to prep ahead, brew a concentrated batch and store it separately from ice. When ready to serve, pour the concentrate over fresh ice and add cold water or milk to taste. This prevents dilution and keeps your coffee crisp.
Avoid reheating leftover iced coffee, as it alters the flavor profile. Instead, use it for coffee ice cubes or blended drinks. Proper storage ensures every sip is as enjoyable as the first.
Frequently Asked Questions
What is the easiest way to make iced coffee with drip coffee?
Brew a pot of drip coffee at double strength (use twice the coffee grounds), then pour it over a glass filled with ice. The extra strength prevents the coffee from becoming watery as the ice melts.
Should I cool the hot drip coffee before pouring it over ice?
Yes, it’s best to let the hot coffee cool at room temperature for 10-15 minutes, or refrigerate it for 20-30 minutes, before pouring over ice. This reduces rapid ice melting and dilution, giving you a stronger, more flavorful iced coffee.
How do I make iced coffee without diluting it?
Use double-strength drip coffee (two scoops of grounds per cup of water) and brew it directly into a heatproof pitcher. Chill the coffee, then pour it over ice. For even less dilution, use coffee ice cubes made from leftover coffee.
Can I brew drip coffee directly onto ice?
Yes, this is called the ‘Japanese iced coffee’ method. Place a glass filled with ice under the drip brewer, then brew a half-strength amount of coffee directly onto the ice. The ice instantly chills the coffee and locks in flavor without over-diluting.
What is the best coffee-to-water ratio for iced drip coffee?
For a standard 12-cup carafe, use 12 tablespoons of medium-ground coffee for 6 cups of water (double your usual amount). For a single serving, use 2 tablespoons of coffee per 6 ounces of water, then pour over a full glass of ice.
How long does iced drip coffee last in the fridge?
Brewed iced coffee stored in an airtight container in the refrigerator stays fresh for up to 3-4 days. For best flavor, consume within 24 hours. Avoid adding milk or sweetener until serving to prevent spoilage.
Can I add milk or cream to iced drip coffee without it curdling?
Yes, but let the coffee cool completely before adding dairy to prevent curdling. For best results, use cold milk or cream and stir gently. Non-dairy milks like almond or oat milk work well too, but add them after the coffee is chilled.
Conclusion
Making iced coffee with drip coffee is simple, affordable, and avoids bitterness. Key takeaways: brew double-strength to prevent dilution, chill the coffee completely before pouring over ice, and customize with milk or sweeteners. Experiment with your favorite beans and ratios—perfecting your own iced coffee is a rewarding, delicious habit. Cheers to staying cool and caffeinated