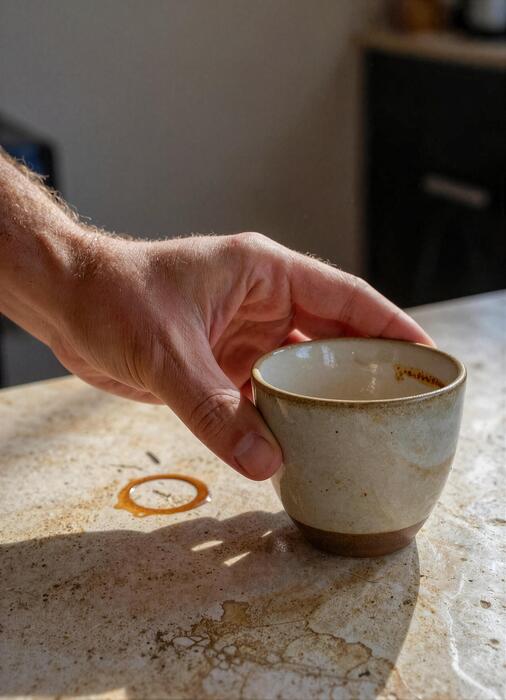
How Do I Remove Coffee Stains From Cups
Wondering how do i remove coffee stains from cups? Those stubborn brown rings and blotches come from tannins bonding to ceramic or glass. You’ve likely tried scrubbing, only to see them return. You’re in the right place. The solution is simpler than you think—using common pantry items that break down the stains without harsh chemicals. Below, you’ll find the most effective, proven methods to restore your cups to like-new condition.
Why Coffee Stains Form on Cups
The chemistry behind coffee stains
Coffee stains are caused by tannins, a type of polyphenol compound that naturally occurs in coffee beans. When coffee is brewed, these tannins dissolve into the liquid. As the coffee cools or evaporates on the cup’s surface, the tannins oxidize and bond to microscopic pores in the ceramic or glass.
This chemical reaction creates a yellowish or brownish discoloration that can become permanent if not treated quickly. The staining process is accelerated by heat, which opens up the material’s pores, allowing tannins to penetrate deeper.
To remove these stains effectively, use a mild abrasive like baking soda or a paste of lemon juice and salt. Gently scrub the stained area with a soft sponge or cloth, focusing on the tannin-bonded spots. Rinse thoroughly with warm water.
For stubborn stains, soak the cup in a solution of equal parts water and white vinegar for 15–30 minutes before scrubbing. This breaks down the tannin compounds without damaging the cup’s surface.
Why some cups stain more than others
The material and finish of your cup significantly influence staining. Porous materials like ceramic, stoneware, and unglazed pottery absorb coffee tannins more readily than non-porous ones like glass or stainless steel.
Cups with a rough or matte glaze have microscopic crevices that trap tannins, making stains more visible and harder to remove. In contrast, smooth, glossy surfaces repel liquids and prevent deep penetration. Additionally, cups that are frequently microwaved or exposed to high heat can develop micro-cracks, further increasing stain retention.
To address this, choose cups with high-gloss finishes for everyday use. For existing stains on porous cups, apply a paste of baking soda and hydrogen peroxide (3:1 ratio) directly to the stain. Let it sit for 10 minutes, then scrub gently with a non-abrasive sponge.
This combination lifts stains from deep pores without scratching. Avoid using steel wool or harsh chemicals, as they can damage the glaze and worsen future staining.
How to prevent stains from setting in
Preventing coffee stains is easier than removing them. Rinse your cup immediately after use with warm water to wash away residual tannins before they oxidize. If you can’t rinse right away, fill the cup with warm water and a drop of dish soap to keep the surface wet.
Avoid letting coffee dry inside the cup, as dried residue bonds more tightly. For daily prevention, apply a thin layer of cooking oil to the inside of the cup every few weeks. This creates a hydrophobic barrier that repels tannins.
Another effective trick is to swish a small amount of lemon juice or white vinegar in the cup after each use—the acidity neutralizes tannins. For stainless steel or glass cups, a quick wipe with a microfiber cloth after rinsing prevents water spots that can trap stains.
If you notice early discoloration, use a paste of baking soda and water immediately to gently scrub the area. Consistent care keeps cups looking new and reduces the need for deep cleaning.
Best Ways to Remove Coffee Stains with Baking Soda

How to make a baking soda paste
Creating a baking soda paste is the simplest and most effective first step for tackling coffee stains. In a small bowl, mix three parts baking soda with one part water to form a thick, spreadable consistency. The paste should be not too runny—aim for a texture similar to toothpaste.
For tougher stains, you can substitute water with white vinegar for extra cleaning power. Apply the paste directly to the stained areas inside your cup using a soft sponge or your fingers, ensuring full coverage.
Let it sit for 10–15 minutes to allow the mild abrasiveness of the baking soda to break down the tannins that cause discoloration. This method is gentle enough for delicate ceramic or glass cups but effective enough for daily coffee drinkers.
After the paste has worked its magic, rinse thoroughly with warm water. You’ll often see immediate results, but for older stains, you may need to repeat the process or move to a more intensive scrubbing technique.
Scrubbing technique for stubborn stains
For set-in or stubborn coffee stains, the baking soda paste needs a bit of elbow grease to be fully effective.
After applying the paste and letting it sit, use a non-abrasive scrubber like a soft-bristled brush, a sponge with a scrubbing pad, or even a damp paper towel to work the paste into the stain. Focus on the bottom and sides of the cup where coffee residue often clings.
Use circular motions and moderate pressure to lift the stain without scratching the surface. If the stain persists, add a splash of lemon juice to the paste—the acidity boosts the stain-fighting power. Rinse and check your progress; repeat the scrubbing if needed.
For deep-set stains, let the paste dry completely on the cup, then scrub with a damp cloth to remove the dried residue. This technique is safe for most mugs, but avoid using on antique or hand-painted ceramics as the abrasiveness may damage the finish.
Baking soda and vinegar combo method
Combining baking soda and vinegar creates a powerful fizzing reaction that can loosen even the most stubborn coffee stains. Start by sprinkling 1–2 tablespoons of baking soda into the stained cup. Then, slowly pour white vinegar over the baking soda—about 1/4 cup should suffice—and watch as it bubbles and foams.
The chemical reaction helps to dislodge tannins and other stain-causing compounds from the cup’s surface. Let the mixture sit for 5–10 minutes while it works. After the fizzing subsides, use a soft sponge or brush to scrub the cup thoroughly, focusing on any remaining discoloration.
Rinse with warm water and inspect the results. For extra effectiveness, you can heat the vinegar slightly before adding it to the baking soda, as warm liquids enhance the cleaning action.
This method is ideal for deep-set stains in white or light-colored cups, but always test on a small area first if your cup has decorative patterns.
How to Use White Vinegar for Coffee Stains

Soaking cups in vinegar solution
For light to moderate coffee stains, soaking your cups in a white vinegar solution is an effective and effortless method. Start by filling your sink or a large bowl with equal parts white vinegar and hot water.
Submerge the stained cups completely, ensuring the coffee residue is fully exposed to the solution. Let them soak for at least 30 minutes to an hour; for older or more stubborn stains, an overnight soak can work wonders.
The acetic acid in the vinegar breaks down the tannins in coffee, loosening the discoloration without harsh scrubbing. After soaking, simply pour out the solution and inspect the cups. Most stains will have faded or disappeared entirely. If any residue remains, you can proceed with a targeted scrub.
This method is particularly useful for ceramic, glass, and stainless steel cups, as it is gentle on surfaces while being tough on stains. Remember to use distilled white vinegar for best results, as other types may not be as effective or could leave unwanted residues.
Vinegar and salt scrub for tough stains
For persistent coffee rings or stubborn buildup that soaking alone cannot remove, a vinegar and salt scrub provides the abrasive action needed without damaging your cups. Begin by sprinkling a small amount of table salt or coarse salt onto the stained area.
Then, pour a few drops of undiluted white vinegar directly onto the salt to create a gritty paste. Using a soft sponge or cloth, gently scrub the stain in circular motions.
The salt acts as a mild abrasive to physically lift the coffee residue, while the vinegar continues to chemically break down the tannins. Focus on any visible rings or darkened patches, applying moderate pressure. This technique is especially effective for mugs with textured surfaces or narrow bottoms where stains accumulate.
Avoid using metal scouring pads, as they can scratch the finish. Rinse the cup thoroughly after scrubbing to remove all salt and vinegar. If needed, repeat the process until the stain is completely gone, then proceed with a final rinse to ensure no salty aftertaste remains.
Rinsing tips to remove vinegar smell
After using vinegar to clean your coffee cups, a lingering vinegar smell is common but easily eliminated with proper rinsing techniques. Start by rinsing each cup under warm running water for at least 30 seconds, using your fingers to wipe the interior surfaces.
For a more thorough approach, add a few drops of mild dish soap to a sponge and wash the cup as usual, focusing on the rim and bottom where odors may cling. Then, rinse again with warm water until all soap suds are gone.
To neutralize any remaining vinegar scent, try a final rinse with a solution of baking soda and water (1 teaspoon per cup of water) or simply wipe the interior with a lemon wedge before rinsing.
For stainless steel cups, a quick rinse with cold water can help close the pores and reduce odor absorption. Always dry the cups completely with a clean towel or air-dry them upside down on a rack.
If the smell persists, a short soak in plain water for 10 minutes usually resolves it, leaving your cups fresh and ready for your next brew.
Lemon Juice and Salt Method for Stains
Why lemon juice works on coffee stains
Coffee stains are caused by tannins, natural compounds that bind to the porous surface of ceramic or glass cups, creating stubborn brown rings.
Lemon juice is highly effective because its citric acid acts as a natural chelating agent, breaking down the chemical bonds of tannins and lifting them away from the cup’s surface. The acidity of lemon juice also helps to dissolve mineral deposits from hard water, which can trap stains deeper.
When combined with salt, a mild abrasive, the mixture creates a gentle scrubbing paste that physically dislodges stain particles without scratching the cup. This method is not only chemical-free and safe for repeated use but also cost-effective and environmentally friendly.
Unlike harsh bleach or commercial cleaners, lemon juice won’t leave behind harmful residues or alter the taste of your next coffee.
For best results, use fresh lemon juice rather than bottled varieties, as it contains higher acidity and natural enzymes that work synergistically to restore your cups to their original, sparkling clean condition.
Step-by-step lemon and salt scrub
To remove coffee stains with lemon juice and salt, start by cutting a fresh lemon in half. Sprinkle a generous amount of table salt or coarse salt directly onto the cut surface of the lemon half.
Gently rub the salted lemon over the stained areas of your cup, applying moderate pressure in circular motions. The abrasive salt works to physically scrub away the stain, while the lemon juice’s citric acid dissolves the tannins. Focus on the brown rings and any stubborn spots for 1-2 minutes.
If the stain is inside a narrow cup, use a small dishcloth dipped in lemon juice and salt instead. After scrubbing, let the mixture sit on the stain for 5-10 minutes to allow the acid to penetrate deeper. Rinse thoroughly with warm water and wash with dish soap.
For tough, set-in stains, repeat the process or let the lemon-salt paste sit overnight. This method is safe for most cup materials, including ceramic, glass, and stainless steel.
Using lemon juice for daily maintenance
Prevent coffee stains from building up by incorporating lemon juice into your daily cup-cleaning routine. After finishing your coffee, immediately rinse the cup with warm water to remove loose residue.
Then, add one to two tablespoons of fresh lemon juice to the cup and swirl it around, ensuring the liquid coats all stained areas. Let it sit for a minute while the citric acid works to break down fresh tannins before they set.
For an extra boost, dip a soft sponge or brush into lemon juice and quickly scrub the interior. This daily practice is especially useful for keeping white or light-colored cups bright without the need for harsh chemicals.
Alternatively, fill a sink with warm water and add half a cup of lemon juice; soak your cups for 10 minutes after each use. This routine not only prevents stains but also eliminates odors and leaves your cups smelling fresh.
Over time, regular use of lemon juice will maintain your cups’ clarity and reduce the need for deep cleaning.
Denture Tablets as a Stain Remover

How denture tablets dissolve coffee stains
Denture tablets are an effective, effervescent solution for removing coffee stains from cups because they contain sodium bicarbonate, citric acid, and oxidizing agents like sodium perborate. When dropped into water, these ingredients react to create bubbles that lift and break down tannins—the compounds in coffee that cause brown discoloration.
To use, simply fill your stained cup with warm water, drop in one or two tablets, and let the fizzing action work. The bubbles penetrate microscopic pores in ceramic, glass, or plastic, loosening stubborn residue without harsh scrubbing.
This method is particularly useful for hard-to-reach areas like the bottom of travel mugs or inside narrow cups. For best results, ensure the solution covers all stained surfaces. The effervescence also helps deodorize the cup, leaving it fresh.
Avoid using denture tablets on delicate materials like antique china or hand-painted ceramics, as the abrasive action may damage finishes. Always rinse thoroughly after soaking to remove any chemical residue before reusing.
Soaking time and water temperature tips
For optimal stain removal, soak coffee-stained cups in hot (not boiling) water with denture tablets for 15 to 30 minutes. Hot water accelerates the chemical reaction, enhancing the effervescence and allowing the cleaning agents to break down tannins more effectively.
Avoid boiling water, as it can reduce the tablet’s efficacy or damage certain cup materials. For light stains, a 15-minute soak is often sufficient, while heavy, set-in stains may require up to 30 minutes or a second soak with fresh tablets.
If stains persist, gently scrub with a soft sponge after soaking to lift any remaining residue. For daily maintenance, a quick 5-minute soak can prevent buildup. Always check the water temperature by hand—it should be comfortably warm, similar to dishwashing water.
After soaking, discard the solution and rinse the cup thoroughly with warm water. For best results, ensure the cup is fully submerged; if not, rotate it halfway through. This method is safe for most cups, but avoid extended soaking on decorative glazes or metallic trims.
Comparing denture tablets to other methods
Compared to other coffee stain removal methods, denture tablets offer a gentle, non-abrasive alternative that requires minimal effort. Unlike bleach, which can leave a chemical smell and damage certain finishes, denture tablets are safer for regular use on ceramic, glass, and plastic cups.
They are also more effective than baking soda paste for reaching narrow crevices, as the effervescence penetrates deep into pores. However, white vinegar is a cheaper, natural option but may require longer soaking and leave a lingering odor.
Dish soap and scrubbing works for surface stains but can scratch delicate materials. For heavy, baked-on stains, denture tablets outperform most household methods because they chemically break down tannins rather than relying on friction.
The main downside is that tablets are less effective on metal cups or those with rough surfaces. Overall, denture tablets provide a balanced solution—effective, easy, and gentle—making them ideal for routine cleaning of coffee-stained cups without the risks of harsh chemicals or physical scrubbing.
Tips for Removing Stains from Different Cup Materials
Cleaning coffee stains from ceramic cups
To remove stubborn coffee stains from ceramic cups, start by rinsing the cup with warm water immediately after use to prevent stains from setting.
For existing stains, create a paste using baking soda and a small amount of water; apply it to the stained areas with a soft sponge or cloth, scrubbing gently in circular motions. Baking soda acts as a mild abrasive that lifts stains without scratching the glaze.
Alternatively, soak the cup in a solution of equal parts white vinegar and hot water for 15–30 minutes, then scrub with a non-abrasive pad.
For tough, set-in stains, try lemon juice and salt—sprinkle salt on the stain, squeeze lemon juice over it, and let it sit for 10 minutes before scrubbing. Rinse thoroughly with warm water and dry with a soft cloth.
Avoid using harsh bleach or steel wool, as these can damage the ceramic finish. Regular cleaning with a gentle dish soap and warm water will keep your ceramic cups looking fresh.
Removing stains from glass and stainless steel
For glass cups, baking soda and water paste is highly effective—apply it to the stain, scrub gently with a soft sponge, and rinse.
Glass is non-porous, so stains are usually surface-level; a mixture of white vinegar and hot water (1:1 ratio) can be used for a deep soak, letting the cup sit for 20–30 minutes before scrubbing. For stainless steel, avoid abrasive cleaners that can scratch the surface.
Instead, use baking soda or a specialized stainless steel cleaner; dampen a soft cloth, apply the cleaner, and rub in the direction of the metal’s grain. Lemon juice or a paste of cream of tartar and water can also lift stains—apply, let sit for 10 minutes, then rinse.
For both materials, rinsing immediately after use prevents stain buildup. If stains persist, try a magic eraser (for glass) or a non-abrasive scrub with dish soap. Dry with a soft towel to avoid water spots. These methods preserve the shine and integrity of glass and stainless steel cups.
What to avoid on plastic or travel mugs
When cleaning plastic or travel mugs, avoid abrasive scrubbers like steel wool or harsh scouring pads, as they can scratch the surface, creating grooves where bacteria and stains can hide. Do not use bleach—it can degrade plastic and leave a chemical residue that affects taste.
Instead, for plastic cups, use baking soda and warm water with a soft sponge; for travel mugs with lids, disassemble all parts and soak in white vinegar and hot water (1:1 ratio) for 15–20 minutes, then scrub with a bottle brush.
Avoid dishwasher use for many plastic items, as high heat can warp them or cause fading—check the manufacturer’s instructions. For stubborn stains, try lemon juice or a paste of baking soda and hydrogen peroxide (test on a small area first).
Never use metal utensils to scrape stains, as they cause scratches. Always rinse thoroughly after cleaning to remove any cleaning agent residue. Regular hand washing with mild dish soap and warm water helps maintain the cup’s appearance and hygiene.
How to Keep Cups Stain-Free Long Term
Rinsing cups immediately after use
The simplest and most effective way to prevent coffee stains from setting is to rinse your cup immediately after finishing your drink. Coffee contains tannins that bond with the porous surface of ceramic or glass within minutes, creating stubborn discoloration.
By holding the cup under warm running water and giving it a quick swirl, you wash away the majority of the staining compounds before they have a chance to adhere.
For best results, use a soft sponge or your fingers to gently wipe the interior while rinsing, paying special attention to the bottom and rim where residue often lingers. If you cannot rinse right away, at least fill the cup with water to dilute the remaining coffee.
This habit alone can reduce the need for deep cleaning by up to 90%. Make it a routine: after your last sip, head straight to the sink. Your future self will thank you when cups stay bright and new-looking for years.
Using a gentle daily cleaner
Even with immediate rinsing, microscopic coffee particles can accumulate over time. To maintain a stain-free finish, incorporate a gentle daily cleaner into your routine. Avoid harsh abrasives like steel wool or bleach, which can scratch the glaze and actually trap more stains.
Instead, use a mild dish soap and a non-scratch sponge or a soft-bristled bottle brush. For added stain-fighting power, create a paste of baking soda and water—apply it to the damp cup, scrub gently for 30 seconds, then rinse thoroughly.
Baking soda is alkaline and lifts acidic coffee stains without damaging the surface. Alternatively, a diluted white vinegar solution (one part vinegar to three parts water) can be swished in the cup weekly to dissolve mineral deposits and tannin buildup.
The key is consistency: a quick daily scrub prevents stains from becoming permanent. This approach keeps your cups looking pristine without requiring harsh chemicals or excessive elbow grease.
When to replace stained cups
Despite your best efforts, some cups may develop deep-set stains that resist all cleaning methods. If you have tried soaking with baking soda, vinegar, or even oxygen bleach (like hydrogen peroxide) for several hours and the discoloration remains, it may be time to consider replacement.
Porous materials like unglazed ceramic, stoneware, or older plastic cups are especially prone to permanent staining. A cup that is crazed (with fine cracks in the glaze) will trap stains in those fissures, creating a breeding ground for bacteria and mold.
In such cases, replacement is the safest and most hygienic option. Look for high-quality, glazed ceramic or borosilicate glass cups—these are non-porous and resist staining far longer. When shopping, choose smooth, light-colored interiors that make stains easy to spot and clean.
Investing in durable cups reduces waste and ensures your morning coffee always looks as good as it tastes. Remember, a fresh cup is a joy to use.
Frequently Asked Questions
What is the fastest way to remove fresh coffee stains from a cup?
Rinse the cup immediately with hot water and scrub with a sponge and dish soap. For light stains, this is usually enough to prevent them from setting.
How do I remove stubborn, set-in coffee stains from ceramic mugs?
Make a paste of baking soda and water, apply it to the stains, and scrub gently with a sponge or soft brush. For deeper stains, let the paste sit for 15-20 minutes before rinsing.
Can I use vinegar to remove coffee stains from cups?
Yes, white vinegar is effective. Fill the cup with equal parts vinegar and hot water, let it soak for 30 minutes, then scrub and rinse thoroughly. Avoid using vinegar on delicate or antique mugs.
Will bleach remove coffee stains from white cups?
Yes, but only for white, dishwasher-safe cups. Mix one tablespoon of bleach with one cup of water, soak for 15 minutes, then wash thoroughly with soap and water. Never mix bleach with other cleaners.
How do I remove coffee stains from a travel mug or thermos?
Fill the mug with hot water and drop in a denture cleaning tablet. Let it fizz and soak for 30 minutes, then rinse well. Alternatively, use a bottle brush with baking soda paste.
Is it safe to use baking soda and hydrogen peroxide to remove coffee stains?
Yes, this combination is safe for most cups. Make a paste of baking soda and hydrogen peroxide, apply to the stains, let it sit for 10 minutes, then scrub and rinse. Test on a small area first for colored mugs.
How can I prevent coffee stains from forming on my cups?
Rinse your cup immediately after use, and avoid letting coffee sit for long periods. Regularly cleaning with baking soda or a gentle abrasive can also prevent buildup.
What should I avoid when removing coffee stains from cups?
Avoid using harsh abrasives like steel wool on delicate or glazed cups, as they can scratch the surface. Also, do not mix bleach with acidic cleaners like vinegar, as it creates toxic fumes.
Conclusion
Removing coffee stains from cups is simple with common household items like baking soda, vinegar, or lemon juice. For tough stains, a paste of baking soda and water or a gentle scrub with salt works wonders. Remember to rinse thoroughly. Don’t let stubborn stains ruin your favorite mug—these quick, natural methods will restore its shine. Enjoy your next cup of coffee with confidence, knowing a clean cup is always within reach.