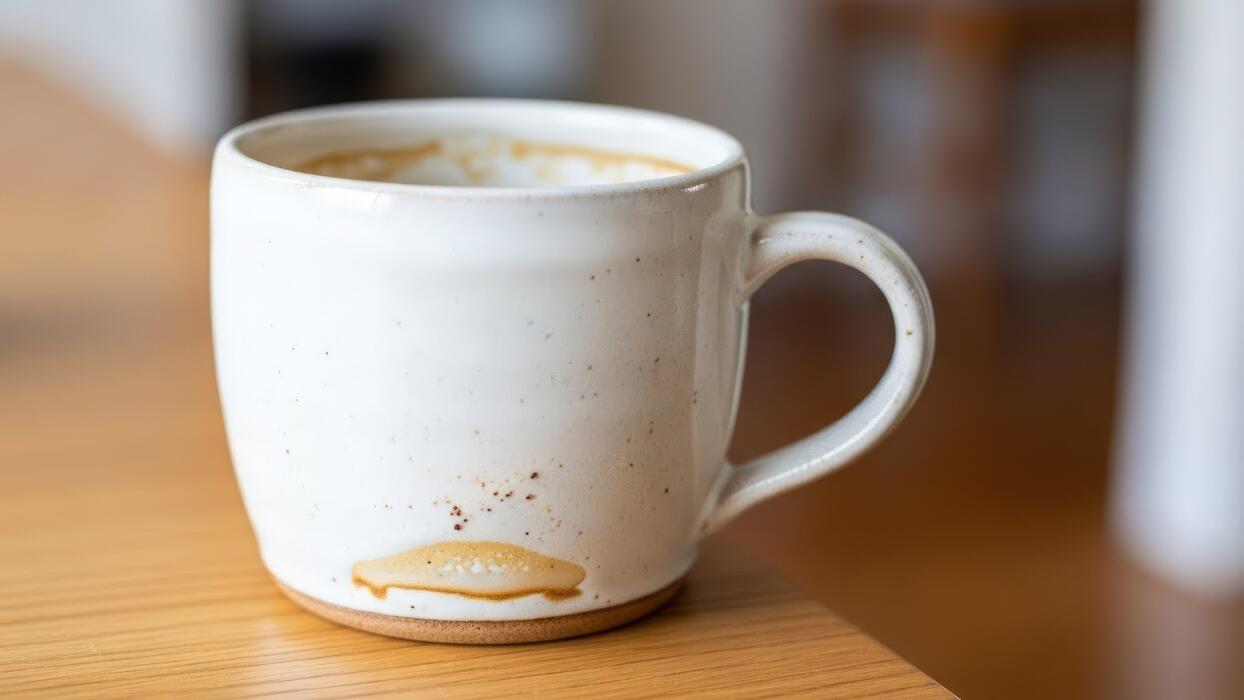
How To Get Rid Of Coffee Mug Stains
If you’re searching for how to get rid of coffee mug stains, you’ve probably noticed those stubborn brown rings that refuse to budge with a simple rinse. The core problem is that coffee’s tannins bond with porous ceramic over time. You’re in the right place—we’ll cover quick, effective methods using common household ingredients, so your mugs look spotless again without harsh scrubbing.
Why Coffee Mugs Stain and What Causes the Discoloration
Tannins in coffee and how they bond to ceramic
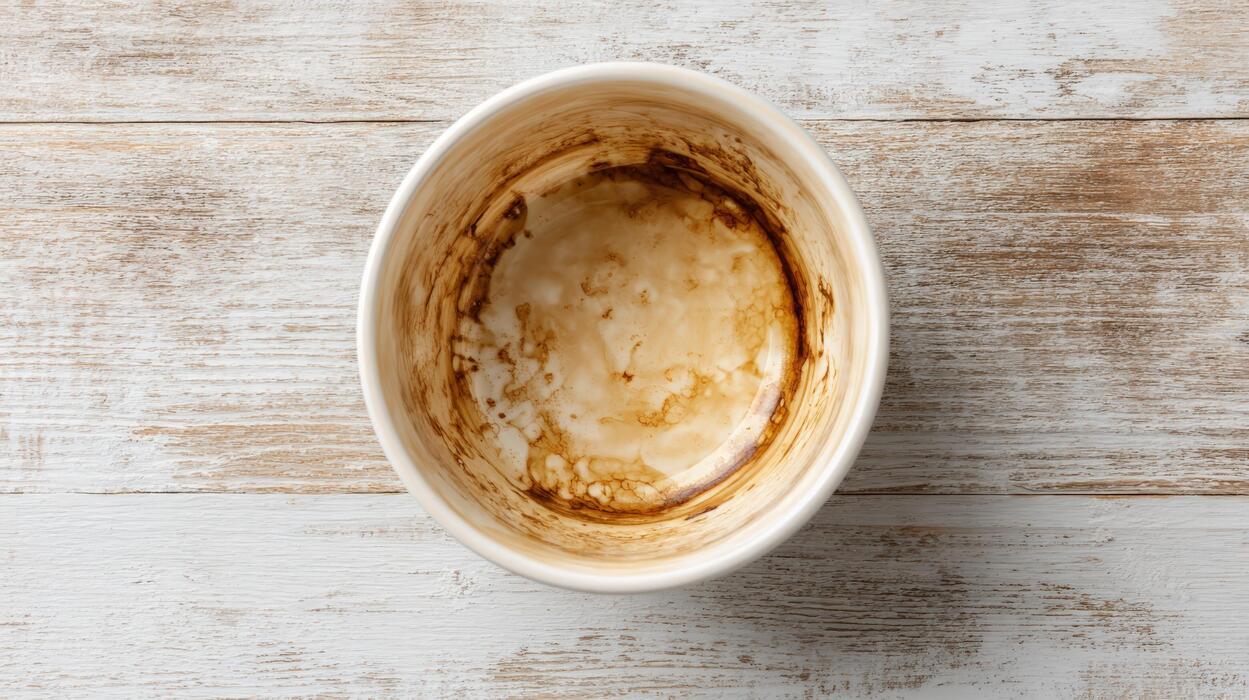
The primary culprit behind coffee mug stains is tannins, natural compounds found in coffee beans. These organic molecules, also present in tea and wine, are highly pigmented and have a tendency to adhere to surfaces.
When hot coffee is poured into a mug, the tannins dissolve and begin to chemically bond with microscopic imperfections in the ceramic or porcelain. Over time, repeated exposure allows these molecules to accumulate and oxidize, forming a stubborn, brownish film that resists simple rinsing.
The bond is strengthened by the heat of the coffee, which opens up the mug’s surface pores slightly, allowing tannins to seep deeper.
To effectively remove these stains, you need to break this bond using mild abrasives or alkaline substances like baking soda or hydrogen peroxide, which lift the tannins without damaging the glaze. Understanding this chemical interaction helps you choose the right cleaning method rather than scrubbing ineffectively.
Why porous mugs stain faster than glazed ones
Not all coffee mugs are created equal when it comes to stain resistance. Porous materials like unglazed ceramic, stoneware, or earthenware have tiny, invisible cracks and pits on their surface. These micro-crevices act like sponges, trapping coffee residue and tannins deep within the material.
In contrast, fully glazed mugs have a glass-like, non-porous coating that prevents liquids from penetrating. This is why your favorite handmade mug may stain after just a few uses, while a factory-glazed mug stays pristine longer.
The porosity accelerates staining because the coffee solids are physically lodged into the material, making them harder to rinse away. To prevent this, consider using mugs with a high-quality, glossy glaze for daily coffee consumption.
If you already have porous mugs, immediate rinsing after use is critical, as dried residue sets into the pores more stubbornly. For existing stains, a paste of baking soda and water can gently abrade the surface without scratching the glaze.
Common mistakes that make stains set in deeper
Many people inadvertently worsen coffee stains by using the wrong cleaning methods. A frequent error is scrubbing with harsh abrasive pads like steel wool, which scratches the glaze, creating new porous areas for future stains to latch onto.
Another mistake is letting coffee residue dry before washing; once tannins oxidize and harden, they become far more difficult to remove. Additionally, using bleach or chlorine-based cleaners can damage the mug’s finish and may not effectively break down the organic tannin bond.
Some also mistakenly soak mugs in soapy water for hours, which can actually spread the stain rather than lift it. To avoid setting stains deeper, always rinse your mug immediately after use with warm water.
For set-in stains, avoid aggressive scrubbing and instead use a gentle paste of baking soda and water or a soak in white vinegar. These methods safely dissolve tannins without harming the mug’s surface, preventing the cycle of deeper, permanent discoloration.
Best Ways to Remove Coffee Stains with Household Ingredients

How to use baking soda paste for gentle scrubbing
Baking soda is a mild abrasive that effectively lifts coffee stains without scratching your mugs. To start, sprinkle a tablespoon of baking soda into the stained mug. Add just enough water (about a teaspoon) to form a thick, spreadable paste.
Use a damp sponge or soft cloth to dip into the paste and gently scrub the interior of the mug in circular motions. Focus on the stained areas, applying light pressure to avoid damaging the glaze.
For stubborn rings, let the paste sit on the stain for 10-15 minutes before scrubbing. Rinse thoroughly with warm water and dry with a clean towel. This method works best on fresh or moderate stains and is safe for all mug materials, including ceramic, glass, and stainless steel.
For extra cleaning power, you can add a splash of white vinegar to the paste to create a fizzy reaction that helps loosen residue. Repeat the process if needed, and your mugs will look like new without harsh chemicals.
White vinegar soak method for tough stains
White vinegar is a natural acid that breaks down stubborn coffee tannins, making it ideal for set-in stains. Fill the stained mug with equal parts white vinegar and hot water (about ½ cup each).
Let the mixture soak for 30 minutes to 1 hour; for very old stains, extend the soak time up to overnight. The acid in the vinegar dissolves the discoloration, while the hot water helps loosen residue.
After soaking, pour out the solution and scrub the mug with a non-abrasive sponge or brush. If any stain remains, sprinkle baking soda onto the damp sponge and scrub gently—the combination of vinegar and baking soda creates a gentle fizzing action that lifts remaining marks.
Rinse thoroughly with warm water and dry immediately to prevent water spots. This method is safe for most mugs but avoid using it on unsealed porous materials like unglazed ceramic. The vinegar smell disappears completely after rinsing, leaving your mug clean and odor-free.
Lemon juice and salt combination for natural whitening
Lemon juice acts as a natural bleaching agent, while salt provides gentle abrasion to remove coffee stains. Start by cutting a fresh lemon in half and dipping the cut side into a small dish of table salt or coarse salt.
Scrub the stained areas of the mug directly with the lemon half, applying firm pressure in circular motions. The citric acid in the lemon juice whitens the stain, and the salt scrubs away residue.
For deeper cleaning, squeeze fresh lemon juice into the mug (about 2 tablespoons) and add 1 tablespoon of salt to form a paste. Let it sit for 15-20 minutes, then scrub with a sponge. Rinse thoroughly with warm water.
This method is especially effective on ceramic and glass mugs, but avoid using it on delicate or metallic finishes as the acid may cause etching. Repeat weekly for maintenance, and your mugs will stay bright and stain-free without chemical bleaches.
The fresh lemon scent is an added bonus, leaving your kitchen smelling clean.
How to Use Bleach Safely on Stubborn Mug Stains
Dilution ratios for bleach and water solution
For stubborn mug stains, use a safe dilution of 1 part bleach to 10 parts water to avoid damaging the mug’s finish. This ratio effectively breaks down coffee and tea tannins without being overly harsh.
For a standard mug, mix 1 tablespoon of bleach with 10 tablespoons of water in a non-metallic bowl. Always add bleach to water, not the reverse, to prevent splashing.
For heavily stained mugs, you can increase to a 1:8 ratio, but never use undiluted bleach as it can ruin glazes and release toxic fumes. Use cold or lukewarm water—hot water can cause bleach to degrade too quickly and produce strong vapors.
Stir the solution gently to ensure even distribution before placing the mug inside. If treating multiple mugs, prepare fresh solution for each batch to maintain effectiveness.
Always measure precisely using a tablespoon or marked cup, and avoid mixing bleach with other cleaners, especially ammonia or vinegar, which create dangerous chlorine gas.
Step-by-step soak and rinse process
First, pre-rinse the mug with cold water to remove loose debris and prevent bleach from reacting with leftover coffee oils. Submerge the mug completely in the diluted bleach solution, ensuring no air pockets inside.
Let it soak for 15 to 30 minutes—check at 15 minutes for lighter stains; extend to 30 minutes for deep-set discoloration. Do not soak longer than 45 minutes, as prolonged exposure can weaken glazes or cause etching.
After soaking, drain the bleach solution and rinse the mug thoroughly under cold running water for at least 30 seconds to remove all bleach residue. For stubborn residue, scrub gently with a soft sponge and mild dish soap. Finally, dry the mug with a clean cloth or air-dry upside down.
For extra assurance, run the mug through a dishwasher cycle on a hot rinse setting to eliminate any lingering bleach smell. Never skip the rinse step—residual bleach can leach into future drinks and pose health risks.
Safety tips to avoid damaging mugs or harming yourself
Always wear rubber gloves and safety goggles when handling bleach to protect skin and eyes from splashes. Work in a well-ventilated area—open windows or use an exhaust fan to avoid inhaling fumes.
Never use bleach on hand-painted, metallic, or antique mugs, as it can strip decorative finishes or react with metals, causing discoloration. For ceramic or porcelain mugs, test a small hidden area first by dabbing bleach solution with a cotton swab and waiting 10 minutes.
Avoid abrasive scrubbers like steel wool, which can scratch surfaces and trap bleach, leading to long-term damage. Keep bleach away from wood, fabric, or unsealed surfaces to prevent stains. Store bleach in its original container, out of reach of children and pets.
If bleach contacts your skin, rinse immediately with cool water for 15 minutes. In case of eye contact, flush with water and seek medical help. After cleaning, label the mug if you plan to reuse it for beverages to avoid accidental mix-ups.
Denture Tablets: A Surprising Trick for Coffee Stains
How denture tablets dissolve tannin buildup
Coffee stains in mugs are primarily caused by tannins, natural compounds in coffee that cling to porous ceramic and glass. Denture tablets are surprisingly effective at removing these stains because they contain sodium bicarbonate, citric acid, and oxidizing agents like sodium perborate.
When dissolved in warm water, these ingredients create a fizzy, alkaline solution that breaks down the chemical bonds of tannins without harsh scrubbing. The effervescence lifts stains from the surface, while the oxidizing agents bleach discolored areas.
This makes denture tablets a gentle yet powerful alternative to abrasive cleaners or bleach, which can damage mug finishes. To use, drop one tablet into a mug filled with warm water—hot water speeds up the reaction—and let it fizz.
The solution penetrates microscopic pores where stains hide, dissolving buildup that regular dish soap leaves behind. This method is especially effective on white or light-colored mugs where stains are most visible, and it works without scratching, preserving the glaze or coating of your favorite cup.
Instructions for soaking mugs overnight
For stubborn, set-in coffee stains, an overnight soak delivers the best results. Start by placing your stained mugs in a large bowl or plastic container—one that holds enough water to fully submerge each mug.
Fill the container with warm water (not boiling, to avoid thermal shock) and add one denture tablet per mug. For example, if soaking four mugs, use four tablets. Drop them in and let them fizz completely, then stir gently to distribute the solution.
Cover the container to prevent evaporation and leave it for 8 to 12 hours, or overnight. The prolonged exposure allows the active ingredients to dissolve tannins deep within the mug’s pores. For extra-stubborn rings, you can pre-fill each mug with the solution before submerging them.
In the morning, remove the mugs, rinse them thoroughly with warm water, and wash with dish soap to remove any residual taste. This method requires minimal effort and avoids scrubbing, making it ideal for delicate or vintage mugs.
Results you can expect on different mug materials
Denture tablets work well on most mug materials, but results vary. Ceramic mugs—especially glazed white or light-colored ones—respond best, often returning to a like-new condition after one overnight soak. The non-abrasive solution removes stains without dulling the glaze.
Glass mugs also show excellent results, as the smooth surface allows the solution to work evenly, eliminating cloudy coffee residue. However, avoid using this method on hand-painted or metallic-accented mugs, as the oxidizing agents may fade or damage decorative elements.
Stainless steel travel mugs can be cleaned effectively, but rinse immediately to prevent any metallic aftertaste. Plastic mugs or those with scratches may not fully recover, as stains can settle into damaged areas. For porous materials like unglazed pottery, expect partial improvement but not complete stain removal.
In all cases, test on a small area first if you’re unsure about the material. Overall, denture tablets offer a safe, cost-effective solution for everyday coffee mugs.
Tips for Preventing Coffee Stains on Your Mugs

Rinse mugs immediately after each use
The simplest and most effective way to prevent stubborn coffee stains is to rinse your mug immediately after finishing your drink. Coffee contains tannins, which are natural compounds that bind to porous ceramic surfaces and create brown discoloration over time.
By rinsing the mug with hot water within seconds of emptying it, you wash away these staining agents before they have a chance to settle. For best results, use a bottle brush or sponge to quickly scrub the interior with just water—no soap needed for this initial rinse.
This habit takes less than 10 seconds and eliminates the need for harsh chemical cleaners later. If you are at work or on the go, keep a small silicone scrub brush near your coffee station.
Remember, fresh stains are always easier to remove than set-in ones, so making rinsing a non-negotiable part of your coffee routine will keep your mugs looking like new for years.
Avoid letting coffee sit for hours in the cup
Leaving coffee to sit in your mug for extended periods dramatically increases the likelihood of permanent staining. When coffee cools and evaporates, the tannins and oils become more concentrated, forming a dark, stubborn film that bonds tightly to the ceramic surface.
This is especially problematic if you tend to sip slowly over several hours or forget to wash your mug until the next day. To prevent this, make it a rule to finish your coffee within 30–60 minutes and then immediately rinse or wash the cup.
If you know you won’t finish a large mug, consider using a thermal travel mug with a lid, which keeps coffee hot and reduces evaporation, minimizing stain formation.
For those who work at a desk, keep a small dish of warm water nearby to drop your spoon or stirrer into, but more importantly, commit to washing your mug at the end of each session.
A simple timer or habit reminder can help break the cycle of letting coffee sit.
Use a non-porous mug coating or glaze sealant
For a proactive, long-term solution, consider upgrading your mugs to those with a high-quality, non-porous glaze or applying a food-safe sealant to existing porous ceramic mugs. Porous surfaces, like unglazed stoneware or handmade pottery, act like tiny sponges, absorbing coffee pigments deep into the material.
A non-porous coating creates a smooth, glass-like barrier that prevents tannins from penetrating, making stains wipe away effortlessly with just a rinse.
When shopping for new mugs, look for terms like “vitrified porcelain” or “fully glazed ceramic.” If you have favorite mugs that are prone to staining, you can apply a food-grade ceramic sealant (available online) according to the manufacturer’s instructions.
This extra layer not only resists stains but also protects against scratches and odors. While this requires an initial investment of time or money, it pays off by drastically reducing scrubbing and extending the life of your mugs. For best results, reapply sealant every six months or as directed.
How to Clean Stains from Travel Mugs and Stainless Steel
Baking soda and water paste for stainless steel
For stubborn coffee stains inside your stainless steel travel mug, a simple paste of baking soda and water is your most effective and gentle solution. Mix three parts baking soda with one part water to form a thick, spreadable paste.
Apply it directly to the stained interior, focusing on the bottom and sides where residue builds up. Let the paste sit for 15-30 minutes to break down the tannins that cause discoloration. Then, scrub gently with a non-abrasive sponge or a soft-bristled bottle brush in circular motions.
Rinse thoroughly with warm water. For extra stubborn stains, add a splash of white vinegar to the paste—the fizzing action helps lift residue. This method works because baking soda is mildly abrasive without scratching stainless steel, unlike steel wool or harsh scouring pads.
Repeat weekly to keep your mug looking like new and prevent odors. Avoid leaving the paste on for too long, as prolonged exposure to any abrasive can dull the finish over time.
Avoiding abrasive cleaners on insulated lids
While cleaning your travel mug’s lid, especially those with insulation or vacuum seals, it’s crucial to avoid abrasive cleaners like scouring powders, bleach-based products, or rough sponges. These can scratch the lid’s surface, creating tiny crevices where coffee oils and bacteria hide, leading to persistent stains and odors.
Instead, use a mild dish soap and warm water with a soft cloth or a dedicated lid brush. For stuck-on stains, soak the lid in a solution of equal parts white vinegar and water for 10-15 minutes before scrubbing gently.
Pay special attention to the seal and drinking spout, as these areas trap residue. Never use steel wool or abrasive pads, as they can damage the rubber gasket or compromise the lid’s insulation properties. After cleaning, rinse thoroughly and air-dry with the lid open to prevent moisture buildup.
This gentle approach ensures your lid stays stain-free, functional, and hygienic without reducing its lifespan.
Dishwasher-safe travel mugs and stain removal cycles
If your travel mug is labeled dishwasher-safe, you can leverage your machine’s stain removal cycles for deep cleaning. Place the mug upside down on the top rack, ensuring the lid is also secured on the top rack (or hand-wash it separately as per manufacturer guidelines).
Use a heavy-duty wash cycle with high-temperature water and a quality dishwasher detergent containing enzymes, which break down coffee stains effectively. Add a rinse aid to prevent mineral deposits that can mimic stains.
For extra stain-fighting power, sprinkle a tablespoon of baking soda in the detergent compartment before starting the cycle. Avoid using the heated dry cycle, as high heat can warp some plastic lids or damage vacuum seals; instead, air-dry the mug completely. Run this cycle once a week for maintenance.
However, note that not all stainless steel mugs are fully dishwasher-safe—check the base for a dishwasher symbol. Repeated dishwasher use can eventually dull the finish, so reserve this method for occasional deep cleaning and hand-wash for daily use to extend your mug’s life.
When to Replace a Stained Mug vs. Keep Cleaning It
Signs of permanent etching or damage from stains
Before deciding whether to replace a stained mug or continue cleaning, inspect for permanent etching or damage. Run your finger over the stain; if you feel a rough or pitted texture, the ceramic glaze has been compromised, and the stain is likely set into the mug’s pores.
This often happens with dark coffee or tea stains that have been left for days, especially in mugs with hairline cracks or chips.
Another sign is a stain that remains after vigorous scrubbing with baking soda or a paste of lemon juice and salt—if it doesn’t fade at all, it’s probably etched. Also, look for a white or cloudy film that won’t wipe away, indicating mineral buildup or glaze wear.
In these cases, cleaning is futile because the stain is not on the surface but within the material. Replacement is the best solution to ensure your coffee tastes fresh and to avoid bacteria hiding in damaged glaze. A new mug is a small investment for better hygiene and enjoyment.
Cost comparison of cleaning supplies vs. new mugs
Weighing the cost of cleaning supplies against buying new mugs can guide your decision. Common DIY cleaners like baking soda, white vinegar, or lemon juice cost pennies per use—a box of baking soda ($1) or a bottle of vinegar ($2) can clean dozens of mugs.
Commercial stain removers, such as oxygen bleach or ceramic-specific cleaners, range from $5 to $10 but last for many applications. In contrast, a new ceramic mug typically costs $5 to $15, with thrift store options as low as $1.
If you have multiple heavily stained mugs, the cost of cleaning supplies might exceed buying replacements, especially if you factor in your time and effort. However, if only one or two mugs are affected, cleaning is more economical.
Also consider long-term value: a durable, stain-resistant mug may cost more upfront but save money over time. For frequent coffee drinkers, investing in a high-quality mug with a smooth, non-porous glaze can reduce future staining.
Ultimately, if cleaning supplies cost more than a new mug and the stain persists, replacement is the smarter financial choice.
How to test if a stain is truly removable
To determine if a coffee mug stain is removable, perform a simple test before committing to extensive cleaning. Start by filling the mug with hot water and a tablespoon of baking soda—let it soak for 15 minutes. If the stain lightens, it’s likely removable with regular cleaning.
For tougher stains, apply a paste of baking soda and water directly to the stain, let it sit for 10 minutes, then scrub with a non-abrasive sponge.
If the stain fades but doesn’t disappear, try a lemon juice and salt scrub or a denture tablet soak (drop one tablet in hot water in the mug, let it fizz for 30 minutes). If the stain remains unchanged after these methods, it’s probably set into the glaze.
Another test: wipe the dry mug with a paper towel dampened with white vinegar—if color transfers to the towel, the stain is superficial. If not, it’s deeper. For persistent stains, consider using a magic eraser (melamine foam) on the inside, but test a small area first.
If none of these steps work, the mug is likely beyond saving, and replacement is the most effective solution.
Frequently Asked Questions
What is the best way to remove coffee stains from a ceramic mug?
Mix equal parts baking soda and water to form a paste. Rub it onto the stain with a soft sponge or cloth, let it sit for a minute, then rinse thoroughly. This gentle abrasive lifts the tannins without scratching the glaze.
Can I use vinegar to clean coffee stains from mugs?
Yes, white vinegar is effective. Fill the mug with undiluted white vinegar, let it soak for 15-30 minutes, then scrub with a sponge. Rinse well with soap and water to remove the vinegar smell.
How do I get rid of stubborn coffee stains using salt?
Sprinkle a small amount of table salt onto the damp stain and scrub with a sponge or your fingers. The salt acts as a mild abrasive that breaks down the residue. Rinse and wash as usual.
Does lemon juice work for coffee mug stains?
Yes, the citric acid in lemon juice helps dissolve coffee stains. Squeeze fresh lemon juice into the mug, add a pinch of salt, and scrub the inside. Let it sit for 10 minutes before rinsing.
How can I remove coffee stains from a travel mug or stainless steel?
For stainless steel, fill the mug with hot water and drop in a denture cleaning tablet. Let it fizz and soak for 20-30 minutes, then rinse. Alternatively, use a paste of baking soda and water.
What about using bleach to clean coffee mug stains?
Avoid bleach on ceramic or stainless steel, as it can damage the finish and leave harmful residues. Instead, stick to natural methods like baking soda, vinegar, or lemon juice.
How do I prevent coffee stains from forming on my mugs?
Rinse your mug immediately after each use to prevent tannins from drying and bonding. For deeper prevention, occasionally soak mugs in a solution of water and a few tablespoons of baking soda overnight.
Conclusion
Removing coffee mug stains is simple with everyday items like baking soda, vinegar, or lemon juice. Remember to scrub gently with a paste or soak stubborn marks for lasting results. Consistency is key—rinse your mug promptly after use to prevent buildup. Don’t let unsightly stains keep you from enjoying your favorite brew. With these easy, non-toxic methods, you can keep every cup looking pristine and start each morning fresh.