How To Make Cold Brew Recipe
Tired of watered-down iced coffee that tastes bitter? Learning how to make cold brew recipe at home is the ultimate game changer for your morning routine. It is incredibly simple, budget-friendly, and results in a velvety smooth concentrate that lasts all week. You do not need fancy equipment to master this refreshing drink.
What is Cold Brew Coffee?
The Difference Between Cold Brew and Iced Coffee
Understanding the distinction between these two beverages is essential for mastering your home brewing technique. While iced coffee is simply hot-brewed coffee that has been cooled and poured over ice, cold brew is a unique extraction method that uses time instead of heat.
To make a proper cold brew recipe, you must steep coarsely ground beans in room temperature or cold water for a period of twelve to twenty-four hours. This slow immersion process creates a concentrated coffee base that is significantly smoother and richer than its flash-chilled counterpart.
Iced coffee often tastes diluted or overly bitter because the hot extraction releases volatile oils that oxidize quickly as they cool down.
In contrast, the cold brew method prevents these harsh compounds from ever entering your cup, resulting in a naturally sweet profile that holds up exceptionally well when mixed with milk or alternative creamers. Choosing the right method ensures you achieve the specific flavor depth and refreshing temperature you desire.
Why Cold Brew Tastes Less Acidic
The science behind a smooth cold brew recipe lies in the temperature of the water used during the steeping phase. High heat typically extracts the acidic oils and bitter tannins found in coffee beans, which can lead to digestive discomfort for some drinkers.
By using cold water, you effectively reduce the acidity levels by up to sixty percent compared to traditional drip methods. This makes cold brew an ideal solution for those with sensitive stomachs who still want to enjoy a caffeine boost.
Because the extraction happens slowly, the water pulls out the chocolatey and nutty notes of the bean while leaving behind the harsh, sour elements. When you follow a dedicated cold brew recipe, you are intentionally manipulating the chemical solubility of the grounds to favor a mellow and balanced flavor.
This chemical shift is why many enthusiasts find they no longer need to add heavy sugars or syrups to mask the natural bitterness often found in standard hot-brewed coffee carafes.
Benefits of Making Cold Brew at Home
Learning how to make cold brew at home offers significant advantages for your wallet and your daily routine. By preparing a large batch of coffee concentrate over the weekend, you create a convenient ‘grab-and-go’ solution that stays fresh in your refrigerator for up to two weeks.
This eliminates the need for expensive daily trips to local cafes, allowing you to save money on every cup you consume. Additionally, DIY brewing gives you total control over the strength and quality of your ingredients.
You can experiment with different single-origin beans and adjust the water-to-coffee ratio to suit your personal palate perfectly. Making it yourself also reduces environmental waste, as you can avoid the single-use plastic cups and straws associated with commercial coffee chains.
Whether you prefer a bold kick or a diluted, refreshing glass, having a jar of homemade concentrate ready to use provides a customizable and efficient caffeine experience that fits seamlessly into a busy lifestyle without sacrificing any of the premium flavor.
Essential Equipment for Cold Brew

Choosing the Right Jar or Pitcher
To begin your cold brew journey, you need a vessel that can withstand a long steeping process. A large glass Mason jar is the gold standard for home brewing because glass is non-reactive and won’t leach metallic or plastic flavors into your concentrate over the sixteen-hour soak.
Ensure the container has a wide-mouth opening, which makes it significantly easier to stir the grounds and pour the mixture out once the brewing is complete.
If you plan on making large batches to last the entire week, look for a two-quart pitcher with an airtight seal to prevent the coffee from absorbing odors from other foods in your refrigerator. Using a dedicated cold brew system with a built-in tap can also simplify the serving process.
Regardless of the brand, the most important factor is a secure lid that keeps the environment oxygen-free, ensuring your cold brew remains fresh, bold, and delicious for up to two weeks when stored properly.
Why a Burp Grinder Matters
The secret to a smooth, sediment-free cold brew lies in the consistency of your coffee grounds. You must use a coarse, even grind that resembles sea salt or peppercorns.
A burr grinder is essential for this task because it crushes the beans into uniform particles, unlike a blade grinder which creates a dusty mix of boulders and fine silt.
If your grounds are too fine, the water will over-extract the oils, leading to a bitter and muddy flavor profile that ruins the mellow nature of cold brew. Furthermore, fine particles often bypass the filter, resulting in a gritty texture in your cup.
Investing in a quality burr grinder allows you to control the surface area exposure, ensuring that the cold water extracts the chocolatey and nutty notes slowly without pulling out the harsh acids.
Consistent grinding is the single most effective way to elevate your home recipe from amateur to professional barista quality instantly.
Best Filters for a Clean Cup
Achieving a crisp and polished finish requires the right filtration method to separate the spent grounds from your liquid gold. Dual filtration is often the best approach for a truly professional result.
Start by using a stainless steel mesh filter to catch the heavy grounds, then pass the concentrate through a paper coffee filter or a fine nut milk bag to remove the micro-sediment and oils. This step ensures your cold brew is vibrant and clear rather than cloudy.
If you prefer a fuller body with more natural oils, a reusable cloth filter is an excellent eco-friendly option that provides a rich mouthfeel while still keeping the sludge at bay. Always remember to rinse your paper filters with plain water before use to eliminate any papery aftertaste.
By selecting a high-quality filtration tool, you guarantee a smooth concentrate that mixes perfectly with water or milk, providing a refreshing caffeine kick that is completely free of any unwanted sediment or bitterness.
Best Coffee Beans and Roast Profiles

Why Coarse Grind is Non-Negotiable
To achieve the perfect cold brew texture, you must use a coarse, sea-salt-like grind rather than a fine powder. Because cold brew involves a long immersion period typically lasting between twelve and twenty-four hours, a fine grind would lead to over-extraction, resulting in a bitter and muddy cup.
A coarse grind allows water to flow freely around the particles, extracting the sweet and chocolatey compounds slowly without pulling out the harsh tannins. If you use a standard drip or espresso grind, you will likely struggle with a clogged filter and a cloudy final product that lacks clarity.
For the best results, use a burr grinder to ensure uniformity, which guarantees that every coffee particle extracts at the same rate. This consistency is the secret to a clean, crisp concentrate that maintains its flavor profile even when diluted with water or milk.
Remember that the goal is a gentle infusion, not a forced pressure extraction, making the grind size the most critical variable in your recipe.
Light Roast vs. Dark Roast for Cold Extraction
Choosing the right roast profile significantly impacts the final taste of your cold brew. Dark roasts are the traditional favorite because the cold extraction process highlights their low acidity and brings out deep notes of cocoa, toasted nuts, and caramel.
These heavy-bodied beans stand up well to ice and cream, making them ideal for those who prefer a classic, bold coffee experience. On the other hand, light roasts offer a floral and fruity complexity that can be surprisingly refreshing when served cold.
While light roasts are harder to extract and may require a longer steeping time, they reveal bright citrus and berry undertones that are often lost in hot brewing methods.
If you are new to making cold brew at home, starting with a medium-to-dark blend is highly recommended as it provides a more forgiving flavor profile and a smoother finish.
Regardless of your preference, ensure your beans are high-quality to avoid any stale or musty aftertastes that the long steeping process can inadvertently amplify.
Freshness and Storage Tips
The quality of your cold brew is directly tied to the freshness of your beans. For the most vibrant flavor, you should buy whole beans and grind them immediately before you begin the steeping process.
Once coffee is ground, its surface area increases, leading to rapid oxidation and a loss of those delicate aromatic oils that define a premium brew. Store your beans in an airtight, opaque container kept in a cool, dark place to protect them from light, heat, and moisture.
Avoid storing beans in the freezer, as temperature fluctuations can introduce condensation that ruins the bean integrity. Once your cold brew concentrate is finished, it can be stored in the refrigerator for up to two weeks in a sealed glass jar.
However, for the peak flavor experience, try to consume it within the first seven days. If you notice a dull or sour taste, it is a sign that the concentrate has begun to oxidize.
By prioritizing freshly roasted beans and proper storage, you ensure every batch of your homemade cold brew remains consistently delicious and refreshing.
The Ultimate Cold Brew Ratio Guide
Standard Ratio for Ready-to-Drink Coffee
For a smooth and refreshing glass of cold brew that is ready to enjoy immediately after straining, the 1:8 ratio is the gold standard for home brewers. This specific measurement means using one part coarsely ground coffee to eight parts filtered water.
This balanced approach ensures that the coffee is flavorful and robust without being overpowering or overly acidic. To start, simply combine your grounds and water in a jar, ensuring all particles are fully saturated.
Let the mixture steep at room temperature or in the fridge for approximately 12 to 18 hours. Once the steeping time is complete, filter the mixture through a fine-mesh sieve or a paper filter to remove all sediment.
Because this ratio creates a ready-to-drink beverage, you do not need to dilute it with extra water or milk, though a few ice cubes can help keep it chilled. This method is perfect for those who want a consistent, cafe-quality experience with minimal effort every single morning.
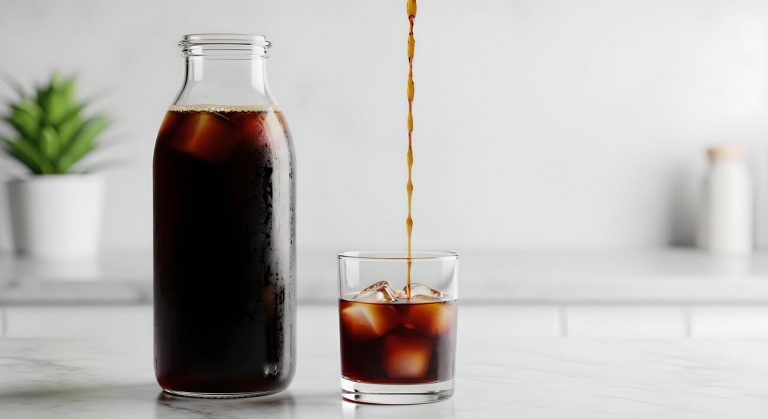
How to Make a Strong Cold Brew Concentrate
If you prefer a versatile base that lasts longer in the fridge, crafting a potent concentrate using a 1:4 ratio is the most effective solution.
This method uses one part coffee to only four parts water, resulting in a dense, highly caffeinated liquid that acts as a syrup-like foundation for various drinks. This concentrated form is ideal because it saves space in your refrigerator and allows you to customize the strength of every individual cup.
After steeping for the full 18 to 24 hours, you will have a rich essence that should be diluted before consumption. Most enthusiasts recommend a one-to-one dilution with either cold filtered water, whole milk, or a plant-based alternative like oat milk.
The beauty of the concentrate method is its flexibility; you can serve it over ice for a classic feel or even mix it with hot water for a low-acid hot coffee alternative.
Always store your concentrate in an airtight glass container to maintain its peak flavor profile for up to two weeks.
Measuring by Weight vs. Volume
To achieve the most consistent and professional results with your cold brew recipe, measuring by weight using a digital kitchen scale is highly recommended over using volumetric scoops.
Coffee beans vary significantly in density based on their roast level and origin; for instance, a cup of dark roast beans weighs much less than a cup of light roast beans.
By using grams to calculate your ratio, you ensure that your water-to-coffee balance remains identical every time you brew, regardless of the specific bag of beans you are using.
If you do not have a scale, you can use a volumetric ratio of roughly 1 cup of grounds to 4 cups of water for a standard batch, but be aware that this is less precise.
For the best flavor extraction, always use a coarse grind size similar to sea salt, as fine grounds can lead to over-extraction and a bitter, muddy taste. Precision in your initial measurements is the secret to eliminating guesswork and mastering the art of the perfect, sediment-free cold brew at home.
Step-by-Step Cold Brew Recipe

Mixing the Grounds and Water
To begin your cold brew journey, start with a high-quality coarse grind that resembles the texture of sea salt. Using a coarse grind is essential because it prevents the over-extraction of bitter oils while ensuring the water can flow freely through the coffee particles.
Aim for a standard ratio of 1:4, which means mixing one cup of coffee grounds with four cups of filtered water. Place your grounds into a large glass jar or dedicated brewing vessel and slowly pour the water over them.
It is crucial to use filtered water to ensure a clean taste that highlights the specific notes of your beans. Once the water is added, use a long spoon to gently stir the mixture, ensuring every single coffee ground is fully saturated.
Avoid over-mixing; you simply want to eliminate any dry pockets. Covering the container tightly will prevent the coffee from absorbing any stray odors from your kitchen environment as it begins its long transformation into a smooth concentrate.
Steeping Times for Room Temperature vs. Fridge
The duration of your steep depends largely on the temperature of your environment and the flavor profile you desire. If you choose to leave your brewing vessel on the kitchen counter at room temperature, the extraction process happens more rapidly, typically requiring between 12 to 15 hours.
This method often results in a bolder, more rounded body. Conversely, steeping your coffee in the refrigerator slows down the chemical reaction, necessitating a longer duration of 18 to 24 hours to achieve full flavor.
Cold-steeping in the fridge often produces a cleaner, crisper profile with reduced acidity, making it ideal for those with sensitive stomachs. Regardless of the location you choose, it is vital to keep the container away from direct sunlight and heat sources.
Once the time is up, do not exceed the 24-hour mark, as over-steeping can lead to a woody or unpleasantly bitter taste that masks the natural sweetness of the beans. Consistency in timing ensures a reliable, delicious result every time.
The Proper Way to Strain and Filter
After the steeping process is complete, the final step is to separate the liquid gold from the soggy grounds. Begin by pouring the mixture through a fine-mesh sieve to remove the largest particles.
For a professional, sediment-free finish, follow this by passing the liquid through a paper coffee filter or a clean piece of cheesecloth layered over the strainer. This secondary filtration is the secret to achieving that signature silky-smooth mouthfeel characteristic of high-end cafe cold brew.
Do not be tempted to squeeze the grounds or the filter, as this forces fine silt and bitter tannins into your concentrate, clouding the final product. Let gravity do the work naturally. Once strained, you are left with a potent concentrate that should be stored in a sealed glass carafe.
This concentrate stays fresh in the refrigerator for up to two weeks. When you are ready to serve, remember to dilute the concentrate with equal parts water, milk, or ice to suit your personal strength preference and enjoy your homemade creation.
How to Serve and Store Your Cold Brew
Diluting Concentrate with Water or Milk
Once your cold brew recipe has finished steeping, you are left with a potent concentrate that requires proper dilution for the best drinking experience.
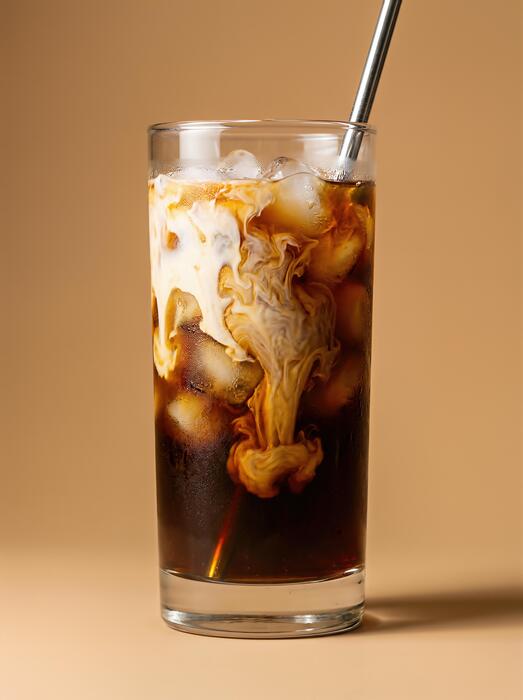
The standard ratio for serving is one part concentrate to one part liquid, though you can adjust this based on your personal caffeine tolerance and flavor preference. If you enjoy a crisp and clean profile, dilute your brew with filtered cold water and plenty of ice.
For those who prefer a decadent, creamy texture, swap the water for whole milk, oat milk, or almond milk, which beautifully complements the chocolatey notes inherent in cold-steeped beans.
Remember that the ice will slowly melt and further dilute the drink, so consider starting with a slightly stronger mix if you plan to sip slowly.
Always stir the mixture thoroughly to ensure the concentrate and diluent are fully integrated before adding any liquid sweeteners or flavored syrups to your glass.
How Long Cold Brew Stays Fresh
To maintain the peak quality of your homemade cold brew, storage conditions are absolutely critical. You should always store your undiluted concentrate in an airtight glass container, such as a mason jar or a specialized carafe, and keep it refrigerated at all times.
When kept in the fridge, a pure cold brew concentrate will stay fresh and flavorful for up to two weeks, though the taste is most vibrant within the first seven days.
If you have already diluted the coffee with water, the shelf life drops significantly to about two or three days. Be sure to avoid adding dairy or sugar directly into the main storage container, as these additions will cause the batch to spoil much faster.
If you notice any sour odors or a visible film on the surface, it is time to discard the batch and start a fresh steep to ensure you are always consuming a safe and delicious beverage.
Creative Ways to Use Coffee Ice Cubes
One of the most effective solutions to prevent a watery beverage is to craft specialized coffee ice cubes. Instead of using plain water, pour a portion of your finished cold brew concentrate into silicone ice cube trays and freeze them overnight.
As these cubes melt in your glass, they release additional coffee flavor rather than diluting the strength of your drink. You can get creative by adding a drop of vanilla extract or a sprinkle of cinnamon into the trays before freezing to provide a slow-release flavor boost.
These cubes are also incredibly versatile for other recipes; try tossing a handful into a blender with milk and a banana for a quick energizing breakfast smoothie.
Using coffee cubes ensures that the final sip of your iced coffee is just as bold and robust as the first, making it a professional-level hack for anyone mastering the art of the perfect home-brewed cold coffee experience at any time.
Tips for Better Tasting Cold Brew
Using Filtered Water for Better Flavor
Since cold brew is composed of over ninety-eight percent water, the quality of your source liquid is arguably the most critical factor in achieving a clean profile.
Tap water often contains high levels of chlorine, fluoride, and various minerals that can impart a metallic or chemical aftertaste, masking the delicate floral or fruity notes of your coffee beans.
To ensure the best results, you should always use filtered or bottled spring water to provide a neutral base that allows the coffee’s natural oils and aromatic compounds to shine. Avoid using distilled water, as it lacks the essential minerals needed to facilitate proper extraction during the long steeping process.
By starting with high-quality purified water, you eliminate unwanted odors and ensure that every sip of your concentrate is crisp, refreshing, and true to the specific roast profile you selected.
This simple adjustment is the easiest way to elevate a standard home recipe into a professional-grade beverage that rivals your favorite local specialty coffee shop.
How to Adjust Steeping Time for Bitterness
Finding the perfect duration for extraction is a balancing act that directly impacts the final flavor profile of your concentrate.
Most standard recipes recommend a window of twelve to twenty-four hours at room temperature, but you should monitor the steeping time closely based on your specific grind size and ambient environment. If your cold brew tastes unpleasantly sharp or harsh, it is likely over-extracted, meaning it sat for too long.
Conversely, a weak or sour brew indicates under-extraction. To fix bitterness, try reducing the steep time by two-hour increments until you find the sweet spot where the chocolatey and nutty notes are most prominent.
Remember that brewing in the refrigerator slows down the extraction process significantly compared to the kitchen counter, so you may need to add an extra six hours if using the cold method.
Consistency is key, so always use a digital timer to track exactly when your beans were submerged to ensure you can replicate your most successful batches perfectly every time.
Common Mistakes to Avoid
One of the most frequent errors beginners make is using a grind that is too fine, which leads to a cloudy, silt-filled texture and excessive bitterness.
For the best mouthfeel, you must use a coarse, pebble-like grind similar to sea salt, which allows water to flow freely while extracting flavors slowly. Another common pitfall is neglecting the proper coffee-to-water ratio; a standard starting point is one part coffee to four parts water by weight.
If you eyeball the measurements, your concentrate will likely be inconsistent. Furthermore, many people forget to thoroughly saturate all the grounds at the beginning of the process. If dry pockets remain at the top of your vessel, you are essentially wasting coffee and losing out on potential depth.
Finally, ensure you are using fresh beans rather than pre-ground bags, as the volatile aromatics dissipate quickly once the bean is broken. By avoiding these typical brewing blunders, you can guarantee a smooth, low-acid result that highlights the complex characteristics of your chosen beans without any unwanted sediment.
Frequently Asked Questions
What is the best coffee-to-water ratio for cold brew?
The ideal ratio for a cold brew concentrate is 1:4 (one cup of coffee grounds to four cups of water). If you prefer a ready-to-drink strength, use a 1:8 ratio for a smoother, less intense flavor profile.
What type of coffee grind should I use for cold brew?
You should always use a coarse, breadcrumb-like grind for cold brew. Fine grounds can lead to over-extraction, resulting in a bitter taste, and are much harder to filter out of the final liquid.
How long should cold brew steep?
Cold brew typically needs to steep for 12 to 18 hours at room temperature, or up to 24 hours if kept in the refrigerator. Avoid steeping longer than 24 hours, as this can pull woody or bitter notes from the grounds.
Do I need special equipment to make cold brew at home?
No special equipment is required; you can simply use a large glass jar or pitcher and a fine-mesh sieve lined with cheesecloth or a paper filter. While dedicated cold brew makers exist, any container that can be sealed will work perfectly.
Should I steep cold brew on the counter or in the fridge?
Both methods work, but room temperature steeping is faster and often yields a more floral, bright profile. Steeping in the refrigerator is slower and more forgiving, typically producing a very smooth, mellow brew.
How long does homemade cold brew stay fresh?
Cold brew concentrate can last up to two weeks in the refrigerator if kept in a sealed container. If you have already diluted the concentrate with water or milk, it is best consumed within 2 to 3 days for optimal flavor.
Conclusion
Mastering the art of cold brew is a simple yet rewarding process that elevates your daily caffeine routine. By focusing on a coarse grind and allowing for a patient steep time, you can achieve a remarkably smooth, low-acid concentrate. Whether you enjoy it black or with a splash of cream, this versatile method puts you in control of your coffee experience. Now that you have the tools, it is time to start brewing your own refreshing batch today.