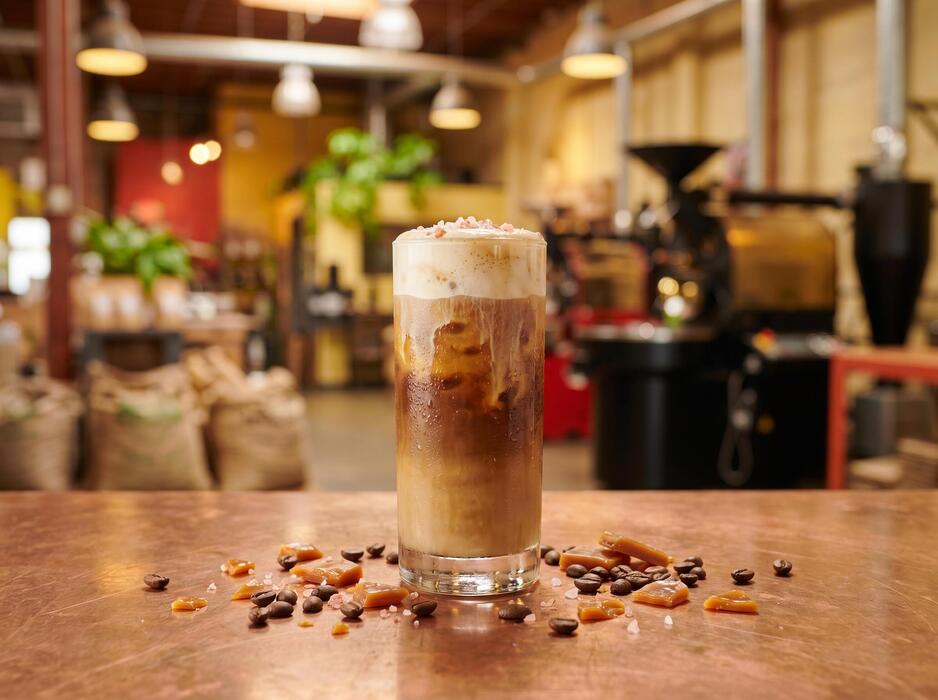
How To Make Sweet Foam Cold Brew
How to make sweet foam cold brew is a common question for anyone craving that café-style iced coffee without the syrupy aftertaste. The core challenge is getting a thick, stable foam that’s sweet but not cloying. You’re in the right place: this method uses cold brew concentrate, heavy cream or milk, and a simple vanilla simple syrup, frothed to perfection. No fancy equipment needed—just a jar or frother for barista-level results at home.
What Is Sweet Foam Cold Brew
Definition of sweet foam cold brew
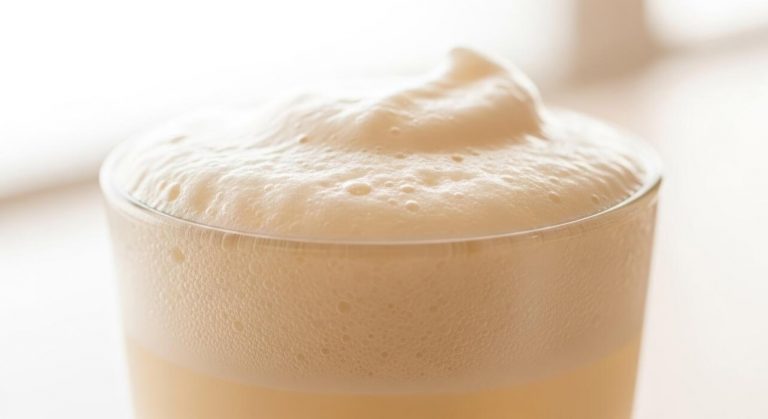
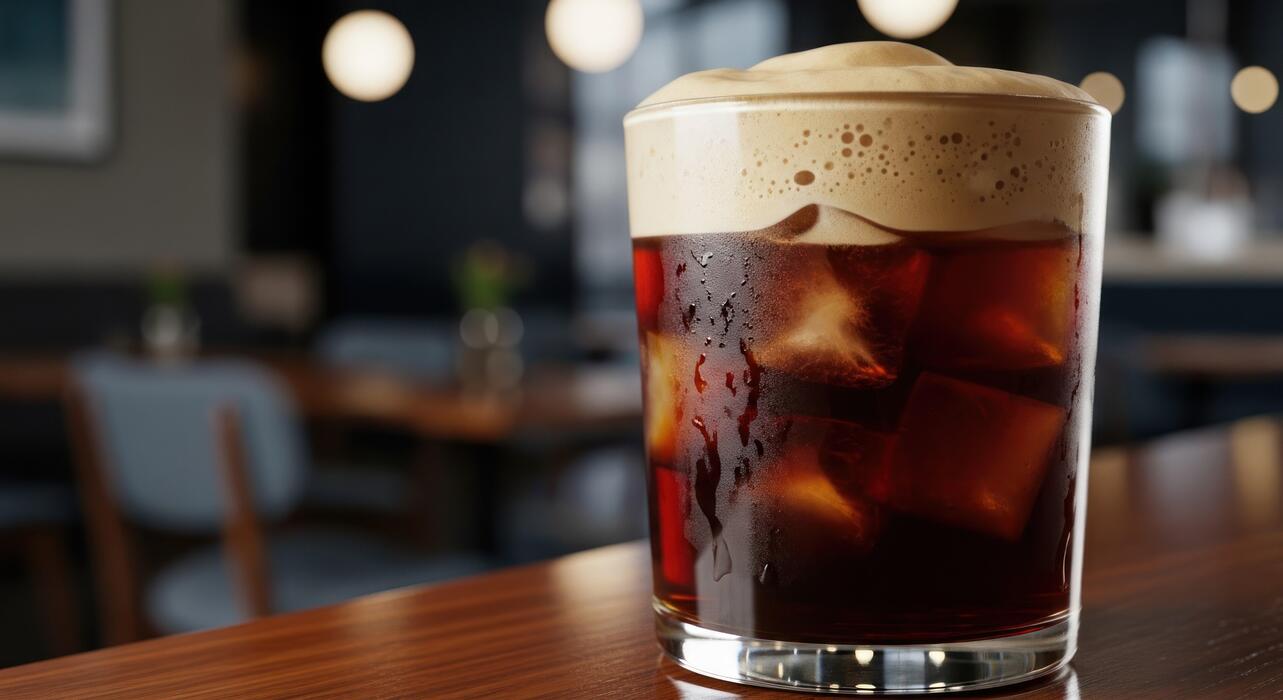
Sweet foam cold brew is a layered coffee drink that combines smooth, concentrated cold brew coffee with a light, airy, and sweetened milk foam topping. To make it, you first prepare or purchase unsweetened cold brew concentrate.
Then, you create the sweet foam by frothing a mixture of cold milk and a sweetener like simple syrup, vanilla syrup, or honey until it forms a thick, velvety layer. This foam is gently spooned over the cold brew, creating a distinct two-tone presentation.
The key is using a high-fat milk, such as whole or oat milk, and a frother or French press to achieve a stable, creamy foam that doesn’t dissolve immediately.
The result is a refreshing, not-too-bitter coffee experience where the sweet foam slowly blends into the bold cold brew, offering a customizable sweetness level with each sip.
How it differs from regular cold brew
Regular cold brew is simply coffee steeped in cold water for 12-24 hours, then strained and served black or with plain milk. Sweet foam cold brew, however, adds a textural and flavor upgrade through its signature topping.
The main difference lies in the aeration and sweetness: the foam is deliberately whipped to incorporate air, creating a lighter, creamier mouthfeel than stirred-in milk. While regular cold brew can be served with milk, that milk sinks and mixes evenly.
In contrast, sweet foam cold brew preserves a layered structure—the foam sits on top, allowing you to experience the bold coffee first, then the sweet, velvety foam. Additionally, the foam’s sweetness is concentrated in the topping, so you control how much blends in, unlike pre-sweetened cold brew.
This makes it a more indulgent, café-style drink that feels special compared to standard cold brew.
Why sweet foam adds a creamy texture
Sweet foam adds a creamy texture because it incorporates tiny air bubbles into the milk, transforming its liquid state into a stable, semi-solid froth. When you froth milk, the proteins and fats trap air, creating a network of bubbles that feel thick and velvety on the tongue.
This aeration changes the milk’s viscosity, making it feel richer and more luxurious than plain milk. The sweetener, like simple syrup, stabilizes the foam further by increasing the liquid’s density, preventing the bubbles from collapsing quickly.
As you sip the cold brew, the foam slowly melts into the coffee, releasing its sweetness gradually while maintaining a silky, creamy layer that coats your palate. This contrasts with the thin, watery consistency of un-frothed milk.
The result is a decadent, dessert-like experience that enhances the cold brew’s natural smoothness without overwhelming its bold flavor.
Ingredients You Need for Sweet Foam Cold Brew
Best coffee beans for cold brew
For a sweet foam cold brew that truly shines, start with coffee beans specifically chosen for cold brew extraction. Medium to dark roasts are ideal because they offer rich, chocolatey, and nutty notes that stand up to dilution and foam.
Avoid light roasts, which can taste overly acidic or sour when steeped cold. Choose coarse ground beans to prevent over-extraction and bitterness—aim for a consistency like raw sugar or coarse sea salt. Single-origin beans from Colombia, Brazil, or Sumatra provide a smooth, full-bodied base.
If you want a naturally sweeter brew without added sugar, opt for beans with flavor notes of caramel, cocoa, or toasted nuts. You can also use a pre-ground cold brew blend, but grinding whole beans fresh ensures peak flavor and aroma.
Remember, the quality of your beans directly impacts the final taste, so invest in fresh, high-quality coffee from a reputable roaster. Store beans in an airtight container away from light and heat to preserve their oils and complexity.
This foundation makes your cold brew naturally sweet and robust, ready to pair perfectly with your foam.
Sweeteners that work with foam
The right sweetener transforms your cold brew foam from plain to indulgent. Simple syrup is the most reliable choice because it dissolves instantly in cold liquids and blends seamlessly into foam without graininess. To make it, combine equal parts sugar and water, heat until dissolved, then cool.
For a richer flavor, use brown sugar syrup or vanilla simple syrup. If you prefer natural options, honey or agave nectar work well—just warm them slightly to thin before mixing. For a sugar-free version, stevia or monk fruit sweetener in liquid form won’t crystallize.
Avoid granulated sweeteners, as they won’t dissolve in cold brew and can ruin the foam’s texture. Add your sweetener directly to the cold brew before frothing, or stir it into the milk or cream for a sweet foam.
The key is to taste as you go—start with 1-2 tablespoons per cup and adjust to your preference. This ensures your sweet foam cold brew is balanced, not cloying, with a smooth, creamy finish that complements the coffee’s natural notes.
Milk or cream options for frothing
The perfect foam for sweet foam cold brew relies on milk or cream with the right fat content. Whole milk (3-4% fat) froths beautifully, creating a stable, velvety foam that holds its shape. For an extra-rich texture, use heavy cream or half-and-half—just a splash adds decadence.
If you prefer dairy-free options, oat milk is the top choice because it froths thick and creamy, mimicking dairy. Coconut cream (from a can) also works but can be heavy; dilute it slightly. Avoid skim or low-fat milk, as they produce thin, watery foam that dissipates quickly.
For frothing, you can use a handheld frother, French press, or electric milk frother—warm the milk slightly (not boiling) for better foam, but cold milk also works if you want a chilled drink. Add your sweetener to the milk before frothing to infuse the foam with flavor.
The key is to experiment with ratios: start with 1-2 ounces of milk or cream per 8 ounces of cold brew, then adjust to achieve your desired creaminess and foam height.
How to Make Cold Brew Coffee at Home
Step-by-step cold brew brewing process
To make sweet foam cold brew, start by grinding coffee beans to a coarse consistency, similar to breadcrumbs. Combine 1 cup of coarse grounds with 4 cups of cold, filtered water in a large jar or pitcher.
Stir gently to ensure all grounds are saturated, then cover and let it steep at room temperature or in the refrigerator. After steeping, pour the mixture through a fine-mesh sieve lined with a coffee filter or cheesecloth to remove grounds. For a cleaner taste, strain twice.
To create sweet foam, shake a small portion of cold brew with sweetened condensed milk or simple syrup in a sealed jar until frothy, then pour over ice and top with the foam. This method delivers a smooth, sweet, and creamy coffee experience without bitterness.
Recommended coffee-to-water ratio
For a balanced sweet foam cold brew, use a coffee-to-water ratio of 1:4 (1 cup coffee to 4 cups water) for a concentrated brew, or 1:8 for a milder drink. This ratio ensures a strong base that holds up well when diluted with milk or sweeteners.
If you prefer a stronger concentrate for more foam, opt for 1:3 ratio, which yields a richer flavor. Always use coarse ground coffee to prevent over-extraction and silt.
Adjust the ratio based on your taste: more coffee creates a bolder, sweeter foam when shaken with sugar, while less coffee results in a lighter drink. Measure precisely using a kitchen scale for consistent results, as volume measurements can vary with grind size.
Steeping time for smooth flavor
Steep your cold brew for 12 to 24 hours at room temperature or in the refrigerator for optimal smoothness. Shorter steeping (12 hours) produces a lighter, less acidic brew, while longer steeping (18-24 hours) extracts more flavor without bitterness due to the cold process.
For sweet foam cold brew, 24-hour steeping is recommended to create a robust concentrate that blends well with sweeteners and cream. Avoid steeping beyond 24 hours, as it can lead to over-extraction and a harsh taste. Stir the mixture once halfway through to ensure even extraction.
After steeping, strain immediately to stop the brewing process. This timing yields a silky, low-acid coffee that pairs perfectly with sweet foam.
How to Make Sweet Foam for Cold Brew
Frothing milk with a handheld frother
For quick, café-style sweet foam, start with cold, full-fat milk or your preferred milk alternative and pour it into a narrow, deep container (like a tall glass or a frothing pitcher).
Add 1-2 teaspoons of simple syrup, honey, or vanilla syrup directly to the milk before frothing—this ensures the sweetness is evenly distributed.
Submerge the handheld frother just below the surface and turn it on, moving it in a gentle up-and-down motion for 20-30 seconds until the milk doubles in volume and forms a thick, airy foam.
Chill the foam for one minute before spooning it over your cold brew to maintain the coffee’s cold temperature. For a richer texture, use a higher-fat milk like whole or oat milk. To avoid large bubbles, keep the frother fully submerged while moving it slowly.
This method works best for single servings and requires minimal cleanup—just rinse the frother head under warm water.
Using a French press for thick foam
A French press creates dense, velvety foam that holds its shape beautifully on cold brew. Begin by warming your milk slightly (to about 60°F, not hot) and pour it into the French press, filling no more than one-third of the carafe.
Add your sweetener—maple syrup, agave, or flavored syrup—and seal the lid. Pump the plunger vigorously up and down for 30-45 seconds, starting slowly and increasing speed as the milk thickens. The mesh filter forces air into the milk, producing a stable, microfoam texture that clings to the coffee.
Stop when the foam is thick enough to mound on a spoon. Let it rest for 10 seconds before pouring over ice and cold brew. For best results, use whole milk or barista blends; skim milk will produce thinner foam.
This method is ideal for making multiple servings at once and yields a luxurious, dessert-like topping.
Tips for dairy-free sweet foam
Achieving dairy-free sweet foam requires choosing the right base: barista-style oat milk or full-fat coconut milk froth best due to their higher protein and fat content. For sweetness, dissolve powdered sugar or date syrup into the milk before frothing, as these blend seamlessly without sinking.
Use a handheld frother or French press, but avoid overheating—dairy-free milks can curdle above 150°F. Chill the milk to 40°F for maximum volume and stability. Add a pinch of salt or vanilla extract to enhance the sweet flavor and mask any beany notes.
If using almond or soy milk, look for “barista” versions with added stabilizers. For extra thickness, blend 1 tablespoon of coconut cream into the milk before frothing. Always froth for 30-45 seconds, then let the foam sit for 20 seconds to firm up.
Spoon it gently over cold brew to preserve the bubbles, and enjoy a creamy, dairy-free treat that rivals traditional foam.
Best Ways to Sweeten Your Cold Brew Foam
Simple syrup vs. honey vs. agave
Choosing the right sweetener is key to a smooth, integrated foam. Simple syrup is the top choice because it dissolves instantly in cold liquid, creating a seamless sweetness without any grittiness. Make it by dissolving equal parts sugar and water (1:1 ratio) over low heat, then cooling.
For a richer flavor, use honey, but it must be very thin and runny—warm it slightly and mix it with a small amount of cold water first to prevent clumping. Agave nectar is another excellent option, as it’s thinner than honey and dissolves easily, though it’s sweeter, so use less.
Avoid granulated sugar or coarse sweeteners, as they won’t dissolve in cold brew foam and will leave a gritty texture. Always add your liquid sweetener to the milk or cream before frothing to ensure even distribution.
Experiment with these bases to find your preferred sweetness level—start with 1-2 teaspoons per serving and adjust to taste.
Adding vanilla or caramel flavor
Enhance your cold brew foam with vanilla or caramel for a gourmet touch without extra effort. For vanilla, use pure vanilla extract (1/4 to 1/2 teaspoon per serving) or vanilla bean paste for a more intense flavor.
Stir it directly into your milk or cream before frothing—this ensures the flavor is evenly incorporated. For caramel, opt for sugar-free caramel syrup or a homemade version made by simmering brown sugar with a little water until thick. Add 1-2 teaspoons to the milk base and froth together.
Avoid caramel sauces that are thick or contain dairy, as they may not blend smoothly. To prevent separation, always mix flavorings thoroughly with the liquid sweetener first. You can also experiment with vanilla-infused simple syrup by steeping a vanilla bean in the syrup while it cools.
These additions create a luxurious foam that complements the bold coffee without overpowering it.
How to avoid graininess in sweet foam
Graininess in sweet foam ruins the smooth texture, but it’s easy to prevent. Always use liquid sweeteners—granulated sugar, brown sugar, or powdered sweeteners will not dissolve in cold brew and will leave a sandy residue.
If you must use a solid sweetener, dissolve it first in a small amount of hot water (about 1 tablespoon per teaspoon of sugar) and let it cool before adding to the milk.
Another trick is to blend the sweetener with the milk before frothing using a handheld frother or blender, ensuring complete integration. For creamy foam, choose full-fat milk or non-dairy alternatives like oat milk, which froth better and mask any slight grittiness.
Finally, avoid over-frothing—stop when the foam is smooth and velvety, as over-aerating can create dry, uneven bubbles. If you notice graininess after frothing, strain the foam through a fine-mesh sieve into your coffee. These steps guarantee a silky, sweet foam every time.
Tips for Serving Sweet Foam Cold Brew
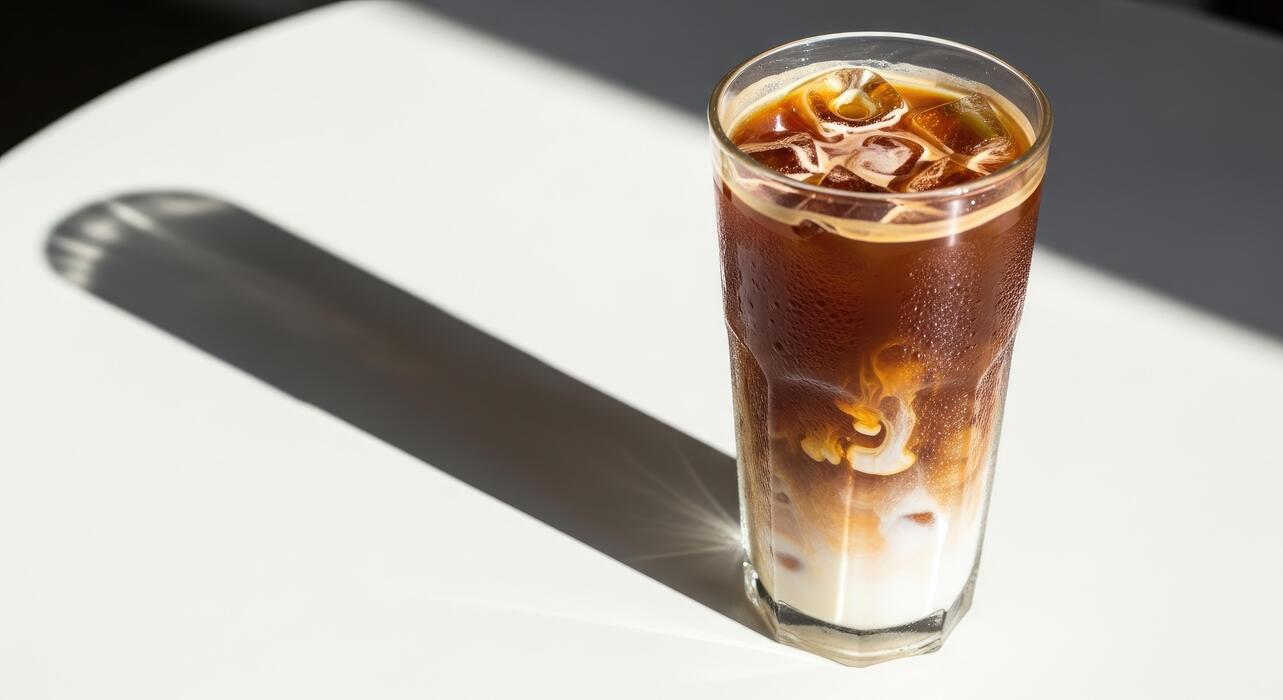
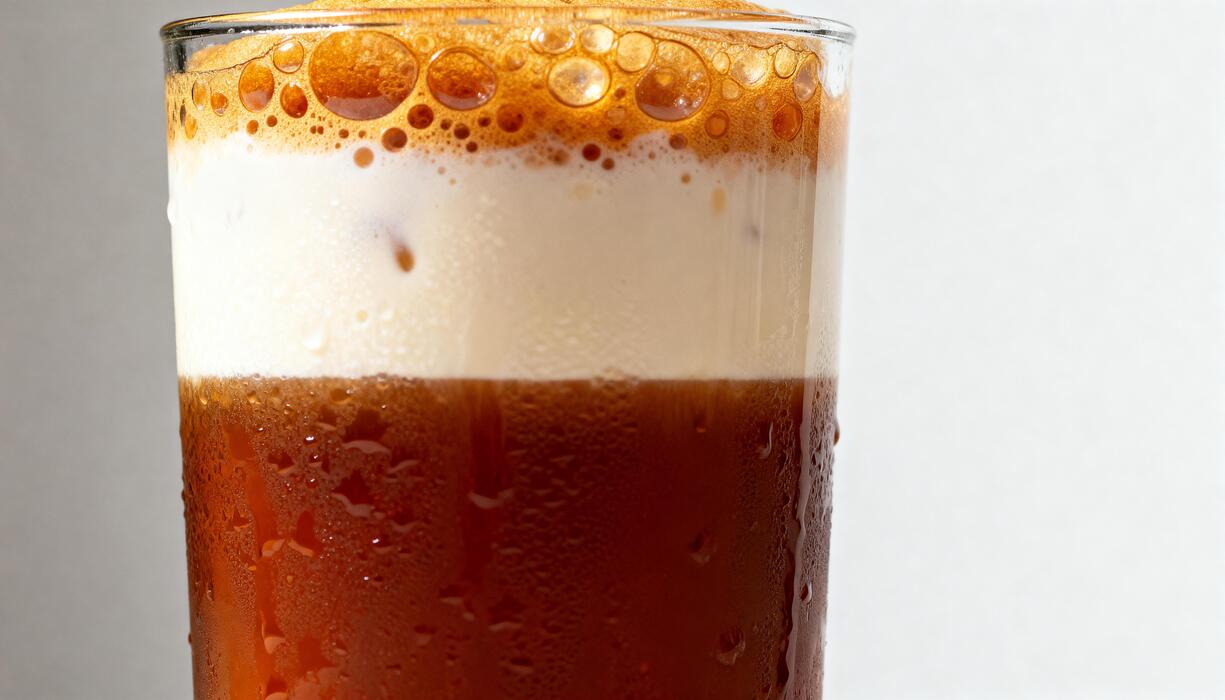
Layering foam over cold brew ice
For the perfect presentation and texture, always layer sweet foam over cold brew that’s been poured over ice. Start by filling your glass with ice cubes, then pour your chilled cold brew until the glass is about two-thirds full.
This leaves enough room for a generous layer of foam without overflow. The key to a stable foam layer is to gently spoon or pour the sweet foam over the back of a spoon held just above the cold brew’s surface.
This technique allows the foam to rest on top without immediately mixing into the coffee. For best results, use a dense, creamy foam made from cold heavy cream or milk, a splash of vanilla syrup, and a dash of salt, frothed until thick.
The cold brew’s bold flavor will cut through the sweet creaminess, creating a beautiful two-tone drink. Serve immediately while the foam is still airy and the ice keeps the coffee chilled.
Garnish ideas like cinnamon or cocoa
Elevate your sweet foam cold brew with simple garnishes that add visual appeal and complementary flavors. A light dusting of ground cinnamon or cocoa powder over the foam not only looks elegant but also introduces a warm, aromatic note that pairs beautifully with coffee’s natural richness.
Use a fine-mesh sieve or a small shaker to ensure an even, delicate layer. For a more indulgent twist, grate fresh nutmeg or sprinkle a pinch of sea salt on top to enhance the sweetness.
You can also add a few coffee beans, a cinnamon stick, or a star anise for a sophisticated finish. If you prefer a sweeter touch, drizzle caramel or chocolate sauce in a zigzag pattern over the foam.
These garnishes make your drink feel like a café creation and encourage sipping through the foam for a layered flavor experience. Always garnish just before serving to maintain the foam’s texture.
Storing leftover cold brew and foam
To avoid waste, store leftover cold brew and sweet foam separately in airtight containers in the refrigerator. Cold brew concentrate can last up to two weeks, while diluted cold brew is best consumed within 3-4 days.
Sweet foam, however, is best used immediately as it will deflate and lose its airy texture within hours. If you must store foam, refrigerate it in a sealed jar and re-froth it using a milk frother or whisk before serving.
For convenience, you can prepare the sweet cream base (cream, syrup, and salt) ahead of time and froth it fresh when needed. Never pour leftover foam back into the cold brew container, as it can introduce bacteria and alter the coffee’s flavor. Label your containers with dates to track freshness.
When ready to enjoy again, simply pour fresh cold brew over ice and top with the re-frothed foam for a consistent, delicious experience every time.
Common Mistakes to Avoid with Sweet Foam Cold Brew
Over-frothing or under-frothing foam
Achieving the perfect sweet foam texture requires precise frothing. Over-frothing creates large, bubbly foam that collapses quickly, leaving you with a watery layer instead of a creamy top.
To avoid this, stop frothing when the foam reaches a thick, velvety consistency with small, uniform bubbles—about 30-45 seconds with a handheld frother. Under-frothing results in thin, runny milk that fails to hold its shape on the cold brew.
Test your foam by letting it sit for 10 seconds; it should cling to a spoon and pour smoothly. Use cold milk straight from the fridge, and froth in a narrow, deep container for better aeration.
If using a steam wand, keep it just below the surface to incorporate air gradually. For consistent results, practice with a timer and adjust based on your milk’s temperature and fat content.
Remember, the goal is a stable, cloud-like foam that floats proudly on your cold brew, not a fizzy mess or a flat layer.
Using wrong milk fat content
The fat content of your milk is critical for sweet foam that lasts. Low-fat or skim milk produces thin, watery foam that dissipates rapidly, while heavy cream can become too thick and greasy, overwhelming the cold brew.
The ideal choice is whole milk (3.5% fat) or oat milk for a dairy-free option—both offer enough fat to create stable, creamy foam without being too heavy. If you prefer plant-based milks, look for barista editions with added stabilizers.
Avoid 2% milk as it often yields foam that is too airy and short-lived. When using whole milk, froth it cold for maximum volume; warm milk can separate and lose structure. For a richer foam, you can mix a splash of half-and-half with whole milk, but keep the ratio balanced.
Always test a small batch first: pour the foam over cold brew and check if it holds for at least 5 minutes. The right fat content ensures your sweet foam is luxuriously thick and long-lasting.
Adding sweetener too early or too late
Timing your sweetener is key to perfect sweet foam. Adding sweetener too early—before frothing—can weigh down the milk, preventing it from aerating properly and resulting in dense, flat foam.
Instead, froth the milk first until it reaches a soft peak stage, then gently fold in your sweetener of choice, such as vanilla syrup, honey, or simple syrup. Adding sweetener too late—after the foam is already on the cold brew—means it won’t dissolve evenly, leaving clumps or a gritty texture.
For best results, use a liquid sweetener to avoid graininess, and stir it into the foam just before pouring. If using sugar, dissolve it in a small amount of warm water first. Another common mistake is over-sweetening; start with 1-2 teaspoons per serving and adjust to taste.
Remember, the foam should be smooth and integrated, not separated. By timing your sweetener addition correctly, you’ll achieve a harmonious sweetness that enhances the cold brew without compromising the foam’s structure or flavor balance.
Frequently Asked Questions
What is sweet foam cold brew?
Sweet foam cold brew is a cold coffee drink topped with a light, airy foam made from cream or milk that has been sweetened and frothed. It combines the smooth, less acidic taste of cold brew with a creamy, dessert-like topping.
How do I make sweet foam for cold brew at home?
To make sweet foam, combine equal parts heavy cream and milk (or your preferred milk) with 1-2 tablespoons of simple syrup or flavored syrup. Use a milk frother, whisk, or blender to aerate the mixture until it becomes thick and foamy, then spoon it over your cold brew.
What ingredients do I need for sweet foam cold brew?
You need cold brew coffee (store-bought or homemade), heavy cream or whole milk, a sweetener like vanilla syrup or simple syrup, and optionally flavorings such as vanilla extract or caramel. Ice cubes are also needed for serving.
Can I make sweet foam without a frother?
Yes, you can make sweet foam without a frother by shaking the sweetened cream mixture in a sealed jar vigorously for 30-60 seconds, or by whisking it by hand until frothy. A blender also works well for this purpose.
How do I make cold brew at home for sweet foam cold brew?
To make cold brew, steep coarse-ground coffee in cold water at a ratio of 1:4 (coffee to water) for 12-24 hours in the refrigerator. Strain through a fine-mesh sieve or coffee filter, and dilute with water or milk to taste before adding the sweet foam.
What sweeteners work best for sweet foam?
Simple syrup, vanilla syrup, caramel syrup, or honey work best because they dissolve easily and don’t leave grains. You can also use flavored syrups like hazelnut or cinnamon dolce for extra taste.
Why is my sweet foam not getting thick?
Your sweet foam may not thicken if the cream-to-milk ratio is too low in milk, or if the mixture is not aerated enough. Use more heavy cream (at least half of the liquid) and froth for a longer time until soft peaks form.
Conclusion
Mastering sweet foam cold brew is simpler than you think. The key takeaways are brewing a strong, smooth concentrate, sweetening it to your taste, and whipping a creamy foam from milk and sugar. This technique transforms your morning coffee into a café-quality treat. Don’t hesitate to experiment with different milks or syrups. Your perfect, refreshing brew is just one whisk away—enjoy every sip.