How To Make Nitrogen Coffee
How to make nitrogen coffee comes down to infusing cold brew with nitrogen gas for a creamy, stout-like texture. The core challenge is achieving that silky cascade without a commercial tap system. You’re in the right place—this guide covers the two proven methods: using a whipped cream dispenser for home brewers or a mini keg setup for serious enthusiasts. Both deliver that velvety mouthfeel and smooth finish you’re after.
What Is Nitrogen Coffee and Why Make It at Home
Definition of nitrogen-infused cold brew coffee
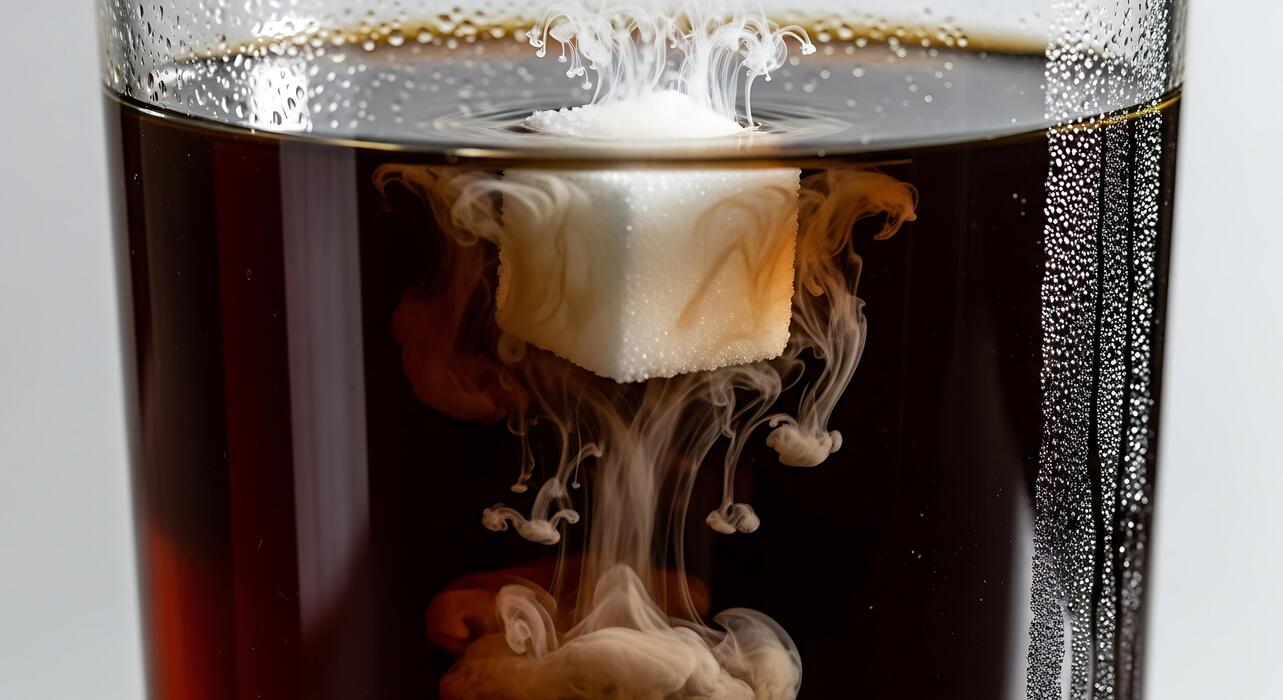
Nitrogen-infused cold brew coffee, or nitro coffee, is cold brew coffee that has been charged with nitrogen gas (N₂) under pressure. Unlike carbonated drinks, nitrogen creates tiny, dense bubbles that give the coffee a creamy, velvety texture similar to a stout beer or a latte, without any dairy.
The infusion process typically involves forcing cold brew concentrate through a specialized faucet with a restrictor plate, which agitates the nitrogen into the liquid. At home, you can achieve this using a whipped cream dispenser (iSi-style) or a dedicated nitro coffee maker.
Simply fill the canister with cold brew, charge it with a nitrogen cartridge (not nitrous oxide, as that adds sweetness), shake vigorously, and dispense. The result is a smooth, naturally sweet coffee with a thick, cascading head that is served cold or over ice.
This method preserves the cold brew’s low acidity while adding a luxurious mouthfeel that hot coffee or standard cold brew cannot replicate.
Key differences between nitro coffee and regular cold brew
The primary difference lies in texture and flavor perception. Regular cold brew is simply coffee steeped in cold water for 12-24 hours, then filtered. It is smooth and low-acid but has a thin, watery mouthfeel unless heavily concentrated.
Nitro coffee, on the other hand, uses nitrogen gas to create a thick, cascading body that clings to the glass. This texture reduces the perception of bitterness and acidity, making the coffee taste naturally sweeter without added sugar or cream.
Additionally, nitro coffee requires a pressurized dispensing system, while regular cold brew can be poured directly from a pitcher. Serving temperature also differs: nitro coffee is typically served on draft at around 34-38°F, while cold brew is often served over ice.
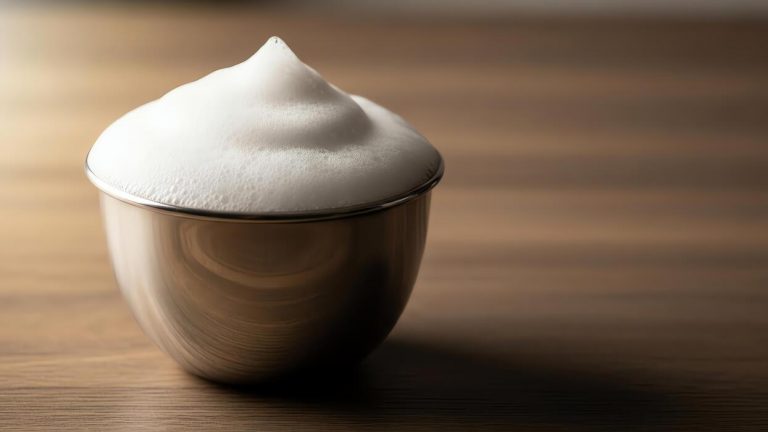
Finally, nitro coffee develops a creamy, foam-like head that slowly settles, whereas regular cold brew has no foam. This visual and textural upgrade makes nitro coffee a more indulgent, café-style beverage that is surprisingly simple to replicate at home with the right equipment.
Benefits of making nitro coffee yourself
Making nitro coffee at home gives you total control over strength, flavor, and cost. You can customize the coffee-to-water ratio and steeping time to match your preferred intensity, and choose specialty beans that are not available in commercial nitro cans.
The upfront cost of a whipped cream dispenser and nitrogen cartridges is quickly offset by the savings compared to buying $5–7 nitro lattes at coffee shops. Homemade nitro coffee also avoids the preservatives and stabilizers often added to canned versions.
Another major benefit is freshness: you can brew small batches and consume them within days, ensuring peak flavor and nitrogen charge. The process itself is quick—once you have cold brew ready, charging and dispensing takes under two minutes.
Plus, you can experiment with infusions like vanilla, cinnamon, or oat milk for a dairy-free creamy finish. Finally, serving nitro coffee at home impresses guests and transforms your daily caffeine ritual into a craft experience, all while reducing single-use cup waste from takeout orders.
Essential Equipment for Making Nitrogen Coffee
Nitro coffee keg and tap system options
For home or small cafe use, a 1.5 to 2.5 gallon stainless steel keg with a nitrogen-specific tap is ideal. Look for a keg that features a ball-lock or pin-lock connection for easy gas line attachment.
The tap system must include a restrictor plate or stout faucet to create the signature cascading effect and creamy head. Consider a kegerator conversion kit if you want temperature control, or a portable keg system for events.
Ensure the keg can hold pressure up to 30-40 PSI for optimal nitrogen infusion. A dual-regulator setup allows you to serve nitro coffee and another beverage simultaneously, maximizing your equipment’s utility.
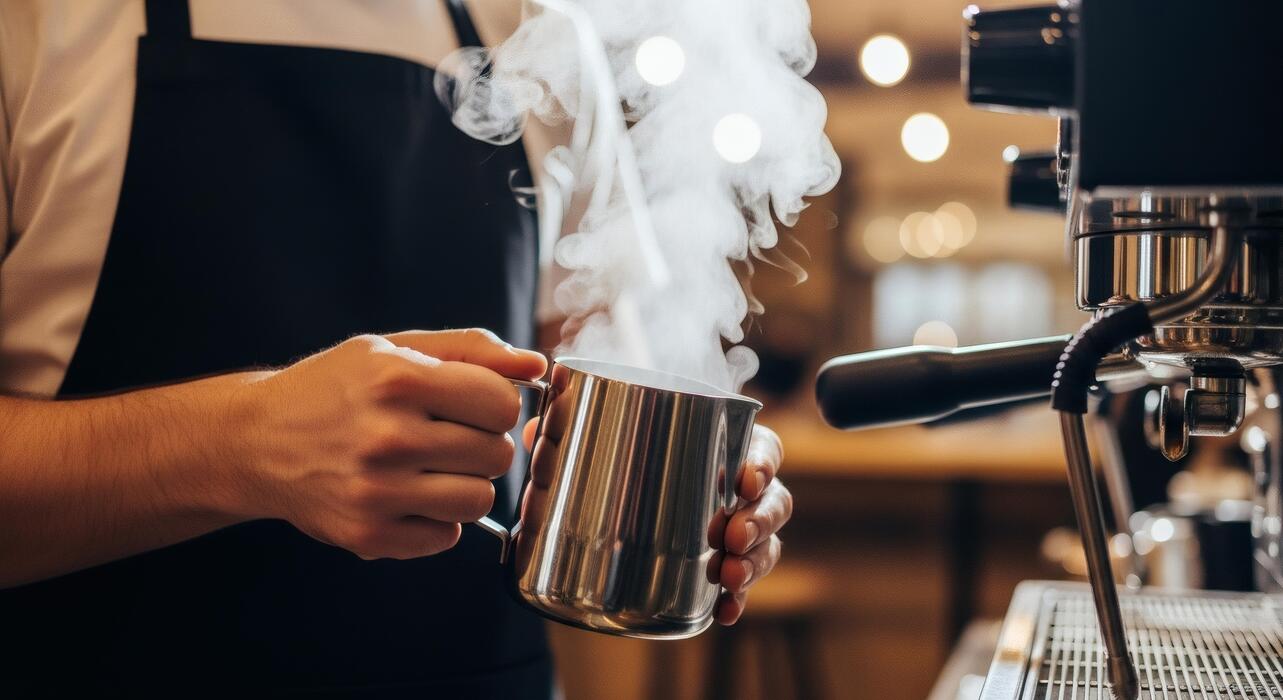
Using a whipped cream dispenser for small batches
A 16-32 ounce stainless steel whipped cream dispenser is perfect for making nitro coffee without a full keg setup. Use nitrogen chargers (N2 cartridges) specifically, not N2O, as nitrous oxide adds sweetness and alters flavor.
Fill the dispenser with cold brew coffee, leaving headspace, then charge with one or two nitrogen cartridges. Shake vigorously for 5-10 seconds, then refrigerate for at least 2 hours to allow nitrogen to fully infuse. Dispense carefully to avoid foam overflow.
This method yields 2-4 servings and is ideal for testing recipes before investing in a larger system. Clean the dispenser thoroughly after each use to prevent clogging.
Nitrogen gas tanks and regulators explained
For consistent results, use food-grade nitrogen gas (N2) in a 5-20 lb tank from a local gas supplier or welding store. A dual-stage regulator is crucial for maintaining steady pressure, typically set between 30-40 PSI for nitro coffee.
Ensure the regulator has a CGA-580 connection for compatibility with standard N2 tanks. A gas line with a check valve prevents coffee backflow into the regulator. For small batches, nitrogen cartridges are a convenient alternative, but a tank is more cost-effective for regular use.
Always secure the tank upright and use a pressure release valve for safety. Proper gas management ensures consistent carbonation and creaminess.
Must-have accessories for consistent results
Key accessories include a digital pressure gauge to monitor PSI accurately, and a keg lid with a pressure relief valve for safe venting. Use stainless steel ball-lock disconnects and gas and liquid lines with John Guest fittings for leak-free connections.
A tap handle with a restrictor plate ensures the correct pour speed. For cleaning, invest in a keg cleaning kit with a brush and sanitizer. A coffee filter bag or cold brew system helps produce sediment-free coffee. Finally, a nitrogen gas tank cart makes moving heavy tanks easy.
These accessories reduce waste and ensure every pour has that velvety, cascading texture nitro coffee is known for.
How to Brew the Perfect Cold Brew Base for Nitro Coffee
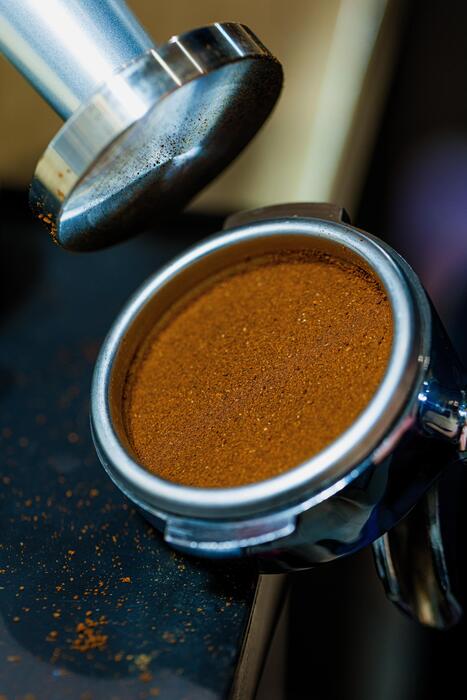
Best coffee beans and grind size for nitro cold brew
For a smooth, rich nitro cold brew, start with high-quality, freshly roasted beans with a medium to dark roast profile. These beans offer deep chocolate and nutty notes that shine through the creamy nitrogen infusion. Avoid light roasts, as they can taste overly acidic.
The grind size is critical: use a coarse grind, similar to breadcrumbs or sea salt. A fine grind leads to over-extraction and bitterness, while too coarse results in weak, watery brew. For best results, grind your beans just before brewing to preserve freshness.
If buying pre-ground, ensure it’s specifically labeled for cold brew. A burr grinder provides the most consistent coarse grind, which is essential for even extraction and a clean final concentrate.
Step-by-step cold brew brewing method
To brew the perfect cold brew base, use a simple immersion method. In a large pitcher or cold brew maker, combine your coarse-ground coffee with cold, filtered water. Stir gently to ensure all grounds are saturated. Cover the container and let it steep at room temperature for 12-24 hours.
For a cleaner taste, refrigerate during steeping, but expect a slightly longer brew time (up to 24 hours). After steeping, pour the mixture through a fine-mesh strainer lined with a coffee filter or a nut milk bag into a clean container.
Avoid pressing or squeezing the grounds, as this can introduce bitterness. The result is a smooth, concentrated cold brew ready for nitrogen infusion.
Water-to-coffee ratio for optimal flavor and strength
The ideal water-to-coffee ratio for a nitro-ready cold brew concentrate is 1:4 or 1:5 (coffee to water by weight). For example, use 1 cup (about 100 grams) of coffee to 4 cups (about 400 grams) of water.
This creates a strong, flavorful base that won’t be diluted when you add nitrogen and serve over ice. If you prefer a milder brew, use a 1:6 ratio, but note that a stronger concentrate yields a richer mouthfeel after nitrogen infusion. Always use filtered water for the cleanest taste.
Weigh your ingredients for consistency, and adjust ratios based on your taste preference—just remember, the concentrate should be potent enough to stand up to the creamy texture of nitro coffee.
Straining and storing your cold brew concentrate
After steeping, strain the cold brew concentrate twice for clarity and to remove fine sediment. First, pour through a fine-mesh sieve, then again through a coffee filter or cheesecloth. This ensures a smooth texture that won’t clog your nitro system.
Store the concentrate in a sealed glass container in the refrigerator for up to two weeks. For best freshness, use within 5-7 days. Avoid plastic containers, as they can absorb odors and affect flavor.
When ready to serve, the concentrate is mixed with nitrogen (often using a whipped cream dispenser or keg system) to create that cascading, creamy nitro effect. Proper storage keeps your base ready for perfect nitro coffee anytime.
Step-by-Step Guide to Infusing Coffee with Nitrogen
How to fill and pressurize a nitro coffee keg
Start by brewing a strong, cold coffee concentrate (a 4:1 water-to-coffee ratio works well). Chill it completely, as warm coffee won’t hold nitrogen properly. Pour the cold concentrate into a clean, sanitized keg, leaving some headspace for gas expansion.
Seal the lid, then connect your nitrogen tank with a regulator set to 30-40 PSI. Purge the air by opening the gas valve for 5 seconds, then pressurize fully. Gently rock the keg to infuse the gas, then let it sit for 12-24 hours in a refrigerator.
For serving, use a stout faucet with a restrictor plate to create that signature cascading effect. Always check for leaks at connections before serving.
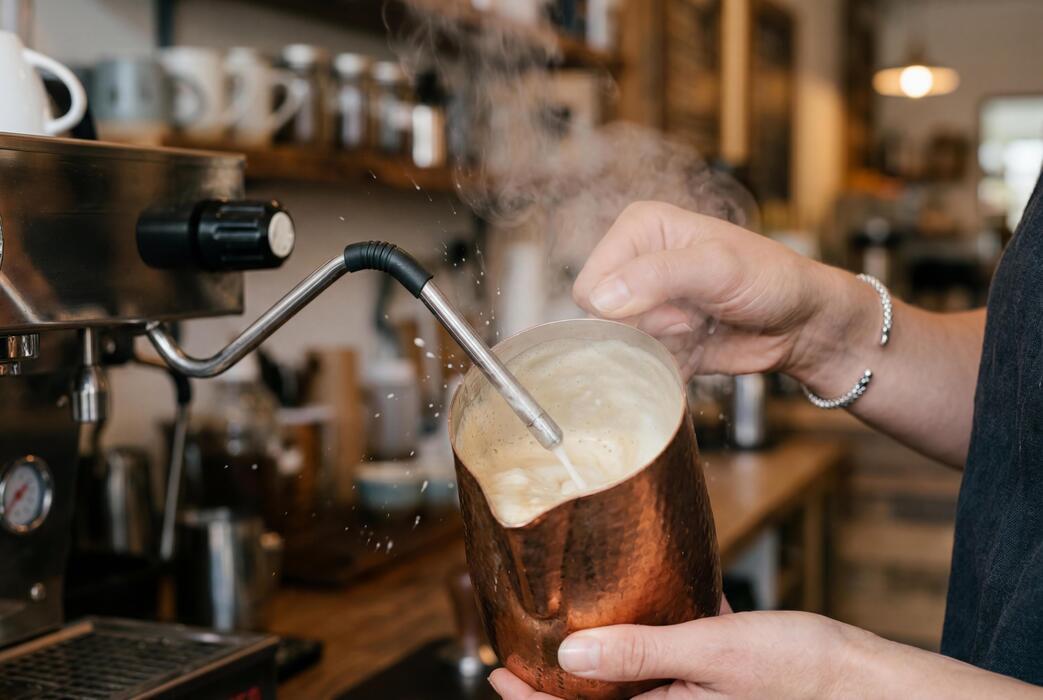
Using a whipped cream dispenser for nitrogen infusion
A whipped cream dispenser is the easiest way to make single servings of nitro coffee. Fill the dispenser with cold, strong coffee (no cream or sugar, as these can clog the nozzle). Leave about 1 inch of headspace.
Screw on the nitrous oxide (N2O) charger holder—not a CO2 charger, as that will carbonize the coffee. Charge with one N2O cartridge, then shake vigorously for 10-15 seconds. Refrigerate for at least 2 hours to stabilize the infusion.
When ready, hold the dispenser upside down, press the lever, and pour into a glass. The result is a creamy, velvety texture with tiny bubbles. For best results, use a glass that’s been chilled to prevent foam collapse.
Proper gas charging and shaking techniques
The key to successful nitrogen infusion is agitation—shaking helps the gas dissolve into the liquid. For a keg, after pressurizing, gently rock it back and forth (not up and down) for 2-3 minutes to distribute the gas evenly. Avoid vigorous shaking, which can create large, unstable bubbles.
For a whipped cream dispenser, shake in a horizontal motion for 15 seconds, then let it rest upright for 30 seconds. Repeat this cycle twice. Always use cold coffee (below 40°F) because cold liquids hold more dissolved gas.
After charging, let the container sit undisturbed in the fridge for at least 1 hour to allow the nitrogen to fully integrate, resulting in a smooth, cascading pour.
Troubleshooting common infusion problems
If your nitro coffee comes out flat or watery, the coffee may be too warm or you didn’t agitate enough. Chill it to below 40°F and repeat the shaking process. Foam that dissipates quickly often means the gas is escaping—check for leaks in keg seals or charger threads.
No cascading effect usually indicates low pressure: for kegs, increase PSI to 40, and for dispensers, use a fresh N2O cartridge. If the coffee tastes metallic or off, your equipment may need thorough cleaning with a non-abrasive cleaner.
Clogged nozzles happen when using coffee with fines—strain through a fine-mesh filter before filling. Finally, always use pure nitrogen or N2O, not compressed air or CO2, which alter flavor.
Tips for Serving and Storing Nitrogen Coffee
How to pour nitro coffee for the perfect cascading effect
To achieve that signature cascading effect, pour your nitro coffee with a steady hand at a slight angle. Start by tilting your glass 45 degrees and pour the coffee slowly down the side to minimize agitation.
Once the glass is half full, gradually straighten it while continuing to pour in a smooth, controlled stream. The key is to avoid splashing or excessive foam—nitro coffee relies on dissolved nitrogen gas, which releases as tiny bubbles when poured.
For a flawless cascade, use a stout faucet or a specialized nitro tap that forces the coffee through a restrictor plate, creating a creamy, velvety head. Always serve immediately after pouring to preserve the texture and carbonation.
Best glassware and serving temperature
The ideal glassware for nitro coffee is a tulip-shaped or pilsner glass, as its narrow base and wider rim help concentrate the aroma and showcase the cascading bubbles. Chill your glass in the freezer for 10–15 minutes before serving to keep the coffee cold without diluting it.
Serve nitro coffee at 34–38°F (1–3°C)—any warmer, and the nitrogen gas escapes too quickly, flattening the texture. Avoid adding ice, as it can disrupt the foam and dilute the rich flavor. For an elevated experience, use a frosted mug or a stemmed glass to maintain temperature and enhance visual appeal.
The cold temperature also reduces bitterness, making the coffee smoother.
Storing nitro coffee in kegs or bottles
For keg storage, use a 1.75- to 5-gallon cornelius keg with a nitrogen regulator set to 30–40 psi. Fill the keg completely to minimize oxygen exposure, then purge the headspace with nitrogen before sealing.
For bottles, use 16-oz amber glass swing-top bottles with a nitrogen-charged widget (like those used in stout beers) or a counter-pressure filler to maintain carbonation. Store both kegs and bottles in a refrigerator at 34–38°F—never freeze, as nitrogen can cause bottle bursts.
If using bottles, consume within 5–7 days for best freshness. Always keep containers upright to prevent sediment from blocking the dispensing system.
How long homemade nitro coffee stays fresh
Homemade nitro coffee stays fresh for 5–7 days when stored in a sealed keg or bottle under refrigeration. The nitrogen gas acts as a preservative, slowing oxidation, but flavor degradation begins after 3–4 days due to subtle staling.
For optimal taste, consume within the first 48 hours—after that, the coffee may develop a slightly flat or papery note. If you notice the cascading effect diminishing or the foam becoming thin, it’s time to discard or use the coffee for iced drinks.
To extend shelf life, use freshly roasted beans (within 2 weeks of roast) and grind them just before brewing. Avoid leaving nitro coffee at room temperature for more than 30 minutes to prevent bacterial growth.
Common Mistakes to Avoid When Making Nitrogen Coffee
Using the wrong type of gas or pressure
One of the most critical mistakes is using pure carbon dioxide or incorrect pressure settings. Nitrogen coffee requires food-grade nitrogen gas or a nitrogen blend (often 70% N2 and 30% CO2) to create the desired creamy, cascading texture.
Pure CO2 will over-carbonate your coffee, producing a fizzy, acidic drink instead of a smooth, velvety one. Additionally, ensure your regulator is set to 40-60 PSI for most keg systems. Too low pressure results in flat coffee, while too high can cause excessive foam and waste.
Always check your gas supplier for food-grade nitrogen and test the pressure before serving.
Over-infusing or under-infusing your coffee
Getting the infusion time right is crucial for balanced flavor. Over-infusing coffee—steeping for more than 24 hours—can extract bitter, harsh compounds, ruining the smooth profile nitrogen coffee is known for. Conversely, under-infusing (less than 12 hours) yields weak, watery coffee.
Aim for a 12-24 hour cold brew steep using a coarse grind at room temperature or in the fridge. Taste-test your brew at the 12-hour mark; if it’s strong but not bitter, it’s ready.
Remember, nitrogen mutes some acidity, so slightly stronger cold brew often works best for a rich, creamy finish.
Skipping the cold brew filtration step
Failing to filter your cold brew properly is a common error that leads to clogged kegs and gritty texture. Unfiltered coffee contains fine grounds and sediment that can block your nitrogen faucet or keg dip tube, causing inconsistent pours and equipment damage.
Always use a fine-mesh strainer, cheesecloth, or a dedicated cold brew filter bag to remove all solids. For best results, double-filter through a paper coffee filter or a nut milk bag. This step ensures a silky-smooth mouthfeel and prevents your nitrogen system from needing frequent cleaning.
Neglecting equipment cleaning and maintenance
Dirty equipment is the fastest way to ruin nitrogen coffee and introduce off-flavors. Residue from old coffee, oils, or milk can breed bacteria and clog your system. Clean your keg, lines, and faucet after every use with a mild, unscented detergent or a specialized keg cleaner.
Rinse thoroughly to avoid soap residue. Additionally, regularly inspect O-rings and seals for wear to prevent gas leaks. A neglected system can produce flat, sour-tasting coffee and require costly repairs. Dedicate 10 minutes to post-use cleaning to ensure consistent quality and extend your gear’s lifespan.
Frequently Asked Questions About Homemade Nitrogen Coffee
Can you make nitro coffee without a keg?
Yes, you can make nitro coffee without a full keg setup by using a whipped cream dispenser (isi-style) with nitrous oxide (N2O) chargers. First, brew strong cold brew coffee and chill it.
Fill the dispenser with the cold brew, charge it with one N2O cartridge, shake for 10 seconds, and refrigerate for at least 2 hours to allow gas absorption. For best results, use a double-charge method: charge once, shake, then release pressure and charge again for a thicker, creamier texture.
While this method doesn’t achieve the same cascading effect as a keg system, it produces a smooth, slightly effervescent coffee. Remember to use only N2O, not CO2, to avoid carbonation. Always follow safety instructions for your dispenser.
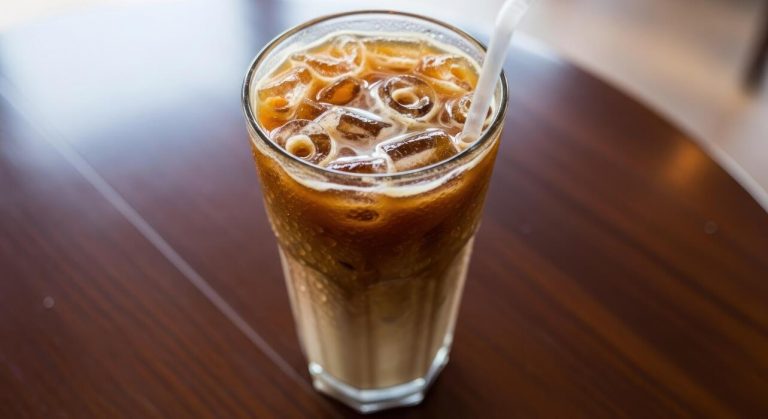
What is the difference between nitro and regular iced coffee?
The main difference lies in texture and serving method. Regular iced coffee is brewed hot, then poured over ice, resulting in a watery, diluted taste as the ice melts.
Nitro coffee is cold brew infused with nitrogen gas, creating tiny bubbles that give it a creamy, velvety mouthfeel similar to stout beer. It is served from a tap or dispenser at a colder temperature (around 35°F) without ice, so it stays strong and smooth from first sip to last.
Regular iced coffee often requires sugar or milk to mask bitterness, while nitro coffee’s natural sweetness and reduced acidity make it enjoyable black. Additionally, nitro coffee has a thicker, more luxurious consistency due to the nitrogen bubbles, while regular iced coffee remains thin and watery.
How much does it cost to make nitro coffee at home?
The cost varies by method. A whipped cream dispenser setup (including dispenser and N2O cartridges) costs $30–$70 upfront. Each N2O charger costs about $0.50–$1, and you’ll use one or two per batch. A keg system (mini keg, CO2 tank, nitrogen regulator, and tap) ranges from $100–$300.
For ongoing costs, cold brew coffee beans cost $8–$15 per pound, making each 16-ounce serving about $0.50–$1 in coffee. Compared to buying nitro coffee at cafes ($4–$6 per cup), home brewing pays for itself after 10–20 uses.
The whipped cream method is cheapest for occasional use, while a keg system offers better quality and volume for frequent drinkers. Factor in time for cold brew preparation (12–24 hours) and gas refills.
Is nitrogen coffee healthier than regular coffee?
Nitro coffee itself isn’t inherently healthier, but its preparation method offers some benefits. Because it’s made from cold brew, it has up to 70% less acidity than hot-brewed coffee, which can be gentler on your stomach and tooth enamel.
The nitrogen gas adds no calories, sugar, or artificial ingredients, making it a clean, black coffee option. However, health claims often relate to what you don’t add—since nitro coffee is creamy without milk or cream, you avoid extra fats and calories.
Some people find they drink less nitro coffee due to its richness, potentially reducing caffeine intake. The caffeine content is similar to regular cold brew, so it’s not a decaf alternative. Ultimately, its health impact depends on your overall diet and whether you drink it plain or with additives.
Frequently Asked Questions
What is nitrogen coffee?
Nitrogen coffee is cold brew coffee infused with nitrogen gas, which creates a smooth, creamy texture and a cascading effect similar to stout beer. It’s served cold without ice to maintain the nitrogen bubbles.
How do I make nitrogen coffee at home?
You need cold brew coffee, a whipping siphon (like an iSi), and nitrogen cartridges (N2O or N2). Fill the siphon with cold brew, charge it with a cartridge, shake, and dispense into a glass.
What type of coffee is best for nitrogen coffee?
Use cold brew concentrate made from coarsely ground, medium-to-dark roast beans steeped in cold water for 12-24 hours. This yields a smooth, low-acid base that works well with nitrogen.
Can I use regular coffee instead of cold brew?
No, regular hot-brewed coffee lacks the necessary body and clarity, and it may become bitter or thin when infused with nitrogen. Cold brew is essential for the best texture and flavor.
Do I need special equipment to make nitrogen coffee?
Yes, you need a whipping siphon designed for beverages and food-grade nitrogen cartridges (N2O works, but pure N2 is better for a smoother texture). Avoid using CO2, as it will make the coffee carbonated and acidic.
How do I serve nitrogen coffee properly?
Chill the siphon and glass beforehand. Dispense the coffee into a glass without ice, holding the siphon upright and opening the nozzle fully to create a creamy pour. Serve immediately to enjoy the cascading effect.
Why is my nitrogen coffee flat or watery?
This often happens if the cold brew is too diluted, the siphon isn’t properly chilled, or the cartridge is expired. Use strong cold brew concentrate, ensure the siphon is cold, and check cartridge freshness.
Conclusion
Making nitrogen coffee at home is simple: cold brew your coffee, chill it, and charge it with a whipping siphon using a nitrogen cartridge. The result is a creamy, smooth, naturally sweet beverage without added dairy or sugar. The key is patience with brewing and proper chilling for the best texture. Now you can skip the café line and impress friends with your own velvety nitro brew. Enjoy the experiment