How To Make Cold Brew Without Filter
Forget expensive gadgets and paper filters. If you are craving that smooth, low-acid caffeine kick but realize your pantry is bare, don’t worry. Learning how to make cold brew without filter is actually incredibly simple and uses items you likely already have in your kitchen. Whether you use a fine-mesh sieve, a French press, or even a clean cloth, we have you covered. This guide provides quick, foolproof methods to get your sediment-free cold brew fix started right now.
Can you make cold brew without a paper filter?
Why traditional filters aren’t always necessary
You can absolutely create a delicious batch of coffee without relying on standard paper filters by utilizing common kitchen alternatives or specialized equipment designed for durability.
When you explore how to make cold brew without filter papers, you discover that the primary goal is simply separating the saturated grounds from the liquid concentrate.
Methods such as using a fine-mesh stainless steel sieve, a clean cheesecloth, or even a French press plunger provide excellent results without the waste of disposable products.
Many enthusiasts prefer these methods because paper filters often trap the natural oils and aromatic compounds that give coffee its unique character and mouthfeel. By skipping the paper, you allow these essential oils to remain in the brew, resulting in a more robust and full-bodied cup.
This approach is not only environmentally friendly but also ensures you are never sidelined by a lack of supplies. Simply steep your coarse grounds in water for twelve to twenty-four hours, then use your chosen alternative to strain the mixture effectively for a smooth finish.
The science of immersion brewing
The reason you can successfully skip the traditional filtration process lies in the fundamental nature of immersion brewing, which differs significantly from drip methods. In cold brew, the coffee grounds remain in constant contact with water for an extended duration, allowing for a slow and gentle extraction of flavors.
Because the water is cold or room temperature, the chemical reactions occur differently than they do with hot water; specifically, fewer acidic compounds are released, leading to a naturally sweeter profile. When it comes time to separate the solids, the coarse grind size is your best ally.
Since the particles are relatively large, they settle more easily at the bottom of your container via gravity. This physical separation makes it possible to decant the liquid concentrate carefully or use a metal mesh that catches the large particles while letting the rich flavors pass through.
Understanding this allows you to manipulate the strength and clarity of your beverage by adjusting the steeping time and the precision of your final pour, ensuring a high-quality result every single time.
Benefits of filter-free cold brew
Opting for a filter-free or metal-filtered approach offers several distinct advantages that can elevate your daily caffeine routine. First and foremost, the flavor profile is noticeably richer because metal or mesh alternatives do not absorb the coffee’s natural lipids, which contribute to a creamy texture and complex aftertaste.
This method also promotes a more sustainable and zero-waste lifestyle, as you eliminate the recurring cost and environmental impact of single-use bleached paper.
Additionally, the process is incredibly forgiving; if you find a small amount of sediment at the bottom of your jar, it often adds to the rustic charm and depth of the drink.
Learning to brew this way provides you with ultimate flexibility and independence, allowing you to prepare your favorite concentrate anywhere from a remote campsite to a minimalist kitchen.
By mastering the art of decanting or using permanent tools, you gain a deeper appreciation for the coffee’s origin and the subtle nuances that are usually hidden by heavy filtration. This results in a versatile, bold, and highly satisfying beverage tailored to your preferences.
Essential supplies for filterless cold brew

Choosing the right glass container
When making cold brew without a traditional paper filter, your choice of vessel is the first critical step toward success.
You should opt for a wide-mouth glass mason jar or a dedicated glass carafe, as these materials are non-porous and will not leach unwanted flavors into your brew during the long steeping process.
A wide opening is essential because it allows you to easily scoop out floating grounds before pouring, which acts as a preliminary filtration step. Ensure the container has a tight-sealing lid to prevent the coffee from absorbing odors from your refrigerator, such as onions or leftovers.
Using glass also allows you to visually monitor the sediment levels at the bottom, helping you decide when to stop pouring to avoid grit. Before you begin, verify that the glass is thoroughly cleaned and sanitized to ensure the final product remains fresh for up to two weeks.
This simple hardware choice provides the structural foundation for a clean, sediment-free concentrate without needing specialized equipment.
The best coffee roast for cold extraction
Selecting the correct beans is paramount when you lack a fine filter to catch small particulates. You should prioritize a dark or medium-dark roast with a profile featuring chocolatey or nutty notes, as these hold up exceptionally well during the sixteen-hour extraction period.
More importantly, you must use an extra-coarse grind size, similar to the consistency of sea salt or peppercorns.
This coarse texture is the secret to filterless brewing because larger particles are easier to strain using a simple kitchen sieve and are less likely to remain suspended in the liquid, causing cloudiness.
Avoid finely ground coffee at all costs, as it will turn into a muddy sludge that is impossible to separate without professional paper filters.
By choosing high-quality, freshly roasted whole beans and grinding them yourself to a chunky consistency, you ensure that the natural oils provide a smooth mouthfeel while the physical size of the grounds makes the eventual separation process quick, efficient, and surprisingly clean for any home setup.
Water quality and temperature basics
Since cold brew is composed of roughly ninety-eight percent water, the quality of your liquid base determines the clarity and sweetness of the final cup.
You should always use filtered or bottled spring water rather than straight tap water to avoid chlorine tastes or mineral imbalances that can mute the delicate flavors of the bean.
When starting the process, use room temperature or cool water to begin the slow extraction; never use hot water, as this changes the chemical breakdown and introduces bitterness that the cold process is designed to avoid.
Maintaining a consistent ratio of one part coffee to four parts water ensures a strong concentrate that can be diluted later. Because you are brewing without a filter, the water’s role in settling the grounds is vital.
After the steeping time is complete, placing the container in the fridge for an extra hour without moving it allows gravity to pull the remaining fine particles to the bottom. This natural sedimentation process works alongside high-quality water to produce a professional-grade beverage.
How to use the ‘Cowboy Method’ for cold brew
Step-by-step preparation guide
To begin the Cowboy Method for cold brew, you need to focus on the ratio and the coarseness of your beans.
Since you are not using a traditional filter, start by selecting a coarse grind size that resembles sea salt; this prevents the water from becoming overly cloudy and makes the eventual separation much easier.
Combine your coffee grounds with room temperature water in a large glass jar or pitcher using a 1:5 coffee-to-water ratio for a strong concentrate. Stir the mixture vigorously with a long spoon to ensure every single coffee particle is fully saturated, which prevents dry clumps from floating on the surface.
Once mixed, cover the container with a lid or a plate to keep out dust and debris. Place the jar in a cool, dark corner of your kitchen or inside the refrigerator.
Allow the mixture to steep for at least 12 to 18 hours, ensuring the extraction process has enough time to develop those smooth, chocolatey notes without the need for specialized equipment.
How to let the grounds settle naturally
The secret to the Cowboy Method lies in the physics of gravity rather than mechanical filtration. Once your steeping time is complete, the most critical step is to let the container sit undisturbed on a flat surface for at least thirty minutes before you even think about pouring.
During this resting period, the saturated coffee grounds will naturally lose their buoyancy and sink to the bottom of the vessel, forming a compact sediment layer.
To speed up this process or ensure a cleaner cup, you can gently tap the side of the jar with a wooden spoon to encourage any stubborn floating grounds to drop.
If you notice a thin film of oil or fine silt on the surface, you can carefully skim the top with a wide spoon before proceeding.
By exercising patience and allowing gravity to do the heavy lifting, you effectively separate the liquid from the solids without needing a paper filter or a mesh sieve, resulting in a surprisingly clear cold brew concentrate.
Pouring techniques to avoid sediment
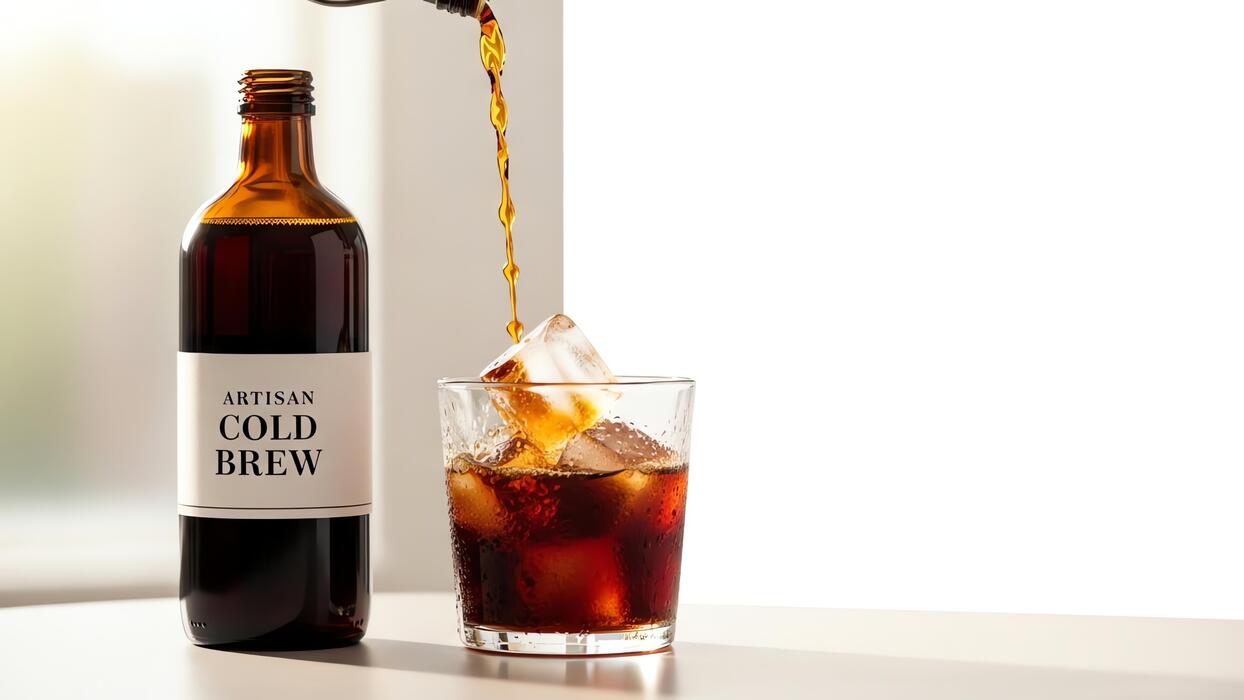
When you are ready to serve, your pouring technique determines the final clarity of your beverage. Pick up the container with a slow and steady hand, making sure not to shake or tilt it abruptly, as any sudden movement will agitate the settled grounds at the bottom.
Begin pouring the liquid into a clean carafe or directly into your glass in one continuous, gentle stream. Stop pouring immediately once you see the thick layer of sludge at the bottom begin to slide toward the rim of the jar.
It is better to sacrifice the last half-ounce of liquid than to ruin your drink with gritty silt. For an even cleaner result, you can pour the coffee over the back of a large spoon to break the fall and minimize turbulence.
This primitive yet effective method relies on visual monitoring and physical control. Once finished, you will have a rich, full-bodied cold brew that highlights the natural oils of the coffee, providing a unique mouthfeel that filtered versions often lack.
Alternative household items to use as strainers
Using a fine-mesh kitchen sieve
A fine-mesh kitchen sieve is one of the most accessible tools for straining cold brew when you lack paper filters. To achieve the best results, look for a sieve with the tightest possible wire weave to catch larger coffee fragments.
Simply place the sieve over a clean jar or bowl and pour the steeped coffee through it slowly. While this method is excellent for removing coarse grounds, it may leave behind a small amount of fine sediment or silt at the bottom of your container.
To minimize this, avoid agitating the grounds during the final minutes of steeping and pour the liquid in a steady, gentle stream.
If you find the coffee is still too gritty for your preference, you can line the sieve with a paper towel or a clean napkin to act as an secondary barrier.
This setup effectively mimics a traditional filter setup while utilizing basic kitchen equipment you likely already own, ensuring a smooth and flavorful beverage without specialty supplies.
Making a DIY filter with a clean cloth
Using a clean cloth is a highly effective way to filter cold brew because the fabric fibers are often tighter than metal mesh. You can use a clean cotton t-shirt, a tea towel, or several layers of cheesecloth to act as your filtration medium.
Before starting, ensure the fabric has been thoroughly rinsed with hot water to remove any residual laundry detergent scents that could ruin the flavor of your coffee.
Secure the cloth over the mouth of a glass jar using a rubber band or string to create a slight indentation in the center. Carefully pour the cold brew concentrate through the fabric, allowing gravity to pull the liquid through while the cloth traps even the finest silty particles.
This method produces a remarkably clean and crisp cup of coffee that rivals the clarity of professional paper filters. Once finished, you can simply rinse the cloth out and wash it for future use, making it an eco-friendly and cost-effective alternative for your daily caffeine routine.
Repurposing a French press plunger
If you have a French press sitting in your cupboard, it serves as the perfect vessel for both steeping and straining cold brew without needing any external filters.
To use this method, combine your coarse coffee grounds and cold water directly inside the carafe and let them sit for 12 to 24 hours. When the steeping process is complete, simply press the plunger down slowly and steadily to separate the liquid from the spent grounds.
The built-in metal screen acts as a durable filter that allows the coffee’s natural oils to pass through, resulting in a rich, full-bodied flavor profile that many enthusiasts prefer.
If you want an even cleaner finish, you can pour the resulting liquid through a second strainer or simply be careful not to pour out the very last bit of liquid where the sediment settles.
This technique is incredibly efficient because it requires no extra waste and utilizes the mechanical advantage of the press to ensure all grounds stay firmly at the bottom of the container.
The perfect coffee-to-water ratio for cold brew

Measuring for a strong concentrate
When you are learning how to make cold brew without a filter, mastering the ratio for a potent concentrate is your first step toward success.
The ideal starting point is a 1:4 ratio of coffee to water, which means using one cup of coarsely ground beans for every four cups of filtered water.
This concentrated approach is particularly helpful when you don’t have a traditional filter, as the higher density of grounds makes them easier to settle at the bottom of your jar or pitcher over time.
Using a digital scale for precision will ensure that your brew remains consistent every single time you prepare a batch. Once the steeping process is complete, you can simply pour the top layer of liquid off carefully, leaving the heavy sediment behind.
This concentrated base is versatile, allowing you to dilute it later with milk, water, or ice according to your personal taste preferences while maintaining a bold flavor profile that stands up to dilution.
Adjusting for a ready-to-drink brew
If you prefer a beverage that is ready to enjoy immediately after the steeping process without adding extra liquids, you should aim for a 1:8 or 1:10 coffee-to-water ratio. This lighter ratio is excellent for those who want a smoother, less intense caffeine kick and a more refreshing mouthfeel.
When brewing without a filter, this method requires a bit more patience during the separation stage. Since there is more water relative to the coffee grounds, the sediment may take longer to settle completely at the bottom of your container.
To achieve a clean cup, let the mixture sit undisturbed in the refrigerator for the full duration of the brew time. When you are ready to serve, use a steady hand to decant the liquid into a clean glass, stopping before you reach the muddy layer at the bottom.
This technique ensures a delicious, crisp cup of cold brew that highlights the natural sweetness and low acidity of your chosen beans without needing specialized equipment.
How grind size affects your results
The success of your no-filter cold brew depends heavily on your grind size, which should always be extra coarse, resembling sea salt.
Because you are not using a paper or mesh filter to catch fine particles, a fine grind will result in a murky, gritty beverage that is difficult to separate.
Coarse grounds are essential because they have less surface area, leading to a slower, more controlled extraction that prevents bitterness during the long soaking period.
Furthermore, larger particles are much heavier and will naturally sink to the bottom of your brewing vessel, acting as their own natural filtration system through gravity. If you find that your coffee still contains too much silt, try pulse-grinding your beans to avoid creating ‘fines’ or dust-like particles.
By focusing on a consistent, chunky grind, you ensure that the water can flow around the coffee freely, extracting the deep chocolate and nutty notes while making the final pouring process significantly cleaner and more efficient for a professional result.
Tips for a smooth and grit-free cup
The importance of extra-coarse grounds
When you are brewing coffee without a traditional paper filter, the size of your coffee particles becomes the most critical factor for success. You must utilize extra-coarse grounds that resemble the consistency of sea salt or peppercorns.
This specific texture is essential because finer particles will easily bypass makeshift strainers, leaving a muddy layer of silt at the bottom of your glass. Larger grounds are much easier to trap using basic household tools like a fine-mesh sieve or a slotted spoon.
Furthermore, a coarse grind ensures a slower, more controlled extraction process, which is necessary for the long immersion time required in cold brewing. By avoiding fine dust and pre-ground commercial coffee, you significantly reduce the risk of over-extraction and bitterness.
Investing in a quality burr grinder allows you to achieve this uniform particle size, ensuring that your final concentrate remains clean, bright, and free from the gritty mouthfeel that often plagues unfiltered DIY brewing methods.
How long to steep at room temperature
Achieving the perfect flavor profile without a filter requires patience and precise timing, especially when steeping on your kitchen counter. For a standard room-temperature brew, you should aim for a steeping window of 12 to 18 hours.
Because you are not using a filter to hold the grounds, the contact between the water and the coffee is total and uninterrupted. If you let the mixture sit for too long, typically beyond 24 hours, the coffee can develop a harsh, woody, or overly acidic taste.
Conversely, pulling the brew too early will result in a weak, tea-like consistency that lacks the signature chocolatey depth of cold brew. Keep your container in a cool, dark spot away from direct sunlight to maintain a stable temperature throughout the process.
Once the time is up, the larger grounds will naturally settle at the bottom of the jar, making it significantly easier to pour off the liquid gently without disturbing the sediment layer too much.
Double-straining for maximum clarity
To achieve a truly professional, grit-free result without a dedicated coffee filter, you must master the technique of double-straining your concentrate. Start by pouring the steeped mixture through a standard kitchen fine-mesh sieve to catch the large chunks and bulk of the coffee grounds.
For the second pass, which provides the necessary clarity, line that same sieve with a clean cheesecloth or a thin flour sack towel. This secondary layer acts as a barrier for the smaller micro-sediments that the metal mesh might miss.
Pour the liquid slowly and avoid the temptation to squeeze the cloth, as pressing down can force bitter oils and fine silt through the fabric and into your clean carafe. This two-step approach effectively mimics the performance of a high-quality filter while using common household items.
The result is a smooth, translucent beverage that highlights the delicate notes of the bean. This method ensures that your homemade cold brew remains crisp and sediment-free from the first sip to the very last drop.
How to store and serve your homemade cold brew
Safe refrigeration timelines
Since you have mastered how to make cold brew without filter using sedimentation or a fine mesh sieve, proper storage is the next step to maintaining freshness.
Once your grounds have settled and the liquid is decanted, store the concentrate in an airtight glass container like a mason jar to prevent oxidation. In the refrigerator, a pure cold brew concentrate will remain flavorful and safe to drink for up to seven to ten days.
However, if you chose to dilute the entire batch with water immediately after brewing, your shelf life drops significantly to about three or four days.
It is vital to keep the container sealed tightly because coffee easily absorbs odors from other foods in your fridge, like onions or leftovers, which can ruin the profile. Always check for a sour smell or visible cloudiness before pouring a glass.
For the best results, write the brew date on the jar so you can track your optimal freshness window and enjoy the smoothest possible caffeine kick every morning.
Best ways to dilute your concentrate
Because the sediment-based method often produces a very robust liquid, understanding how to balance your drink is essential for a pleasant experience. Most homemade recipes yield a strong concentrate that requires a one-to-one ratio of coffee to liquid for a standard strength.
If you prefer a lighter, more refreshing beverage, try a one-to-two ratio instead. For those who enjoy a hot cup even in winter, you can dilute your cold concentrate with boiling water; this provides a low-acid hot coffee that retains the chocolatey notes of the cold brewing process.
If you are serving it iced, remember that the melting cubes will eventually add more water, so you might want to start with a slightly stronger pour. Using filtered water for dilution is highly recommended to ensure no chlorine or mineral tastes interfere with the coffee beans.
Experimenting with these ratios allows you to customize the caffeine intensity and mouthfeel to suit your personal palate while ensuring the sediment-free brew remains the star of the show.
Flavor additions and serving ideas
Elevating your unfiltered cold brew involves more than just pouring it over ice; it is about enhancing the naturally sweet profile you created. Consider making coffee ice cubes by freezing a small portion of your brew; this prevents your drink from becoming watery as you sip.
For a creamy texture, add a splash of oat milk or almond milk, which complements the low-acidity profile perfectly. If you have a sweet tooth, stir in a simple syrup or agave nectar while the coffee is at room temperature for better integration.
You can also experiment with aromatic additions like a drop of vanilla extract, a dash of cinnamon, or even a sprig of fresh mint for a unique twist.
For a sophisticated touch, serve your cold brew in a chilled glass with a twist of orange peel to highlight any citrus undertones in the beans.
These small adjustments transform a basic homemade beverage into a cafe-quality experience, proving that you do not need expensive filters to enjoy a versatile and delicious cold caffeine treat at home.
Frequently Asked Questions
Can I make cold brew without a paper filter?
Yes, you can make cold brew by using alternative separation methods like a fine-mesh sieve, a French press, or even a clean piece of fabric. The goal is to separate the coarse grounds from the liquid after the steeping process is complete.
How do I use a fine-mesh strainer for cold brew?
After steeping your coffee grounds and water for 12-24 hours, slowly pour the mixture through a fine-mesh metal strainer into a clean jar. You may need to strain it twice to remove smaller sediment and ensure a smoother texture.
Can I use a French press to make filter-free cold brew?
A French press is one of the best tools for this because its built-in metal screen acts as the filter. Simply steep the coffee with the plunger up, then press down slowly when the brewing time is finished to separate the grounds.
What household items can replace a coffee filter?
If you don’t have a strainer, you can use a clean cotton t-shirt, a cheesecloth, or a nut milk bag. Place the fabric over a container and pour the coffee through it to trap the fine particles while letting the liquid pass.
How does the ‘settling’ method work for cold brew?
The settling method involves letting the brewed coffee sit undisturbed for an hour after steeping so the grounds sink to the bottom. You then carefully ladle or pour the clear coffee off the top, leaving the sludge behind.
Will my cold brew be muddy without a paper filter?
Without a paper filter, your cold brew may have more body and some fine sediment at the bottom of the cup. To minimize this, ensure you are using a very coarse grind and avoid stirring the mixture right before you strain it.
Conclusion
Making delicious cold brew without a traditional filter is surprisingly simple when you use household alternatives like French presses, fine-mesh strainers, or cheesecloth. By adjusting your technique and allowing for extra settling time, you can achieve a smooth, cafe-quality concentrate right in your own kitchen. Don’t let a lack of equipment stop you from enjoying this refreshing beverage. Experiment with these creative methods today and discover how easy it is to master DIY coffee.