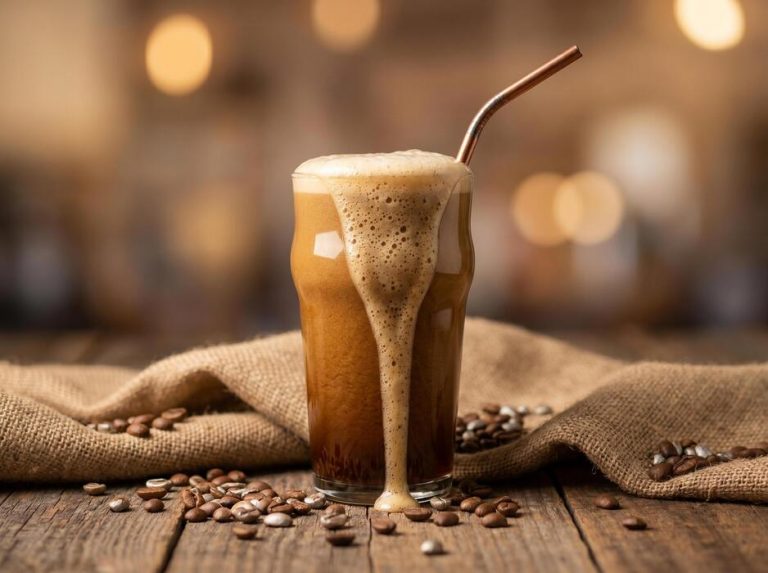
How To Make Starbucks Cold Coffee At Home
Stop spending five dollars every morning when you can master the art of the perfect brew in your own kitchen. Whether you crave a classic iced latte or a velvety cold brew, learning how to make Starbucks cold coffee at home is easier than you think. This guide provides the exact ratios, simple techniques, and secret ingredients needed to replicate your favorite menu items. We will show you how to skip the line and save money without sacrificing that signature taste.
Essential Ingredients for Starbucks Quality Cold Coffee
Choosing the Right Coffee Beans and Roast
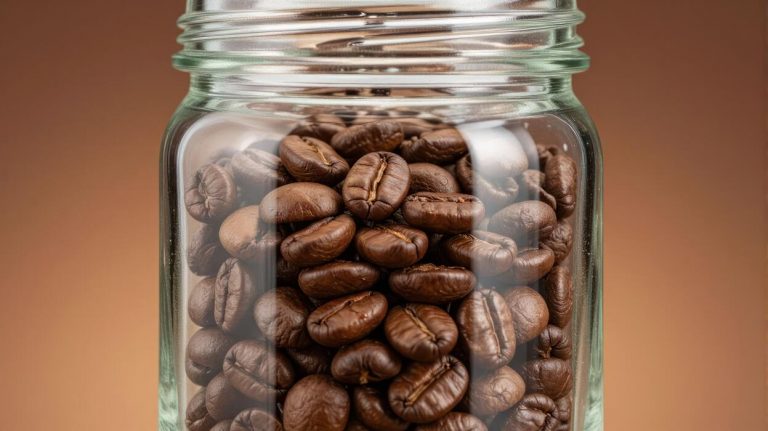
To replicate the signature Starbucks flavor profile, you must start with high-quality, 100% Arabica beans that feature low acidity and high oil content.
For a classic iced coffee experience, select a medium-roast blend like Starbucks Kenya or Guatemala Casi Cielo, which offer crisp citrus notes that remain vibrant even when chilled. If you prefer the velvety smoothness of a cold brew, opt for a dark-roast bean like the Sumatra or Espresso Roast.
These darker profiles provide the deep, chocolatey, and earthy undertones that characterize the Starbucks Cold Brew experience. Crucially, your grind size must match your brewing method; use a coarse grind for cold brew to prevent over-extraction and bitterness, or a medium grind for traditional iced pour-overs.
Freshness is paramount, so try to grind your beans immediately before brewing to ensure the aromatic oils are preserved, providing that professional, coffeehouse-quality aroma and a robust body that doesn’t disappear once diluted by ice.
The Importance of Filtered Water and Ice
One of the most overlooked secrets to Starbucks-quality beverages is the water quality, as coffee is nearly 99% water. Starbucks utilizes a triple-filtration system to remove chlorine and minerals that can distort the delicate flavors of the bean.
At home, you should use a multi-stage water filter pitcher or bottled spring water rather than tap water to ensure a clean, neutral base. Furthermore, the ice you use is just as critical as the liquid. Standard freezer ice often absorbs odors from food, which can ruin your drink’s profile.
Instead, create ice cubes using filtered water to maintain purity. For a professional touch that prevents your drink from becoming watery, consider making coffee ice cubes by freezing leftover brewed coffee. This technique ensures that as the ice melts, your beverage remains bold and flavorful.
Using large, solid cubes rather than crushed ice will also slow down the dilution process, allowing you to savor the rich strength of your homemade cold coffee for longer periods.
Classic Starbucks Syrups and Sweeteners
The final step in achieving that authentic Starbucks taste is mastering the art of customization with the right sweeteners. Most Starbucks cold drinks rely on a simple syrup base, often referred to as ‘Classic Syrup,’ which dissolves instantly in cold liquids without leaving a grainy texture.
You can easily recreate this at home by simmering equal parts sugar and filtered water until clear. To mimic the most popular menu items, keep bottles of Vanilla, Caramel, and Toffee Nut syrups on hand, as these are the pillars of their flavoring system.
When adding these to your glass, remember the standard Starbucks pump ratio: three pumps for a tall, four for a grande, and six for a venti. If you are aiming for a creamy finish, use half-and-half or oat milk to create that iconic marbled effect.
For a truly professional finish, try making a homemade cold foam by frothing non-fat milk with a splash of vanilla syrup using a handheld milk frother until it reaches a thick, cloud-like consistency.
How to Make Starbucks Style Cold Brew at Home
The Perfect Coffee to Water Ratio
To replicate the signature Starbucks flavor profile, the foundation begins with a precise coffee-to-water ratio. The goal is to create a robust concentrate that maintains its integrity when diluted with water, milk, or ice.
For a true professional strength, use a 1:4 ratio by weight, which translates to approximately one cup of coarsely ground coffee for every four cups of filtered water.
It is essential to use coarsely ground beans that resemble the texture of sea salt; using fine grounds will result in a cloudy, overly bitter brew that is difficult to filter.
Choosing a dark roast with chocolatey notes will best mimic the specific flavor notes found in their retail cold brew blend. Always use filtered water to ensure a clean taste, as tap water minerals can interfere with the subtle sweetness that develops during the long extraction.
Measuring by weight rather than volume ensures consistent results every time you brew a fresh batch in your kitchen.
Step-by-Step Steeping Process
Once you have measured your ingredients, combine the coarse grounds and filtered water in a large glass jar or dedicated cold brew maker. Gently stir the mixture with a long spoon to ensure all grounds are fully saturated, but avoid over-agitating the sediment.
Unlike traditional hot coffee, cold brew relies on time rather than heat to extract flavor, which results in 60% less acidity and a much smoother finish. Place the lid on your container and let it steep at room temperature for 12 to 20 hours.
If you prefer a lighter, more floral profile, aim for the shorter end of the timeframe; for a bold, syrupy body similar to the Starbucks standard, allow the full 20 hours. Avoid steeping longer than 24 hours, as this can lead to woody or metallic off-flavors.
Keeping the jar in a cool, dark place away from direct sunlight will maintain a stable temperature throughout the slow extraction process for the best results.
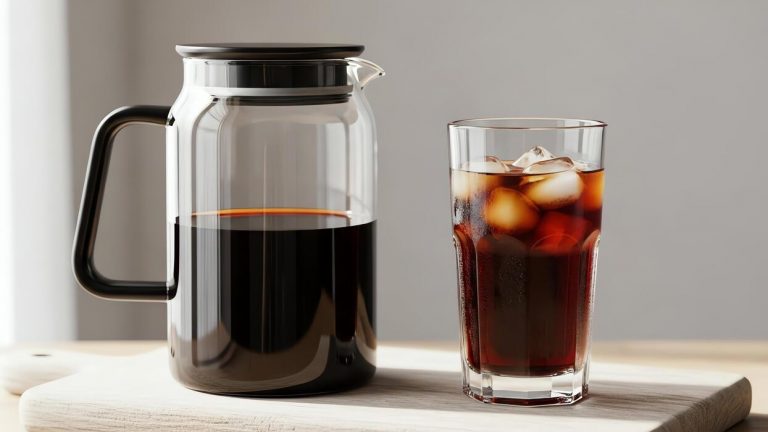
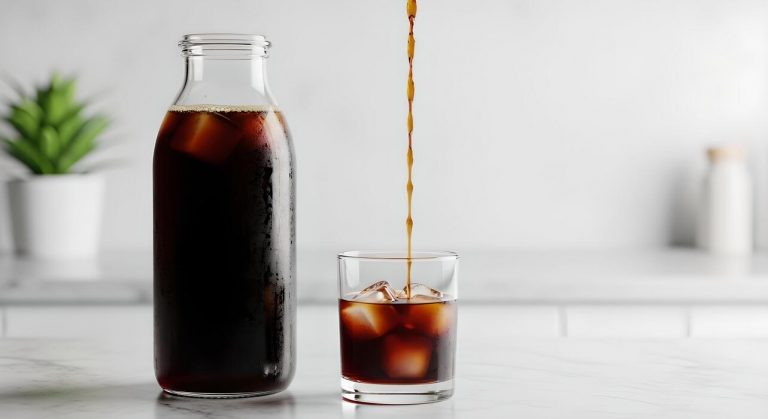
Filtering and Storing Your Concentrate
After the steeping window is complete, the final step is achieving a crystal-clear finish through proper filtration. Slowly pour the mixture through a fine-mesh sieve lined with a paper filter or a clean cheesecloth to remove all silt and fine particles.
Do not squeeze the filter, as this forces bitter tannins into your drink. The resulting liquid is a potent concentrate that should be stored in an airtight glass carafe in the refrigerator.
This concentrate remains fresh and flavorful for up to two weeks, allowing you to enjoy a quick caffeine fix whenever desired. When you are ready to serve, follow the Starbucks method of diluting the concentrate with equal parts water or milk over a tall glass of ice.
You can further customize your beverage by adding a splash of vanilla syrup or a dollop of homemade sweet cream. This professional storage technique ensures that your home-brewed cold coffee tastes just as vibrant and refreshing as the version served by a barista.
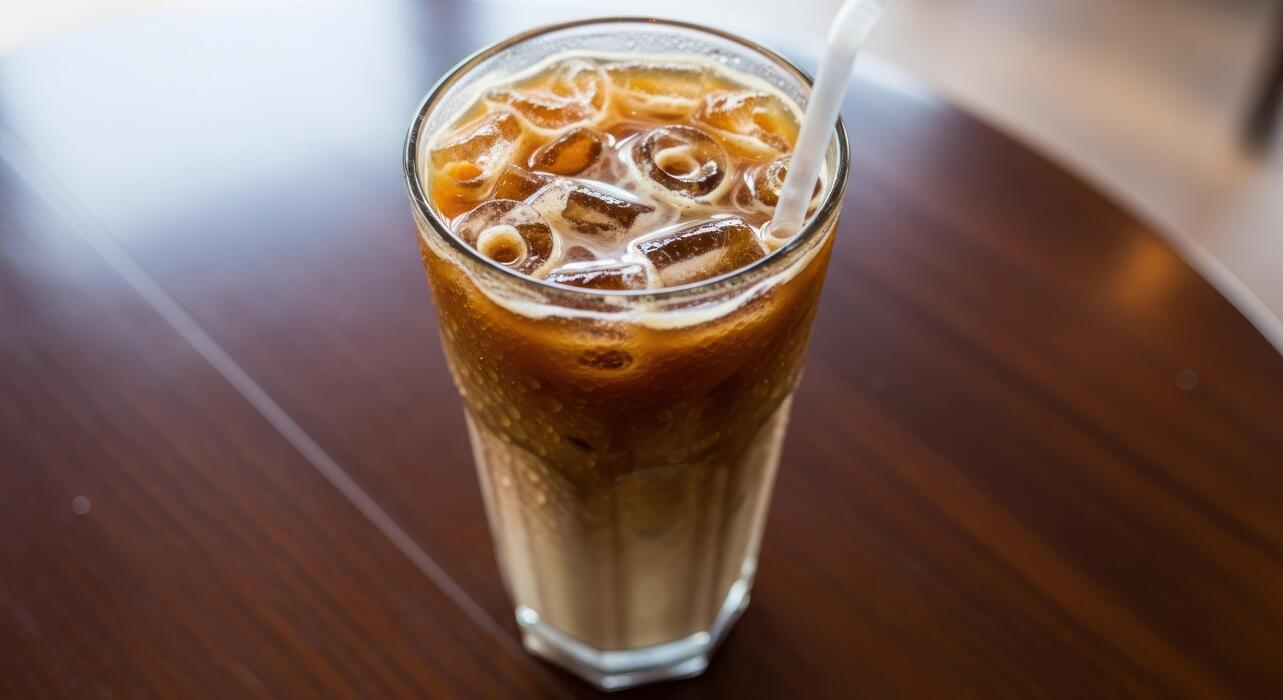
Easy Methods for Starbucks Iced Coffee
The Double-Strength Brewing Technique
To replicate the bold flavor of Starbucks iced coffee at home, you must start with a double-strength brew. Standard coffee recipes often turn weak when poured over ice, but using two tablespoons of ground coffee for every six ounces of water ensures the profile remains robust.
For the most authentic taste, choose a medium-roast bean like Starbucks Kenya or Pike Place, which offers a crisp acidity that shines when chilled. If using a standard drip machine or a Pour-over, simply halve the amount of water you would normally use while keeping the coffee grounds the same.
This concentrated liquid is the secret foundation for a professional-grade drink. By creating a high-density extraction, you allow the natural oils and caffeine levels to stay prominent even after dilution occurs.
This method effectively mimics the commercial brewing process used in stores, providing a rich, satisfying base that can stand up to heavy creamers, sweet syrups, or alternative milks without losing its distinct coffee character.
How to Flash Chill Your Coffee
Flash chilling is the fastest way to enjoy Starbucks-style coffee without waiting hours for a cold brew cycle. Once you have finished your double-strength hot brew, you must immediately introduce it to ice to lock in the aromatics and bright flavor notes.
Fill a large glass or a heat-resistant pitcher to the brim with fresh ice cubes. Pour the hot concentrate directly over the ice; the rapid temperature drop creates a clean and vibrant finish that prevents the bitterness often found in coffee that has cooled slowly at room temperature.
This technique, often called the Japanese Iced Coffee method, is preferred by many baristas for its ability to preserve the delicate nuances of the bean. To enhance the experience, consider adding your sweeteners or syrups while the coffee is still slightly warm to ensure they dissolve completely and evenly.
Once the liquid is cold to the touch, add a few more fresh ice cubes to maintain the temperature as you sip, ensuring a refreshing and professional result every time.
Preventing Watered-Down Iced Coffee
One of the most common complaints when making coffee at home is a diluted, watery mess. To solve this, you can create coffee ice cubes by freezing leftover coffee in a standard silicone tray.
Using these specialized cubes ensures that as they melt, they contribute more flavor to your glass rather than just plain water.
Another pro tip is to pre-chill your glassware in the freezer for ten minutes before serving, which helps maintain the integrity of the drink from the first sip to the last.
If you prefer a creamier texture, try using cold foam or a heavy splash of half-and-half, which adds body and prevents the ice from melting too quickly.
Additionally, always use filtered water for both your brew and your ice cubes to avoid any metallic or chlorine aftertastes that can ruin the premium Starbucks experience.
By controlling the dilution through these smart substitutions, you maintain the perfect balance of strength and sweetness, resulting in a homemade beverage that rivals any cafe order in both appearance and taste.
How to Make Starbucks Vanilla Sweet Cream Cold Foam
Ingredients for the Vanilla Sweet Cream Base
To replicate the signature Starbucks flavor at home, you must start with the correct ratio of three simple ingredients: heavy whipping cream, 2% milk, and vanilla syrup.
The heavy cream provides that luxurious, velvety thickness, while the 2% milk prevents the mixture from becoming too heavy or turning into whipped cream. For a standard batch, combine half a cup of heavy cream with a quarter cup of 2% milk and two tablespoons of high-quality vanilla syrup.
If you want the most authentic taste, look for a vanilla bean syrup or make your own by simmering sugar, water, and vanilla extract until thickened. Ensure all your liquids are thoroughly chilled before mixing, as cold dairy traps air bubbles much more effectively than room-temperature ingredients.
Stir the mixture gently until the syrup is fully incorporated. This base can be stored in an airtight container in the refrigerator for up to five days, allowing you to enjoy a professional-grade cold brew topper every morning without starting from scratch.
Tools for Achieving the Perfect Froth
The secret to that iconic pourable texture lies in the aeration process, and you have several options depending on your kitchen gear. An electric handheld milk frother (often called a wand) is the most popular choice for home baristas because it offers precision control over the density.
Submerge the wand just below the surface for about thirty seconds until the volume doubles and the bubbles become microscopic. If you do not have a wand, a French press is an incredible alternative; simply pour the cream mixture into the carafe and pump the plunger rapidly for twenty seconds.
This method creates a very dense, stable foam that mimics the Starbucks industrial blenders. For those seeking convenience, a high-speed blender on a low setting for ten seconds will also yield excellent results.
Regardless of the tool you choose, the goal is to reach a soft-peak consistency that is thick enough to sit on top of the coffee but fluid enough to slowly cascade down into the dark brew for a beautiful marble effect.
Tips for Layering Foam on Your Drink
Achieving the perfect visual contrast between the dark coffee and the white foam requires a careful pouring technique. Start by filling your glass with cold brew or iced coffee and adding your preferred ice cubes, leaving about an inch of space at the top.
To prevent the foam from sinking immediately, use a spoon to guide the pour or pour the sweet cream very slowly over the back of a spoon held just above the coffee’s surface.
This breaks the fall of the liquid and allows the foam to settle as a distinct, pillowy layer. For an extra flavor boost, you can sprinkle a dash of cinnamon or cocoa powder on top of the foam once it is settled.
Remember that the foam will naturally begin to bleed into the coffee over time, creating those beautiful white streaks known as the ‘bleed’ effect.
If your foam is too thin and sinks instantly, try frothing for a few seconds longer next time to build more structural integrity within the dairy proteins before you attempt the final pour.
Recipes for Popular Starbucks Cold Coffee Drinks

Iced Brown Sugar Oatmilk Shaken Espresso
To replicate this fan favorite at home, start by making a quick brown sugar syrup by simmering equal parts brown sugar and water with a touch of cinnamon. For the coffee base, brew two shots of dark roast espresso or use a highly concentrated cold brew.
Add the hot espresso to a shaker with two tablespoons of your prepared brown sugar syrup and a dash of cinnamon powder. Fill the shaker with plenty of ice and shake vigorously for 20 seconds until the mixture is frothy and chilled.
This aeration process is essential for achieving that signature Starbucks texture. Pour the entire mixture, ice and all, into a tall glass and top it off with a generous splash of creamy oatmilk. The oatmilk provides a nutty richness that balances the spicy sweetness of the cinnamon.
By shaking the espresso instead of just stirring it, you create a light foam that holds the flavors together beautifully for a professional finish.
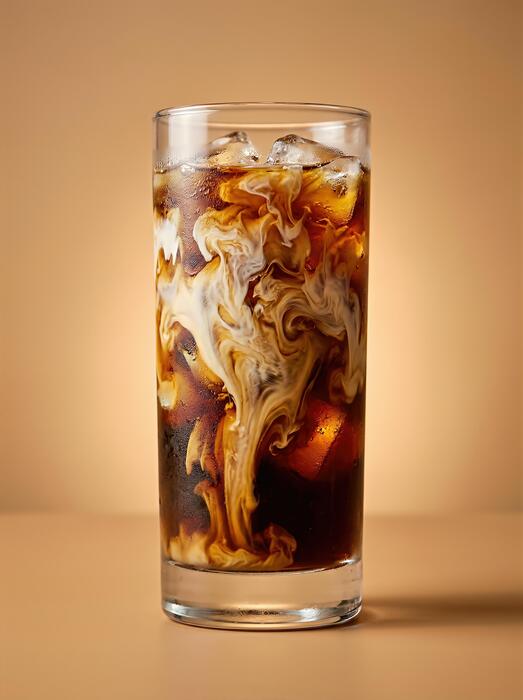
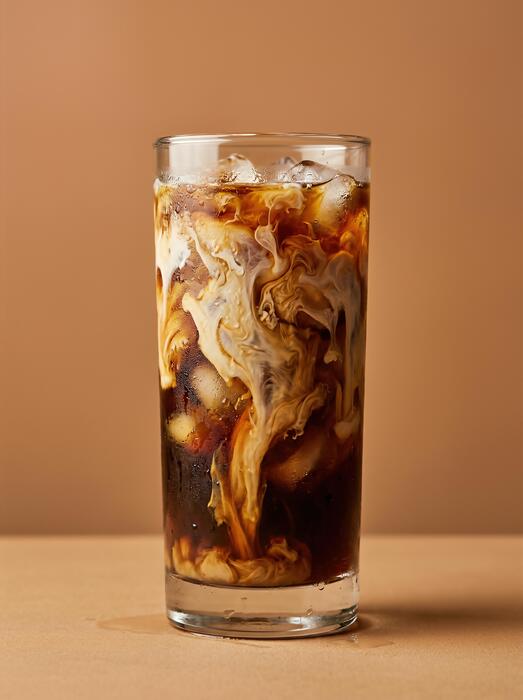
Salted Caramel Cream Cold Brew
The secret to this drink lies in the contrast between the bold coffee and the savory-sweet foam. Begin with a base of smooth cold brew coffee steeped for at least 12 hours to ensure low acidity. Sweeten the coffee directly with two pumps of vanilla syrup.
The highlight of this recipe is the salted caramel cold foam, which you can make by combining heavy cream, 2% milk, caramel syrup, and a pinch of sea salt.
Use a handheld milk frother to whisk these ingredients until they reach a thick, pillowy consistency that sits right on top of the liquid. Pour your sweetened cold brew over ice, leaving about an inch of space at the top of the glass.
Gently pour the salted cream mixture over the back of a spoon to create distinct layers. This technique ensures that you get a bit of salty cream and bold coffee in every sip, perfectly mimicking the expensive boutique cafe experience without the high price tag.
Classic Iced Caramel Macchiato
Unlike a traditional latte, a macchiato is layered with the coffee poured over the milk. To start, add a tablespoon of vanilla syrup to the bottom of a large glass, then fill it halfway with ice.
Pour in one cup of cold milk of your choice, leaving enough room for the espresso shots. Carefully brew two shots of espresso and pour them slowly over the center of the milk; this creates the iconic marbled effect as the dark coffee streaks through the white milk.
The final and most important step is the buttery caramel drizzle. Use a high-quality caramel sauce to create a crosshatch pattern over the top of the ice and foam.
Because the espresso is poured last, it stays bold and intense at the top while gradually blending with the sweet vanilla milk as you drink. This method ensures that your homemade version looks just as beautiful as the drink handed to you at the drive-thru window while tasting remarkably fresh.
Best Equipment for Making Cold Coffee at Home
Top Rated Cold Brew Makers
To achieve that signature smooth and low-acid profile found in Starbucks beverages, investing in a high-quality cold brew maker is essential.
The Toddy Cold Brew System is a gold standard for home baristas, utilizing a unique felt filtration process that removes bitter oils and acids while preserving the rich coffee concentrate.
Alternatively, the OXO Good Grips Cold Brew Coffee Maker offers an automated rainmaker head that evenly distributes water over the grounds for optimal extraction. When preparing your brew, always use a coarse grind setting to prevent cloudiness and ensure a clean finish.
Steep your grounds for exactly 12 to 24 hours at room temperature before refrigerating the concentrate.
This method allows you to create a large batch of coffee base that stays fresh for up to two weeks, making it incredibly convenient to whip up a professional-grade iced latte or nitro-style coffee whenever the craving strikes without needing to leave your kitchen.
Affordable Milk Frothers and Blenders
Recreating the iconic Starbucks cold foam requires the right tools to aerate your choice of milk into a velvety cloud. A handheld milk frother is an inexpensive yet powerful device that can transform skim milk or oat milk into thick foam in under thirty seconds.
For those who prefer a more automated experience, the Aeroccino or similar electric frothers offer a dedicated cold stir setting that creates stiff peaks without applying heat.
If you are a fan of blended beverages like Frappuccinos, a high-speed blender is non-negotiable to ensure the ice is pulverized into a smooth, slushy consistency rather than leaving chunky fragments.
To get the best results, always froth your milk while it is chilled directly from the refrigerator, and consider adding a splash of vanilla syrup or heavy cream to mimic the specific density and sweetness of the professional versions.
These tools are the secret to achieving that luxurious mouthfeel and beautiful layered aesthetic at home.
Must-Have Tumblers and Reusable Straws
The final step in mastering the Starbucks experience at home is the presentation and temperature maintenance of your drink.
Using a double-walled insulated tumbler is vital because it prevents condensation from forming on the outside and keeps your ice from melting prematurely, which would otherwise dilute the flavor of your coffee. Look for stainless steel options or high-quality BPA-free acrylic cups that mirror the classic cafe design.
To stay eco-friendly while enjoying the authentic sipping experience, pair your vessel with wide-diameter reusable straws, which are specifically designed to handle thicker cold foams and blended ice drinks without clogging.
Many enthusiasts prefer silicone or glass straws because they do not alter the taste of the coffee and are easy to sanitize in the dishwasher.
Having the right hardware not only makes your homemade beverage look Instagram-ready but also ensures that the very last sip is just as cold and refreshing as the first one you took after brewing.
Tips for Saving Money on Your Coffee Habit
Comparing Home Costs vs. Starbucks Prices
Transitioning from daily retail visits to home brewing offers a staggering financial advantage that most enthusiasts overlook. When you purchase a standard cold brew at a cafe, you are paying for labor, overhead, and a significant brand markup, often totaling over five dollars per serving.
By contrast, investing in a high-quality bag of Starbucks Pike Place or Siren’s Blend beans allows you to recreate that signature flavor profile at a fraction of the cost.
A single twelve-ounce bag of coffee can produce nearly ten large servings of concentrated cold brew, bringing your cost per cup down to roughly sixty cents. This shift saves the average consumer over one thousand dollars annually.
To maximize these savings, buy whole beans in bulk and grind them yourself to ensure the oils remain fresh for optimal extraction.
By eliminating the daily commute and tip, you effectively reclaim both your time and your budget while enjoying a custom beverage tailored exactly to your personal strength preferences and sweetness levels.
How to Batch Brew for the Whole Week
Efficiency is the key to maintaining a consistent home coffee habit without the morning stress. To replicate the Starbucks experience, utilize a large glass carafe or a specialized cold brew maker to batch brew a concentrated base every Sunday evening.
Use a coarse grind and a water-to-coffee ratio of four-to-one; let this steep in the refrigerator for eighteen to twenty-four hours to pull out the smooth, chocolatey notes without the bitterness found in hot-brewed coffee.
Once the steeping process is complete, filter the concentrate through a fine-mesh sieve or a paper filter to remove all sediment.
This potent coffee concentrate stays fresh in an airtight container for up to seven days, allowing you to simply pour and dilute with water or milk throughout the busy work week.
By preparing your caffeine supply in advance, you remove the temptation to visit a drive-thru when you are running late, ensuring you always have a professional-grade cold coffee ready to be enjoyed immediately upon waking up.
Creative Ways to Use Coffee Ice Cubes
One of the most common complaints about homemade iced coffee is the watery consistency that occurs as ice melts. You can solve this dilemma and enhance your drink’s flavor by freezing leftover coffee into ice cubes.
Instead of pouring that last bit of the pot down the drain, fill a silicone ice tray with cooled coffee or even a mixture of coffee and a splash of vanilla syrup.
As these cubes melt in your glass, they release more caffeine and flavor rather than diluting your beverage, maintaining that bold Starbucks-style strength until the very last sip.
For a more indulgent treat, try freezing coffee cubes made with a hint of cream or coconut milk to create a beautiful marbling effect as they dissolve. This simple hack ensures that your drink remains cold without sacrificing the integrity of the brew.
Furthermore, you can toss these frozen cubes into a blender with a bit of milk to create a DIY Frappuccino-style blended beverage that rivals any expensive menu item from the local coffee shop.
Frequently Asked Questions
What is the best coffee to use for a Starbucks-style cold brew?
For an authentic taste, use a dark roast like Starbucks Cold Brew Pitcher Packs or their Kenya or Guatemala beans. Ensure you use a coarse grind to achieve a smooth, low-acid flavor profile during the long steeping process.
How do I make Starbucks sweet cream cold foam at home?
Whisk together 2 tablespoons of heavy cream, 1 tablespoon of 2% milk, and 1 tablespoon of vanilla syrup until frothy but not stiff. Pour this mixture gently over your iced coffee to replicate the signature Starbucks texture.
What is the ratio for making DIY Starbucks iced coffee?
Brew your coffee at double strength by using two tablespoons of ground coffee for every six ounces of water. This prevents the coffee from tasting watered down once you pour it over a full glass of ice.
How long should I steep cold brew to match the Starbucks flavor?
To mimic the Starbucks profile, steep your coarse coffee grounds in filtered water for 12 to 20 hours at room temperature or in the fridge. Longer steeping times result in a bolder, more caffeinated concentrate.
Which syrups does Starbucks use for their cold drinks?
Starbucks primarily uses Fontana brand syrups, which are available for purchase online. You can easily recreate classics like the Vanilla Sweet Cream Cold Brew or Caramel Macchiato by using vanilla or caramel syrups and matching sauces.
Can I make a Starbucks Iced Shaken Espresso at home?
Yes, combine two shots of espresso, your choice of syrup, and ice in a mason jar or cocktail shaker. Shake vigorously for 10 seconds until frothy, pour into a glass, and top with a splash of milk.
Conclusion
Mastering Starbucks-style cold coffee at home is both simple and rewarding. By selecting high-quality beans, experimenting with cold brew techniques, and using your favorite syrups, you can recreate that signature cafe experience in your own kitchen. Not only will you save money, but you also have the freedom to customize every cup to your liking. So, grab your ingredients and start brewing today. You will be amazed at how easy it is to enjoy professional results.