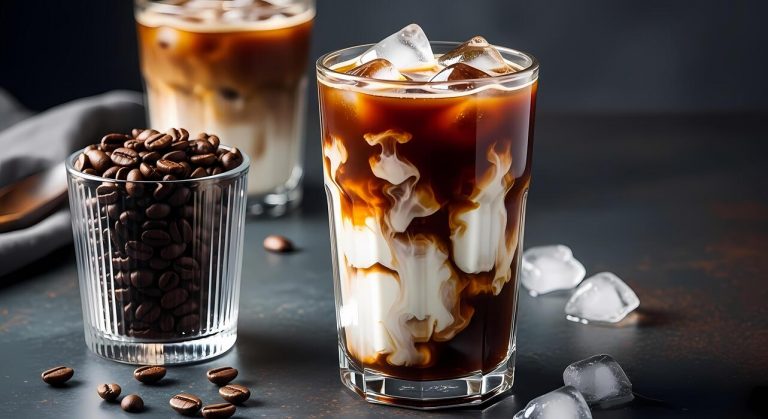
How To Make Quick Cold Brew
How to make quick cold brew is the question when you crave that smooth, low-acid coffee but don’t have 12–24 hours to wait. The core problem is speed without sacrificing flavor. You’re in the right place: the solution uses a finer grind and room-temperature water, steeping for just 5–10 minutes, then filtering. It’s not traditional, but it delivers a concentrated, bold brew fast—perfect for impatient coffee lovers.
What Is Quick Cold Brew Coffee?
Quick cold brew vs. traditional cold brew
Traditional cold brew requires 12–24 hours of steeping coarse coffee grounds in cold water, producing a smooth, low-acid concentrate. Quick cold brew drastically reduces that time to 5–30 minutes by using techniques like fine grinding, hot bloom, or agitation.
The trade-off is a slightly brighter flavor and less body, but the convenience is unmatched. For fastest results, steep finely ground coffee in room-temperature water for 5 minutes, then shake vigorously every minute. This extracts flavor rapidly without heat-induced bitterness.
Alternatively, use a hot bloom method: pour a small amount of hot water (just off boil) over grounds, let sit 30 seconds, then add cold water and steep 5–10 minutes. The hot bloom kickstarts extraction while cold water prevents over-extraction.
Compared to traditional cold brew, quick versions yield a lighter, tea-like coffee—perfect for iced coffee on demand. Adjust steeping time to taste: longer for stronger, shorter for milder. Always filter through a fine mesh or paper filter for clarity.
Why make cold brew in under 30 minutes?
Making cold brew in under 30 minutes solves the time crunch of traditional methods without sacrificing the smooth, low-acid profile you love. This speed is ideal for last-minute cravings, unexpected guests, or busy mornings when you want iced coffee but forgot to prep overnight.
Quick cold brew also preserves delicate flavor notes that can fade during long steeps, especially with light roasts. The fast process reduces oxidation, keeping your brew fresher for immediate use. Additionally, it’s a practical experiment to fine-tune your perfect ratio: use 1:4 coffee-to-water for concentrate or 1:8 for ready-to-drink.
The short steeping time lets you adjust grind size, water temperature, or agitation method without committing to a full day’s wait. For example, a 5-minute shake method yields a mild, refreshing cup, while a 15-minute hot bloom creates a richer base.
This flexibility empowers you to customize strength and flavor on the fly, making cold brew an accessible daily habit rather than a weekend project.
Key ingredients for fast cold brew
The essential ingredients for quick cold brew are high-quality coffee beans, cold or room-temperature water, and optional agitation tools like a jar or shaker. Start with freshly ground coffee—use a medium-fine grind (like table salt) for faster extraction, but avoid powdery fine grinds that clog filters.
A 1:4 coffee-to-water ratio (by weight) is standard for concentrate; use 1:8 for ready-to-drink. For the hot bloom method, you’ll need a small amount of hot water (just off boil) to bloom the grounds for 30 seconds before adding cold water. Filtered water improves taste by removing chlorine.
Optional ingredients include sweeteners (simple syrup, honey) or flavorings (vanilla extract, cinnamon) added after brewing. For the fastest method, use a French press or a jar with a tight lid to shake vigorously for 1–2 minutes. A fine-mesh strainer or paper filter ensures clarity.
Pro tip: chill your water beforehand to slow extraction slightly, preventing bitterness from fine grounds. Adjust ratios to your taste—stronger for milk, lighter for sipping neat.
How to Make Quick Cold Brew in 5 Minutes
Using a French press for instant cold brew
Your French press is the fastest tool for making cold brew without any special equipment. Start by adding coarsely ground coffee to the carafe at a ratio of 1 part coffee to 4 parts cold water. For a standard 8-cup press, use about 1 cup of grounds.
Pour in the cold water, then gently stir to ensure all grounds are saturated. Instead of waiting hours, press the plunger down immediately after stirring—this creates a quick immersion brew. Let the pressed coffee sit for 5 minutes to allow the grounds to settle fully.
Pour the liquid through a fine-mesh strainer or paper filter to remove any fine sediment. The result is a smooth, low-acid concentrate that you can dilute with water or milk. This method works because the French press mesh traps most grounds while the quick steep extracts flavor without bitterness.
Serve over ice immediately for a refreshing drink.
The blender method for fast extraction
For a truly 5-minute cold brew, use a blender to mechanically extract coffee flavors. Add 1/2 cup of coarsely ground coffee and 2 cups of cold water to your blender. Blend on high for 30 seconds to break down the coffee particles and accelerate extraction.
The agitation forces water into the grounds, releasing oils and flavor quickly. After blending, pour the mixture through a nut milk bag, cheesecloth, or fine sieve into a pitcher. This filters out the sludge, leaving a clean, robust brew. For extra clarity, strain twice.
The resulting cold brew is stronger than traditional methods but smooth and ready to drink. Dilute with equal parts water or milk if needed. This technique is ideal when you’re short on time but crave the rich taste of cold brew. Add ice and enjoy immediately—no waiting required.
Stovetop cold brew concentrate in minutes
The stovetop method delivers a concentrated cold brew in just 5 minutes using heat to speed extraction. Combine 1 cup of medium-ground coffee with 2 cups of cold water in a small saucepan. Bring the mixture to a gentle simmer over medium heat, stirring occasionally. Do not boil—boiling extracts bitterness.
After 2 minutes of simmering, remove from heat and let it steep for 3 minutes off the stove. The heat accelerates the infusion, pulling out deep, chocolatey notes without the acidity of hot brewing. Strain the liquid through a coffee filter or fine sieve into a jar.
This yields a double-strength concentrate that you can store in the fridge for up to a week. To serve, mix 1 part concentrate with 2 parts cold water or milk over ice. This method is perfect when you want cold brew flavor fast, using standard kitchen tools.
Best Coffee Beans for Quick Cold Brew
Coarse vs. fine grind: what works faster?
For quick cold brew, coarse grind is your best friend. While fine grind extracts flavor faster in hot water, it can lead to over-extraction and bitterness in cold water due to its larger surface area.
Coarse grind, similar to sea salt, allows water to flow through evenly, preventing clogging and ensuring a smooth, clean taste even with a shorter steep time. To speed up the process, use a coarse grind and steep for 8–12 hours instead of the usual 12–24.
If you’re in a rush, try a medium-coarse grind and steep for 6–8 hours, but monitor closely to avoid bitterness. Always use a burr grinder for consistent particle size—blade grinders create fines that muddy the flavor.
Remember, the goal is to extract quickly without harshness, so coarse grind is the reliable shortcut for a balanced, quick cold brew.
Top bean varieties for bold flavor
For quick cold brew, choose single-origin beans with bold, chocolatey, or nutty profiles that shine even with shorter steep times. Brazilian Santos offers a smooth, low-acid body with hints of cocoa, ideal for a fast extraction. Sumatra Mandheling delivers earthy, spicy notes that remain robust without bitterness.
Colombian Supremo provides a balanced, caramel sweetness that complements quick brewing. Avoid light roasts—they tend to be acidic and underdeveloped in cold brew. Instead, opt for medium-dark to dark roasts; they have lower acidity and more soluble compounds, extracting faster and richer.
Blends labeled ‘cold brew’ often combine beans for a consistent, bold flavor. For a twist, try Ethiopian Yirgacheffe if you prefer fruity notes, but steep it slightly longer to avoid sourness. Ultimately, the best beans are those that deliver full flavor without extra time, so stick with low-acid, high-body varieties.
How to store beans for quick brewing
Proper storage ensures your beans stay fresh for quick cold brew. Store whole beans in an airtight container away from light, heat, and moisture—like a cool, dark cupboard. Avoid the fridge; condensation can ruin flavor. For maximum freshness, buy small batches and use within two weeks of roasting.
If you grind ahead, store ground coffee in a vacuum-sealed bag in the freezer for up to a month, but only thaw once to prevent moisture damage. For quick brewing, pre-portion beans into daily doses using small jars or bags. This saves time and preserves aroma.
Never store beans near strong odors (spices, onions) as they absorb smells. A one-way valve bag is ideal for whole beans; squeeze out air after each use. By keeping beans fresh, you ensure consistent extraction and avoid stale, flat flavors, making your quick cold brew taste freshly made every time.
Tips for Speeding Up the Cold Brew Process
Using hot water to accelerate extraction
For a significantly faster cold brew, start with hot water instead of cold. This method, often called ‘hot bloom cold brew,’ uses the principle that heat accelerates extraction. Begin by pouring just enough hot (not boiling) water—around 195°F—over your coarsely ground coffee to saturate it completely.
Let it bloom for 60 seconds. Then, immediately add the remaining cold or room-temperature water. This initial heat shock rapidly dissolves flavorful oils and caffeine, reducing the total steep time from 12-24 hours to just 2-4 hours at room temperature or overnight in the fridge.
The key is to use a coarse grind to prevent over-extraction and bitterness. After steeping, strain as usual. This technique delivers a smooth, concentrated brew with a flavor profile very close to traditional cold brew, but in a fraction of the time.
Experiment with the hot water ratio—starting with just 20% of the total water as hot is a safe bet to avoid a burnt taste.
Shaking or stirring for faster infusion
Agitation is your secret weapon for rapid cold brew. By physically moving the coffee grounds and water, you break down the concentration gradient that slows extraction. Instead of letting the mixture sit passively, stir vigorously every 30 minutes for the first 2 hours of steeping.
For an even faster method, use a sealed mason jar and shake it hard for 30 seconds every hour. This constant motion forces water into the coffee grounds’ porous surfaces, dramatically speeding up the release of soluble compounds.
You can achieve a full-flavored cold brew in as little as 4-6 hours with consistent agitation, compared to 12+ hours without. For best results, use a fine-mesh strainer or cheesecloth to filter, as shaking can create more fines.
This technique works exceptionally well with a medium-coarse grind, which balances extraction speed with clarity. Remember to taste after 4 hours—once it reaches your desired strength, strain immediately to prevent bitterness.
Cold brew in a mason jar: time-saving hacks
A simple mason jar is the ultimate tool for quick cold brew, thanks to its versatility and ease of use. Start by adding coarsely ground coffee and cool water at a 1:4 ratio (coffee to water) directly into the jar.
Seal the lid tightly and shake vigorously for 30 seconds—this initial agitation jumpstarts extraction. Then, employ the ‘flash steep’ hack: after shaking, place the sealed jar in a warm water bath (around 100°F) for 1 hour, then move it to the fridge for another 2 hours.
This temperature swing accelerates flavor release without the bitterness of full heat. For an even faster option, use a French press filter inside the jar: steep for 3-4 hours with occasional shaking, then press the built-in plunger to separate grounds instantly—no messy straining.
Another hack is to grind slightly finer than usual (but not too fine) to increase surface area, cutting steep time by 30%. Always strain through a coffee filter after steeping for a clean, grit-free cup.
Quick Cold Brew Ratios and Recipes
Standard ratio for fast concentrate
For a quick cold brew concentrate, use a 1:4 coffee-to-water ratio by weight. This means for every 1 gram of coarsely ground coffee, add 4 grams (or milliliters) of cold, filtered water.
This ratio is ideal for a fast steep of 12 to 16 hours at room temperature or in the refrigerator. A longer steep can increase bitterness, so stick to the shorter end of the range for a smoother concentrate.
To scale up, use 100 grams of coffee to 400 grams of water for a small batch, or 250 grams to 1000 grams for a larger one. Grind your beans to a coarse consistency, similar to breadcrumbs, to prevent over-extraction.
After steeping, strain through a fine-mesh sieve lined with a coffee filter or a nut milk bag. This concentrate is strong and versatile, perfect for mixing with water or milk.
Store it in an airtight container in the fridge for up to two weeks, but for best flavor, use within 7 days.
Dilution tips for ready-to-drink cold brew
To turn your concentrate into a ready-to-drink cold brew, dilute it with equal parts water or milk, starting with a 1:1 ratio. For example, mix ½ cup of concentrate with ½ cup of cold water.
Adjust based on your taste preference: for a stronger brew, use a 1:0.75 ratio (more concentrate), or for a milder flavor, try 1:1.5 (more water). Always use cold liquid to preserve the smooth, low-acid profile. For a creamy texture, substitute water with whole milk, oat milk, or almond milk.
Stir gently to combine, then serve over ice. If you prefer a less intense caffeine kick, dilute further with ice cubes as they melt. To avoid dilution, use coffee ice cubes made from leftover concentrate.
Store diluted cold brew in the fridge for up to 5 days, but it’s best fresh. Experiment with ratios to find your perfect balance—1:1 is a classic starting point that highlights the coffee’s natural sweetness without bitterness.
Flavor add-ins for quick batches
Enhance your quick cold brew with simple flavor add-ins during steeping or after dilution. For a vanilla twist, add 1 teaspoon of vanilla extract or a split vanilla bean to the coffee grounds before adding water.
For spiced notes, mix in ½ teaspoon of cinnamon, a pinch of nutmeg, or a few whole cloves. For a chocolatey depth, stir in 1 tablespoon of cocoa powder or a dash of unsweetened chocolate shavings.
After brewing, sweeten with simple syrup (equal parts sugar and water dissolved) or honey—add 1-2 tablespoons per cup of diluted cold brew. For a mocha flavor, blend in 1 tablespoon of chocolate syrup and a splash of milk.
Citrus lovers can add a strip of orange zest to the grounds for a bright finish. For a salted caramel touch, mix 1 tablespoon of caramel sauce and a pinch of sea salt into your glass. Always stir well and taste as you go, starting with small amounts.
These add-ins let you customize your quick batch without extra effort—perfect for morning routines or entertaining guests.
How to Filter Quick Cold Brew Without Mess
Using a fine-mesh strainer and cheesecloth
For a quick and mess-free cold brew, combine a fine-mesh strainer with cheesecloth or a nut milk bag. First, line your strainer with a double layer of cheesecloth and place it over a large pitcher or carafe.
After steeping your coarse-ground coffee in cold water for 12-24 hours, pour the mixture through the lined strainer slowly. The cheesecloth catches fine sediment that a mesh alone misses, while the strainer provides structure to prevent spills. Rinse the cheesecloth immediately after use to avoid stains and odors.
For even faster cleanup, use a reusable nut milk bag—just place it inside the brewing container, add coffee and water, then lift it out when done. This method reduces mess because the grounds stay contained.
Pro tip: Wet the cheesecloth slightly before lining the strainer to prevent it from shifting during pouring. This approach balances speed and clarity, yielding a smooth concentrate without cloudy residue or lingering grit.
Paper filter vs. reusable filter for speed
When speed is a priority, paper filters win for quick cleanup, while reusable filters save time on prep. Paper filters (like pour-over or Chemex filters) are disposable, so you simply toss them with the grounds after a single use.
To use, place a paper filter in a funnel or strainer, pour the cold brew through it, and discard everything—no scrubbing required. This is ideal for busy mornings when you want minimal post-brew effort.
However, reusable metal or cloth filters are faster for the initial setup because you don’t need to fit or wet a paper filter each time. Reusable filters can be rinsed immediately after pouring, but they require occasional deep cleaning to avoid oil buildup.
For the best of both worlds, start with a reusable filter for daily use and keep paper filters on hand for hassle-free disposal when you’re short on time. Key insight: Paper filters produce a cleaner cup but generate waste, while reusable options are eco-friendly but need maintenance.
Choose based on your priority: speed of cleanup or speed of preparation.
No-filter methods for lazy days
For days when even rinsing a filter feels like too much work, no-filter methods simplify cold brew to the extreme.
The easiest trick is the scoop-and-settle technique: brew coarse grounds directly in a jar, let them sink to the bottom after steeping, then carefully pour off the clear liquid from the top using a ladle or spouted container.
This works best with very coarse grounds and a narrow jar to minimize disturbance. Another method is the immersion blender trick—after steeping, blend the mixture briefly, then let it rest for 10 minutes; the grounds clump and sink faster, allowing you to decant the smooth liquid above.
For ultimate laziness, brew in a French press and simply press the plunger down—no pouring through extra filters needed. Warning: These methods may leave some fine sediment, but they cut cleanup to seconds. Just swirl the remaining grounds into the trash or compost.
Pro hack: Use a wide-mouth jar for easier scooping and less mess when discarding grounds. Perfect for when you want cold brew without the chore of filtering.
Common Mistakes When Making Quick Cold Brew
Over-extraction from too-hot water
When rushing cold brew, it’s tempting to use hot water to speed extraction, but this often backfires with bitter, harsh results. Hot water rapidly dissolves tannins and acids, creating over-extraction that tastes burnt or astringent.
For true quick cold brew, stick with room-temperature or cool water (60-70°F) and use a concentrated ratio like 1:4 coffee to water. Agitate the mixture by stirring vigorously for 30 seconds to jumpstart extraction without heat.
If you must use warm water, keep it below 120°F and steep for only 10-15 minutes, then dilute with ice. Always taste-test after 20 minutes to avoid bitterness. The key is gentle, consistent agitation over high temperatures—a few shakes every 5 minutes can dramatically improve speed without sacrificing smoothness.
Remember, hot water shortcuts ruin the signature low-acid, sweet profile of cold brew.
Grind size errors that slow down brewing
Many home brewers use a coarse grind for traditional cold brew, but this drastically slows extraction when you’re in a hurry. A medium-fine grind (like table salt) increases surface area, allowing water to penetrate grounds faster in quick methods.
Avoid too fine a grind, which leads to sludge and clogged filters—aim for a consistent texture that feels slightly gritty between your fingers. For a 20-minute steep, use a burr grinder set between drip and fine settings.
If using pre-ground coffee, choose a medium grind and steep for 30-40 minutes instead. Always stir grounds thoroughly after adding water to ensure even saturation. A quick tip: shake the jar every 5 minutes to redistribute particles and prevent channeling.
This grind adjustment alone can cut brew time by half while maintaining clarity and flavor balance.
Skipping the bloom step
In the rush to make quick cold brew, most people skip blooming, but this step is crucial for flavor extraction. Blooming releases trapped carbon dioxide from freshly ground coffee, allowing water to fully saturate the grounds. Without it, you get uneven extraction and a flat, underdeveloped taste.
For quick cold brew, pour a small amount of cool water (just enough to wet the grounds) over your coffee and let it sit for 2-3 minutes. Gently stir to ensure all particles are moistened—this primes the grounds for rapid extraction. After blooming, add the remaining water and agitate again.
This simple step can boost extraction efficiency by up to 20% in the first 15 minutes. Don’t skip it even when pressed for time; it’s the difference between a muddy, weak brew and a crisp, rich concentrate. Use a scale to measure coffee and water precisely for consistent results.
Frequently Asked Questions
What is the quickest method to make cold brew coffee?
The quickest method is to use a French press: coarsely grind 1 cup of coffee, add 4 cups of cold water, stir, and steep at room temperature for 12-15 minutes. Then press the plunger down and serve over ice for an instant cold brew concentrate.
Can I make cold brew in under 30 minutes?
Yes, you can make a ‘flash brew’ by pouring hot water over coarsely ground coffee in a French press, letting it steep for 2-3 minutes, then adding an equal amount of cold water and ice. Press and serve immediately for a quick, less acidic cold brew.
What coffee-to-water ratio should I use for quick cold brew?
For a strong concentrate, use a 1:4 ratio (e.g., 1 cup coffee to 4 cups water). For a milder brew, use 1:8. Adjust based on your taste, but a coarser grind helps avoid bitterness in quick methods.
Do I need special equipment for quick cold brew?
No, a French press, mason jar with a fine mesh strainer, or even a clean sock can work. For the fastest results, a French press is ideal because it separates grounds quickly without needing a separate filter.
How long should I steep for a quick cold brew?
For a quick cold brew, steep for 12-15 minutes at room temperature if using the French press method. For a slightly stronger flavor, you can steep for up to 30 minutes, but longer than that may lead to bitterness without proper refrigeration.
Can I use hot water to speed up the cold brew process?
Yes, using hot water initially (just off the boil) for a 2-3 minute steep, then diluting with cold water and ice, creates a ‘flash brew’ that mimics cold brew’s smoothness in minutes. This method reduces acidity and bitterness.
Why does my quick cold brew taste bitter?
Bitterness often comes from over-extraction due to a grind that’s too fine or steeping too long. Use a coarse grind, limit steeping to 15 minutes max for quick methods, and ensure your water is cold or room temperature to avoid over-extraction.
How do I serve quick cold brew for the best flavor?
Serve immediately over ice with milk or water to dilute the concentrate to your taste. For a creamy texture, add a splash of oat milk or simple syrup. Avoid letting it sit too long after brewing to maintain freshness.
Conclusion
Making quick cold brew is simple: steep coarsely ground coffee in room-temperature water for just 10-15 minutes, then strain through a fine sieve or paper filter. The result is a smooth, low-acid concentrate that’s ready to enjoy over ice. Dilute with water or milk to taste. Don’t let the traditional 12-hour method hold you back—this fast technique delivers delicious results in a fraction of the time. Give it a try and elevate your iced coffee game today.