How To Make Cold Drip Coffee At Home
How to make cold drip coffee at home is a question that often leads to confusion over equipment and timing. You want that smooth, concentrated brew without a pricey machine, right? You’re in the right place. This method uses a simple tower setup—ice water slowly dripping over coffee grounds for 6–12 hours. The result is a rich, low-acid concentrate. Let’s cut through the noise and get you brewing perfectly.
What Is Cold Drip Coffee and How Is It Different
Cold drip vs cold brew: key differences explained
To make cold drip coffee at home, start by understanding its distinction from cold brew. Cold brew involves steeping coarse coffee grounds in cold water for 12-24 hours, then filtering. Cold drip, however, uses a slow, controlled drip of cold water through a coffee bed, typically over 3-12 hours.
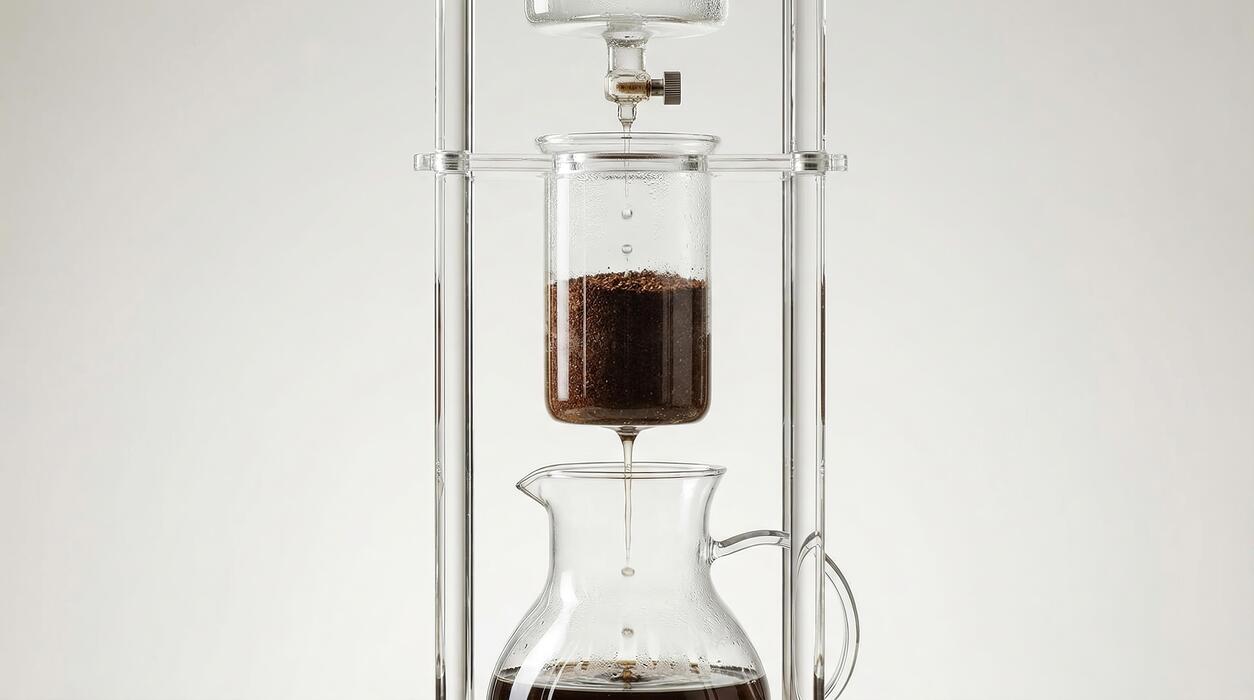
The key equipment difference is a cold drip tower (like a Yama or Hario) with three chambers: a water reservoir, a coffee grounds chamber, and a collection carafe. For cold brew, you just need a jar and a filter.
The grind size also differs: cold drip uses a medium-fine grind (similar to pour-over), while cold brew uses a very coarse grind. The drip rate is critical—aim for 40-60 drops per minute to extract flavors without bitterness.
This method produces a cleaner, more concentrated brew that can be enjoyed straight or diluted, unlike cold brew which is often served over ice.
Why cold drip coffee tastes smoother and less acidic
When you make cold drip coffee at home, you’ll notice it tastes remarkably smooth and low in acidity compared to other methods.
This is because the cold water drips slowly through the coffee grounds at a rate of about one drop per second, avoiding the high temperatures that extract harsh acids and bitter compounds.
The extraction process is gentle and prolonged, pulling out soluble oils and flavors while leaving behind chlorogenic acid and quinic acid—the culprits behind sour and bitter notes. Additionally, the paper filter in most cold drip setups removes fine particles and oils that can cause bitterness.
The result is a silky, mellow cup with a sweet, chocolatey profile that’s easy on the stomach. To maximize smoothness, use light to medium roast beans and filtered water at 40-50°F (4-10°C). Serve it over ice or with milk for a refreshing, non-acidic coffee experience.
The science behind slow water dripping through coffee grounds
To master making cold drip coffee at home, understand the science of slow water dripping. The process relies on gravity and controlled flow—water droplets fall from the reservoir onto a diffuser (often a paper filter or metal screen) that spreads them evenly over the coffee bed.
The drip rate (40-60 drops per minute) ensures steady saturation without channeling, where water bypasses grounds. As water seeps through, it extracts soluble compounds like caffeine, sugars, and aromatic oils at a low temperature (40-50°F), which slows down the extraction of bitter tannins and acids.
The contact time (3-12 hours) allows for complete extraction without over-extraction, yielding a balanced, full-bodied brew. The coffee bed depth (about 2-3 inches) and grind consistency (medium-fine) create a uniform flow path.
For best results, pre-wet the grounds with a few drops to start the extraction evenly, and adjust the drip rate to your taste preference.
Essential Equipment for Making Cold Drip Coffee at Home
Best cold drip coffee makers for beginners
For your first cold drip setup, choose a maker that balances simplicity with control. The Hario Mizudashi is an affordable and user-friendly option, using a simple glass carafe and mesh filter to produce smooth, concentrated coffee.
If you prefer a more automated experience, the OXO Compact Cold Brew Maker features a rainmaker head for even water distribution and a fine-mesh filter, making cleanup easy.
For those wanting a true cold drip tower without a high price tag, the Yama Glass 1-Liter Cold Drip Tower is a classic choice—it uses a glass drip chamber and a valve to control drip rate, producing a clean, bright brew.
Start with a medium-coarse grind and a 1:8 coffee-to-water ratio, then adjust based on taste. The key is consistent drip rate: aim for about 1 drop per second. These machines let you experiment with brewing time (12-24 hours) to find your perfect flavor profile.
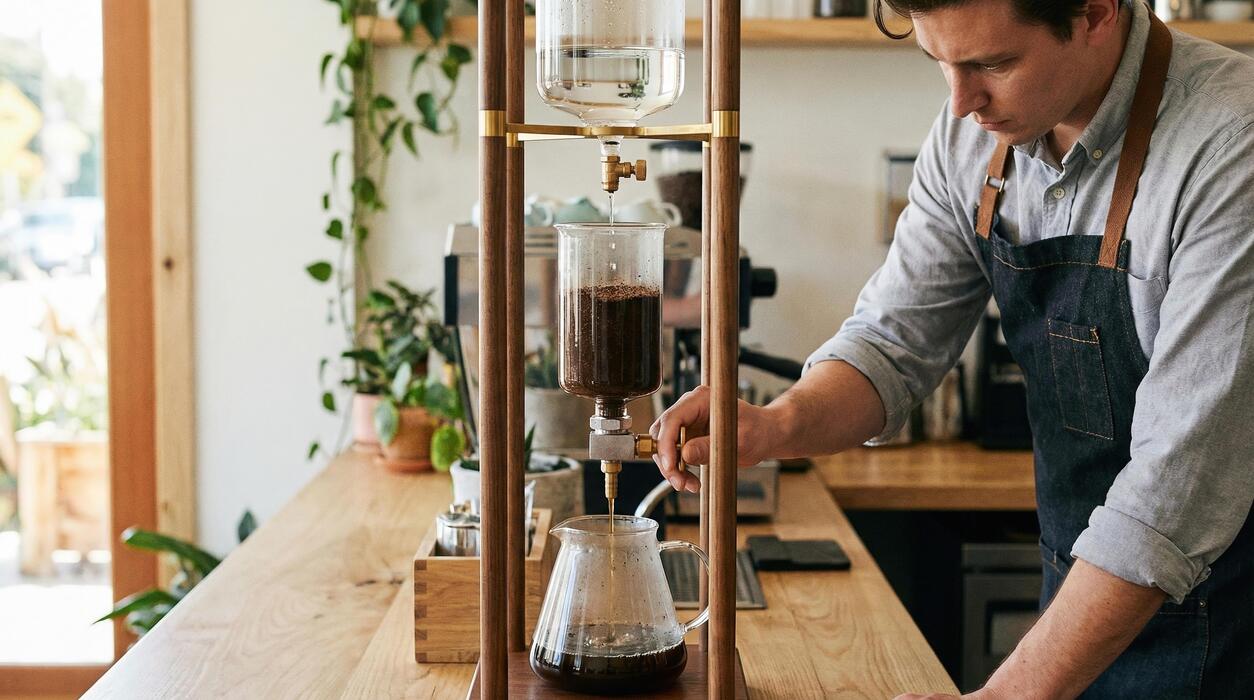
DIY setup: how to build your own cold drip tower
Building your own cold drip tower is cost-effective and highly customizable. Start with a glass or plastic container for the water reservoir—a mason jar works well. Drill a small hole in the lid and insert a plastic or metal valve (like an aquarium air valve) to control drip rate.
For the drip chamber, use a funnel or a second jar with a narrow neck; add a coffee filter or a layer of cheesecloth at the bottom to hold grounds. Place this over a glass carafe or bottle to collect the brew.
Secure the setup with a stand made from wood or metal rods, or repurpose a plant stand. The key is ensuring a stable, vertical alignment so water drips evenly. Use a pinch clamp or drip regulator to fine-tune the flow to about 1 drop every 1-2 seconds.
This DIY approach lets you control every variable—grind size, drip speed, and brew time—for a truly personalized cold drip experience.
Must-have accessories: filters, grinders, and carafes
To master cold drip at home, invest in a few key accessories. A burr grinder (like the Baratza Encore) ensures consistent, medium-coarse grounds—essential for even extraction and avoiding clogging.
Use unbleached paper filters or a reusable stainless steel mesh filter; paper filters produce a cleaner cup, while mesh allows more oils for a richer body.
For the carafe, choose borosilicate glass (like a Hario decanter) for heat resistance and easy cleaning, or a stainless steel insulated carafe to keep your brew cold for days.
A digital timer or simple kitchen timer helps monitor drip rate, while a small funnel aids in filling the reservoir without spills. Finally, a drip regulator (often included with commercial towers) lets you fine-tune flow.
With these tools, you’ll consistently produce smooth, concentrated cold drip coffee that’s ready to dilute with water or milk to taste.
How to Choose the Right Coffee Beans for Cold Drip
Best roast levels for cold drip coffee
For cold drip, medium to dark roasts generally work best, as they provide a bold, chocolatey, and low-acid profile that stands up to the long, cold extraction. Light roasts can taste overly sour or grassy because cold water struggles to extract their delicate, acidic compounds.
A full-city or Vienna roast is ideal: it’s dark enough to deliver rich, caramelized sugars and body, but not so dark that it becomes bitter or ashy. If you prefer a cleaner, more tea-like cup, a medium roast with notes of nuts or cocoa can also shine.
Avoid extremely oily, French-roast beans, as they can produce a burnt flavor. Always choose freshly roasted beans (within 2–4 weeks) for maximum aroma and sweetness. For a balanced, smooth cold drip, start with a Guatemalan or Colombian medium-dark and adjust based on your taste.
Remember, the cold process mutes acidity, so a roast that’s too light will taste hollow, while a proper medium-dark will yield a syrupy, full-bodied brew with no sharp edges.
Single origin vs blends: which works better
Blends are often the safer choice for cold drip, as roasters design them to be balanced and consistent, with chocolate, nut, or caramel notes that extract evenly. A well-crafted blend, like a Brazil-Ethiopia mix, can deliver a smooth, full-bodied cup with no single flavor dominating.
Single origins, however, can be exceptional if chosen carefully. Look for washed-process beans from Central America (e.g., Costa Rica or Honduras) for bright, clean acidity that mellows beautifully, or natural-process Ethiopians for fruity, wine-like complexity.
Avoid single origins that are very light or high-altitude, as they may taste sour or thin. For home experimentation, start with a specialty blend from a reputable roaster—it’s forgiving and reliable. Once you’re comfortable, try a single-origin Colombian or Sumatran to explore unique flavors like red berry or herbal spice.
The key is to match the bean’s profile to your preference: if you love rich, chocolatey cold brew, a blend wins; if you want exotic notes, a single origin can surprise you. Always buy from a source that provides roast dates and tasting notes.
Grind size tips for optimal extraction
For cold drip, aim for a medium-coarse grind, similar to sea salt or raw sugar. This is coarser than drip coffee but finer than French press. Too fine, and the water will clog the filter, causing a slow, over-extracted brew that tastes bitter or muddy.
Too coarse, and the water will rush through, yielding a weak, watery cup. The ideal grind allows water to slowly saturate the grounds for 4–6 hours, extracting sugars and oils without bitterness. Use a burr grinder for consistency—blade grinders create fines that lead to uneven extraction.
If your drip rate is too fast (drops every second), grind slightly finer; if too slow (drops every 3–4 seconds), coarsen it. A good test: the grounds should feel like sand, not powder. For most home cold drip towers, a #20–#25 setting on a Baratza Encore works well.
Always grind right before brewing to preserve volatile aromas. Remember, cold drip is forgiving: you can adjust grind size next batch based on taste. Start with medium-coarse and tweak until you get a smooth, sweet cup with no harshness.
Step-by-Step Guide to Making Cold Drip Coffee
How to set up your cold drip equipment properly
Start by rinsing all components with hot water to remove dust or residues. Place your cold drip tower on a stable, level surface away from direct sunlight. Insert the filter paper into the brew basket and rinse it with hot water to eliminate paper taste.
Add coarsely ground coffee (similar to French press grind) to the basket, then gently tap to level the bed without compacting. Place the water reservoir on top, ensuring the drip valve is closed. Fill with cold, filtered water and add ice cubes if your design allows—this keeps water cold longer.
Finally, open the valve slightly to start the drip, and position the collection vessel underneath to catch the concentrate.
Ideal coffee-to-water ratio for cold drip
For a balanced concentrate, use a 1:8 coffee-to-water ratio (e.g., 60g coffee to 480ml water). This yields a smooth, drinkable brew that can be diluted later. If you prefer stronger concentrate for milk drinks, try 1:6 (60g coffee to 360ml water). Weigh your ingredients for accuracy—volume measurements are unreliable.
Use coarsely ground coffee to prevent over-extraction and bitterness. Adjust the ratio based on your taste: 1:10 for a lighter brew, 1:5 for intense flavor. Always start with fresh, filtered water at room temperature or chilled. Write down your ratio and grind size to reproduce your perfect cup consistently.
Drip rate adjustment: how fast should water flow
The optimal drip rate is 40-60 drops per minute (about 1 drop every second). This ensures even extraction without channeling or stalling. Adjust the valve slowly: turn clockwise to slow, counterclockwise to speed up. Test the rate by counting drops for 10 seconds and multiply by 6.
If it’s too fast (over 70 drops/min), the coffee will be under-extracted and weak. Too slow (under 30 drops/min) risks over-extraction and bitterness. Monitor for the first 10 minutes and readjust as needed. The flow may change as water level drops.
A consistent, steady drip produces the smoothest, most flavorful cold drip concentrate.
How long to let cold drip coffee brew
Total brew time depends on your drip rate and water volume. For a standard 500ml batch at 45 drops per minute, expect 3-4 hours. The first few ounces may drip faster initially—this is normal. Never rush the process; slower drips yield richer flavor.
Check progress by measuring the collected concentrate—it should match your water input minus what’s absorbed by grounds. Brew until the water reservoir is empty, then wait 1-2 minutes for final drips. Transfer the concentrate to a sealed container and refrigerate immediately.
For best taste, let it rest 12-24 hours in the fridge before serving—this smooths acidity and enhances sweetness.
Tips for Perfecting Your Cold Drip Coffee Flavor
How to control bitterness and acidity in cold drip
To master bitterness and acidity, start with a medium roast—it offers balanced flavor without the harshness of dark roasts or the sharp acidity of light roasts. Grind your beans to a medium-coarse consistency, similar to sea salt, to avoid over-extraction that causes bitterness.
Adjust the drip rate to 40–60 drops per minute; slower drips increase extraction and bitterness, while faster ones yield a lighter, more acidic brew. Use filtered water at room temperature to prevent mineral imbalances that amplify bitterness.
For a smoother cup, steep the grounds for 12–24 hours at room temperature, then refrigerate for 2–4 hours to mellow acidity. If your brew tastes too bitter, reduce the drip rate or switch to a lighter roast; if too acidic, increase steeping time or use a slightly finer grind.
Always taste your brew after chilling, as flavors become less pronounced when cold.
Adding flavors: spices, citrus, or vanilla during brewing
Enhance your cold drip by infusing whole spices like cinnamon sticks, cardamom pods, or star anise directly into the coffee grounds before brewing. Use 1–2 pods or sticks per 100g of coffee to avoid overpowering.
For citrus, add thin strips of orange or lemon zest to the water reservoir—avoid pith to prevent bitterness. Vanilla can be introduced by splitting a vanilla bean and placing it in the grounds or adding 1/2 teaspoon of vanilla extract to the brewed coffee after dripping.
To ensure even flavor distribution, layer spices and zest evenly between coffee layers in the brew chamber. Steep for 12–24 hours to allow subtle integration. For a twist, try cocoa nibs or dried lavender—start with small amounts and adjust to taste.
Remember, cold drip extracts flavors slowly, so add extras sparingly and taste before serving.
Common mistakes and how to fix them
A common error is grinding too fine, which clogs the filter and stalls dripping—fix this by using a medium-coarse grind and shaking the brew chamber to settle grounds.
Inconsistent drip rates often stem from an uneven water level or debris in the valve; clean your dripper thoroughly and ensure the water reservoir is level.
If your coffee tastes weak or watery, your grind may be too coarse or the drip rate too fast—adjust to 40–50 drops per minute and steep for at least 12 hours.
Over-extracted, bitter brew results from too fine a grind or too slow a drip—increase the drip rate or switch to a coarser grind. Cloudy coffee indicates over-agitation or old beans; use fresh, medium-roast beans and avoid stirring the grounds.
Finally, stale flavor means your beans are past their prime—always use beans roasted within 2 weeks for optimal taste.
How to Store and Serve Cold Drip Coffee
Best containers for storing cold drip coffee
To maintain the rich flavor and freshness of your cold drip coffee, choose airtight glass containers like swing-top bottles or mason jars. Glass is non-reactive and won’t impart any off-flavors, unlike plastic which can absorb odors over time.
Dark-colored or opaque bottles are ideal because they block light that can degrade the coffee’s delicate compounds. Before storing, let the brewed coffee cool to room temperature, then transfer it to your container, leaving minimal headspace to reduce oxidation. Seal tightly and place in the refrigerator immediately.
For convenience, use containers with a pouring spout or a narrow neck to control serving size. Avoid metal containers, as they can alter the taste.
If you plan to use the coffee over several days, consider dividing it into smaller portions—this way, you only open what you need, preserving the rest. Proper storage ensures your cold drip stays smooth and vibrant for up to two weeks, making it a perfect make-ahead coffee solution.
How long does cold drip coffee last in the fridge
Properly stored in an airtight container in the refrigerator, cold drip coffee retains peak flavor for 7 to 10 days. After that, it remains safe to drink for up to two weeks, though the taste may gradually dull and develop slight bitterness.
The key is to keep it chilled at a consistent 40°F (4°C) or below and avoid temperature fluctuations. Unlike hot-brewed coffee, cold drip’s slow extraction creates a concentrate with lower acidity, which naturally extends its shelf life.
To maximize freshness, store it in a dark, sealed glass container and never leave it out at room temperature for more than 30 minutes. If you notice any off-smells, cloudiness, or mold, discard it immediately. For best results, brew in small batches and consume within the first week.
Label your container with the brew date to track freshness. This longevity makes cold drip an excellent choice for weekly meal prep, ensuring you always have smooth, ready-to-serve coffee on hand.
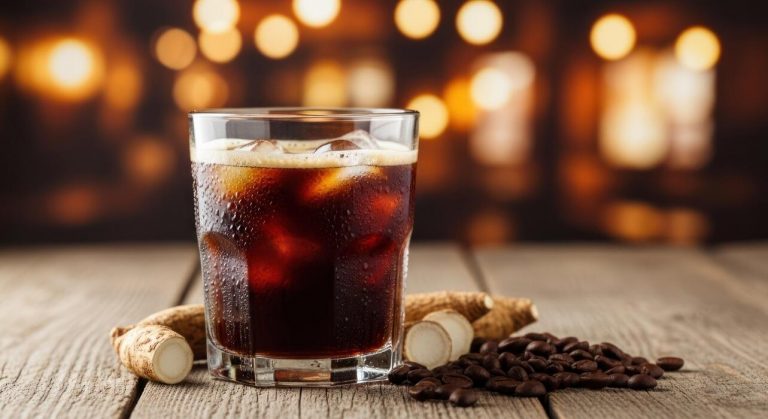
Serving suggestions: over ice, with milk, or as a concentrate
Cold drip coffee is incredibly versatile—serve it over ice for a crisp, refreshing drink: fill a glass with large ice cubes, pour the coffee to about two-thirds full, and top with a splash of cold water if desired.
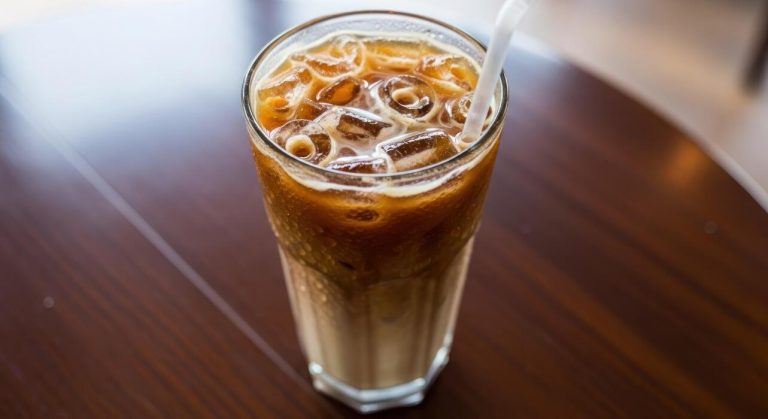
For a creamier option, add milk or a dairy-free alternative—start with a 1:1 ratio of coffee to milk, then adjust to taste. The concentrate nature of cold drip also shines in latte-style drinks: froth warm milk and gently fold it into the concentrate for a smooth, low-acid latte.
If you prefer a bolder kick, use the concentrate straight, diluting it with water or ice at a 1:1 or 2:1 ratio (coffee to water). For a twist, try it with a dash of vanilla syrup, cinnamon, or a pinch of salt to enhance flavor.
Store the concentrate in the fridge and mix individual servings as needed—it’s perfect for iced coffee, cocktails, or even baking. Experiment with ratios to find your perfect balance of strength and smoothness.
Cold Drip Coffee Recipes to Try at Home
Classic iced cold drip coffee recipe
Start with coarsely ground coffee (like sea salt texture) and filtered water at room temperature. For a standard 1:8 coffee-to-water ratio, use 60 grams of grounds and 480 grams of water. Fill your cold drip tower’s water chamber and adjust the drip rate to 1-2 drops per second.
Place a paper filter in the brew basket to avoid sediment. Let it drip over 6-12 hours at room temperature. Once done, remove the carafe and stir the concentrate.
For serving, fill a tall glass with ice cubes and pour 1 part cold drip concentrate to 2 parts cold water or milk. Add simple syrup if desired. Store leftover concentrate in the fridge for up to 2 weeks. This method extracts low acidity and smooth flavors without heat.
Cold drip coffee latte with oat milk
Brew a strong cold drip concentrate as above, using a 1:6 ratio (e.g., 70g coffee to 420g water) for a bolder base. For one latte, fill a glass with ice and pour 120ml of oat milk (barista blend works best for creaminess).
Add 60ml of cold drip concentrate and 1-2 teaspoons of maple syrup or vanilla simple syrup. Stir gently. For extra froth, warm the oat milk slightly and use a handheld frother before adding ice. The oat milk’s natural sweetness balances the coffee’s chocolatey and nutty notes.
Garnish with a pinch of cinnamon or cocoa powder. This dairy-free latte is velvety and satisfying without being heavy. Adjust the coffee-to-milk ratio to your taste—more concentrate for a stronger kick.
Cold drip coffee cocktail: espresso martini twist
Use your cold drip concentrate as a smooth, non-bitter base for a cocktail. In a shaker, combine 60ml cold drip concentrate, 60ml vodka (or coffee liqueur for sweetness), and 30ml simple syrup. Add a handful of ice cubes and shake vigorously for 15 seconds. Strain into a chilled martini glass.
The cold drip’s silky texture mimics espresso without the heat. For a twist, add 15ml of Irish cream or a dash of vanilla extract. Garnish with three coffee beans on top for aroma. This drink is bold, boozy, and refreshing—perfect for brunch or evening sipping.
Adjust sweetness by reducing syrup if using sweetened liqueur. Experiment with flavored syrups like caramel or hazelnut.
Frequently Asked Questions
What is cold drip coffee and how is it different from cold brew?
Cold drip coffee uses a slow, controlled drip of cold water over coffee grounds, extracting flavors gradually over hours. Unlike cold brew, which steeps grounds in water, cold drip produces a cleaner, more nuanced cup with less bitterness.
What equipment do I need to make cold drip coffee at home?
You need a cold drip tower or a DIY setup with a container for water, a drip valve or adjustable flow device, a filter chamber for coffee grounds, and a carafe to collect the brewed coffee. Common home options include the Hario Mizudashi or a simple Yama tower.
What is the ideal coffee-to-water ratio for cold drip?
A standard ratio is 1:10 to 1:12 (coffee to water) by weight. For example, use 30 grams of coarsely ground coffee per 300-360 milliliters of water, adjusting to taste for strength.
How fine should I grind the coffee for cold drip?
Use a medium-coarse grind, similar to sea salt or coarse sand. Too fine can clog the filter and over-extract, while too coarse may under-extract, resulting in weak coffee.
How long does the cold drip process take?
It typically takes 6 to 12 hours, depending on the drip rate (usually 1-2 drops per second). Slower drips yield a more concentrated brew, while faster ones produce a lighter cup.
Can I use a cold drip tower without a specialized kit?
Yes, you can DIY with a glass jar, a funnel, a paper filter, and a controlled drip from a bottle or a plastic cup with a small hole. Ensure the water drips steadily over the grounds, and collect the coffee in a separate container.
How should I store cold drip coffee after brewing?
Store it in an airtight container in the refrigerator for up to 2 weeks. It’s concentrated, so dilute with water or milk to taste before serving over ice.
Conclusion
Making cold drip coffee at home rewards patience with a silky, low-acid brew that highlights delicate flavors. Remember to use a coarse grind, a steady drip rate of one drop per second, and steep for 12-24 hours. The result is a smooth concentrate perfect over ice or diluted with water or milk. Embrace the process—your perfect glass of cold brew is just a slow, satisfying pour away.