How To Make Iced Coffee With Normal Coffee
Wondering how to make iced coffee with normal coffee without a fancy machine? The core problem is avoiding a watery, bitter drink when you just have standard grounds. You’re in the right place. The simple trick is to brew your coffee double-strength and pour it over ice, which dilutes it to the perfect strength. I’ll walk you through the exact ratios and method to get a smooth, bold iced coffee every time.
Why Use Normal Coffee for Iced Coffee?
What counts as normal coffee for iced coffee
Normal coffee for iced coffee simply means your everyday drip coffee, pour-over, or French press brew made with standard ground coffee and hot water. This is the same coffee you’d drink hot, but you’ll chill it or pour it over ice.
Use a medium roast for balanced flavor, or a dark roast for a bolder taste that cuts through milk. Avoid instant coffee unless specified, as it lacks the depth of fresh-brewed.
The key is to brew it double-strength by using twice the coffee grounds you normally would—about 2 tablespoons per 6 ounces of water. This ensures the flavor isn’t diluted by melting ice. For best results, brew directly into a heatproof carafe, let it cool slightly, then refrigerate for 30 minutes.
You can also brew it the night before for quick morning iced coffee. Remember, any standard ground coffee works, so choose your favorite roast and grind size (medium for drip, coarse for French press). This method uses everyday tools and ingredients, making it accessible without special equipment.
Benefits of using regular drip coffee
Using regular drip coffee for iced coffee offers convenience, speed, and cost-effectiveness without sacrificing quality. You don’t need a cold brew maker or special beans—just your usual coffee maker and grounds. Brew a pot double-strength, chill it, and you have iced coffee in under 10 minutes.
This method also allows you to customize strength and flavor easily: adjust the coffee-to-water ratio, try different roasts, or add spices like cinnamon to the grounds before brewing. Because it’s hot-brewed, you extract more oils and acids quickly, giving a brighter, more complex taste than cold brew’s mellow profile.
Additionally, drip coffee is budget-friendly since you use the same beans you already buy, and you can control sweetness by adding simple syrup while it’s hot. It’s perfect for experimenting with flavored syrups or milk alternatives.
For a quick fix, pour hot double-strength coffee over a full glass of ice—this flash-chills it while preserving boldness. Overall, it’s a practical, versatile option that fits into any routine.
How normal coffee compares to cold brew
Normal coffee and cold brew differ primarily in extraction method, flavor, and acidity. Normal coffee uses hot water to extract quickly, resulting in a bright, acidic, and aromatic profile that shines with milk or sweeteners. It’s ready in minutes and offers a classic coffee taste.
Cold brew, on the other hand, steeps coarse grounds in cold water for 12-24 hours, producing a smooth, low-acid, and mellow concentrate. It’s less bitter but also less complex in flavor nuances.
For iced coffee, normal coffee is more versatile—you can adjust strength on the fly, use any roast, and enjoy a familiar taste. Cold brew requires planning and yields a concentrate that needs dilution. However, normal coffee can become watery if not brewed double-strength, while cold brew stays robust.
If you crave quick, bright iced coffee with a kick, choose normal. If you prefer a smoother, less acidic drink and have time to plan, opt for cold brew. Both work, but normal coffee wins for speed and convenience in everyday use.
How to Make Iced Coffee with Normal Coffee: The Basic Method
Step-by-step brewing and cooling process
Start by brewing a double-strength batch of your favorite normal coffee using a drip machine, French press, or pour-over. Use twice the usual amount of coffee grounds for the same amount of water. For example, if you normally use 2 tablespoons per 6 ounces of water, use 4 tablespoons.
Once brewed, let the coffee cool to room temperature for about 15–20 minutes. Do not pour hot coffee directly over ice, as this dilutes the flavor and creates a watery drink. Instead, transfer the cooled coffee to a glass pitcher or jar and refrigerate until chilled, ideally for 1–2 hours.
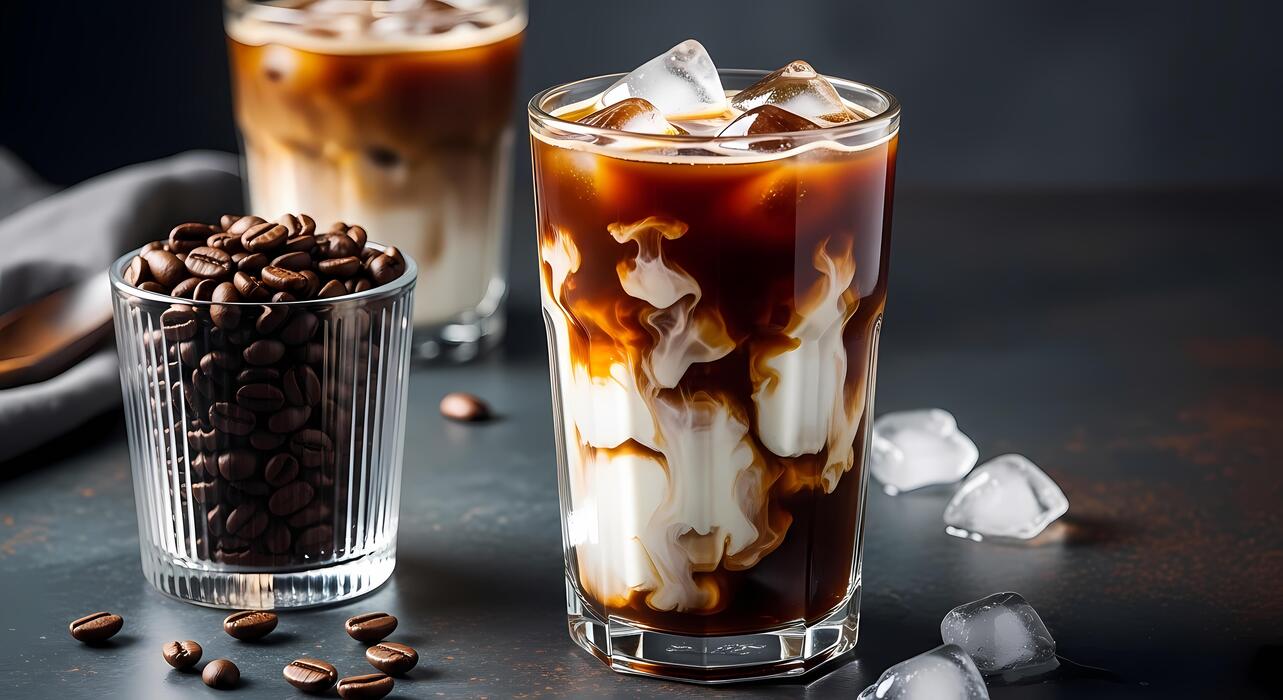
When ready, fill a tall glass with large ice cubes (they melt slower) and pour the chilled coffee over them. Add milk, cream, or sweetener to taste, and stir gently. This method ensures a smooth, refreshing iced coffee without bitterness or excessive dilution.
Best coffee-to-water ratio for iced coffee
To achieve a robust flavor that stands up to melting ice, use a 1:8 coffee-to-water ratio for your brew. For every 1 ounce (about 28 grams) of coffee grounds, use 8 ounces (about 240 milliliters) of water.
This is double the strength of a standard hot coffee, which typically uses a 1:16 ratio. For a single serving, try 2 tablespoons (10–12 grams) of ground coffee to 4 ounces (120 milliliters) of hot water. Brew as usual, then pour the concentrate over a full glass of ice.
The ice will melt and dilute the coffee to a normal strength. If you prefer a milder taste, adjust to a 1:10 ratio, but avoid going below 1:12 as the coffee may taste weak.
Experiment with your preferred roast and grind size—medium-coarse grind works best for drip or French press to prevent over-extraction. This ratio ensures a balanced, flavorful iced coffee every time.
How to avoid watery iced coffee
Watery iced coffee is the most common pitfall, but you can prevent it with a few key tricks. First, brew your coffee double-strength as mentioned earlier, so that when ice melts, the flavor remains bold.
Second, cool the coffee completely before pouring it over ice; hot coffee melts ice rapidly, leading to a diluted mess. Third, use large ice cubes or ice spheres—they have less surface area and melt slower than crushed or small cubes.
For an extra boost, try coffee ice cubes: freeze leftover brewed coffee in an ice tray and use those instead of water cubes. They chill your drink without watering it down.
Finally, avoid overfilling your glass with ice; use enough to chill the coffee but not so much that it overwhelms the liquid. A good rule is to fill the glass halfway with ice and then pour the chilled coffee.
If you add milk, pour it first and then add the coffee to control dilution. These steps keep your iced coffee rich and satisfying from the first sip to the last.
How to Make Iced Coffee with Normal Coffee Using the Ice Cube Trick
Why ice cubes dilute your coffee
When you pour hot coffee over regular ice cubes, the ice melts quickly, watering down your drink. This dilution happens because hot coffee raises the temperature of the ice, causing it to melt rapidly.
The result is a weak, less flavorful iced coffee that lacks the boldness of your original brew. The ice cube trick solves this by using frozen coffee cubes instead of water-based ones. By freezing coffee into ice cubes, you maintain the coffee’s strength and flavor profile as they melt.
This method ensures that your iced coffee remains rich and concentrated throughout the drinking experience. To prevent dilution, always let your brewed coffee cool slightly before pouring it over the cubes, or use room temperature coffee for a slower melt.
The key is to replace water ice with coffee ice—this simple swap transforms your iced coffee from watery to wonderfully robust.
How to make coffee ice cubes
Start by brewing a strong batch of your regular coffee—use double the coffee grounds you normally would for hot coffee. This ensures the flavor holds up after freezing and melting. Let the coffee cool to room temperature, then pour it into an ice cube tray.
For best results, use silicone trays to easily pop out the cubes. Fill each compartment evenly and place the tray in the freezer for at least 4 hours, or overnight. You can also add a splash of milk or sweetener before freezing for flavored cubes.
Once frozen, transfer the cubes to a sealed freezer bag to prevent them from absorbing odors. This step is crucial for maintaining pure coffee taste. Store them for up to 2 weeks, and always use them within that time for optimal freshness.
When ready, simply add the coffee ice cubes to a glass of cold milk or water, then pour fresh hot coffee over them for an instant iced coffee that stays strong.
Tips for using coffee ice cubes effectively
To get the most out of your coffee ice cubes, use them as both coolant and flavor enhancer. Start by filling your glass halfway with coffee ice cubes—this prevents over-dilution while keeping your drink cold.
Pour your freshly brewed coffee over the cubes, but let it cool for 2-3 minutes first to slow melting. For a creamier texture, add a splash of milk or a non-dairy alternative before the hot coffee.
You can also layer flavors by using different coffee blends in your ice cubes, like a dark roast for a bolder taste. If you want a sweeter drink, stir in simple syrup or flavored syrup before adding the cubes. For an extra kick, freeze espresso shots into mini cubes.
Remember to adjust your brewing strength—a stronger hot coffee will yield better results. Finally, experiment with ratios: 2 parts coffee to 1 part ice cubes for a balanced, non-watery iced coffee every time.
How to Make Iced Coffee with Normal Coffee Using the Japanese Method
What is the Japanese iced coffee method
The Japanese iced coffee method is a brewing technique that directly cools hot coffee over ice, locking in volatile aromatics and preventing bitterness. Unlike chilling brewed coffee, which can stale flavors, this method uses normal coffee grounds and a pour-over setup (like a Hario V60 or Chemex).
You simply brew hot coffee onto a carafe filled with ice, instantly chilling it while preserving brightness. The key is to reduce your brewing water by half and replace it with ice—for example, use 250g hot water and 250g ice for a 500ml batch.
This approach works with any normal drip grind, making it accessible for daily use. The hot water extracts oils and acids quickly, then the ice stops extraction, resulting in a clean, crisp iced coffee that tastes like fresh-brewed coffee, not leftover.
It’s ideal for hot days because it’s ready in minutes without dilution or wait time.
Step-by-step brewing instructions
Start by placing a paper filter in your pour-over dripper and rinsing it with hot water to remove paper taste. Add 30g of normal coffee grounds (medium-fine, like for drip). In your carafe or server, add 200g of ice cubes (or half your total desired volume).
Boil water to 200°F (93°C) and pour 200g of hot water over the grounds in slow, circular motions—bloom for 30 seconds, then continue pouring in stages until you reach 200g. The hot water should finish dripping through the filter onto the ice within 2.5–3 minutes.
Stir the resulting liquid to ensure the ice melts evenly and chills the coffee. If needed, add a few more ice cubes to your serving glass. This yields about 400ml of perfectly balanced iced coffee.
For stronger flavor, adjust the coffee-to-water ratio to 1:15 (e.g., 30g coffee to 450g total water/ice). Serve immediately over fresh ice for maximum crispness.
Why this method produces a cleaner taste
The Japanese method delivers a cleaner taste because heat extraction is halted by rapid chilling, preventing over-extraction of bitter compounds. When you brew hot coffee directly onto ice, the cold temperature locks in the bright, fruity acids and delicate aromatics that would otherwise degrade or become muted in slow-cooled coffee.
This technique also reduces the risk of oxidation, which happens when hot coffee sits at room temperature. The ice instantly drops the temperature below the threshold where bitter tannins and chlorogenic acids continue to extract, so you get a smooth, crisp profile without harshness.
Additionally, the pour-over filter removes oils and fines that can cause muddiness, leaving a transparent, tea-like clarity. Compared to cold brew (which can be flat or overly smooth), Japanese iced coffee retains the character and origin notes of the bean.
For best results, use freshly roasted normal coffee and drink immediately—this method shines when the coffee is still vibrant and chilled, not diluted or stale.
Best Ways to Flavor Your Iced Coffee
Simple syrup and sweetener options
Sweetening iced coffee can be tricky because granulated sugar doesn’t dissolve well in cold liquid. The solution is simple syrup, which you can make by dissolving equal parts sugar and hot water (1:1 ratio). Let it cool, then add to your coffee.
For flavor variations, try brown sugar syrup for a molasses depth, or honey syrup (diluted with warm water) for a floral touch. Vanilla syrup is a classic: just add a vanilla bean or extract to your simple syrup.
For a low-calorie option, use liquid stevia or monk fruit sweetener, which dissolve instantly. Avoid powdered sweeteners as they can clump. A pro tip: stir in your syrup while the coffee is still slightly warm from brewing to ensure even distribution.
You can also infuse syrups with cinnamon sticks, citrus zest, or mint for extra complexity. Start with 1-2 tablespoons per cup and adjust to taste.
Milk, cream, and non-dairy alternatives
The right dairy or non-dairy choice transforms your iced coffee’s texture. Whole milk or half-and-half adds creaminess without overpowering the coffee’s flavor. For a richer drink, use heavy cream sparingly (1-2 tablespoons per cup).
If you prefer plant-based options, oat milk is a top pick due to its neutral taste and creamy consistency that doesn’t curdle in cold coffee. Almond milk works well but can separate; choose a barista blend for stability.
Coconut milk adds a subtle tropical note, while soy milk provides protein-rich froth. For a lighter option, try cashew milk or low-fat milk. Always pour milk over ice first, then add coffee to prevent curdling. To avoid dilution, consider using cold brew coffee or brewing your regular coffee double-strength.
Experiment with ratios—start with 1/4 cup milk per 8 oz coffee—and adjust to your preferred balance of bold coffee and creamy smoothness.
Spices and extracts to try
Elevate your iced coffee with simple spice and extract additions that require no extra equipment. Cinnamon is a natural pairing—sprinkle a pinch directly into your ground coffee before brewing, or stir a dash into the finished drink for a warm, sweet note.
Nutmeg or cardamom add exotic depth; just a tiny pinch per cup. Vanilla extract is a no-fuss flavor booster: add 1/4 teaspoon per serving to enhance sweetness without sugar. Almond extract lends a nutty, marzipan-like taste (use sparingly, 1/8 teaspoon).
For a refreshing twist, try peppermint extract (1/8 teaspoon) or coconut extract (1/4 teaspoon). Pumpkin pie spice blends cinnamon, ginger, and cloves for a seasonal kick. Stir extracts into the coffee while it’s still warm for even mixing, or blend them into your simple syrup.
For a savory-sweet combo, add a pinch of sea salt to balance bitterness. Start with small amounts and taste as you go.
Tips for Making Iced Coffee with Normal Coffee in Bulk
How to brew a large batch for the week
To make a large batch of iced coffee with normal coffee, double your usual coffee grounds when brewing. For every 8 ounces of water, use 2 tablespoons of grounds instead of 1. Brew a full 12-cup pot using a standard drip machine, French press, or pour-over.
Use room temperature or cold filtered water to avoid bitterness. Once brewed, let the coffee cool completely at room temperature for about 30 minutes. Then transfer it to a large pitcher or airtight container. For best results, brew the coffee at double strength because melting ice will dilute it.
If you prefer a smoother taste, brew with a coarse grind and steep for 12–24 hours in the fridge using a cold brew method. This yields a concentrate that you can mix with water or milk later. Label the container with the brew date and store it in the fridge.
This batch method saves time and ensures you always have ready-to-use iced coffee for the week.
Storage tips to keep coffee fresh
To keep your large batch of iced coffee fresh, store it in an airtight glass or BPA-free plastic container in the refrigerator. Avoid leaving it at room temperature for more than 2 hours to prevent spoilage. Do not add milk or sweeteners until serving, as dairy accelerates spoilage.
For maximum freshness, consume within 3–5 days; after that, the flavor degrades. If you want to extend shelf life, freeze the coffee in ice cube trays—these cubes won’t dilute your drink later. Keep the container away from strong-smelling foods like onions or garlic, as coffee absorbs odors easily.
When pouring, use a clean, dry scoop to avoid introducing bacteria. Shake or stir the container gently before each use, as sediment may settle. Label the container with the date and strength (e.g., “double-strength batch”).
For best taste, store the coffee in the back of the fridge where temperature is most consistent, not in the door where it fluctuates.
How to reheat or serve cold later
When serving your pre-brewed iced coffee cold, pour the chilled concentrate over a glass full of ice and add water or milk to your desired strength. For a stronger flavor, use coffee ice cubes made from leftover batch.
To reheat, microwave individual servings for 30–45 seconds in a microwave-safe mug, or warm it gently on the stovetop over low heat. Avoid boiling, as it makes coffee bitter. If reheating a whole batch, use a saucepan on low heat and stir occasionally.
For a quick iced coffee, skip reheating entirely—just shake the container and pour. To enhance flavor, add a pinch of salt to reduce bitterness when reheating. For cold servings, pre-chill your glass or add a splash of cream.
If the coffee tastes flat after storage, add a few drops of vanilla extract or cinnamon to revive it. Always taste before serving, and adjust sweetness or milk ratio. These methods ensure your bulk iced coffee stays delicious whether served cold or hot.
Common Mistakes When Making Iced Coffee with Normal Coffee
Using hot coffee directly over ice
Pouring hot coffee directly over ice might seem efficient, but it often leads to a watery, diluted brew. When hot coffee hits cold ice, the ice melts rapidly, increasing the water content and washing out the coffee’s rich flavors.
To avoid this, brew your coffee at double strength—use twice the usual coffee grounds per cup of water—so that even as ice melts, the coffee remains bold and flavorful. Alternatively, cool the coffee first by letting it sit at room temperature for 10-15 minutes before pouring over ice.
This slows the melting process, preserving the intended strength. For a pro tip, try making coffee ice cubes by freezing leftover coffee; they chill without diluting. By controlling how heat interacts with ice, you ensure every sip is concentrated and refreshing, not weak.
Remember, the goal is a balanced iced coffee that highlights the beans’ profile, not a sad, watery disappointment.
Not adjusting coffee strength
A common oversight is using the same coffee-to-water ratio as hot coffee, which results in a weak, lackluster iced drink.
Since ice melts and adds water, your coffee needs to be brewed stronger to compensate—aim for a 1:10 ratio of coffee to water (e.g., 2 tablespoons per 6 ounces) instead of the typical 1:16. This extra strength ensures that after dilution, the coffee still tastes robust and aromatic.
Consider using a concentrated brewing method like a cold brew or a strong pour-over; for hot brewed iced coffee, double the grounds while keeping the water volume the same. If you prefer a smoother taste, experiment with a medium roast for balanced acidity.
Adjusting strength is key because iced coffee’s cold temperature dulls sweetness and acidity, so a bolder base prevents a flat, boring finish. With the right ratio, you’ll unlock a vibrant, satisfying iced coffee every time.
Skipping the cooling step
Pouring freshly brewed hot coffee directly over ice without any cooling can cause thermal shock to the glass, potentially cracking it, and more importantly, it creates a cloudy, bitter brew. Rapid temperature changes release unwanted acids and oils, leading to a harsh taste.
Instead, cool your coffee gradually by letting it sit for 15-20 minutes at room temperature, or speed it up by placing the carafe in an ice bath. This gentle cooling preserves the coffee’s natural sweetness and clarity.
For the best results, brew the coffee ahead of time and refrigerate it for 1-2 hours; this allows flavors to meld and reduces ice melt. Skipping this step often results in a drink that’s both diluted and overly acidic, masking the nuanced notes of your beans.
By taking a few extra minutes to cool, you ensure a smooth, crisp iced coffee that’s refreshing without compromise.
Frequently Asked Questions
What is the simplest way to make iced coffee with normal coffee?
Brew a double-strength batch of your regular coffee (using twice the grounds), let it cool to room temperature, then pour it over ice. Add milk or sweetener if desired.
Can I use hot brewed coffee directly on ice?
Yes, but it will dilute the coffee as the ice melts. To avoid this, use strong coffee or coffee ice cubes made from leftover coffee.
How do I make cold brew with normal coffee?
Mix 1 cup of coarse ground coffee with 4 cups of cold water, let it steep in the fridge for 12-24 hours, then strain through a fine sieve or coffee filter. Serve over ice.
What’s the best ratio of coffee to water for iced coffee?
Use a 1:8 ratio of coffee to water (e.g., 1 ounce coffee to 8 ounces water) for a strong brew that won’t get too watery when ice melts.
How can I quickly cool down hot coffee for iced coffee?
Pour the hot coffee into a heat-safe container and place it in an ice bath, or stir it with a metal spoon in the freezer for a few minutes. Avoid adding ice directly until it’s cool.
What type of coffee works best for iced coffee?
Medium to dark roasts with bold flavors work well, as they stand up to dilution. Avoid light roasts that can taste sour when cold.
Can I make iced coffee with instant coffee?
Yes, dissolve 1-2 teaspoons of instant coffee in a small amount of hot water, then pour over ice and add cold water or milk to taste.
How do I prevent my iced coffee from becoming watery?
Use coffee ice cubes (frozen leftover coffee) instead of regular ice, or brew a concentrate and chill it before serving over ice.
Conclusion
Making iced coffee with normal coffee is simple, affordable, and avoids the bitterness of diluted hot coffee. Key takeaways: brew your coffee double-strength, let it cool completely, and pour over plenty of ice. For best results, add milk or sweetener before the ice melts. Don’t let a lack of fancy equipment stop you—experiment with ratios until it’s perfect for your taste. Enjoy a refreshing, homemade iced coffee anytime.