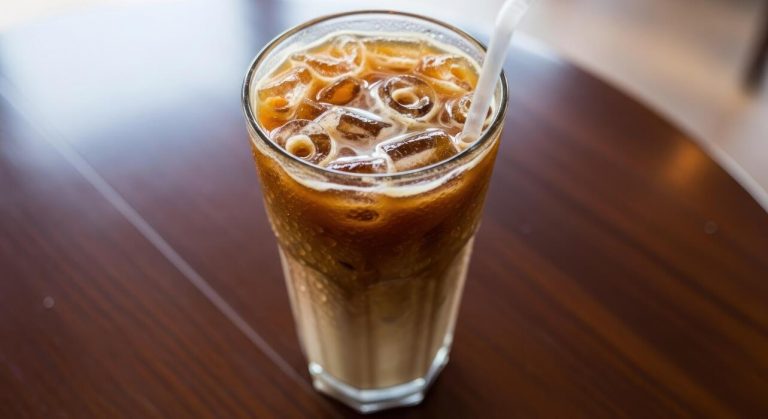
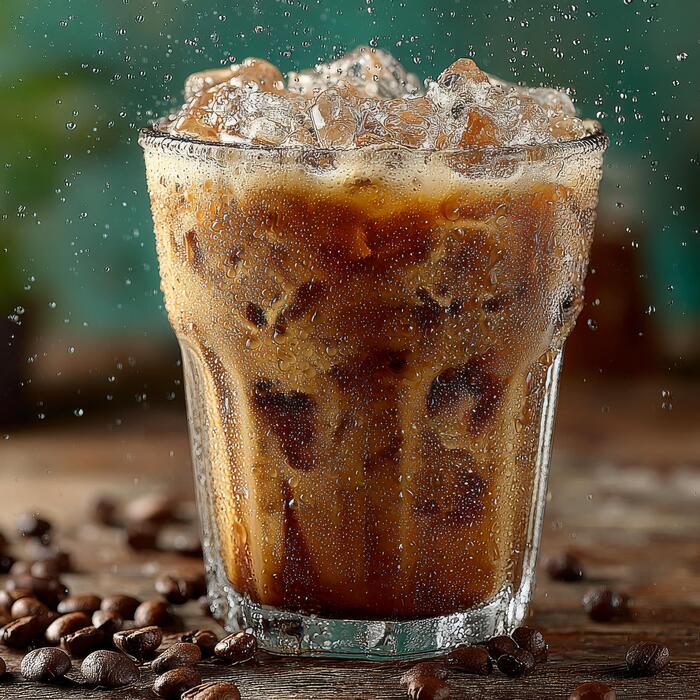
How To Make Iced Coffee In The Ninja
The core problem is avoiding watery, diluted coffee. This locks in bold flavor without melting away your coffee’s strength. Just select the “Over Ice” setting, fill your carafe, and pour immediately over fresh ice for a crisp, barista-quality iced coffee at home.
Why Use a Ninja for Iced Coffee?
Benefits of Ninja Coffee Makers for Cold Drinks
Using a Ninja coffee maker for iced coffee offers speed and convenience without sacrificing flavor. The Ninja’s specialized brewing technology extracts coffee at the optimal temperature, then instantly cools it over ice, preventing the bitterness that often comes from hot coffee poured directly over ice.
This method delivers a bold, smooth taste that rivals your favorite café. The built-in ice setting automatically adjusts the brew ratio, ensuring your drink isn’t watered down. Plus, Ninja models often include programmable features, so you can set a timer to have fresh iced coffee ready when you wake up.
The single-serve option lets you make a quick glass, while the carafe serves a crowd. With easy cleanup and reusable filters, you save money and reduce waste. For those who love customization, Ninja’s strength settings allow you to dial in the perfect intensity for your cold brew or iced latte.
Overall, it’s a time-saving, cost-effective solution for consistent, delicious iced coffee at home.
Types of Ninja Models That Work Best
For optimal iced coffee, choose a Ninja model with a dedicated ice setting. The Ninja Specialty Coffee Maker (CM401) is a top pick, offering both hot and cold brew functions, plus a specialty brew for concentrated coffee that holds up well over ice.
The Ninja Hot and Cold Brew System (CFN601) excels with its Cold Brew mode, steeping coffee grounds in cold water for up to 25 minutes for a smooth, low-acid result. If you prefer single-serve, the Ninja DualBrew Pro (DCM201) includes a coffeehouse-style ice setting and works with K-Cups.
For a budget-friendly option, the Ninja Programmable Brewer (CE251) lacks a dedicated ice button but can still make decent iced coffee by brewing a stronger concentrate (use the “Bold” setting) directly over a full glass of ice. Avoid models without temperature control, as they may produce bitter or weak results.
Key features to look for: an ice brew function, adjustable brew strength, and a thermal carafe to keep cold drinks cold. Always check the manual for model-specific ice coffee instructions.
What Makes Ninja Iced Coffee Different
Ninja’s iced coffee stands out because of its patented technology that brews hot coffee directly onto ice, but at a controlled rate to lock in flavor and prevent dilution.
Unlike traditional methods where hot coffee melts ice unevenly, Ninja’s Ice Brew setting uses a higher coffee-to-water ratio, creating a concentrated brew that maintains its boldness even as the ice melts.
This results in a smooth, non-bitter taste that many find superior to cold brew or iced coffee from other machines. Additionally, Ninja offers multiple brew styles (classic, rich, over ice) so you can tailor the strength.
The built-in frother on some models lets you create café-style lattes or iced macchiatos in minutes. Another difference is the speed: Ninja brews a full carafe of iced coffee in under 5 minutes, whereas cold brew takes hours. This makes it perfect for busy mornings or spontaneous cravings.
The consistent results every time, plus the ability to use any ground coffee, give you total control over your iced coffee experience without the wait or hassle.
Ingredients and Tools You Need
Essential Ingredients for Ninja Iced Coffee
To make a refreshing iced coffee with your Ninja, start with the basics: fresh coffee grounds and cold, filtered water. For a standard brew, use 1 to 2 tablespoons of coffee per 6 ounces of water—adjust based on your preferred strength.
The Ninja’s specialty is its Over Ice Brew function, which brews a concentrated coffee designed to be poured directly over ice without dilution. You’ll also need plenty of ice cubes (use large, dense cubes or silicone molds to slow melting).
For customization, have milk, cream, or non-dairy alternatives on hand, plus sweeteners like simple syrup, honey, or flavored syrups. Optional but recommended: a pinch of salt to reduce bitterness, or vanilla extract for depth.
Prep your ingredients in advance to streamline the process—measure coffee, fill the water reservoir, and fill your glass with ice. This setup ensures a smooth, barista-quality iced coffee every time.
Best Coffee Beans and Grind Size
Choosing the right beans and grind is crucial for Ninja iced coffee. Opt for medium to dark roast beans—they hold up well to ice and deliver rich, bold flavors without tasting watery. Lighter roasts can work but may taste more acidic.
For grind size, use a medium-coarse grind, similar to sea salt. This prevents over-extraction (which causes bitterness) and allows the Ninja’s brew basket to drain properly. If your Ninja has a specialty brew setting, a slightly finer grind (medium) can enhance the concentrate’s strength.
Always grind beans just before brewing for peak freshness. Pre-ground coffee is acceptable but use a coarse grind labeled for cold brew or French press. Avoid fine espresso grinds—they’ll clog the filter and produce a muddy, over-extracted taste. Store beans in an airtight container away from light and heat.
For the best iced coffee, experiment with single-origin beans from Colombia or Ethiopia for bright notes, or a blend for balanced richness.
Tools and Accessories for Better Results
Beyond your Ninja coffee maker, a few tools elevate your iced coffee game. First, invest in a digital kitchen scale to measure coffee and water precisely—this ensures consistent strength every brew. A burr grinder (manual or electric) gives uniform grind size, crucial for balanced extraction.
Use a tall, insulated glass (like a 16-ounce tumbler) to hold ice and coffee without melting too fast. Silicone ice cube trays or large sphere molds slow dilution; freeze coffee cubes for an extra boost. A milk frother (handheld or electric) adds creamy texture to lattes or iced coffee toppings.
For storage, an airtight coffee canister with a one-way valve keeps beans fresh. Optional but handy: a reusable metal filter if your Ninja model supports it (reduces paper waste and adds oils for fuller flavor).
Lastly, keep a stirring spoon or straw handy—preferably stainless steel or glass to avoid plastic taste. These tools streamline your workflow and help you craft café-quality iced coffee at home.
How to Make Iced Coffee with a Ninja Coffee Bar
Step-by-Step Guide for Classic Iced Coffee
To make classic iced coffee with your Ninja Coffee Bar, start by filling the water reservoir to the 8-10 cup line for a full carafe or use the ‘Travel Mug’ setting for a single serving. Place a tall glass filled with ice under the brew basket, not the carafe.
For best results, use coarsely ground coffee in the permanent filter—about 3 tablespoons per cup. Select the ‘Classic Brew’ setting and press ‘Brew’. The hot coffee will drip directly over the ice, instantly chilling it. Stir the mixture well to ensure even cooling and dilution.
Add milk, cream, or sweetener to taste. Pro tip: Brew at double strength by using half the water or the ‘Rich’ setting for a bolder flavor that holds up against melting ice. Serve immediately for a crisp, refreshing iced coffee.
Using the Specialty Brew Setting
For a more concentrated and flavorful iced coffee, use the ‘Specialty Brew’ setting on your Ninja Coffee Bar. This setting uses a slower water flow and a higher coffee-to-water ratio, producing a richer, bolder concentrate that mimics cold brew.
Fill the reservoir to the ‘Specialty’ line (usually marked for 8 oz servings) and add coarsely ground coffee to the filter basket—about 4 tablespoons per cup. Place a glass full of ice under the brew basket and select ‘Specialty Brew’.
The resulting liquid is intense and smooth, perfect for iced lattes or black iced coffee. Because it’s stronger, you can add milk or water to adjust strength without losing flavor.
This method also works with the ‘Over Ice’ feature if your model has it, which automatically adjusts brew temperature for less bitterness.
Adjusting Strength and Flavor
Customize your iced coffee by adjusting the brew strength on your Ninja Coffee Bar. For a milder iced coffee, use the ‘Classic’ setting with less coffee grounds (2 tablespoons per cup) and a full ice glass—this reduces bitterness.
For a bolder, more robust flavor, switch to the ‘Rich’ setting, which extends brew time for a deeper extraction. You can also mix grounds by adding a small amount of dark roast or espresso roast to your regular coffee for a flavor boost.
Flavor syrups, vanilla extract, or cinnamon can be added directly to the ice before brewing to infuse the coffee. For a creamy texture, use whole milk or oat milk and shake it with ice before adding.
Remember to taste and adjust—the Ninja’s versatility lets you experiment with ratios until you find your perfect iced coffee balance.
How to Make Iced Coffee with a Ninja DualBrew
Brewing Directly Over Ice
For the strongest, most flavorful iced coffee, use the Ninja DualBrew’s Brew Over Ice setting. Fill a 16-ounce glass to the brim with ice cubes. Place the glass directly under the brew basket, ensuring it’s centered.
Select the ‘Brew Over Ice’ button on the control panel; this automatically adjusts the water temperature and brew time to extract a more concentrated coffee that won’t get diluted. Choose your preferred brew size—usually the ‘Cup’ setting (8-10 oz) works perfectly for a single serving.
Press ‘Brew’ and watch as hot coffee flows directly over the ice, instantly chilling it. The result is a smooth, rich iced coffee without the need for a separate cooling step. Remember that using fresh, coarsely ground coffee optimizes extraction for this method, preventing bitterness while ensuring full flavor.
Using the Single-Serve Function
If you prefer a customizable, café-style iced coffee, use the Single-Serve function to brew a concentrated cup first. Fill the water reservoir to the desired level (e.g., 6-8 ounces for a strong base). Place a mug under the brew basket and select the ‘Rich’ brew setting to intensify flavor.
Once brewed, immediately pour the hot coffee over a glass filled with ice. This method gives you control over strength and sweetness—add your preferred milk, syrup, or creamer directly to the ice before pouring the coffee for even mixing.
For a colder drink, let the brewed coffee cool for 1-2 minutes before adding to ice. The key is to brew a smaller volume than your final drink size; this ensures the ice melts just enough to chill without watering down the flavor.
Experiment with different ratios until you find your perfect balance.
Tips for Avoiding Watery Coffee
The number one culprit of watery iced coffee is using too much ice or not adjusting your brew strength. Always use a full glass of ice but brew a smaller, more concentrated coffee volume—aim for 6-8 ounces of coffee for a 16-ounce glass.
Select the ‘Rich’ brew setting on your Ninja DualBrew to extract more coffee solids, which stand up better to melting ice. For the Brew Over Ice method, ensure you’re using the dedicated setting, as it automatically compensates.
Additionally, chill your glass in the freezer for 5-10 minutes before brewing to slow ice melt. Avoid using crushed ice, which melts faster; opt for large cubes.
Finally, pre-brew your coffee and let it cool to room temperature before pouring over fresh ice—this prevents immediate dilution and gives you a bolder, more satisfying iced coffee every time.
How to Make Ninja Iced Coffee Without a Special Setting
Brewing Hot Coffee and Chilling Fast
If your Ninja doesn’t have a dedicated iced coffee setting, you can still make excellent iced coffee by brewing a strong, hot batch and chilling it rapidly. Start by using double the amount of coffee grounds you normally would—this accounts for the ice that will melt and dilute the brew.
For example, if you use 2 scoops for a full carafe, use 4 scoops instead. Brew the coffee directly into a heat-safe pitcher or a large glass measuring cup. To cool it down fast, fill a separate large glass or metal container halfway with ice.
Immediately pour the hot, concentrated coffee over the ice, stirring vigorously. This quick chilling locks in flavor and prevents the bitter notes that come from slow cooling. For best results, use cold, filtered water in the Ninja’s reservoir and pre-wet your filter.
Serve immediately over fresh ice, adding milk or sweetener to taste. This method works with any Ninja model and delivers a crisp, bold iced coffee every time.
Using the Ninja’s Regular Brew Cycle
Your Ninja’s Classic or Rich brew cycle is perfect for making iced coffee without a special setting. Simply select the ‘Rich’ option if available—this extracts a more concentrated coffee by slowing the water flow, yielding a bolder flavor that stands up to ice.
If your model only has Classic, you can manually increase the grounds. For a standard 40-ounce carafe, use 4 to 5 scoops of medium-coarse ground coffee instead of the usual 2-3.
Brew the coffee into a carafe, then immediately pour it over a full glass of ice (about 1 cup of ice per 8 ounces of coffee). Stir for 15-20 seconds to melt some ice and cool the coffee down.
The key is to act fast—don’t let the hot coffee sit in the carafe. For an even stronger brew, use the ‘Small Batch’ function (if your Ninja has it) to make a concentrated 8-ounce serving that you can pour over a large glass of ice.
This approach works seamlessly with any Ninja brewer.
Best Practices for Cooling Without Dilution
To keep your iced coffee strong and flavorful, avoid standard dilution by using coffee ice cubes. Simply pour leftover brewed coffee (or extra brew) into an ice cube tray and freeze.
When you make your next iced coffee, use these cubes instead of regular ice—they cool the drink without watering it down. Another pro tip: chill your glass or mug beforehand by placing it in the freezer for 10-15 minutes. This helps maintain cold temperature longer.
When brewing, always use a 2:1 ratio of ice to hot coffee for the perfect balance—about 1 cup of ice per 8 ounces of strong brew.
If you prefer a creamy texture, add milk or creamer first to the glass before pouring the coffee over ice; this helps blend flavors evenly. Finally, stir your iced coffee immediately after pouring to ensure even cooling and prevent hot spots.
For a quick fix, brew into a metal container and place it in an ice bath for 5 minutes before serving over fresh ice. These methods guarantee a bold, refreshing Ninja iced coffee every time.
Tips for the Best Ninja Iced Coffee Flavor
Choosing the Right Coffee-to-Water Ratio
The foundation of exceptional Ninja iced coffee is a precise coffee-to-water ratio. Since ice dilutes your brew, you must compensate by making a stronger concentrate. Start with a 1:15 ratio of coffee to water—for example, use 2 heaping tablespoons (10-12 grams) of medium-coarse ground coffee per 6 ounces of water.
This is about 25% more coffee than you would use for a hot brew. For the Ninja’s Specialty or Iced Coffee setting, fill the water reservoir to the 8-ounce line but use the same amount of coffee as for a full 10-ounce hot cup.
Alternatively, use the ‘Over Ice’ brew function if your Ninja model has it, which automatically adjusts the brew cycle to produce a bolder concentrate. Always use filtered water and freshly ground beans for the cleanest flavor.
After brewing, immediately pour the hot concentrate over a full glass of ice to lock in brightness and prevent bitterness.
Adding Milk, Cream, or Syrups
Elevate your Ninja iced coffee with smart additions that enhance without overwhelming. For a creamy texture, add milk or cream first to the glass before pouring the coffee—this helps temper the hot concentrate and prevents curdling.
Use whole milk, oat milk, or a splash of heavy cream for richness; avoid skim milk as it can taste watery. For syrups, choose simple syrup, vanilla, or caramel—powdered sweeteners often clump in cold liquids.
Make your own simple syrup by dissolving equal parts sugar and water over low heat, then cool it. Add 1-2 teaspoons of syrup directly to the hot coffee so it dissolves fully before hitting the ice.
For a café-style touch, shake the coffee, milk, and syrup in a sealed jar with ice for 10 seconds, then pour over fresh ice. This aerates the drink, creating a silky, frothy texture. Experiment with spices like cinnamon or a pinch of salt to balance bitterness.
Storing and Reusing Coffee Ice Cubes
Avoid watery, diluted iced coffee by using coffee ice cubes instead of regular ones. Brew a full carafe of your Ninja coffee using the same bold ratio described earlier, then pour the cooled coffee into an ice cube tray and freeze overnight.
These cubes chill your drink without watering it down, and they slowly release concentrated coffee flavor as they melt. For best results, use silicone trays for easy removal and store the cubes in a sealed freezer bag for up to two weeks.
You can also infuse the cubes with extras: freeze cubes made with a splash of vanilla extract, cinnamon, or even cold brew concentrate. When ready to use, fill your glass halfway with these cubes, pour fresh Ninja-brewed coffee over them, and stir.
For a stronger morning boost, reuse leftover coffee from the day before—just strain it through a fine-mesh sieve to remove any sediment before freezing. This zero-waste trick keeps your drink bold from first sip to last.
Common Mistakes to Avoid When Making Ninja Iced Coffee
Using the Wrong Grind Size
One of the most frequent mistakes when making Ninja iced coffee is selecting the incorrect coffee grind size. For the Ninja’s specialized iced coffee brew cycle, which uses less hot water over a concentrated bed of grounds, a medium-fine grind is essential.
If you use a coarse grind, the water will pass through too quickly, resulting in a weak, watery brew that lacks the robust flavor needed to stand up to ice. Conversely, an overly fine grind can cause over-extraction, leading to a bitter, harsh taste and potentially clogging your filter basket.
To get it right, aim for a texture resembling table salt or sand. If you’re grinding your own beans, pulse them for a consistent medium-fine setting. For pre-ground coffee, look for a product labeled ‘drip’ or ‘automatic drip’ grind.
Remember, the goal is a concentrated coffee base that dilutes perfectly over ice, not a full-strength hot coffee that becomes watery. Adjust your grind until you achieve a balanced, flavorful iced coffee every time.
Overfilling the Water Reservoir
A common error that ruins the perfect Ninja iced coffee is overfilling the water reservoir. Unlike brewing a hot carafe, the Ninja’s iced coffee function uses a specific ratio of hot water to coffee grounds to create a concentrated brew that will be poured over a full glass of ice.
If you fill the reservoir to the ‘Max’ line for a full hot carafe, you’ll end up with too much liquid, which dilutes the concentrate and yields a weak, watery final drink.
Instead, always use the ‘Iced Coffee’ fill line indicated on the water reservoir, or follow the manual’s instructions for the exact amount of water based on the serving size you want (e.g., 4 or 6 servings). Typically, this means using half the water you would for hot coffee.
The concentrated brew should be just enough to fill your carafe or directly pour over a cup of ice. Measure carefully; too much water is the fastest way to sabotage the bold, rich flavor you’re aiming for. Stick to the designated iced coffee markings for consistent results.
Skipping the Pre-Wet Step
Many Ninja iced coffee makers include a ‘Pre-Wet’ or ‘Bloom’ step in their iced coffee cycle, and skipping this is a critical mistake. This step involves a brief pause after the initial water is released, allowing the coffee grounds to absorb water and release trapped carbon dioxide.
Skipping the pre-wet step prevents proper extraction, leading to a flat, one-dimensional flavor profile in your iced coffee. The bloom ensures that the coffee grounds are fully saturated before the main brewing begins, promoting even extraction of oils and solubles.
To utilize this correctly, simply do not open the brew basket lid or interrupt the machine during this pause. If your Ninja model allows manual control, let the grounds sit with the initial water for 30–45 seconds before continuing.
This simple action unlocks deeper, more complex flavors and enhances the overall richness of your iced coffee concentrate. Always allow the pre-wet cycle to complete; it’s a short wait that pays off with a noticeably smoother and more delicious iced coffee.
Frequently Asked Questions
What is the best way to make iced coffee in a Ninja Coffee Maker?
Use the ‘Specialty Brew’ setting with the included glass carafe and fill it with ice up to the ‘Brew 4’ line. Add your coffee grounds, select the ‘Over Ice’ brew size, and the machine will brew a concentrated coffee directly over the ice for a smooth, non-watered-down result.
How do I make iced coffee using the Ninja’s ‘Over Ice’ function?
Fill a glass or the carafe with ice, then press the ‘Over Ice’ button on your Ninja Coffee Maker. The machine automatically adjusts the brew ratio to extract a stronger concentrate that balances perfectly as the ice melts, preventing a diluted taste.
Can I use regular ground coffee for iced coffee in a Ninja?
Yes, you can use regular ground coffee. However, for best results with the ‘Over Ice’ setting, use a medium to coarse grind. Avoid very fine grinds as they can over-extract and cause bitterness when brewed as a concentrate.
How much coffee should I use for Ninja iced coffee?
The Ninja Coffee Maker’s ‘Over Ice’ setting automatically adjusts the water-to-coffee ratio. For a standard 4-cup batch, fill the filter basket with the recommended amount of coffee grounds (typically 4-5 tablespoons) as indicated in your model’s manual, and fill the water reservoir to the ‘Over Ice’ line.
What is the difference between the ‘Brew’ and ‘Over Ice’ settings on a Ninja?
The ‘Brew’ setting makes a standard-strength hot coffee, while the ‘Over Ice’ setting brews a more concentrated coffee using less water. This concentrate is designed to be poured over ice, ensuring the final drink remains flavorful and not watery from melting ice.
Can I make Ninja iced coffee without the ‘Over Ice’ button?
Yes, if your Ninja model lacks an ‘Over Ice’ button, brew a double-strength batch by using twice the amount of coffee grounds and the same amount of water. Then, pour the hot coffee over a full glass of ice to achieve a similar concentrated result.
How do I clean my Ninja Coffee Maker after making iced coffee?
After brewing, discard the used grounds and filter. Rinse the brew basket and carafe with warm soapy water. For deep cleaning, run a cleaning cycle with equal parts water and white vinegar, followed by two rinse cycles, to remove coffee oils and residue.
Can I add milk or syrup directly to the Ninja carafe when making iced coffee?
It’s best to add milk, cream, or syrups after brewing directly into your serving glass. Adding them to the hot carafe can cause the milk to curdle or the syrup to stick, making cleanup harder. Stir your additions into the chilled coffee in your cup.
Conclusion
Mastering iced coffee with your Ninja is all about balance: brew a strong, concentrated batch using the specialty setting, pour it immediately over a full glass of ice to lock in bold flavor without dilution, and customize with milk or sweeteners to your taste. The process is quick, refreshing, and endlessly adaptable. Now, grab your Ninja and treat yourself to a perfect, café-quality iced coffee right at home.