How To Make Flavored Cold Foam At Home
If you’ve been searching for how to make flavored cold foam at home, you’re likely tired of paying café prices for that silky, sweet topping. The core challenge is achieving the right frothy texture and balanced flavor without a commercial machine. You’re in the right place—this guide cuts through the noise with simple techniques and ingredients you already have, so you can master barista-quality cold foam in minutes.
What Is Cold Foam and Why Make It at Home?
Cold foam vs. whipped cream: key differences
Understanding the difference between cold foam and whipped cream is crucial for perfecting your homemade coffee topping.
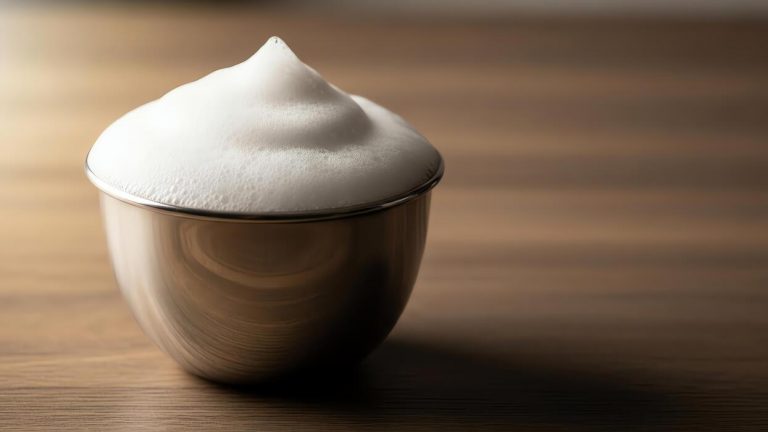
Cold foam is made from nonfat or low-fat milk that is frothed to create a dense, silky, and pourable texture, unlike whipped cream which uses heavy cream and sugar to create a stiff, spoonable structure.
The key is that cold foam incorporates tiny air bubbles without adding significant fat, allowing it to float beautifully on iced drinks without sinking or dissolving quickly.
Whipped cream, on the other hand, is rich and creamy but can weigh down cold beverages and melt faster due to its high butterfat content. For flavored cold foam, you want a base that holds flavor well and maintains its airy consistency for at least 15-20 minutes.
By choosing cold foam, you get a lighter, more stable topping that enhances the texture of your iced coffee or cold brew without overwhelming the drink’s flavor profile.
Benefits of homemade flavored cold foam
Making flavored cold foam at home gives you complete control over ingredients and sweetness while saving money compared to café drinks. You can customize flavors to match your preferences, from vanilla and caramel to seasonal pumpkin spice or lavender, using natural syrups or extracts without artificial additives.
Homemade cold foam is also healthier because you can adjust sugar levels or use sugar-free alternatives like stevia or monk fruit. Another major benefit is freshness and consistency—you can whip up a small batch in under 30 seconds with a handheld frother, ensuring it’s always fresh and perfectly aerated.
Additionally, you avoid preservatives and stabilizers found in store-bought versions. By making it yourself, you can experiment with unique flavor combinations like brown sugar cinnamon or matcha, and tailor the foam’s thickness to your liking—whether you prefer a thin, pourable layer or a thicker, cloud-like top.
This flexibility enhances your daily coffee ritual without extra cost or effort.
Essential ingredients for a perfect foam base
The foundation of great flavored cold foam starts with the right milk choice. Nonfat or skim milk works best because its low fat content allows for more stable, voluminous foam—fat inhibits bubble formation.
For a creamier texture, you can use 2% milk, but avoid whole milk or plant-based milks unless they are barista blends, as they may not froth as well.
The second essential ingredient is a flavoring agent like vanilla syrup, caramel sauce, or a pinch of cinnamon, which should be added before frothing to ensure even distribution. For sweetness, use simple syrup, honey, or a zero-calorie sweetener dissolved in warm water to avoid graininess.
Finally, a pinch of salt can enhance flavors and stabilize the foam. If you want a dairy-free option, try unsweetened oat milk or a low-fat coconut milk, but note that they may produce less foam. With these basics, you can achieve a silky, flavorful cold foam every time.
How to Make Basic Cold Foam Without a Machine
Using a French press for quick foam
A French press is an excellent tool for making cold foam without an electric frother. Start by pouring cold milk into the press—about 1/4 cup per serving, leaving room for expansion.
For flavored foam, add 1-2 teaspoons of vanilla syrup, caramel sauce, or a pinch of cinnamon directly to the milk. Secure the lid and pump the plunger vigorously up and down for 30-60 seconds. You’ll notice the milk thickens into a creamy, airy foam as you pump.
For best results, use whole milk or oat milk for richer texture, as skim milk may produce thinner foam. After pumping, pour the foam over your iced coffee or cold brew. The French press method is ideal for making small batches quickly, and the plunger action incorporates air efficiently.
To enhance flavor, experiment with pumpkin spice mix, chocolate powder, or a drop of peppermint extract before pumping. Clean the press immediately to prevent residue buildup.
Whisking by hand: step-by-step method
Whisking cold foam by hand requires a bit of elbow grease but yields satisfying results. Begin by chilling a small bowl and a whisk in the freezer for 5 minutes to keep the milk cold. Pour 1/4 cup of cold milk (whole or 2% works best) into the bowl.
Add your flavoring: 1 tablespoon of flavored syrup, a dash of vanilla extract, or a spoonful of cocoa powder. Whisk vigorously in a circular motion, tilting the bowl to incorporate air. Continue for 2-3 minutes until the milk doubles in volume and forms soft peaks.
For faster results, use a handheld milk frother instead of a manual whisk, but the manual method is perfect if you don’t have one. The key is to keep the milk very cold—warm milk won’t foam properly. Once foamy, spoon it onto your iced coffee.
This method is great for single servings and allows you to control sweetness. Rinse tools immediately to avoid sticky residue.
Electric frother tips for consistent texture
Using an electric frother simplifies cold foam creation, ensuring consistent, velvety texture every time. Start with cold milk—whole, oat, or almond milk work well. Fill the frother only to the max line to allow expansion.
For flavored foam, add 1-2 teaspoons of syrup, honey, or flavored powder directly into the milk before frothing. Press the cold foam setting (if available) or froth for 20-30 seconds until thick and glossy. Avoid over-frothing, which can make the foam too stiff or watery.
For best results, chill the milk and frother cup beforehand. Clean the whisk attachment immediately after use to prevent buildup. Experiment with pumpkin spice, lavender syrup, or matcha powder for unique flavors. If your frother has a hot foam setting, never use it for cold foam—stick to the cold setting.
This method yields restaurant-quality foam in seconds, perfect for topping iced lattes or cold brew. Adjust sweetness to taste by adding more or less syrup.
Best Ways to Add Flavor to Cold Foam

Syrups and extracts: simple flavor boosters
Start with classic flavored syrups like vanilla, caramel, or hazelnut, adding 1-2 tablespoons directly to your cold milk before frothing. For a more intense taste, use concentrated extracts (peppermint, almond, or coconut) with just 1/4 teaspoon per cup of milk. Sugar-free syrups work equally well for a low-calorie option.
Always stir the syrup or extract thoroughly into the cold milk to ensure even distribution before frothing. This method creates a consistent flavor throughout the foam without clumps. Experiment with combinations like vanilla + lavender or caramel + sea salt for gourmet results.
Remember that syrups are sweet, so adjust your coffee’s sugar accordingly. The key is to start with a small amount and taste-test your milk before frothing to avoid overpowering your foam.
Powdered flavors: cocoa, matcha, and spices
For a rich, natural flavor, whisk 1-2 teaspoons of unsweetened cocoa powder, matcha powder, or ground cinnamon into your cold milk before frothing.
To prevent clumps, first create a smooth paste by mixing the powder with a tablespoon of hot water or milk, then combine it with the rest of the cold milk. Spice blends like pumpkin pie spice or chai masala add warmth and complexity.
For a savory twist, try a pinch of cardamom or nutmeg. The powder adds both flavor and a subtle color change, making your foam visually appealing. Use a fine-mesh strainer to sift powders into the milk for a lump-free texture.
This method works best with a handheld frother or immersion blender to fully incorporate the ingredients. Adjust sweetness with a drop of honey or simple syrup if needed.
Fruit purees and sauces for natural sweetness
Add 1-2 tablespoons of fruit puree (like strawberry, mango, or raspberry) or thick fruit sauces (such as caramel or chocolate) to your cold milk for a naturally sweet, vibrant flavor. Purees should be smooth and seed-free to ensure a silky foam texture.
For best results, blend the puree with the milk using a hand blender or electric frother to create a uniform mixture. Berry purees pair beautifully with vanilla or chocolate bases, while tropical fruits like passion fruit or pineapple add a tangy twist.
These additions not only flavor but also tint your foam a lovely pastel shade. Remember that fruit purees are less sweet than syrups, so you may need to add a sweetener like agave or simple syrup to taste. This method is perfect for creating seasonal or refreshing cold foam drinks.
How to Make Vanilla Sweet Cream Cold Foam
Ingredients for a classic vanilla foam
Start with 2 tablespoons of heavy cream for a rich, stable foam that holds its shape. You’ll need 3 tablespoons of 2% or whole milk to lighten the texture without sacrificing creaminess.
For sweetness, add 1 tablespoon of vanilla syrup (store-bought or homemade) or 1 teaspoon of vanilla extract plus 1 teaspoon of sugar. If you want a dairy-free version, use full-fat oat milk or coconut cream for the best frothing results.
For a thicker, more indulgent foam, substitute the milk with an extra tablespoon of heavy cream. Always use cold ingredients straight from the fridge—cold dairy froths better and stays fluffy longer. If you like a hint of extra flavor, add a pinch of salt or a drop of almond extract.
Measure carefully: too much liquid can make the foam watery, while too little can make it too stiff. This base recipe makes enough for one large or two small coffees.
Step-by-step mixing and frothing guide
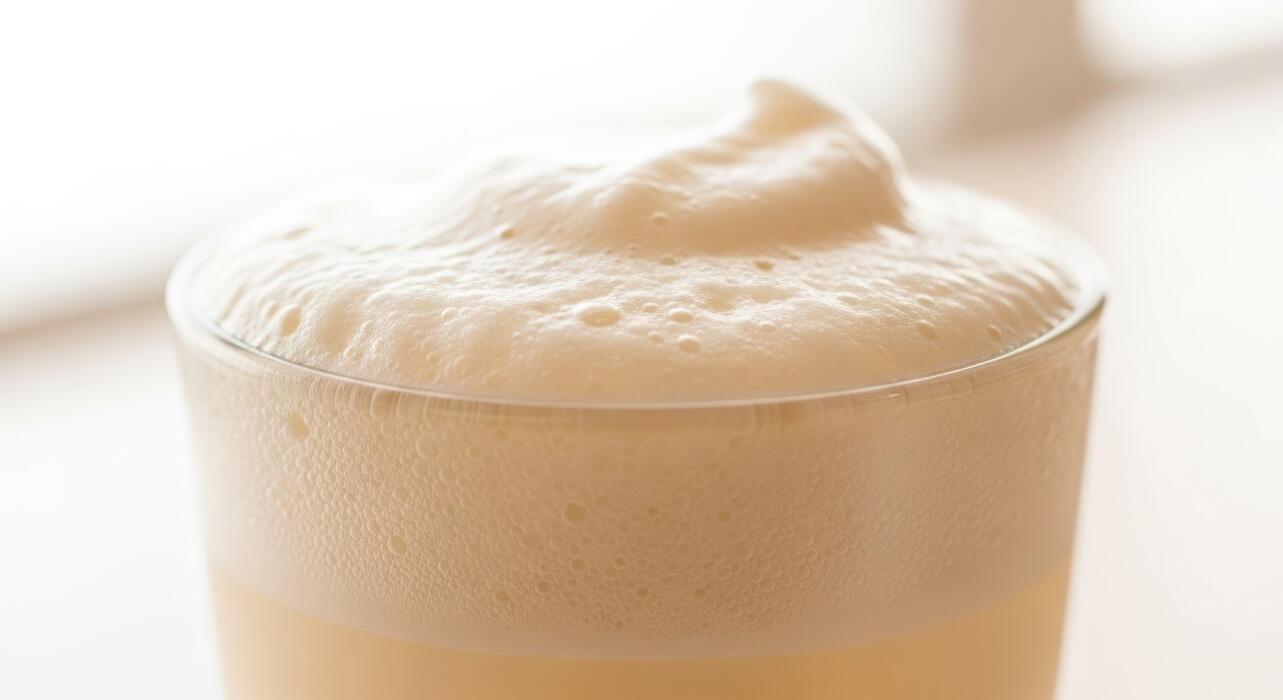
Combine the heavy cream, milk, and vanilla syrup in a tall, narrow jar or a frothing pitcher—the smaller the opening, the better the foam builds.
If using a handheld milk frother, submerge the wand just below the surface and froth for 30–45 seconds until the mixture doubles in volume and forms soft peaks.
For a French press, pour in the ingredients and pump the plunger vigorously for 45–60 seconds, tilting the press slightly to incorporate air. If you’re using a stand mixer or electric whisk, whip on medium-high for 1–2 minutes until thick but still pourable.
The key is to stop before it becomes stiff butter—the foam should be silky and cloud-like. For a cold foam that layers beautifully, spoon it directly onto iced coffee or cold brew right after frothing. If you want a denser foam, let it rest for 30 seconds before pouring.
Storage tips for leftover vanilla foam
Vanilla cold foam is best fresh, but you can store leftovers in an airtight container in the fridge for up to 24 hours. Before refrigerating, give the foam a quick stir to reincorporate any separated liquid.
When you’re ready to use it, re-froth the foam for 10–15 seconds with a handheld frother or whisk—it won’t be as airy as the first batch, but it will still be creamy and flavorful. Avoid freezing the foam, as the texture becomes grainy and watery upon thawing.
If you’ve made extra vanilla syrup, keep it separate and mix only the amount of foam you need for each serving. For best results, make only as much as you’ll use in one day—the foam’s structure degrades quickly.
If you notice a watery layer after storage, simply pour it off before re-frothing. Store your leftover syrup in a sealed bottle in the fridge for up to two weeks.
How to Make Chocolate and Caramel Cold Foam
Rich chocolate cold foam recipe
Start by combining 2 tablespoons of heavy cream with 1 cup of cold whole milk in a tall jar. Add 1 tablespoon of high-quality cocoa powder and 1 tablespoon of simple syrup (or maple syrup for a natural twist).
Use a handheld milk frother for 30-45 seconds until the mixture doubles in volume and forms a thick, velvety foam. For a deeper chocolate flavor, try dark cocoa powder or a splash of vanilla extract. The key is to use cold ingredients to prevent the foam from collapsing.
If you don’t have a frother, shake the mixture vigorously in a sealed mason jar for 60 seconds. Pour the foam over your iced coffee, leaving room for the layers to settle. This foam adds a luxurious, dessert-like touch without extra calories from syrups.
Store any leftover foam in the fridge for up to 2 days, but re-froth briefly before serving.
Salted caramel cold foam variations
For a salted caramel twist, begin with 1 cup of cold whole milk and 2 tablespoons of heavy cream. Add 2 tablespoons of caramel sauce (homemade or store-bought) and a pinch of flaky sea salt. Froth with a handheld frother for 30-40 seconds until it’s airy and thick.
Adjust sweetness by using sugar-free caramel syrup or date caramel for a healthier option. For extra depth, stir in 1/4 teaspoon of vanilla extract or a dash of cinnamon. To make it dairy-free, substitute with oat milk and coconut cream—the fat content ensures a stable foam.
Experiment with smoked sea salt for a gourmet finish. This foam pairs beautifully with cold brew or espresso over ice, balancing bitter notes with creamy, salty-sweet richness. For a layered drink, pour the foam slowly over the back of a spoon to keep it floating.
Serve immediately for the best texture.
Pairing chocolate and caramel foams with coffee
Combine the chocolate and caramel foams for a decadent mocha-caramel experience. Start with a base of strong cold brew or iced espresso—use a double shot for intensity. Layer 2 tablespoons of chocolate cold foam first, then gently spoon 2 tablespoons of salted caramel foam on top.
The contrasting flavors create a sophisticated, café-style drink. For a twist, drizzle caramel sauce inside the glass before adding coffee. Adjust ratios to your taste: more chocolate for richness, more caramel for sweetness. For a healthier version, use unsweetened almond milk and cacao powder with a sugar-free caramel syrup.
To make it a dessert coffee, top with whipped cream and a sprinkle of cocoa nibs or sea salt. The key is cold ingredients and a slow pour to maintain distinct layers. Serve with a straw for sipping through the foam.
This pairing works well with vanilla or hazelnut syrups for extra flavor depth.
Tips for Getting the Right Cold Foam Consistency
Milk fat content: whole vs. skim vs. alternatives
The fat content of your milk directly impacts the texture and stability of your flavored cold foam. Whole milk (3-4% fat) creates a rich, creamy foam that holds its shape well, but it can be slightly heavier and may not incorporate flavors as evenly.
Skim or nonfat milk is the classic choice for cold foam because it has the highest protein-to-fat ratio, allowing it to whip into a light, airy, and stable structure that floats perfectly on cold drinks. However, it can lack the velvety mouthfeel of whole milk.
For dairy-free options, oat milk is the top performer—its high sugar and protein content produces a thick, creamy foam that mimics dairy well. Almond milk is thinner and often requires a stabilizer like xanthan gum, while coconut milk yields a rich foam but can separate.
Always choose a barista edition of plant-based milks for best results, and remember that lower-fat options generally yield more voluminous foam for your flavored creations.
Temperature tricks for stable foam
Temperature is the secret weapon for achieving perfectly stable cold foam. Always start with ice-cold milk—refrigerate your milk for at least 30 minutes before frothing, as cold temperatures help the proteins denature slowly, creating a tighter, more durable foam structure.
For best results, use a cold frothing pitcher (chill it in the freezer for 10 minutes) to keep the milk cold during the entire process.
When using a handheld frother, submerge the wand fully and froth for 15-30 seconds until soft peaks form; over-frothing warms the milk and collapses the foam. If using a French press, pump the plunger slowly for 30 seconds to incorporate air without generating heat.
Avoid frothing milk that has been sitting at room temperature, as it will produce a loose, watery foam that deflates quickly. For flavored syrups, add them after frothing to prevent sugar from interfering with protein structure. This temperature control ensures your foam stays fluffy and intact on your beverage.
Common mistakes and how to fix them
Even experienced home baristas encounter foam failures, but most are easily fixable. Mistake: Foam is too thin or watery. Solution: You likely used milk that wasn’t cold enough or over-frothed it. Chill milk to 35-40°F and froth for only 15-20 seconds—stop as soon as soft peaks form.
Mistake: Foam deflates immediately on the drink. This often happens when you add flavored syrup before frothing; the sugar destabilizes the foam. Always froth plain milk first, then gently fold in your syrup or flavoring with a spoon.
Mistake: Large bubbles and uneven texture. You probably submerged the frother wand too shallowly or used a whisk attachment. Keep the wand fully submerged near the bottom of the pitcher and tilt it slightly to create a vortex.
Mistake: No foam at all. This is common with ultra-filtered milks or plant-based milks lacking stabilizers. Switch to a barista blend or add a pinch of xanthan gum (⅛ tsp per cup) to improve structure. With these fixes, your flavored cold foam will be restaurant-quality every time.
How to Serve and Store Flavored Cold Foam
Best coffee and drink pairings for each flavor
Pairing your flavored cold foam with the right coffee base elevates both the drink and the foam’s flavor. For vanilla or caramel foam, choose a medium-roast drip coffee or a classic latte—the sweetness complements the coffee’s natural chocolate notes.
Chocolate or mocha cold foam shines with a bold dark roast or an iced espresso, creating a rich, dessert-like experience. Fruity flavors like raspberry or lavender pair best with a light roast pour-over or a cold brew, as the bright acidity of the coffee balances the floral or tart notes.
For spiced foams (cinnamon, pumpkin spice), try an oat milk latte or a chai tea latte—the creamy foam blends seamlessly with the warm spices. Always match the intensity: delicate foams work with lighter roasts, while robust foams can handle darker, more bitter coffee bases.
Experiment with iced drinks first, as the cold foam stays thickest on cold beverages, but hot drinks also work if you pour gently to avoid melting the foam instantly.
Layering cold foam on hot and iced drinks
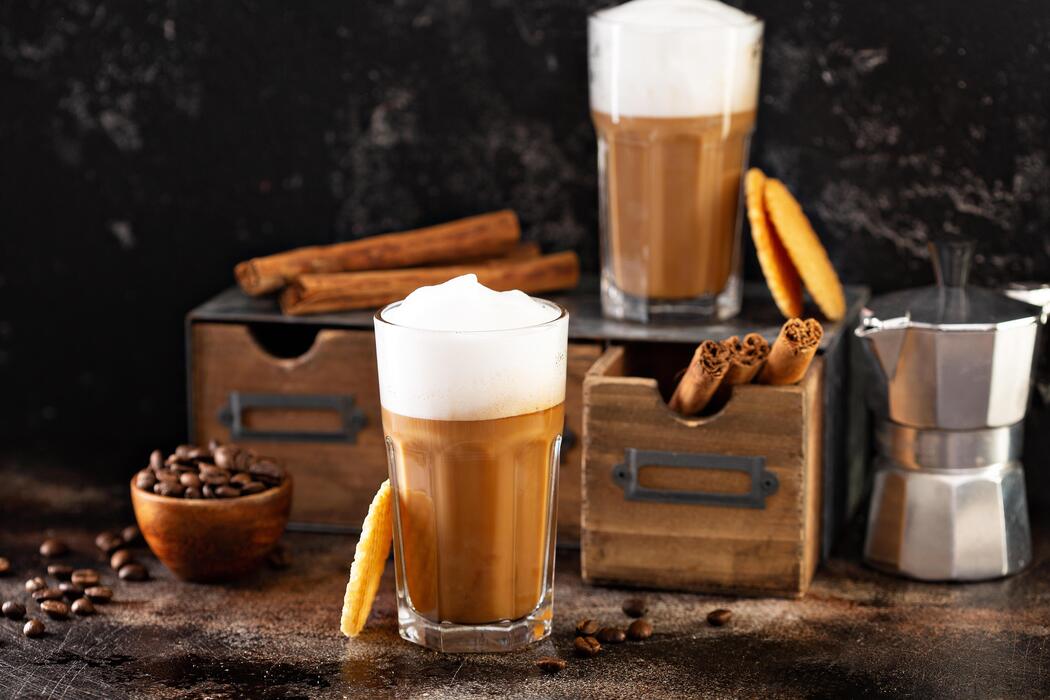
Layering cold foam correctly ensures a beautiful, Instagram-worthy drink that stays stable. For iced drinks, fill your glass with ice and coffee, leaving at least an inch of space at the top.
Slowly spoon or pour the flavored cold foam over the back of a spoon onto the surface—this prevents it from sinking and keeps it as a distinct layer. For hot drinks, let your coffee cool for 30 seconds before adding foam, as extreme heat will cause it to dissolve quickly.
Pour the foam gently in the center, then use a spoon to spread it evenly. Key tip: the foam should be thick enough to hold its shape—if it’s too runny, it won’t layer properly. For best results, use a frother or blender until the foam reaches a soft peak consistency.
To keep layers intact, avoid stirring; instead, drink through the foam to enjoy the flavor contrast with the coffee below.
Refrigerating and reusing leftover foam
Leftover flavored cold foam can be stored and reused, but it won’t stay perfectly stable. Refrigerate any unused foam in an airtight container for up to 24 hours—after that, the texture becomes watery and less frothy.
To reuse, gently re-froth it with a handheld frother or shake it vigorously in a sealed jar for 10 seconds. Avoid microwaving the foam, as heat destroys its airy structure; instead, let it sit at room temperature for 5 minutes before re-frothing.
Important note: dairy-based foams separate faster than non-dairy ones, so if using heavy cream or milk, use it within 12 hours. For best quality, only make the amount you need per serving.
If you have leftover foam, consider using it as a topping for hot chocolate, iced matcha, or even desserts like pancakes or brownies.
Pro tip: freeze leftover foam in ice cube trays for a quick addition to future iced coffees—just drop a cube in and let it melt slowly for a subtle flavor boost.
Frequently Asked Questions
What is cold foam and how is it different from regular milk foam?
Cold foam is frothed cold milk, often made with non-fat milk for a creamy texture, while regular foam is made from steamed hot milk. Cold foam sits on top of iced drinks, providing a light, airy layer without melting the ice.
What ingredients do I need to make flavored cold foam at home?
You need cold milk (preferably whole or 2% for richness), a sweetener like simple syrup or vanilla syrup, and a flavoring such as vanilla extract, caramel sauce, or cocoa powder. A frother or blender is used to aerate the mixture.
How do I make vanilla cold foam without a frother?
Combine 1/4 cup cold milk, 1 teaspoon vanilla syrup, and a dash of vanilla extract in a jar with a tight lid. Shake vigorously for 30-60 seconds until frothy, then pour over your drink.
Can I use plant-based milk for flavored cold foam?
Yes, oat milk and soy milk work best because they have a creamy consistency similar to dairy. Almond milk may be thinner, so use a barista blend for better foam. Add flavorings like cinnamon or honey for taste.
How do I make chocolate or caramel flavored cold foam?
For chocolate, mix 1/4 cup cold milk with 1 tablespoon chocolate syrup and a pinch of salt, then froth. For caramel, blend 1/4 cup milk with 1 tablespoon caramel sauce and a drop of vanilla extract before frothing.
What is the best technique to get thick, creamy cold foam at home?
Use cold milk with higher fat content (like whole milk) and a handheld milk frother. Froth for 20-30 seconds until thick peaks form, and avoid over-frothing which can make it watery. Chill the milk beforehand for best results.
How do I add flavored cold foam to my iced coffee without it sinking?
Pour your iced coffee or cold brew into a glass, leaving room at the top. Gently spoon the cold foam over the back of a spoon onto the drink’s surface to create a floating layer. Serve immediately to maintain the foam.
Can I make sugar-free flavored cold foam?
Yes, use unsweetened milk and sugar-free syrups like vanilla or caramel. Stevia or monk fruit sweeteners also work. Froth as usual, and note that sugar-free options may produce slightly less stable foam.
Conclusion
Mastering homemade flavored cold foam is simple: use cold heavy cream or non-dairy milk, a frother, and your favorite syrups or spices. The key is achieving a thick, velvety texture by frothing just until soft peaks form. Whether you crave vanilla, caramel, or matcha, this quick upgrade transforms any coffee or tea into a café-worthy treat. Experiment fearlessly, and enjoy the creamy, luxurious reward of your own creation.