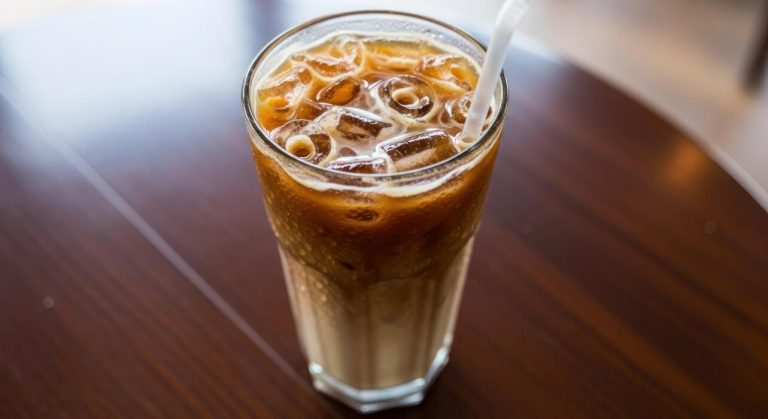
How To Make Best Iced Coffee At Home
Stop settling for watered-down caffeine fixes and learn how to make the best iced coffee at home today. Whether you crave a velvety cold brew or a lightning-fast chilled pour-over, achieving coffeehouse quality in your own kitchen is easier than you think. This guide reveals the pro secrets to balancing bold flavor with refreshing coolness, ensuring every sip is perfect.
Essential Tools and Ingredients for Professional Iced Coffee
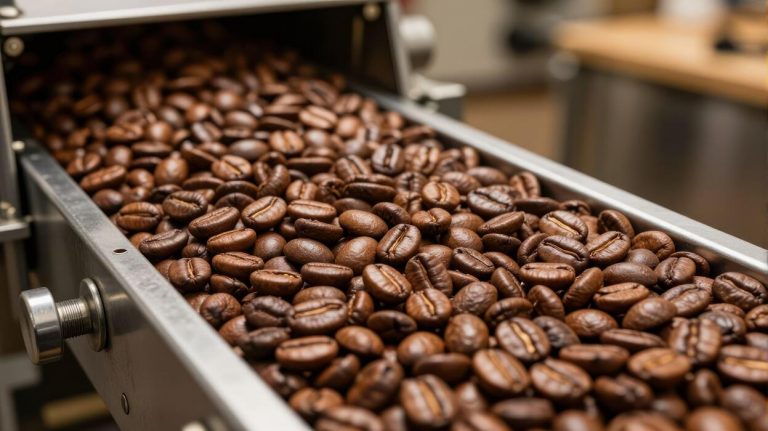
Choosing the Best Coffee Beans for Cold Drinks
To replicate a cafe-quality experience at home, you must start with freshly roasted specialty beans.
When making iced coffee, the flavor profile is often diluted by melting ice, so selecting a medium to dark roast is generally recommended as it provides a robust, chocolatey, and nutty backbone that stands up well to chilling.
If you prefer a brighter, more tea-like consistency, a light roast with floral notes can work beautifully, provided you brew it at a higher concentration. Always check the roast date on the bag to ensure maximum aromatic intensity.
For the best results, buy whole bean coffee and grind it immediately before brewing to prevent oxidation. Since cold temperatures can suppress certain taste nuances, choosing beans with distinct profiles like Ethiopian fruitiness or Sumatran earthiness ensures your drink remains flavorful even as it cools.
Investing in high-quality beans is the single most important step in mastering the art of home brewing for refreshing summer beverages.
Why Water Quality Matters for Flavor
Since a cup of iced coffee is approximately ninety-eight percent water, the quality of your tap is just as vital as the beans themselves.
Using filtered or bottled spring water is essential because chlorine, minerals, and impurities found in standard tap water can create a metallic or harsh aftertaste that ruins the delicate balance of the brew.
Ideally, you want water that is neutral in pH and rich in magnesium, which helps extract the sweet and acidic compounds from the grounds more effectively.
If your water is too hard, your coffee will taste flat and chalky; if it is too soft, it may turn out overly acidic or sour. Many professionals recommend using a simple charcoal filter pitcher to remove odors and sediments that interfere with the natural sweetness of the coffee.
By controlling this often-overlooked variable, you ensure a clean, crisp finish that allows the true character of your chosen roast to shine through without any distracting chemical interference or unwanted off-flavors.
Must-Have Equipment for Home Brewing
To achieve professional results, you need a few fundamental tools beyond a standard kitchen pot. A burr grinder is non-negotiable, as it produces uniform particle sizes that lead to even extraction and prevent a bitter or muddy cup.
For precision, a digital kitchen scale allows you to measure your coffee-to-water ratio accurately, ensuring consistency every time you brew. If you prefer the flash-chill method, a V60 or Chemex dripper is perfect for brewing hot coffee directly over ice.
Alternatively, a large glass carafe or French press is ideal for those who favor the smooth, low-acidity profile of cold brew. Don’t forget a long-handled stirring spoon to integrate your ingredients and high-quality silicone ice cube trays, which produce larger cubes that melt slower and reduce dilution.
Finally, using a fine-mesh strainer or paper filter will guarantee a sediment-free drink with a silky mouthfeel. Having these specific tools on hand transforms the process from a guessing game into a repeatable, high-quality craft at your own kitchen counter.
How to Make Cold Brew Coffee for a Smooth Taste

The Perfect Coffee-to-Water Ratio
To achieve the ultimate smooth taste when learning how to make the best iced coffee at home, the foundation lies in your measurements. For a versatile cold brew concentrate, use a ratio of 1:4 (one part coffee to four parts water).
This specific balance ensures a bold flavor profile that remains flavorful even after adding ice or milk. It is essential to use coarsely ground coffee beans, resembling the texture of sea salt or breadcrumbs; if the grind is too fine, your beverage will taste bitter and over-extracted.
Using filtered water at room temperature is another critical step, as it prevents impurities from masking the subtle chocolatey or nutty notes of your beans. By sticking to this precise ratio, you create a robust base that is neither too watery nor overwhelmingly intense.
This consistency allows you to replicate café-quality results every single morning, providing a reliable and delicious caffeine kick without the acidic bite often found in standard hot-brewed drip coffee methods.
Step-by-Step Steeping Instructions
Once your ingredients are prepped, combine the coarse grounds and filtered water in a large glass jar or a dedicated cold brew maker. Gently stir the mixture with a long spoon to ensure every coffee ground is fully saturated, which prevents dry pockets from ruining the extraction process.
Place the lid on your container and let it steep for 12 to 18 hours at room temperature. Avoid the temptation to refrigerate it during this initial phase, as the cold temperature slows down extraction and can lead to a weaker flavor profile.
If you prefer an exceptionally bold brew, aim for the full 18-hour mark, but avoid exceeding 24 hours to prevent the development of woody or earthy off-flavors. This long, slow immersion process is what naturally reduces the acidity levels, resulting in that signature velvety texture.
Keep the container in a dark spot away from direct sunlight to maintain a stable environment, ensuring the chemical process remains consistent throughout the entire duration of the long steeping period.
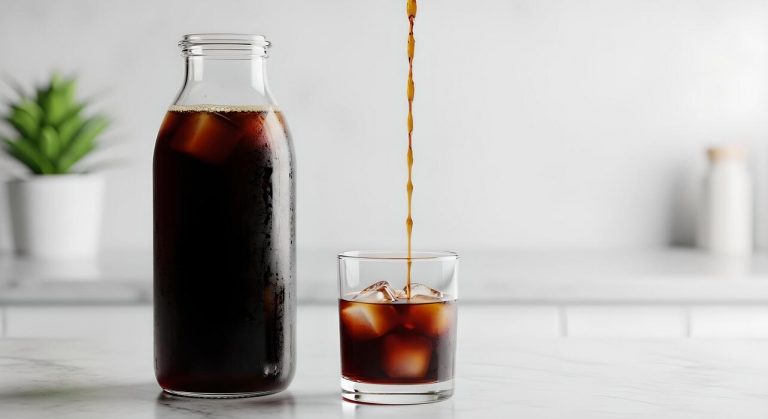
How to Filter and Store Your Concentrate
After the steeping time is complete, the final step for a clean, sediment-free cup is proper filtration. Start by pouring the mixture through a fine-mesh sieve to remove the largest grounds, followed by a paper coffee filter or cheesecloth to catch the finer particles.
This double-filtration method is the secret to a professional, smooth mouthfeel without any grit at the bottom of your glass. Once filtered, transfer the liquid into a clean glass carafe or airtight mason jar.
You can store the concentrate in the refrigerator for up to two weeks without any loss in quality. When you are ready to serve, remember that this is a concentrate; dilute it with equal parts water or milk over a glass full of fresh ice.
Using coffee ice cubes is a pro tip to prevent dilution as you sip. Because the concentrate stays fresh for so long, you can easily prep a large batch on Sunday and enjoy the best iced coffee at home throughout the entire busy work week.
The Flash Chilling Method for Instant Results
What is Japanese Style Iced Coffee?
Flash chilling, popularly known as Japanese style iced coffee, is a superior brewing technique that prioritizes flavor preservation and aromatic complexity. Unlike cold brew, which relies on a long immersion process that often results in a mellow, low-acid profile, flash chilling involves brewing coffee hot directly onto ice.
This immediate temperature drop locks in volatile aromatic compounds that are typically lost during a slow cooling process. By using hot water for the initial extraction, you effectively dissolve the bright acids and nuanced oils that characterize high-quality specialty beans.
The result is a vibrant, crisp, and incredibly clean cup that tastes exactly like a professional pour-over but at a refreshing temperature.
This method is the gold standard for coffee enthusiasts who want to enjoy the full terroir of their beans without the muddy or oxidized flavors that can occur when traditional hot coffee is left to cool at room temperature before being refrigerated for later use.
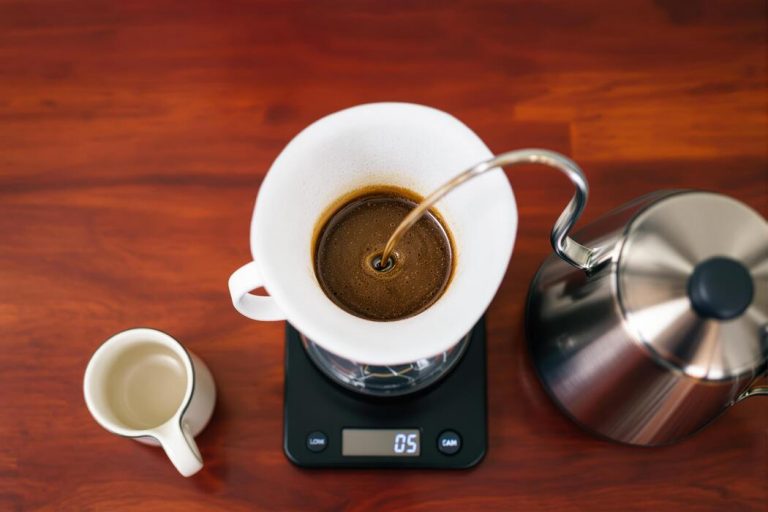
How to Brew Directly Over Ice
To execute the perfect flash chill at home, you must adjust your standard pour-over ratio to account for the melting ice. Start by weighing out your total water volume and splitting it: use approximately 60% hot water for brewing and 40% ice in the carafe.
Place your ice cubes directly into the bottom of your dripper vessel before you begin. Grind your coffee beans slightly finer than usual to ensure a thorough extraction since you are using a smaller volume of hot water.
Pour the hot water (ideally between 195-205 degrees Fahrenheit) over the grounds in slow, circular motions. As the concentrated hot coffee drips, it hits the ice and instantly chills to a cold temperature, melting the cubes to create the final desired volume.
This rapid transition prevents the coffee from oxidizing, ensuring that every sip is as fresh as possible. Once the brew is finished, give the carafe a quick swirl to ensure the temperature is consistent throughout the entire drink.
Tips for Balancing Dilution and Strength
The biggest challenge with flash chilling is preventing a watery or weak final product. To master the balance, you must focus on the total beverage weight rather than just the water poured from the kettle.
If you typically use a 1:16 ratio, maintain that same ratio but count the ice as part of your total water weight. Using large, dense ice cubes is a pro-tip because they have less surface area and melt more predictably than small, crushed ice.
Additionally, consider using a darker roast or a higher dose of grounds to provide more body that can stand up to the cooling process. If your coffee feels too thin, increase your coffee-to-water ratio slightly to 1:14 to boost the intensity.
Always rinse your paper filter with hot water first to remove any papery taste, but ensure the carafe is emptied of that rinse water before adding your ice.
These small adjustments ensure a bold, full-bodied iced coffee that maintains its structural integrity from the first sip to the very last drop.
Ways to Prevent Watered-Down Iced Coffee
How to Make Coffee Ice Cubes
One of the most effective strategies to maintain the integrity of your beverage is to replace standard water ice with coffee ice cubes. To do this, simply brew a fresh pot of your favorite blend and let it cool to room temperature before pouring it into silicone ice trays.
For an extra flavor boost, you can add a touch of vanilla or simple syrup to the liquid before freezing. These frozen cubes ensure that as they melt, they release concentrated coffee flavor instead of diluting your drink with excess water.
This technique allows you to enjoy every sip from the first to the last without the dreaded watery finish. It is a proactive solution for those who prefer to drink their iced coffee slowly throughout the morning.
By keeping a steady supply of these cubes in your freezer, you transform a standard kitchen staple into a professional barista tool that guarantees a rich, consistent, and full-bodied experience every single time you brew.
Using HyperChillers and Rapid Cooling Tools
If you are looking for an immediate solution without the wait time of traditional refrigeration, investing in a HyperChiller or rapid cooling device is a game-changer for home brewing. These specialized tools use a multi-chamber design filled with ice to flash-chill hot liquid in under sixty seconds.
By pouring your freshly brewed coffee directly into the device, you drop the temperature by up to 130 degrees without the liquid ever touching the ice itself. This process prevents dilution entirely, allowing you to pour the chilled coffee over fresh ice cubes without them melting instantly upon contact.
It is the perfect method for those who want the bold profile of a hot brew served cold and crisp. Utilizing rapid cooling technology ensures that the delicate aromatic oils and nuanced flavor notes of your beans are preserved.
This approach is highly efficient for busy mornings, providing a barista-quality iced coffee in the same amount of time it takes to brew a standard hot cup, making it a must-have for enthusiasts.
The Benefits of Double-Strength Brewing
When you know your coffee will eventually encounter ice, the best defense is to implement a double-strength brewing technique. This involves using the same amount of coffee grounds you would normally use but reducing the amount of brewing water by half.
The result is a highly concentrated extract that is specifically designed to be balanced out by the melting ice. As the ice cubes begin to dissolve, they act as the second half of your water ratio, bringing the beverage to its ideal flavor equilibrium rather than watering it down.
This method is particularly effective for drip machines, pour-overs, and Aeropress systems where you have precise control over the water-to-coffee ratio. By starting with a robust and intense base, you ensure that the final product remains flavorful and punchy even on a hot day.
This simple adjustment in your brewing math is the most cost-effective way to elevate your home setup, providing a consistently bold profile that mimics the premium iced beverages served at high-end specialty coffee shops.
Best Sweeteners and Syrups for Cold Drinks

How to Make Simple Syrup at Home
To achieve a professional-grade iced coffee, you must master the art of making simple syrup. Unlike granulated sugar, which often sinks to the bottom of cold liquids and creates a gritty texture, a liquid sweetener integrates instantly for a smooth sip every time.
To create a standard batch, combine equal parts white granulated sugar and water in a small saucepan over medium heat. Stir the mixture constantly until the sugar completely dissolves and the liquid turns crystal clear.
Avoid bringing it to a rolling boil for too long, as this can over-concentrate the mixture and make it too thick to pour easily.
Once the sugar is dissolved, remove the pan from the heat and let it cool to room temperature before transferring it to a sealed glass jar or bottle. This homemade syrup can be stored in the refrigerator for up to four weeks.
Using this method ensures your iced coffee is perfectly sweetened from the first sip to the last, allowing for a consistent flavor profile without the unpleasant crunch of undissolved crystals.
Natural Sweetener Alternatives
If you are looking to avoid refined white sugar, several natural alternatives work beautifully in chilled coffee beverages. Honey and agave nectar are popular choices because they possess unique floral notes that complement the acidity of medium-roast beans.
However, honey can seize up or become thick when it hits ice-cold coffee; to prevent this, whisk it into a small amount of warm water or hot coffee first to create a honey-water dilution.
Agave nectar is naturally more fluid and dissolves much easier in cold liquids, making it a convenient option for quick preparation. For those following specific dietary patterns, maple syrup is a fantastic vegan alternative that provides a rich, earthy depth of flavor.
If you prefer a calorie-free option, liquid stevia or monk fruit drops are highly effective because they do not require heat to dissolve.
When using these natural substitutes, start with a very small amount and taste as you go, as their sweetness levels are often much more intense than traditional cane sugar. Choosing high-quality, minimally processed sweeteners will enhance the complexity of your beverage while meeting your nutritional preferences.
Adding Flavor with Vanilla, Caramel, or Mocha
Elevating your home-brewed iced coffee to cafe standards is easily achieved by incorporating flavored syrups and sauces. To make a classic vanilla syrup, simply add a tablespoon of pure vanilla extract or a scraped vanilla bean to your homemade simple syrup while it is still warm.
This creates a fragrant, aromatic base that pairs perfectly with a splash of cream. For those who enjoy a richer, more indulgent drink, caramel sauce or salted caramel syrup provides a buttery sweetness that cuts through the bitterness of dark roast coffee.
If you are a fan of chocolate, creating a mocha-style drink is as simple as whisking high-quality cocoa powder and a touch of sugar into your hot coffee before pouring it over ice. You can also use a pre-made chocolate ganache for a more velvety texture.
Remember that these flavors are potent, so it is best to layer your flavors gradually. Start by adding one tablespoon of your chosen flavor to the bottom of your glass, pour in your coffee, and stir thoroughly before adding ice.
This technique ensures the flavor is evenly distributed throughout the entire drink for a balanced and delicious experience.
How to Achieve the Perfect Creamy Texture
Choosing Between Dairy and Plant-Based Milks
To achieve the ultimate creamy texture in your iced coffee, the fat and protein content of your chosen whitener play a critical role. If you prefer traditional dairy, whole milk or half-and-half provides a rich, velvety mouthfeel that balances the acidity of the coffee perfectly.
For those opting for plant-based alternatives, oat milk is widely considered the gold standard because its natural starches mimic the thickness of dairy and create a smooth consistency that won’t separate when chilled.
Soy milk also offers a high protein content that helps maintain structural integrity when stirred into cold liquids. Avoid thin alternatives like skim milk or basic almond milk if you want a luxurious finish, as these can often lead to a watery result.
By selecting a high-fat barista blend, you ensure that your beverage has enough body to coat the palate, providing a professional coffee house experience right in your own kitchen with every refreshing sip you take.
How to Make Cold Foam in Your Kitchen
Elevating your iced coffee with a cloud-like layer of cold foam is surprisingly easy and requires no expensive machinery. To start, take a small amount of cold heavy cream and 2% milk mixed with a touch of flavored syrup.
You can use a handheld battery-operated frother to aerate the mixture for about thirty seconds until it doubles in volume and reaches a thick, pourable consistency.
If you do not have a frother, simply pour the ingredients into a mason jar and shake vigorously for a minute until stiff peaks begin to form.
The key to successful cold foam is ensuring the liquid is ice-cold before you begin the aeration process, as warm dairy will not trap air bubbles as effectively.
This technique creates a beautiful, sweet microfoam that sits delicately on top of your coffee, slowly cascading downward to create a stunning visual effect while providing a silky, decadent texture that enhances every single mouthful of your homemade caffeinated creation.
Tips for Mixing and Layering Your Drink
The order in which you combine your ingredients is the final secret to a perfectly textured iced coffee. Start by filling your glass with large ice cubes, which melt slower than crushed ice and prevent your drink from becoming diluted too quickly.
Pour your concentrated coffee or cold brew over the ice first, then add your sweeteners while the liquid is still slightly accessible to ensure they dissolve completely.
When it comes time for the creamy element, pour the milk or foam slowly over the back of a spoon to create distinct, beautiful layers that look as good as they taste.
This layering technique prevents the milk from instantly thinning out the coffee, allowing you to enjoy different flavor profiles as the drink naturally integrates while you sip. Remember to give it a gentle swirl rather than a vigorous stir to maintain the integrity of the textures.
By mastering these simple layering steps, you achieve a professional balance of bold coffee flavor and smooth, creamy richness throughout the entire beverage.
Common Mistakes to Avoid When Making Iced Coffee
Why You Should Never Use Hot Leftover Coffee
One of the most frequent errors home baristas make is attempting to salvage yesterday’s pot of joe by pouring it over ice. While it might seem resourceful, using hot leftover coffee results in a stale, oxidized beverage that lacks the vibrant flavor profile of a fresh brew.
When coffee sits at room temperature for hours, the oils begin to degrade and the acids turn unpleasantly sharp, leading to a flat and muddy taste. To achieve the best results, you should always brew fresh coffee specifically for your iced drink.
If you are in a rush, utilize the flash-chilling method by brewing a concentrated hot batch directly over a measured amount of ice. This technique instantly locks in the aromatic compounds and delicate flavors that are lost when coffee is left to sit out.
By prioritizing freshness over convenience, you ensure your morning glass is crisp, refreshing, and entirely free from the bitterness associated with old, oxidized beans.
Fixing Bitter or Sour Flavors
If your homemade iced coffee tastes overly harsh or unpleasantly tart, the issue usually lies in your extraction parameters or your water-to-coffee ratio. Bitter flavors typically indicate over-extraction, which often happens when the water is too hot or the grind size is too fine for the brewing method.
Conversely, sour or thin coffee is a sign of under-extraction, suggesting your grinds are too coarse or the brewing time was too short. To fix these common issues, start by using filtered water to ensure a clean base, as tap water minerals can distort the bean’s natural profile.
If you find your drink becomes watery as the ice melts, try making coffee ice cubes to maintain the strength of the brew until the very last sip.
Adjusting your grind size incrementally and monitoring your water temperature will allow you to find the sweet spot, resulting in a perfectly balanced and smooth glass of iced coffee that rivals any professional cafe.
Proper Cleaning for Better Tasting Coffee
Many people overlook the impact that a dirty machine has on the final flavor of their iced beverages. Over time, coffee oils and mineral deposits build up inside your brewer, carafe, and even your reusable filters, which can impart a rancid or metallic aftertaste to your drink.
To ensure your iced coffee remains bright and clean, you must regularly descale your equipment and deep-clean all removable parts with specialized cleaners or a simple vinegar solution. Pay close attention to the spray head and the basket where old residues tend to hide.
Furthermore, if you are using a cold brew pitcher, ensure it is thoroughly scrubbed after every use to prevent bacterial growth and stale odors from lingering.
Maintaining a meticulous cleaning schedule is the simplest way to elevate the quality of your brew and ensure that the unique notes of your premium coffee beans are the only thing you taste. A pristine machine is the foundation of every great cup of coffee.
Frequently Asked Questions
What is the best coffee-to-water ratio for iced coffee?
For the best results, use a 1:8 ratio for cold brew concentrate or a 1:16 ratio for hot-brewed coffee that will be poured over ice. Using a higher coffee-to-water ratio ensures the flavor remains bold even as the ice begins to melt.
How do I prevent my iced coffee from becoming watery?
The most effective way to prevent dilution is to use coffee ice cubes made by freezing leftover brewed coffee in an ice tray. Alternatively, you can brew your coffee at double strength to compensate for the melting ice.
What is the difference between cold brew and iced coffee?
Cold brew is made by steeping coarse grounds in cold water for 12-24 hours, resulting in a smooth, low-acid flavor. Traditional iced coffee is brewed hot and then chilled, which offers a more acidic and aromatic profile but requires careful cooling.
How can I sweeten iced coffee without undissolved sugar at the bottom?
Use a simple syrup made by dissolving equal parts sugar and water, as it mixes instantly with cold liquids. You can also use flavored syrups, honey, or agave nectar, which incorporate much better than granulated sugar.
Should I use a specific roast for the best iced coffee?
Medium to dark roasts are generally preferred for iced coffee because their bold, chocolatey, and nutty notes hold up better against ice and milk. Light roasts can sometimes taste overly sour or thin when served cold.
How can I get a frothy texture in my homemade iced coffee?
You can achieve a professional froth by shaking your cold coffee and milk in a mason jar or using a handheld milk frother for 30 seconds. This adds a creamy mouthfeel and a visually appealing foam layer to your drink.
Conclusion
Mastering the perfect iced coffee at home is all about balancing quality beans, the right brewing method, and creative customization. Whether you prefer the smoothness of cold brew or the speed of an flash-chilled pour-over, using fresh ingredients ensures a cafe-quality result every time. Don’t be afraid to experiment with syrups and milk alternatives to find your signature blend. Start brewing today and enjoy the refreshing satisfaction of a professional drink in your own kitchen.