How To Get Cork Out Of Corkscrew
Stuck cork in your corkscrew? Don’t worry—it happens to everyone. Whether you’re hosting a dinner party or enjoying a quiet night in, getting that stubborn cork out doesn’t have to be frustrating. In this quick guide, we’ll walk you through simple, effective methods to safely remove a cork from any corkscrew in minutes. No special tools needed—just everyday items and a little know-how. Let’s get that cork out and your wine flowing smoothly again.
How to Remove a Cork from a Waiter’s Friend Corkscrew
Step-by-step guide for standard waiter’s corkscrew
To remove a cork from a standard waiter’s friend corkscrew, start by fully extracting the screw from the bottle while keeping the cork attached. Hold the corkscrew handle firmly in one hand and grip the cork with the other.
Rotate the cork gently while pulling it straight out—this reduces resistance and helps maintain control. If the cork is stuck, avoid yanking; instead, wiggle it slightly side to side to loosen it from the metal spiral.
Use a clean cloth to improve your grip on the cork, especially if it’s damp or slippery. Once free, inspect the screw for any cork debris and clean it with a damp cloth. This step ensures the tool remains effective and hygienic for future use.
Practicing this method regularly helps build confidence and efficiency when serving wine in professional or home settings.
Using leverage to safely extract the cork
When the cork resists removal, apply controlled leverage to dislodge it without breaking. Place your index finger on the top of the cork and your thumb beneath the base of the spiral for stability.
Use your wrist and fingers—not your arm—to twist and pull the cork upward in a smooth motion. If needed, rest the corkscrew handle against a solid surface like a table edge to gain extra leverage while pushing the cork off.
Maintain even pressure to prevent sudden slips that could damage the cork or injure your hand. For deeper insertions, partially reinsert the screw into the cork to create better grip before extraction. This technique is especially useful with older, fragile corks.
Always work over a trash can or towel to catch debris. With practice, this method becomes intuitive and significantly reduces the risk of cork breakage.
Tips for avoiding broken corks during removal
To prevent cork breakage, insert the screw correctly—centered and at a slight angle, twisting in until just before the hinge reaches the bottle lip. Over-insertion increases the risk of splitting the cork. Use a sharp, clean spiral that grips without shredding.
For older wines, consider using a longer, thinner screw or alternative tools like an Ah-So. If the cork feels soft, pull slowly and steadily rather than with force. Keep the bottle steady and avoid tilting it excessively during extraction.
If the cork starts to crumble, stop and reposition the screw slightly off-center to catch more solid material. Wet corks are more pliable, so ensure the bottle neck is clean and moist if possible. Regular maintenance of your corkscrew ensures smoother performance.
These precautions preserve cork integrity and enhance the wine-serving experience.
Fixing a Cork Stuck in a Winged Corkscrew
How to release pressure in winged corkscrews
When a cork gets stuck in a winged corkscrew, releasing built-up pressure is the first critical step. Begin by stabilizing the bottle on a flat surface to prevent slipping. Gently push the cork slightly back into the bottle to relieve tension between the cork and the corkscrew’s worm.
This small reinsertion can loosen the grip and make extraction easier. While applying light downward pressure, slowly lower the wings back to their starting position—this reduces mechanical strain on the mechanism. Avoid forcing the wings upward, as this can jam the cork further.
If the cork resists, twist the corkscrew slightly counterclockwise to disengage the threads. Once pressure is released, you can proceed with extraction more safely. Performing this step carefully prevents breakage and maintains control, setting the stage for successful cork removal without damaging the bottle or tool.
Removing cork without damaging the wings
To remove a stuck cork without harming the wings, use controlled, even motion throughout the process. After releasing pressure, grip the corkscrew firmly and slowly pull upward while keeping the wings level. If resistance occurs, alternate between slight twisting and pulling to gradually ease the cork free.
Never jerk or yank the handle, as this can bend or break the delicate wing mechanism. If the cork breaks, stop immediately and reposition the worm deeper into the remaining fragment. Applying steady, rotational force helps maintain alignment and reduces stress on the wings.
For added stability, brace the bottle with your non-dominant hand. If the wings begin to wobble, pause and realign the corkscrew straight with the cork. This method preserves the tool’s integrity and increases the likelihood of full cork extraction. Patience and precision are key to avoiding damage.
Best tools to assist in extraction
If the cork remains stubborn, supplemental tools can make removal easier and safer. A pair of needle-nose pliers offers excellent grip on exposed cork edges, allowing you to pull it out once the corkscrew worm is partially disengaged.
Alternatively, use a second corkscrew—like a twin-prong waiter’s friend—to grip the cork from the side and extract it alongside the winged model. Wooden dowels or chopsticks can also be inserted into the bottle to push the cork through, especially if it’s broken.
For precision, a small hook tool or bent paperclip can help nudge the cork free. Always sanitize tools before use to maintain wine safety. These aids reduce strain on the winged corkscrew and increase control.
Choosing the right tool based on cork position and breakage level ensures a clean, efficient extraction without damaging the bottle or remaining cork.
Getting a Cork Out of an Electric Corkscrew

Safely opening electric corkscrew mechanisms
To safely open an electric corkscrew and remove a stuck cork, first unplug or remove the batteries to prevent accidental activation. Most electric models have a removable top housing that detaches with a twist or by pressing release tabs.
Carefully examine the unit for screws or clips—some require a small screwdriver to open. Handle internal components gently, especially the spiral worm and gear assembly. Once open, inspect how the cork became lodged—often, it’s wrapped tightly around the worm or jammed in the neck mechanism.
Avoid forcing parts apart, as this can strip gears or damage plastic components. If the cork fragment is visible and loose, use your fingers or a soft tool to ease it out. Reassemble the unit only after confirming all parts move freely.
Regular inspection helps catch wear before it leads to jams.
Using tweezers or pliers for stuck corks
When a cork fragment remains stuck inside the electric corkscrew’s worm, use long-nose tweezers or needle-nose pliers for precise removal. Choose tools with a fine tip to fit into tight spaces without damaging the spiral.
Grip the exposed edge of the cork firmly and pull straight out with steady pressure—twisting slightly may help loosen its grip. If the cork is deeply embedded, try rotating the worm manually in reverse to back it out a bit first.
Avoid using excessive force, as this can bend the worm or break the cork into smaller, harder-to-reach pieces. For added grip, lightly dampen the tweezers to create friction. After removal, inspect the worm for cork residue and clean it with a soft brush or cloth.
This method preserves both the cork remnants for inspection and the device’s functionality.
Preventing motor damage during removal
Preventing motor damage is crucial when removing a stuck cork from an electric corkscrew. Never attempt removal while the device is powered on, as continued operation under resistance can overheat and burn out the motor. If the cork jams during use, stop immediately and disconnect power.
Allow the motor to cool before attempting any disassembly. When manually reversing the worm, do so slowly by hand or with a non-metal tool to avoid stressing internal gears. Check for obstructions before reactivating the device. Lubricating moving parts periodically with food-safe silicone grease reduces friction and prevents future jams.
Also, ensure the cork is centered before starting the extraction process. Consistent maintenance and gentle handling extend the lifespan of your electric corkscrew and reduce the risk of mechanical failure during cork removal.
Common Tools to Help Remove a Stuck Cork
Using a butter knife or flat tool
If the cork is stuck in the corkscrew, a butter knife or any flat, sturdy utensil can help gently pry the cork loose. First, stabilize the bottle on a flat surface to prevent slipping.
Slide the tip of the butter knife between the cork and the corkscrew’s spiral, angling it slightly to avoid damaging the cork further. Apply gentle upward pressure while carefully rotating the knife to create space.
Once you’ve loosened one side, repeat on the opposite side to gradually lift the cork out. Be patient—rushing can crumble the cork or injure your hand. This method works best when the cork is only partially extracted and still has enough structure to grip.
Avoid using sharp knives that could slip and cause injury. With steady hands and controlled force, this simple kitchen tool can safely free the stuck cork without needing specialized equipment.
Needle-nose pliers technique
Needle-nose pliers are one of the most effective tools for removing a cork stuck in a corkscrew. Their narrow, gripping tips can latch onto the edge of the cork even when it’s deeply embedded. First, ensure the bottle is stable.
Open the pliers and carefully insert the tips around the visible edge of the cork. Squeeze firmly to grip the cork, then gently pull straight upward while maintaining a steady grip. If the cork resists, try wiggling the pliers slightly to loosen it.
This method excels when the cork is too short for fingers but still has a rim to grasp. Maintain control to avoid breaking the cork or spilling wine. Needle-nose pliers provide precision and leverage, making them ideal for this delicate task.
Their availability in most toolkits or kitchen drawers makes them a reliable, accessible solution for rescuing your wine without waste.
Alternative household items that work
When specialized tools aren’t available, several common household items can help extract a stuck cork from a corkscrew. A pair of tweezers, especially those with a pointed tip, can grip small cork fragments. Similarly, a bent paperclip straightened and twisted at the end can act as a makeshift hook.
Insert the improvised tool beside the cork and gently pull upward. Another option is using a small screw and screwdriver—screw it slightly into the exposed cork, then use the screwdriver as a handle to pull the cork out.
Stability and precision are key; work slowly to avoid pushing the cork deeper. Even a chopstick can help by pressing down evenly to push the cork into the bottle if removal isn’t possible.
These alternatives may require creativity, but they’re practical in a pinch and prevent wine waste using only items you likely already have at home.
Preventing Corks from Getting Stuck in the Future
Proper corkscrew insertion angle
To prevent corks from getting stuck, insert the corkscrew at a straight, centered angle directly into the middle of the cork. Tilting the corkscrew can cause it to pierce the edge of the cork, increasing the risk of breakage or jamming.
Begin by placing the tip gently on the center of the cork and apply slow, even pressure while twisting. Use a smooth, controlled motion—rushing increases the chance of misalignment. If the bottle is on a table, stabilize it with one hand while guiding the corkscrew with the other.
Ensure the spiral (worm) is fully engaged but not pushed too deep, as going beyond the cork’s base can make extraction difficult. Practicing consistent alignment builds muscle memory, making future openings easier. A well-inserted corkscrew reduces friction and resistance, minimizing the likelihood of leaving part of the cork behind.
Always check alignment before pulling to avoid complications during extraction.
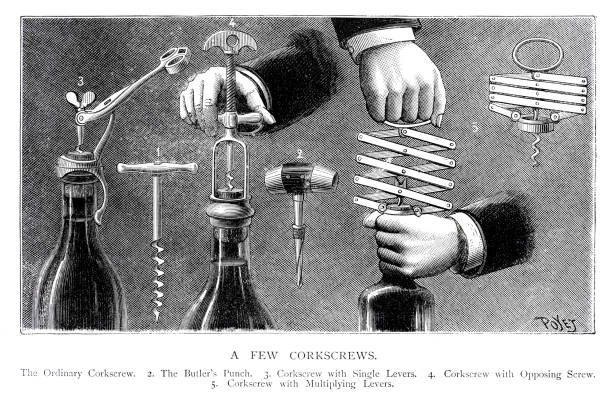
Choosing the right corkscrew for the bottle
Selecting the appropriate corkscrew significantly reduces the chance of cork breakage or getting stuck. Lever-style or double-hinged corkscrews offer superior mechanical advantage and control, especially with older or fragile corks. For everyday use, a waiter’s friend (winged corkscrew) provides portability and effectiveness when used correctly.
Consider the length and design of the spiral—longer worms work better with longer corks, while shorter ones may not grip fully. Screw corks with non-stick coatings reduce resistance and lower the risk of shredding.
Champagne or sparkling wine bottles require specific openers like a butterfly corkscrew or Ah-So puller to avoid damaging the cork. Matching your tool to the bottle type ensures smoother extraction. Invest in quality tools that balance durability and ease of use, as cheap corkscrews often bend or slip.
The right corkscrew makes all the difference in preserving cork integrity.
Maintaining your corkscrew regularly
Regular maintenance keeps your corkscrew functioning smoothly and prevents cork jams. Clean the spiral after each use with warm, soapy water and a brush to remove wine residue and cork fragments, which can accumulate and cause friction. Dry thoroughly to prevent rust or corrosion, especially on metal parts.
Inspect the corkscrew periodically for signs of wear, bending, or dulling—a warped spiral won’t penetrate evenly, increasing the chance of cork breakage. Lubricate the moving parts of lever-style or winged corkscrews occasionally with food-safe oil to ensure smooth operation. Store your corkscrew in a dry place to avoid moisture damage.
For models with hinges or gears, check for looseness and tighten screws if needed. A well-maintained corkscrew performs reliably and extends the tool’s lifespan. Routine care prevents unexpected failures during use, ensuring every bottle opens cleanly and safely.
What to Do If the Cork Breaks During Removal
How to extract broken cork pieces from the bottle
When a cork breaks during removal, remain calm and avoid pushing the broken piece further into the bottle. Carefully remove the corkscrew and assess how much of the cork remains inside.
If part of the cork is still protruding, use clean fingers or tweezers with a firm grip to gently pull it out. For deeper fragments, try inserting a clean knife or butter knife along the side of the cork at a slight angle to lift it without crumbling it further.
Another effective method is to use a long, thin tool like a screw extractor or a clean screw and pliers—screw it into the cork fragment, then pull slowly and steadily.
To prevent cork particles from entering your wine, pour the wine through a fine mesh strainer, cheesecloth, or coffee filter into another container. This ensures a smooth, sediment-free pour while salvaging your bottle with minimal waste.
Using a double-hinged corkscrew as backup
A double-hinged corkscrew (also known as a Butler’s Friend or Ah-So) is an excellent tool for removing corks that have broken or are too fragile for traditional corkscrews.
To use it, gently insert the two thin metal prongs on either side of the cork, sliding them between the cork and the bottle neck. Apply even pressure while slowly twisting and pulling upward to extract the cork intact.
This method works especially well when the cork is partially stuck or has fractured at the top. Unlike spiral corkscrews, the Ah-So minimizes damage by gripping the cork’s sides rather than piercing it. Keep one in your wine toolkit for emergencies—its compact size makes it easy to store.
With a little practice, this tool can save a bottle that might otherwise be lost to a broken cork, making it a must-have for frequent wine drinkers and collectors alike.
When to use a wine pump instead
If the cork has completely shattered or fallen into the bottle, a wine pump (like a vacuum pump or wine saver) can be a practical alternative to traditional extraction. These devices work by creating pressure above the wine’s surface, gently pushing the liquid out without needing to remove the cork.
Simply insert the stopper into the bottle neck and pump the air out—this forces the wine up and out through a spout. Ideal for older wines with fragile corks, the pump avoids disturbing sediment and minimizes contact with broken cork pieces.
While it doesn’t remove the cork itself, it allows you to enjoy the wine safely and efficiently. Note that this method works best when the bottle neck is clear and the cork debris isn’t blocking the opening. After pouring, filter the wine if needed.
A wine pump is a smart, low-risk solution when conventional methods fail.
Best Practices for Storing and Cleaning Corkscrews
How to clean corkscrew after each use
After each use, immediately clean your corkscrew to prevent wine residue and cork particles from building up. Start by wiping the worm (the spiral part) with a damp cloth to remove any visible debris.
If cork fragments remain stuck, gently pull them out with tweezers or use a soft brush, like an old toothbrush, to dislodge them. For deeper cleaning, soak the corkscrew in warm, soapy water for 5–10 minutes, then scrub carefully—avoid submerging wooden handles to prevent warping.
Rinse thoroughly and dry with a clean towel. For corkscrews with hinges or moving parts, apply a food-safe lubricant sparingly to maintain smooth operation. Regular cleaning not only removes stuck cork but also prevents bacterial growth and extends the tool’s lifespan.
Never place corkscrews with delicate finishes in the dishwasher, as high heat and harsh detergents can cause corrosion or damage.
Storing tools to prevent rust and damage
Proper storage is essential to protect your corkscrew from moisture, dust, and physical damage. Always store the corkscrew in a dry place, preferably in a drawer or a dedicated wine tool holder. If your corkscrew has a folding mechanism, close it before storing to protect the worm and prevent accidents.
Avoid leaving it near the sink or in humid environments like under the kitchen cabinet near the dishwasher, as exposure to moisture promotes rust, especially on metal parts. For added protection, consider wrapping the worm in a soft cloth or using a silicone sleeve.
Wall-mounted racks or countertop stands made of durable materials keep corkscrews accessible yet secure. For travel or long-term storage, place the tool in a protective case. Keep away from other utensils that could scratch or bend the spiral. Proper storage ensures your corkscrew remains functional and safe for everyday use.
Recommended maintenance schedule
To ensure long-term performance, follow a consistent maintenance routine for your corkscrew. Clean the tool after every use to prevent buildup and corrosion. Conduct a deeper cleaning once a month—disassemble if possible, wash with mild soap, and inspect for wear or damage.
Check the worm’s sharpness and alignment, and look for signs of rust or wobbling in the hinge. Every three to six months, apply a food-grade mineral oil or lubricant to moving parts to maintain smooth operation.
Wooden handles should be conditioned with beeswax or mineral oil annually to prevent drying and cracking. For electric or lever-style corkscrews, follow manufacturer guidelines for battery and motor maintenance. Keeping a maintenance log helps track service intervals and detect issues early.
Regular care not only makes it easier to remove stuck cork but also ensures your corkscrew remains a reliable tool for years.
Frequently Asked Questions
Why does a cork get stuck in a corkscrew?
A cork can get stuck in a corkscrew if the screw wasn’t inserted properly, the cork is old and brittle, or too much force was used during extraction. This causes the cork to break or wrap tightly around the worm of the corkscrew.
How do I remove a stuck cork from a corkscrew?
Carefully grip the cork with your fingers or pliers and twist it off the corkscrew while gently pulling. If the cork is too small or fragile, push it through the bottom of the corkscrew by pressing the screw against a hard surface covered with a cloth.
Can I use tools to remove a cork from a corkscrew?
Yes, needle-nose pliers or tweezers can help grip and twist the cork free. Use gentle pressure to avoid damaging the corkscrew or injuring yourself.
What if the cork is completely embedded in the corkscrew?
Try rotating the corkscrew backward slowly to unscrew the cork. If that fails, push the cork out from the other end using a thin rod or nail and light, steady pressure.
How can I prevent corks from getting stuck in the future?
Insert the corkscrew at a steady angle, ensuring the worm goes in straight and doesn’t hit the bottle’s edge. For older bottles, consider using a two-prong cork puller to avoid breaking the cork.
Is it safe to push a cork through the corkscrew?
Yes, pushing the cork through is safe if done carefully. Place the corkscrew tip on a soft surface like a towel and apply even pressure to avoid bending the screw or causing injury.
Conclusion
Removing a stuck cork from a corkscrew can be simple with the right techniques. Use pliers for grip, twist gently, or push the cork through with a clean rod. Stay patient and avoid excessive force to prevent breakage. With practice, even tricky corks become manageable. Don’t let a stubborn cork discourage you—every wine lover faces this challenge. Keep these tips handy and enjoy the satisfying pop of success with every bottle you open.