How To Make Cold Brew Foam Starbucks
Ever wonder how Starbucks achieves that velvety, cloud-like cold foam on their signature brews? You don’t need a green apron or a fancy industrial blender to recreate it at home. Whether you are craving a sweet cream topping or a dairy-free alternative, achieving that perfect texture is simpler than you think. In this guide, we will show you exactly how to make cold brew foam Starbucks-style using just a few basic ingredients and tools you already have in your kitchen.
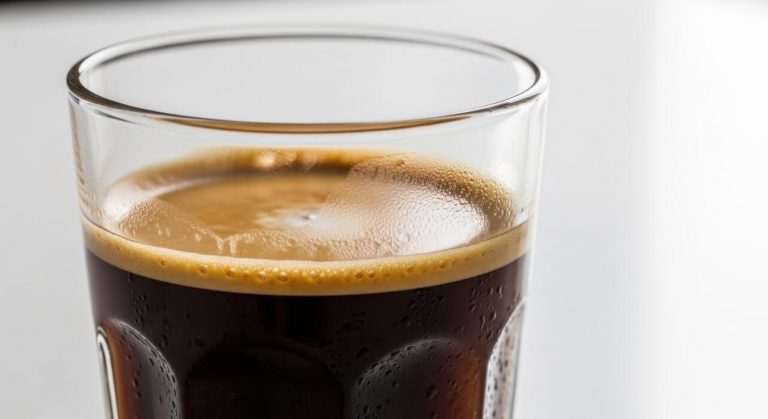
What is Starbucks Cold Foam?
The difference between cold foam and steamed milk
Understanding the fundamental mechanics of your coffee topper is the first step in learning how to make cold brew foam Starbucks style.
While traditional lattes rely on steamed milk, which uses high heat and water vapor to create a warm, micro-foam texture, cold foam is created by aerating cold milk at high speeds without any temperature increase.
This process ensures that the foam remains structurally sound when hitting your chilled cold brew, preventing it from melting instantly into the dark coffee below.
The result is a thick, velvety layer that sits prominently on top of the ice, providing a distinct sensory contrast between the creamy sweetness and the bold coffee. Because it lacks the heat that typically breaks down proteins, cold foam maintains a stiffer peak and a more meringue-like consistency.
Choosing this method allows you to enjoy a luxurious, creamy mouthfeel in a refreshing iced format that doesn’t dilute the complex flavor profile of your favorite specialty cold brew beans.
Key ingredients in the original recipe
To replicate the authentic Starbucks experience at home, you must focus on the specific components that define their signature sweet cream. The original recipe is essentially a blend of heavy cream, milk, and vanilla syrup, but the ratio is what creates that iconic pourable texture.
To achieve professional results, you should combine heavy whipping cream with a splash of milk and high-quality vanilla bean syrup. This mixture is then frothed until it reaches a consistency similar to melted ice cream or wet paint.
For those looking to branch out, you can easily customize this base by adding cinnamon, pumpkin spice, or sea salt to match seasonal favorites. The secret is ensuring your ingredients are kept ice-cold until the very moment you begin frothing.
Using a high-speed electric frother or a specialized blender setting will help emulsify the fats and sugars, creating a stable emulsion that won’t separate. This foolproof combination ensures every sip provides a perfect balance of sweetness and rich, dairy-forward flavor that complements the bitterness of concentrated coffee.
Why non-fat milk creates the best texture
It may seem counterintuitive, but the original Starbucks cold foam was actually developed using non-fat milk because of its unique protein structure. While heavy cream offers richness, non-fat milk contains a higher concentration of whey and casein proteins relative to its fat content.
These proteins act as stabilizers that trap air bubbles more efficiently than whole milk, resulting in a foam that is incredibly lightweight yet remarkably durable.
When you use a high-speed frother on skim milk, you create a dense, cloud-like topping that captures the essence of a marshmallow without the heavy calories. This is the ideal solution for those who want a stiff foam that holds its shape for an extended period.
For the best home results, always use ultra-pasteurized non-fat milk, as the extra processing helps strengthen the protein bonds.
By prioritizing protein over fat, you can achieve a professional-grade froth that mimics the classic Starbucks aesthetic while allowing the bright acidity and chocolatey notes of your cold brew to shine through clearly without being overwhelmed by heavy dairy.
Essential Tools for Making Cold Foam at Home
Using a handheld milk frother
To replicate the signature Starbucks texture at home, a handheld milk frother, often called a wand, is the most efficient and budget-friendly tool available. Start by pouring cold heavy cream, milk, and your preferred syrup into a tall glass, ensuring you leave ample room for expansion.
Submerge the whisk head just below the surface and turn it on to begin the aeration process. Move the wand up and down to pull air into the mixture, which creates that velvety micro-foam consistency essential for cold brew toppings.
The high-speed motor works quickly to stabilize the proteins and fats, resulting in a stiff peak texture that sits perfectly atop your iced coffee without immediately dissolving. For the best results, use a narrow container to concentrate the whisking energy and keep your ingredients ice-cold before starting.
This method allows for maximum control over the thickness, letting you customize the density to match your personal preference for every single cup you brew.
The French press method for thick foam
If you do not own specialized electrical equipment, a standard French press is an incredible alternative for creating a dense and creamy cold foam that rivals any coffee shop. Pour your base liquid—ideally a mix of 2% milk and heavy cream—into the carafe, filling it no more than one-third full.
Insert the plunger and pump it vigorously up and down for approximately thirty to forty-five seconds. This rapid movement forces air through the fine mesh filter, breaking down the bubbles into a uniform and silky structure that is remarkably stable.
The mechanical pressure from the double-mesh screens found in most modern presses ensures that the foam becomes thick enough to support a drizzle of caramel or a dusting of cocoa powder. Once the volume has doubled, remove the lid and pour the mixture slowly over your cold brew.
This manual technique is highly effective for making larger batches when you are entertaining guests or preparing multiple morning beverages at once.
Electric aeroccino and blender options
For a truly hands-off experience, high-speed electric aeroccinos and countertop blenders offer the most consistent professional-grade results with minimal effort. Most modern electric frothers now include a dedicated ‘cold froth’ setting, which spins the internal whisk at high speeds without activating the heating element.
This creates a persistent and voluminous foam that maintains its shape for several minutes. Alternatively, if you are using a high-powered blender, use the smallest container or the ‘pulse’ function to avoid over-processing the cream into butter.
Blenders are particularly useful when you want to incorporate thick ingredients like pumpkin puree or sweetened condensed milk into your foam for seasonal recipes. These machines provide a level of power that manual tools cannot match, ensuring that every molecule of milk is aerated into a luxurious cloud-like topping.
Using these automated tools guarantees that your homemade Starbucks-style cold brew will have the exact mouthfeel and aesthetic appeal of a drink crafted by a professional barista at your local cafe.
How to Make Vanilla Sweet Cream Cold Foam
The 3-2-1 ratio for perfect consistency
To replicate the signature Starbucks texture at home, you must master the classic 3-2-1 ratio. This specific formula uses three parts heavy cream, two parts 2% milk, and one part vanilla syrup.
Using heavy whipping cream is non-negotiable because its high fat content provides the necessary structure to hold air bubbles, creating that velvety, thick cloud that sits gracefully atop your cold brew.
The 2% milk acts as a thinning agent, ensuring the foam remains pourable rather than turning into stiff whipped cream. For the sweetener, Starbucks-style vanilla syrup provides the iconic flavor profile that balances the bitterness of the coffee.
If you prefer a sugar-free version, you can easily swap the syrup for a keto-friendly alternative without compromising the structural integrity of the foam.
Achieving this precise balance is the secret to getting that professional, cascading effect where the cream slowly bleeds into the dark cold brew layer below for a beautiful aesthetic.
Step-by-step mixing instructions
Once you have gathered your ingredients, combine them in a glass jar or a specialized foaming pitcher. For the best results, use an electric handheld milk frother submerged just below the surface of the liquid.
Turn the frother on and tilt the container slightly to incorporate air, moving the wand up and down for approximately 30 to 45 seconds. You are looking for a consistency that resembles melted ice cream—thick enough to hold its shape but fluid enough to pour smoothly.
If you do not own an electric frother, you can achieve similar results by shaking the ingredients vigorously in a sealed mason jar for one minute or using a French press by pumping the plunger rapidly.
Be careful not to over-mix, as excessive agitation will turn the mixture into solid butter. Immediately pour the finished foam over your ice-filled cold brew and watch as the vanilla-infused bubbles create a luxurious, creamy topper that rivals any coffee shop experience.
How to store leftover sweet cream
The beauty of this recipe is that the liquid base can be prepared in larger batches and stored for future use. To maintain the highest quality, keep the un-frothed mixture in an airtight glass container in the back of your refrigerator, where the temperature is most consistent.
It will typically stay fresh for up to five days, or until the expiration date on your dairy cartons. It is important to note that you should only froth the amount you plan to use immediately; pre-frothed foam will eventually deflate and lose its airy texture if left to sit.
When you are ready for your next caffeine fix, simply give the stored liquid a quick stir to recombine any settled syrup, pour out a small portion, and froth it fresh right before serving. This ensures that every cup of cold brew you make features that signature fluffy peak.
Always check for freshness before use, as the dairy components are sensitive to temperature fluctuations and light exposure.
Popular Starbucks Cold Foam Flavor Variations
How to make salted caramel cold foam
To recreate this fan favorite, begin by whisking together two tablespoons of heavy cream, one tablespoon of milk, and a teaspoon of vanilla syrup until the mixture reaches a thick, velvety consistency.
The secret to the Starbucks signature profile is the addition of half a teaspoon of sea salt and a pump of caramel syrup directly into the foam. Using a handheld milk frother is the most efficient way to achieve that light, aerated texture that sits perfectly atop your cold brew.
For the best results, ensure your dairy ingredients are ice cold before you start frothing, as cold proteins bond better to hold air bubbles. Once your foam is stiff enough to hold its shape, slowly pour it over your sweetened cold brew.
The contrast between the salty-sweet cream topping and the bold coffee base creates a professional-grade beverage experience right in your own kitchen without the expensive cafe price tag.
Pumpkin cream cold foam recipe
This seasonal staple is easily replicated by blending real pumpkin puree with a sweetened cream base. Start with a foundation of heavy cream and milk, then whisk in one tablespoon of pumpkin puree, a splash of vanilla, and a pinch of pumpkin pie spice containing cinnamon, nutmeg, and cloves.
To mimic the Starbucks sweetness, add a teaspoon of condensed milk or simple syrup to the mixture. Use an electric frother for about thirty seconds until the liquid transforms into a thick orange-tinted cloud.
It is crucial to strain the pumpkin puree if it is too fibrous to ensure a smooth mouthfeel. Pour this autumnal foam over a glass of cold brew filled with ice and finish with an extra dusting of cinnamon on top.
This homemade version allows you to control the sugar content while maintaining that iconic, spicy flavor profile that defines the fall coffee season for millions of enthusiasts worldwide.
Chocolate cream and Irish cream versions
For a decadent chocolate variation, sift one tablespoon of cocoa powder and a teaspoon of powdered sugar into your heavy cream and milk blend before frothing. Whisk vigorously until the cocoa is fully incorporated and the foam becomes stiff and mousse-like.
If you prefer the sophisticated Irish cream version, replace the cocoa with Irish cream flavored syrup or a drop of almond extract and cocoa bits.
The key to both recipes is maintaining a two-to-one ratio of heavy cream to 2% milk, which provides the necessary fat content for a stable foam that won’t immediately dissolve into the coffee.
These variations are particularly delicious when paired with vanilla-sweetened cold brew, as the flavored foam acts as a rich, aromatic cap.
Experimenting with these infusions allows you to customize the intensity of the chocolate or botanical notes, ensuring your at-home barista skills rival the quality of any standard Starbucks order during your morning routine.
Dairy-Free and Vegan Cold Foam Options

Best plant-based milks for frothing
To replicate the Starbucks experience without dairy, you must select high-protein plant milks that can support air bubbles. The top contenders for cold brew foam are barista-edition oat and soy milks, as they contain added stabilizers like dipotassium phosphate that mimic the structural integrity of cow’s milk.
While regular almond milk is popular for its flavor, it often lacks the density required for a thick topping. For the best results, look for products labeled ‘Barista Blend’ specifically, as these are formulated to withstand the mechanical stress of a high-speed frother.
If you are making foam at home, ensure the liquid is chilled thoroughly before you begin whisking; cold proteins bond more effectively to create a micro-foam texture.
You can also experiment with pea protein milk, which offers a neutral taste and an exceptionally thick, velvety head that sits perfectly atop a glass of cold brew.
Always shake the carton vigorously before pouring to ensure the fats are evenly distributed for a consistent, professional-grade foam every single time you brew.
Using oat milk for a creamy finish
Oat milk is widely considered the gold standard for dairy-free Starbucks-style cold foam because its natural carbohydrate profile produces a naturally sweet and creamy mouthfeel.
When frothing oat milk, use a handheld electric whisk or a French press to aerate the liquid for about thirty seconds until it doubles in volume.
The key to achieving that signature Starbucks ‘cloud’ effect is using full-fat oat milk, which provides the lipid structure necessary to prevent the foam from collapsing into the coffee immediately.
To elevate the flavor, try adding a splash of vanilla syrup or a pinch of sea salt during the frothing process, which helps the foam stay stiff and flavorful.
Because oat milk is heavier than other alternatives, it creates a beautiful cascading effect as it slowly integrates with the dark cold brew underneath. This method provides a rich, indulgent experience that is entirely vegan while maintaining the dense, marshmallow-like consistency that fans of the original dairy recipe crave.
It is truly the most seamless transition for those looking to ditch the heavy cream without sacrificing the luxury of a specialty latte.
Tips for stabilizing almond milk foam
Almond milk is notoriously difficult to froth due to its high water content and low protein levels, but you can achieve a stable foam with a few simple modifications.
To prevent the foam from becoming too bubbly or dissipating quickly, try blending in a small amount of coconut cream or a half-teaspoon of agave nectar before frothing. These additives increase the viscosity of the liquid, allowing it to trap air more effectively for a longer-lasting peak.
Another professional tip is to avoid over-aerating; stop frothing once you see small, tight bubbles forming, as large bubbles will pop and cause the foam to liquefy. Using a cold-process frother is essential here, as heat can cause the almond proteins to separate and curdle.
For a Starbucks-inspired twist, whisk in a dash of cinnamon or cocoa powder to help thicken the texture and provide a flavorful barrier that sits elegantly on your cold brew.
By focusing on increasing the fat content and maintaining a low temperature, you can transform thin almond milk into a reliable, frothy topping that rivals any commercial coffee shop offering in both appearance and taste.
Tips for the Perfect Starbucks Texture
The importance of using cold ingredients
To replicate the signature Starbucks texture at home, temperature is the most critical variable you must control. The secret behind that velvety, stable foam lies in using heavy cream and milk straight from the refrigerator.
When fats and proteins are cold, they form a much more stable structure that can trap and hold tiny air bubbles effectively. If your ingredients are even slightly room temperature, the molecular bonds weaken, resulting in a thin, watery liquid that dissipates within seconds of hitting your coffee.
For the best results, many baristas even recommend chilling your frothing pitcher or glass in the freezer for five minutes before you begin. This ensures that the friction from the frother’s motor doesn’t prematurely warm the mixture.
By maintaining a strictly cold environment, you allow the fats to emulsify into a rich, paint-like consistency that sits perfectly on top of your cold brew without sinking, mirroring the professional quality of a high-end coffee house beverage every single time.
How to avoid large bubbles in your foam
A common mistake when making cold foam is creating large, soapy bubbles instead of a smooth microfoam. To achieve that iconic Starbucks silkiness, you must submerge your handheld frother fully before turning it on and keep it tilted at a slight angle.
Avoid pulling the wand up to the surface, as this introduces too much air and creates a rocky, uneven texture. Instead, aim for a whirlpool effect that pulls the air down into the liquid slowly.
If you do notice large bubbles forming on the top, simply tap the bottom of your pitcher firmly on the counter several times and swirl the liquid gently. This physical agitation breaks down the larger air pockets and forces the foam to become more uniform and dense.
Consistency is key, so focus on a steady, controlled motion rather than moving the wand vigorously up and down. This technique ensures a professional, micro-textured finish that feels luxurious on the palate and enhances the overall aesthetic of your homemade cold brew creation.
Timing your frothing for maximum thickness
Achieving the perfect thickness is a matter of precision timing rather than just raw power. For a standard serving of sweet cream foam, you should froth the mixture for exactly 20 to 30 seconds.
Stopping too early will leave you with a runny mess, while over-frothing can actually cause the cream to stiffen too much, turning it toward a butter-like consistency that won’t pour smoothly.
You are looking for the ‘soft peak’ stage where the foam is thick enough to hold its shape but fluid enough to cascade beautifully over your ice cubes. It is also vital to pour the foam immediately after frothing is complete.
Because cold foam is an unstable emulsion, the air and liquid will begin to separate the moment the whisk stops spinning. By timing your preparation so the foam is the very last component added to your drink, you ensure the maximum volume and a pillowy mouthfeel.
This careful attention to timing allows the foam to integrate slightly with the coffee while maintaining a distinct, creamy layer that lasts until the very last sip.
How to Serve and Layer Your Cold Brew
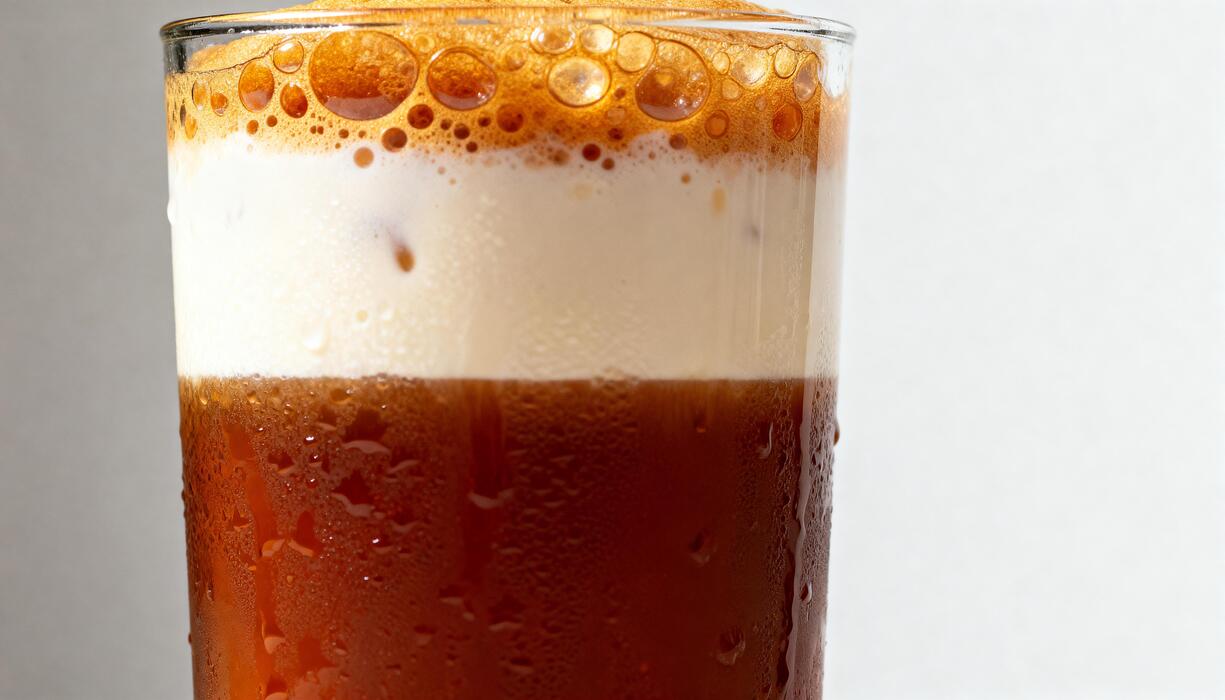
Pouring techniques to keep layers separate
To achieve that iconic Starbucks aesthetic, the secret lies in the physics of density and the speed of your pour. Start by filling your glass with your base cold brew and any sweeteners, leaving about two inches of space at the top for your foam.
To create a distinct visual separation, you must pour the cold foam slowly over the back of a spoon held just above the surface of the coffee.
This technique, often used in mixology, breaks the fall of the liquid and allows the lighter, aerated foam to sit delicately on top of the denser coffee rather than mixing immediately.
If you are using a heavy cream-based foam, ensure the coffee is chilled to prevent the heat from melting the air bubbles. Maintaining a steady, gentle stream is crucial for those crisp, photogenic layers that define a professional cold brew.
By mastering this layering method, you ensure that every sip begins with a velvety texture before transitioning into the bold, smooth notes of the cold brew coffee underneath.
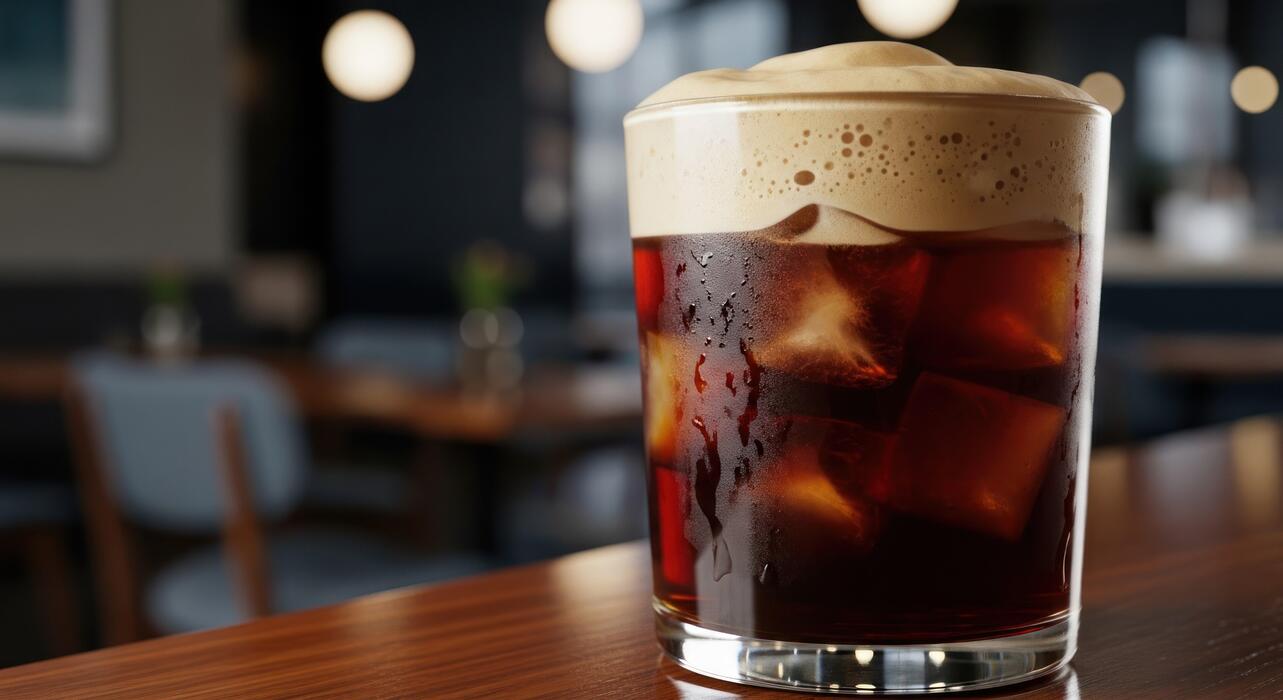
Best ice types for cold brew drinks
The ice you choose plays a vital role in both the temperature and the dilution rate of your home-crafted Starbucks-style beverage. For the best results, opt for large, clear ice cubes or specialized spheres.
Smaller ice chips or standard crescent-shaped cubes from a home freezer tend to melt rapidly due to their high surface area, which can quickly water down the concentrated flavor of your cold brew.
Large cubes provide a slower melt rate, keeping your drink cold for an extended period without compromising the strength of the brew. If you want to take your drink to the next level, consider making coffee ice cubes by freezing leftover cold brew in trays.
This ensures that as the ice eventually melts, it only adds more coffee flavor to your glass rather than plain water.
This professional touch keeps the integrity of the drink intact from the first sip to the very last drop, allowing the cold foam layers to remain stable and chilled against the ice surface.
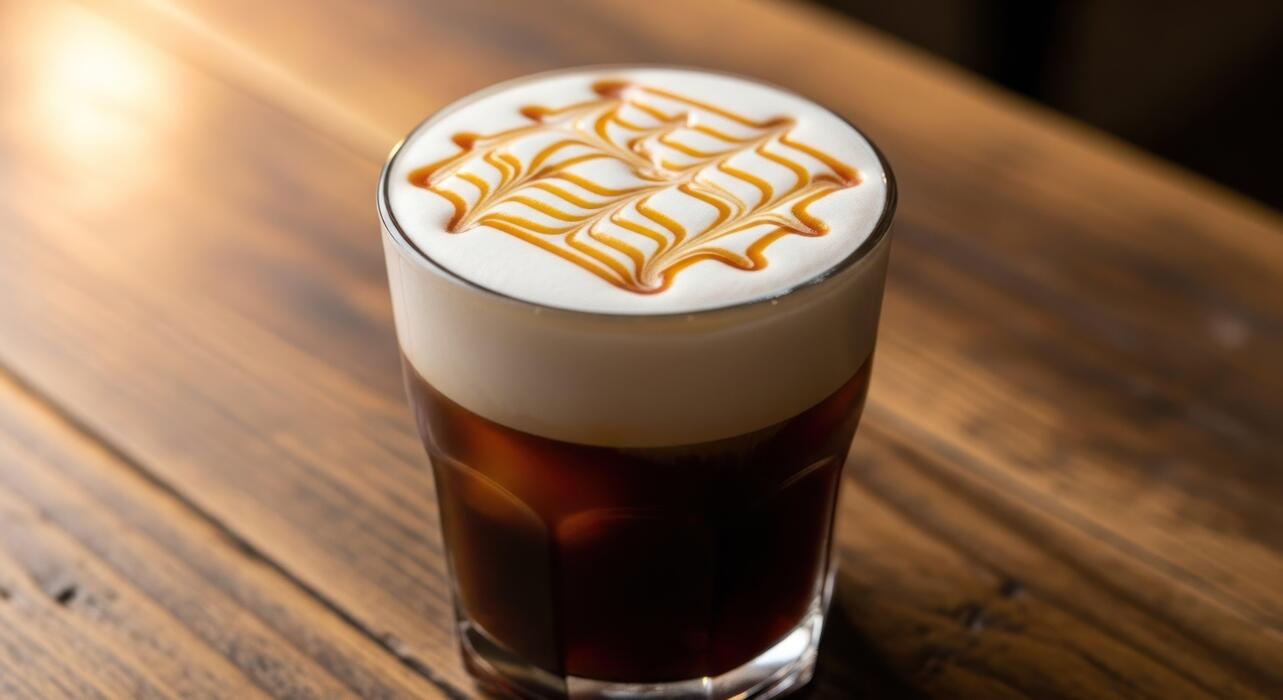
Adding syrups and toppings for a finished look
Finalizing your cold brew with the right garnishes elevates the drink from a simple caffeine fix to a gourmet experience. Before adding your foam, stir high-quality syrups like vanilla or caramel directly into the cold brew to ensure the sweetness is evenly distributed.
Once your foam layer is perfectly seated on top, you can enhance the visual appeal and flavor profile by adding a light dusting of cocoa powder, cinnamon, or pumpkin spice. For a true Starbucks-inspired finish, drizzle a decorative pattern of caramel or chocolate sauce over the foam.
The foam acts as a sturdy canvas, supporting these toppings without them sinking immediately to the bottom. If you prefer a more natural look, a few cracks of sea salt over a caramel foam can highlight the richness of the dairy.
These small additions provide a sensory boost, offering an inviting aroma and a professional polish that makes your homemade cold brew look like it was crafted by a master barista in a high-end cafe.
Frequently Asked Questions
What is the secret to making Starbucks-style cold foam?
The secret is using a combination of 2% milk and heavy cream, which mimics the Starbucks ‘sweet cream’ base. When frothed together with vanilla syrup, this high-fat ratio creates a stable, velvety microfoam that sits perfectly on top of cold brew.
How do I make the vanilla sweet cream base at home?
Mix 1/2 cup heavy cream, 1/4 cup 2% milk, and 2 tablespoons of vanilla syrup. This ratio ensures the foam is thick enough to hold its shape while maintaining the signature sweetness found in Starbucks beverages.
Which tools are best for frothing cold foam?
A handheld electric milk frother (wand) is the most effective and affordable tool for achieving the Starbucks texture. Alternatively, you can use a French press by pumping the plunger rapidly for 30 seconds or a high-speed blender on a low setting.
Can I make Starbucks cold foam with non-dairy milk?
Yes, but for the best results, use extra-creamy oat milk or barista-edition nut milks. Because non-dairy milks lack the same protein and fat structure as dairy, they may dissipate faster, so it is best to froth them immediately before serving.
How do I make the Pumpkin Cream or Salted Caramel variations?
To customize your foam, add 1 tablespoon of pumpkin spice sauce or a pinch of sea salt and caramel syrup to the standard sweet cream base before frothing. This allows you to replicate seasonal Starbucks favorites like the Pumpkin Cream Cold Brew.
Why is my homemade cold foam collapsing so quickly?
The foam usually collapses if the milk is too warm or if the fat content is too low. Ensure your cream and milk are ice-cold from the fridge and that you are using heavy whipping cream to provide the necessary structure.
Conclusion
Mastering the art of Starbucks-style cold brew foam at home is both simple and rewarding. By using fresh heavy cream, milk, and your favorite syrups, you can replicate that velvety texture and rich flavor in your own kitchen. Whether you prefer a frother or a blender, the key is achieving the perfect consistency. Now that you have the secrets to these decadent toppings, it is time to elevate your daily caffeine routine and enjoy gourmet coffee anytime.