How To Make Wine At Home
Making wine at home is easier than you think and incredibly rewarding. Whether you’re using grapes, fruit, or a wine kit, you can craft delicious homemade wine with just a few basic supplies and some patience. No fancy tools needed, just clear instructions to get your first batch fermenting in no time. Let’s uncork the fun!
How to Make Wine at Home: A Step-by-Step Guide
What You Need to Start Making Wine at Home
Making wine at home begins with understanding the essential ingredients and conditions for fermentation. You’ll need fresh fruit or juice, sugar (if additional sweetness is desired), wine yeast, and water. The fruit provides natural sugars that the yeast converts into alcohol during fermentation.
Sanitation is critical—all equipment must be thoroughly cleaned and sanitized to prevent contamination by unwanted bacteria or wild yeasts. A controlled environment with stable temperature (ideally between 60–75°F) ensures healthy fermentation. Start with a simple recipe, such as homemade grape or berry wine, to build confidence.
Patience is key, as fermentation can take several weeks, followed by aging for improved flavor. By focusing on clean practices and precise measurements, even beginners can produce drinkable wine. With minimal upfront investment and attention to detail, home winemaking becomes a rewarding and enjoyable hobby.
Choosing the Right Fruit for Your Wine
The flavor and quality of your homemade wine heavily depend on the type and freshness of the fruit you select. Grapes are the most traditional choice, but fruits like apples, berries, peaches, and plums also produce excellent results.
Opt for ripe, high-quality fruit free from mold or overripeness, as these can introduce off-flavors. If using store-bought juice, choose 100% pure, unsweetened varieties without preservatives, which can inhibit yeast activity. For fresh fruit, crush or puree it thoroughly to release juices and maximize flavor extraction.
Consider the fruit’s natural sugar and acidity levels—balancing these with added sugar or acid blend helps achieve a well-rounded wine. Some fruits may require blending with others or water to adjust intensity.
Experimenting with combinations can yield unique profiles, but starting with a single fruit allows better understanding of its characteristics. Proper fruit selection lays the foundation for a delicious, aromatic homemade wine.
Basic Equipment for Home Winemaking
To make wine at home successfully, you’ll need a few essential tools and containers designed for fermentation. A primary fermenter (a food-grade plastic bucket or glass carboy) holds the initial fermentation, while an airlock and stopper allow carbon dioxide to escape without letting contaminants in.
You’ll also need a long-handled spoon for stirring, a siphon hose for transferring wine, and bottles with corks or caps for storage. A hydrometer is crucial for measuring sugar levels and estimating alcohol content. Other helpful items include a funnel, mesh bags for fruit, and cleaning brushes.
All equipment must be thoroughly sanitized before each use to prevent spoilage. While advanced kits offer extras like wine presses or temperature controllers, beginners can start affordably with the basics. Investing in durable, easy-to-clean tools ensures consistency and safety across batches.
With the right equipment, home winemaking becomes a manageable and satisfying process that yields high-quality results over time.
Best Types of Grapes for Homemade Wine

Red vs White Grapes: Which Should You Use?
Choosing between red and white grapes depends on the wine style you want to create. Red grapes, like Cabernet Sauvignon or Merlot, contain pigments in their skins that give wine its color and add tannins for structure and aging potential.
They’re ideal for full-bodied wines and require fermentation with the skins. White grapes, such as Chardonnay or Riesling, are typically pressed before fermentation, producing lighter, crisper wines with bright acidity.
Consider your taste preference and equipment: reds need longer fermentation and aging, while whites are quicker and often require temperature control to preserve delicate aromas. You can also experiment with blending or making rosé by briefly contacting red grape juice with skins.
Matching grape type to your skill level is key—beginners may find white wines easier due to simpler processing. Ultimately, both types offer rewarding results when matched to your goals and patience level.
Where to Buy Fresh Grapes for Winemaking
Sourcing high-quality fresh grapes is crucial for successful homemade wine. The best options include local vineyards, winemaking supply stores, or online specialty suppliers that ship in season. Look for wine grape varietals, not table grapes, as they have the right sugar, acid, and tannin balance.
Timing matters: most grapes are harvested in late summer to early fall, so plan purchases accordingly. Some suppliers offer frozen must (crushed grapes with juice) for off-season winemaking. Joining a homebrewing club or co-op can help you buy in bulk and reduce costs.
Always check for freshness—grapes should be plump, mold-free, and have a strong varietal aroma. Organic or sustainably grown grapes are preferable to avoid pesticide residues. When ordering online, ensure the supplier guarantees cold shipping to preserve grape integrity.
With the right source, you’ll set a solid foundation for a delicious, authentic homemade wine.
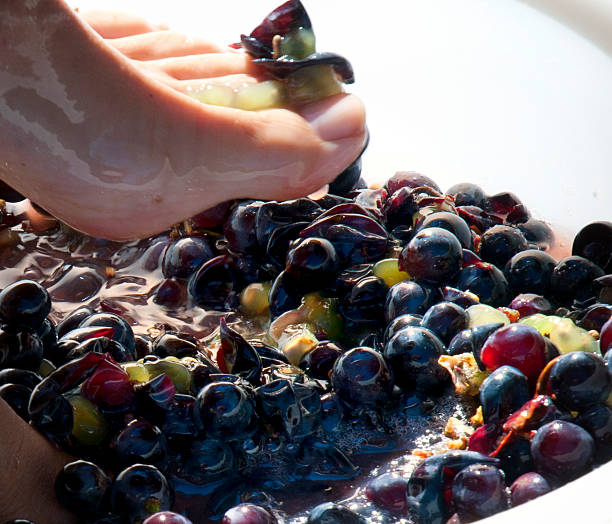
Crushing and Destemming Grapes Properly
Proper crushing and destemming releases juice while minimizing bitter tannins from stems and seeds. For small batches, a handheld crusher or food-grade container with a potato masher works well. Destemming first prevents stem tannins from making wine harsh—use a destemmer or do it by hand if processing small quantities.
The goal is to break skins gently, not pulverize seeds. For reds, crushed grapes (called must) ferment with skins for color and flavor; for whites, press immediately after crushing and remove skins. Sanitation is critical—clean all tools thoroughly to avoid contamination. Work quickly to reduce oxidation and spoilage risk.
If you lack equipment, some suppliers sell pre-crushed, refrigerated must. Monitor temperature during and after crushing, especially for whites, which benefit from cool handling. This foundational step greatly influences your wine’s clarity, taste, and balance, so take care to do it right.
Fermentation Process: Turning Juice into Wine

How to Add Yeast and Start Fermentation
To begin fermentation, sanitize all equipment thoroughly to prevent contamination. Once your juice or must (crushed fruit mixture) is prepared, sprinkle wine yeast directly onto the surface or rehydrate it in warm water (95–105°F) for 15 minutes before adding. Stir gently to distribute the yeast evenly.
Use the correct yeast strain—such as Lalvin EC-1118 for robust fermentation or Red Star Côte des Blancs for white wines—for optimal flavor and alcohol tolerance. Seal the container with an airlock filled with water to allow carbon dioxide to escape while keeping oxygen and microbes out.
Store the vessel in a dark, stable environment. Fermentation typically begins within 12–36 hours, indicated by bubbling in the airlock and foam formation. Avoid sealing airtight without an airlock, as pressure buildup can cause explosions.
Proper yeast activation ensures a clean, efficient fermentation process, laying the foundation for high-quality homemade wine.
Ideal Temperature for Fermenting Wine
Maintaining the correct fermentation temperature is crucial for flavor development and yeast health. Most wine yeasts perform best between 68–75°F (20–24°C). Temperatures below this range slow yeast activity, potentially stalling fermentation, while higher temperatures can kill yeast or produce off-flavors like sulfur or excessive alcohol heat.
Monitor temperature daily using a sanitized floating thermometer or adhesive strip. For white wines, aim for the lower end (68–72°F), while reds can tolerate the upper range (72–75°F).
If your space is too cold, use a fermentation heater belt; if too warm, place the carboy in a water bath with ice packs. Avoid rapid temperature swings, as they stress yeast.
Consistent, controlled conditions promote clean, complete fermentation and preserve the wine’s intended aroma and balance, ensuring a smoother, more enjoyable final product.
How Long Fermentation Should Take
Primary fermentation typically lasts 5 to 14 days, depending on temperature, sugar content, and yeast strain. Active fermentation shows vigorous bubbling and a foamy head; as it slows, bubbles become infrequent.
To confirm completion, use a hydrometer to measure specific gravity—when it reads 0.990 or below for three consecutive days, fermentation is likely finished. Do not rely solely on airlock activity, as it can cease even with residual sugar.
After primary fermentation, many winemakers transfer the wine to a secondary vessel for aging and malolactic fermentation, which can take weeks to months. Extended aging improves clarity and flavor complexity. Patience is key—rushing the process risks off-flavors or instability.
Always keep the wine topped up and sealed with an airlock during aging. Proper timing ensures balanced alcohol, sweetness, and aroma in your finished homemade wine.
How to Monitor and Control Wine Acidity
Testing Acid Levels in Your Wine
Accurately testing acid levels is essential for producing balanced homemade wine. Use a wine acid testing kit or a digital pH meter to measure both titratable acidity (TA) and pH during fermentation and before bottling.
For TA, titrate a wine sample with sodium hydroxide until it reaches a pH of 8.2, indicated by a color change in phenolphthalein. Each milliliter of sodium hydroxide used corresponds to 0.1% tartaric acid in the wine. Ideal TA for most wines ranges from 0.6% to 0.7%.
pH should fall between 3.0 and 3.6—lower values increase microbial stability but may make wine too tart, while higher values risk spoilage. Test regularly, especially after primary fermentation and before racking, to catch imbalances early. Always sanitize equipment and take multiple readings for accuracy.
Consistent monitoring ensures your wine develops the proper structure, flavor, and longevity.
Adjusting Acidity with Additives
If testing reveals imbalanced acidity, you can correct it using approved additives. To increase acidity, add tartaric acid—the most wine-friendly option—dissolved in a small amount of warm water and blended thoroughly into the must. Use about 1 gram per gallon to raise TA by 0.1%.
For deacidifying, mix potassium bicarbonate or chalk (calcium carbonate) to neutralize excess acid. Add cautiously—chalk reacts quickly but can cause foaming, while potassium bicarbonate works more gradually. Always retest after adjustments and wait 24 hours before further changes. Avoid over-correction, as drastic shifts can affect yeast activity and flavor.
These adjustments are best made before fermentation begins, though minor tweaks post-fermentation are acceptable. Proper dosing preserves the wine’s freshness and microbial stability while enhancing fruit expression and balance.
Signs of Imbalanced Wine pH
Recognizing signs of pH imbalance helps prevent flawed wine. A pH below 3.0 often results in excessive tartness, a sharp mouthfeel, and inhibited malolactic fermentation. Conversely, a pH above 3.6 increases the risk of bacterial spoilage, oxidation, and a flat, dull taste.
Wines with high pH may appear unstable, browning quickly and lacking crispness. Other indicators include sluggish or stuck fermentation, unexpected cloudiness, or off-odors like vinegar or rotten eggs. Poor sulfur dioxide effectiveness at higher pH also compromises preservation.
Taste and observe your wine regularly—bright, vibrant acidity suggests balance, while harsh or flabby profiles signal issues. Use these sensory cues alongside lab testing to guide corrections. Addressing pH early ensures a stable, flavorful, and shelf-stable homemade wine with professional-quality character.
Transferring and Aging Your Homemade Wine
Racking Wine: When and How to Do It
Racking is the process of transferring wine from one container to another to separate it from sediment that forms during fermentation. This step is crucial for clarity and flavor development. Begin the first racking about 5–7 days after primary fermentation ends, once most solids have settled.
Use a siphon hose and sanitized equipment to avoid contamination. Transfer the wine gently, stopping before the sediment layer is disturbed. Repeat racking every 2–4 weeks during the initial aging phase until the wine clears. Minimize oxygen exposure by keeping the receiving vessel full and using an airlock.
Racking also helps stabilize the wine, reducing off-flavors and promoting smoothness. Always sanitize tools thoroughly, and consider measuring specific gravity before and after to track fermentation progress. With careful, consistent racking, your homemade wine will develop greater clarity, complexity, and drinkability over time.
Choosing the Right Aging Container
Selecting the proper aging vessel is essential for preserving quality and enhancing flavor in homemade wine. Glass carboys are ideal for short to medium-term aging because they’re inert, easy to clean, and limit oxygen exposure when paired with an airlock.
For longer aging, especially red wines, oak barrels add complexity, imparting tannins and subtle vanilla or spice notes. However, barrels require careful maintenance to prevent spoilage. Alternatively, stainless steel tanks offer excellent temperature control and zero oxygen transfer but don’t contribute flavor.
Some home winemakers use oak chips in glass carboys to mimic barrel aging affordably. Regardless of container type, ensure it’s food-grade, airtight, and filled nearly to the top to reduce headspace. Always sanitize thoroughly before use.
The right aging container not only protects your wine but actively shapes its character, so match your choice to your wine style and aging goals.
How Long to Age Wine at Home
The ideal aging time for homemade wine depends on the type of wine, sugar content, and desired flavor profile. Most white wines benefit from 3–6 months of aging, which softens acidity and integrates aromas. Red wines typically need longer—6 months to 2 years—to mellow tannins and develop complexity.
Fruit wines may require 6–12 months to fully mature. Aging too briefly can result in harsh or unbalanced flavors, while over-aging may lead to oxidation or flavor loss. Store bottles in a cool, dark place with stable temperature (55–60°F) and minimal vibration.
Monitor your wine periodically with tastings every few months to assess progress. Use sulfites appropriately to protect against spoilage. Remember, not all wines improve with age—some are best enjoyed young. By tracking your batches and adjusting aging times based on taste, you’ll learn what works best for your homemade creations.
Bottling Your Wine: Tips for Success
Sanitizing Bottles and Equipment
Before bottling your homemade wine, thoroughly sanitize all equipment to prevent contamination that could spoil your batch. Begin by washing bottles, siphon tubing, funnels, and any tools with warm water to remove debris. Then, use a no-rinse sanitizer—such as potassium metabisulfite or a commercial brewing sanitizer—following the manufacturer’s dilution instructions.
Submerge each item for at least 5–10 minutes to ensure all surfaces are treated. Pay special attention to bottle interiors; use a bottle brush if needed, but avoid soap, which can leave residues.
After sanitizing, allow equipment to air-dry on a clean rack—do not towel dry, as this can reintroduce bacteria. Work in a clean, dust-free environment and handle bottles by the base to minimize contact with the neck and interior.
This step is critical for preserving flavor and stability, as even minor microbial contamination can lead to off-flavors or refermentation in the bottle. Taking time here ensures your wine remains pure and enjoyable for months or years.
Using a Siphon for Clean Filling
Transferring wine from the carboy to bottles using a siphon system ensures clarity and minimizes oxidation. Begin by placing the carboy on a raised surface and the bottles below to create gravity flow.
Attach sanitized tubing to the racking cane and insert it gently into the wine, keeping the end above the sediment layer.
Start the siphon using gentle suction or a pump—never by mouth—and guide the tube into each bottle with a filler wand that automatically stops flow when the bottle is full. Avoid splashing, as this introduces oxygen and can degrade the wine’s quality.
Fill each bottle to within about 1 inch of the top, leaving proper headspace for corking. Work slowly and steadily to maintain a continuous flow and reduce sediment disturbance. Using a siphon not only preserves the wine’s character but also makes bottling faster and cleaner.
This method is essential for achieving professional-quality results at home.
Corking Techniques for Long-Term Storage
Proper corking is essential for preserving wine quality during long-term aging. Use high-quality corks that match your bottle size and a durable corker—either a floor-standing double-lever or a handheld model. Before inserting, lightly lubricate corks with water or a food-grade solution to prevent cracking.
Position the bottle upright under the corker, place the cork evenly on top, and press down firmly and steadily to insert it fully—about two-thirds of the cork should be inside the neck. Ensure each cork is straight and securely seated to create an airtight seal.
After corking, store bottles horizontally in a cool, dark place with stable humidity to keep corks moist and prevent drying out. This orientation ensures the wine stays in contact with the cork, maintaining the seal. Properly corked wine can age gracefully for years, preserving its aroma, flavor, and complexity.
Common Problems in Home Winemaking and Fixes
Why Your Wine Might Taste Sour or Off
If your homemade wine tastes sour, vinegary, or just “off,” it’s likely due to bacterial contamination or incomplete fermentation. Acetobacter bacteria, which thrive in oxygen-rich environments, can turn alcohol into acetic acid—giving wine a vinegar-like flavor.
To prevent this, ensure your equipment is thoroughly sanitized before use and minimize air exposure during fermentation by using an airlock. Another cause could be stuck fermentation, where yeast stops working prematurely due to low temperature, poor yeast health, or high sugar levels.
To fix this, gently warm the fermenting must to 70–75°F (21–24°C), and consider adding yeast nutrient or repitching with fresh, active wine yeast. Taste and smell your wine regularly during the process to catch issues early.
Always use a hydrometer to confirm fermentation has fully completed before bottling, ensuring stable, balanced flavor.
Dealing with Cloudy or Hazy Wine
Cloudy or hazy wine is a common issue in home winemaking, often caused by suspended yeast, proteins, or pectin remaining after fermentation. While not harmful, it affects clarity and presentation. To fix this, first ensure fermentation is complete—cloudiness may persist if yeast is still active.
Then, use fining agents like bentonite, gelatin, or isinglass to bind and settle particles. Cold stabilization—chilling the wine for several days—also encourages sediment formation for easier racking. Racking the wine carefully off the lees (sediment) multiple times enhances clarity.
For fruit wines, pectic enzyme should be added at the beginning to break down pectin, a natural substance in fruits that causes haze. Avoid filtering too early, as it can reintroduce oxygen. Patience is key—many wines naturally clear over time with proper storage.
With these clarification techniques, you’ll achieve a bright, professional-looking wine.
Preventing Mold and Contamination
Mold and microbial contamination can ruin a batch of homemade wine, often appearing as fuzzy growth or odd odors. These issues stem from poor sanitation, exposure to air, or using spoiled fruit. To prevent mold, sanitize all equipment—including fermenters, spoons, and airlocks—with a no-rinse sanitizer before use.
Always use fresh, high-quality ingredients and discard any fruit showing signs of spoilage. During fermentation, keep the container sealed with an airlock to allow CO2 to escape while blocking airborne contaminants. Avoid opening the fermenter unnecessarily, as each exposure increases contamination risk.
If mold appears on the surface, discard the entire batch—do not attempt to salvage it, as toxins may have spread. Using sulfites like potassium metabisulfite at recommended levels helps inhibit unwanted microbes. Maintain clean, cool, and dark storage conditions.
With strict hygiene and preventive measures, you’ll significantly reduce contamination and produce safe, delicious wine consistently.
Frequently Asked Questions
What is the basic process of making wine at home?
The basic process involves crushing grapes or using fruit juice, adding wine yeast to start fermentation, allowing the mixture to ferment for several weeks, then racking (transferring) the liquid to a secondary container to age. After aging, the wine is clarified, stabilized, and finally bottled.
What equipment do I need to make wine at home?
You’ll need a fermentation vessel (like a food-grade plastic bucket or glass carboy), an airlock, a siphon hose, sterilizing solution, a hydrometer, bottles, corks, and a corker. Additional tools like a juice press or wine thief can be helpful but aren’t essential for beginners.
Can I make wine without grapes?
Yes, you can make wine from any fruit or even flower-based liquids like dandelions. The key is ensuring enough sugar is present for fermentation, which may require adding sugar to non-grape fruits to achieve proper alcohol levels.
How long does it take to make wine at home?
Fermentation typically takes 1–2 weeks, followed by aging that can last from a few months to over a year depending on the type of wine. Most homemade wines are ready to drink within 2–6 months after fermentation.
Do I need to add sulfites when making wine at home?
Sulfites, like potassium metabisulfite, help preserve wine and prevent spoilage. While not strictly required, they are recommended for stability and shelf life, especially if you plan to store the wine for more than a few months.
How do I know when my wine is ready to bottle?
Use a hydrometer to check the specific gravity; when it reads consistently around 0.990–0.998 for three consecutive days, fermentation is likely complete. The wine should also appear clear and no longer smell of active fermentation.
Can I make wine without an airlock?
An airlock is highly recommended because it allows carbon dioxide to escape while preventing oxygen and contaminants from entering. Using a cloth or loose lid increases the risk of infection and oxidation, which can spoil your wine.
Conclusion
Making wine at home is a rewarding and enjoyable process that anyone can master with patience and attention to detail. By selecting quality ingredients, maintaining proper sanitation, and allowing sufficient fermentation and aging time, you can create delicious homemade wine. With practice, your skills will improve, leading to richer, more flavorful results. Start your winemaking journey today and savor the fruits of your labor.