How To Make Light Beer
Craving a crisp, homemade brew but watching your calories? Learning how to make light beer at home is surprisingly simple and incredibly rewarding. You don’t need a massive brewery to craft a refreshing, low-calorie pint that rivals your favorite store-bought brand. Let’s dive into the easy process of brewing your own light beer today.
Understanding Light Beer: The Basics of Low-Calorie Brewing
What Defines a ‘Light’ Beer?
To truly understand how to make light beer, you must first grasp what defines it. Generally, a light beer is characterized by a significantly lower calorie and carbohydrate count compared to its standard counterparts, often achieved by reducing the alcohol content or the residual sugars left after fermentation.
The brewing process involves creating a highly fermentable wort, meaning the yeast consumes more sugars, leaving fewer behind to contribute to the final calorie count. Key factors include using specific enzymes to break down complex starches into simple sugars that yeast can easily digest.
Additionally, brewers might utilize rice or corn as adjuncts to lighten the body and flavor profile without adding excess fermentable sugars.
By carefully controlling the mash temperature and yeast selection, you can ensure a higher attenuation rate, which is crucial for achieving that crisp, dry finish associated with high-quality light beers.
The Difference Between Light Beer and Regular Beer
When exploring how to make light beer, it is essential to distinguish it from regular beer. The primary difference lies in the original gravity and the final attenuation of the brew. Regular beers typically have a higher density of fermentable sugars, resulting in more body, flavor, and alcohol.
In contrast, light beer recipes aim for a lower starting gravity and employ techniques to maximize yeast consumption of available sugars. This results in a drier finish with fewer residual carbohydrates.
While regular beer might rely on malted barley for its robust character, light brewing often incorporates adjuncts like corn or rice to dilute the caloric density without drastically reducing alcohol volume. The fermentation process is also managed more aggressively to ensure that the yeast does not leave behind sweetness.
Understanding these distinctions helps brewers adjust their recipes to hit specific targets for lower calories while maintaining a refreshing taste.
Benefits of Brewing Your Own Light Beer
Brewing your own light beer at home offers distinct advantages over purchasing commercial options, particularly when you want precise control over what you consume.
By making it yourself, you can dictate exactly which ingredients go into the batch, allowing you to avoid artificial preservatives or excessive additives often found in store-bought brands. You gain the ability to fine-tune the calorie count and alcohol content to suit your specific dietary goals.
Homebrewing also provides the opportunity to experiment with different hop varieties and yeast strains to create a flavor profile that is uniquely yours, rather than settling for a generic taste. Furthermore, the process can be cost-effective in the long run, producing high-quality beverages for a fraction of the retail price.
Ultimately, the satisfaction of crafting a refreshing, low-calorie beer that meets your personal standards is a rewarding experience that enhances your appreciation for the brewing art.
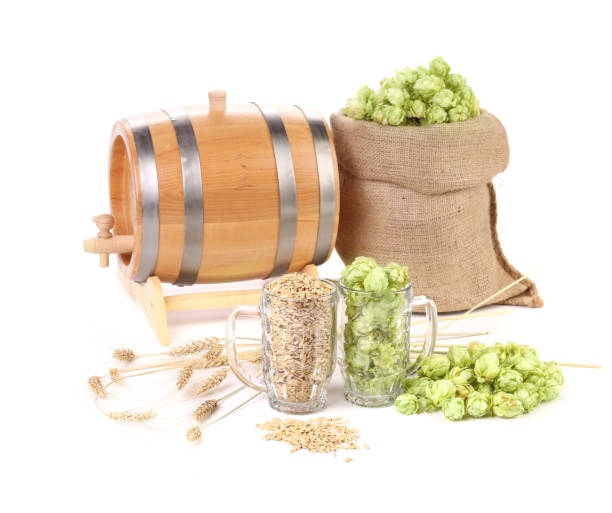
Essential Ingredients for a Crisp, Low-Calorie Brew
Choosing the Right Base Malts and Grains
To create a light beer that remains flavorful yet low in calories, selecting the appropriate base malts is crucial. You should prioritize pale malt varieties such as Pilsner or American 2-row, which provide a solid fermentable base without contributing heavy residual sweetness or excessive body.
These grains offer a high degree of fermentability, allowing yeast to convert more sugars into alcohol, thereby reducing the final gravity. Avoid darker roasted malts or heavy crystal malts, as these add complex sugars that yeast cannot fully ferment, resulting in a higher calorie count and a fuller mouthfeel.
By focusing on highly modified base malts, you ensure a clean, crisp flavor profile. Additionally, performing a step mash or employing a single infusion mash at a lower temperature, around 148°F to 150°F, can further encourage the production of fermentable sugars.
This technique is essential for achieving the dry, refreshing finish characteristic of a quality light brew.
Utilizing Adjuncts: Rice, Corn, and Sugar
Incorporating adjuncts like rice, corn, or sugar is a proven method for lightening the body and color of your beer while boosting alcohol content without adding extra calories.
Rice and corn are classic choices that contribute fermentable sugars which yeast processes efficiently, resulting in a drier finish and a lighter mouthfeel than barley alone can provide. These ingredients dilute the protein and polyphenol content, leading to a cleaner, crisper taste.
Alternatively, adding simple sugars such as table sugar or dextrose directly to the boil can significantly increase attenuation. Because these sugars are fully fermentable, they add alcohol but leave behind virtually no residual sweetness or body.
This process, often called “gravity boosting,” effectively lowers the carbohydrate ratio in the final product. When using these adjuncts, aim for a balance where they make up roughly 20 to 30 percent of your total grain bill to maintain drinkability while ensuring the beer retains enough structure to be satisfying.
Selecting High-Attenuating Yeast Strains
The yeast strain you choose plays a pivotal role in determining the final caloric density and crispness of your homebrew.
To achieve a truly light beer, you must select high-attenuating yeast strains known for their ability to ferment a wide spectrum of sugars, including complex maltotrioses that other yeasts might leave behind. Look for neutral ale yeasts or specific lager strains that boast high attenuation percentages, often exceeding 80 percent.
These yeasts scour the wort for fermentable sugars, drastically reducing the final gravity and minimizing leftover carbohydrates. It is also beneficial to choose strains with low flocculation to ensure the yeast remains active in the suspension longer, thoroughly fermenting the brew.
Furthermore, proper yeast management, such as pitching an adequate amount of healthy cells and controlling fermentation temperatures, ensures complete attenuation. By utilizing a robust yeast culture, you guarantee a dry, clean finish that defines the style, effectively lowering the calorie count while maximizing alcohol potential.
Must-Have Homebrewing Equipment for Beginners
Basic Brewing Hardware and Vessels
To brew a crisp light beer, you need a reliable setup to extract fermentable sugars without adding heavy flavors. Start with a large brew kettle made of stainless steel or aluminum, ideally at least 5 gallons in capacity, to accommodate vigorous boiling without messy boil-overs.
You will also need a mash tun or a large insulated cooler for steeping your grains, which is crucial for achieving the light body and color characteristic of this style. Do not forget a long stirring spoon; plastic or wood works, but metal is easier to sanitize.
A thermometer is non-negotiable for hitting precise temperature targets during the mash and boil stages, ensuring your enzyme activity is optimal for a clean fermentable profile.
Finally, a wort chiller is highly recommended to rapidly cool your liquid after boiling, which helps lock in the delicate flavor profile and prevents bacterial growth before pitching your yeast.
Fermentation and Bottling Essentials
Once your wort is prepared, transferring it to the right environment is key to making a refreshing light beer. A glass carboy or food-grade plastic fermentation bucket is essential for the primary fermentation phase where yeast converts sugars into alcohol.
For light beers, which often require a bit of aging to smooth out flavors, a secondary vessel can help clarify the final product. You will need an airlock and stopper to let carbon dioxide escape without letting oxygen or contaminants in.
When the beer is ready, bottling buckets with spigots make the filling process much cleaner and more efficient. Invest in high-quality bottles and caps, ensuring they are pry-off type if using a hand capper.
A bottling wand is a small but mighty tool that controls the flow, reducing oxidation and foam, ensuring your homemade light beer looks professional and tastes perfectly carbonated.
Sanitation Supplies to Prevent Infection
Nothing ruins a batch of homebrew faster than poor sanitation, especially when brewing light beers where off-flavors are easily detected. You must acquire a high-quality no-rinse sanitizer, such as Star San or iodophor, which effectively kills bacteria and wild yeast without leaving aftertastes that could mask your beer’s delicate profile.
Avoid using standard bleach, as it can be corrosive to equipment and requires extensive rinsing. A dedicated cleaning agent, like powdered brewery wash (PBW), is necessary for removing stubborn protein residues and hop trub from your kettles and fermenters before sanitizing.
Keep plenty of soft cloths or sponges that are strictly used for brewing to avoid cross-contamination from kitchen surfaces. Additionally, having a spray bottle filled with your sanitizer solution allows you to quickly hit surfaces during the transfer process.
Rigorous attention to these sanitation supplies ensures that the only thing fermenting in your wort is the specific yeast strain you chose.
Step-by-Step Guide: The Brewing Process
Step 1: Mashing and Sparging for Maximum Efficiency
To create a light, crisp beer, you must maximize fermentable sugar extraction while minimizing heavy proteins. Begin by crushing your grain to a fine consistency to ensure optimal starch conversion.
Mash your grains at a lower temperature, ideally between 148°F and 150°F, which encourages the production of simple sugars rather than complex dextrins. This step is crucial for achieving a dry finish. Once conversion is complete, sparge slowly with hot water to rinse the sugars from the grain bed.
Be careful not to extract tannins by keeping the sparge water temperature below 170°F. Efficient lautering ensures you hit your target specific gravity without adding unwanted body or astringency to the final brew.
Step 2: The Boil and Hop Additions
Bring your wort to a vigorous rolling boil to sterilize the liquid and extract bitterness from hops. For a light beer profile, focus on using low-alpha acid hops or noble varieties to keep the bitterness subtle and clean.
Add your bittering hops early in the boil, typically for 60 minutes, but aim for a low International Bitterness Unit (IBU) range. If you are using adjuncts like rice or corn syrup to lighten the body, add them during the boil to ensure they are fully fermentable.
Avoid heavy late-hop additions that might overpower the delicate flavor. A 60-minute boil is standard, but ensure you evaporate enough water to concentrate the sugars properly before moving to the cooling stage.
Step 3: Cooling, Pitching Yeast, and Primary Fermentation
Rapidly cooling the wort is essential to prevent contamination and create the perfect environment for yeast. Use a wort chiller to drop the temperature to pitching range, typically between 45°F and 55°F for lagers or 65°F for ales.
Once cooled, transfer the wort to a sanitized fermenter and pitch a high-quality yeast strain known for a clean profile, such as a lager yeast. Oxygenate the wort thoroughly to help the yeast reproduce. Seal the fermenter with an airlock and store it in a temperature-controlled environment.
Consistent temperatures are vital to prevent off-flavors. Allow the beer to ferment until the specific gravity stabilizes, indicating that the yeast has consumed the available sugars.
Step 4: Conditioning and Carbonation
After primary fermentation is complete, the beer requires conditioning to mature and clarify. For the best results, perform a diacetyl rest if necessary, then lower the temperature for a cold conditioning phase, known as lagering. This process helps settle out remaining yeast and proteins, resulting in a crystal-clear appearance.
Once the beer is clear and stable, it is time to package. Prime your beer with a measured amount of corn sugar or force carbonate it in a keg to achieve the desired level of fizziness.
Store the bottled or kegged beer at room temperature for a few days to allow carbonation to develop, then move it to a refrigerator. This final step ensures the light beer is refreshing, effervescent, and ready to serve.
The Science Behind Reducing Calories and Carbs
Understanding Original Gravity and Final Gravity
To brew a lighter beer, you must master the relationship between Original Gravity (OG) and Final Gravity (FG). OG measures the density of sugars in your unfermented wort, while FG measures the density after fermentation. The gap between these two numbers indicates how much sugar the yeast consumed.
For a low-calorie brew, you aim for a lower Final Gravity, meaning fewer residual carbohydrates remain in the finished product. By starting with a moderate OG and ensuring your yeast ferments as completely as possible, you reduce the overall carbohydrate count.
This process directly impacts the caloric content because residual sugars contribute significantly to the total calories. Therefore, monitoring gravity readings throughout the fermentation process is essential for verifying that your beer is achieving the desired dryness and lightness without sacrificing flavor entirely.
Consistent tracking allows you to fine-tune your process for the best results.
The Role of Enzymes in Alcohol Conversion
Enzymes act as the biological catalysts that transform starches into fermentable sugars, a critical step in reducing carbohydrates. During the mashing process, enzymes like alpha and beta amylase break down complex starch chains into simple sugars that yeast can consume.
To make light beer, brewers often introduce supplemental enzymes such as amyloglucosidase. This specific enzyme breaks down dextrins, which are complex carbohydrates that standard brewer’s yeast cannot typically ferment.
By converting these unfermentable dextrins into glucose, you allow the yeast to produce more alcohol while leaving behind virtually no residual sugars. This results in a beer with a significantly lower carbohydrate count and a lighter body.
Utilizing these enzymatic tools ensures that the maximum amount of potential sugar is converted, creating a dry, crisp profile that is essential for a satisfying low-calorie beverage.
Techniques for Increasing Attenuation
Increasing attenuation is the primary method for ensuring your beer finishes dry and low in calories. Attenuation refers to the percentage of sugars converted to alcohol and carbon dioxide.
To achieve high attenuation, you should select a yeast strain with high attenuation potential and maintain a lower mash temperature, typically between 148°F and 152°F. Lower mash temperatures favor the production of simple, fermentable sugars over complex dextrins.
Additionally, ensuring proper yeast health through adequate oxygenation and nutrient levels will help the yeast finish the job completely. You can also employ a step mash or a fermentation rest at slightly higher temperatures to encourage the yeast to scavenge any remaining sugars.
By focusing on these techniques, you force the yeast to consume every available sugar, drastically lowering the carbohydrate content and resulting in the clean, refreshing finish characteristic of high-quality light beers.
How to Maintain Flavor While Reducing Body
Balancing Hop Bitterness and Aroma
When brewing light beer, maintaining perceived flavor without adding body relies heavily on strategic hop utilization. Since you cannot rely on malt sweetness for balance, bittering hops must be calculated precisely to match the lower alcohol content.
Aim for a balanced bitterness-to-IBU ratio so the beer doesn’t taste thin or overly astringent. To enhance flavor without weight, focus heavily on late-hop additions or dry hopping. This technique infuses bright aromatic qualities such as citrus or floral notes that distract the palate from the lack of malt backbone.
Using noble hop varieties or modern clean aroma hops can provide a sophisticated finish. Remember that high alpha-acd hops allow for lower usage rates, reducing vegetal flavors while still achieving the desired snap.
This approach ensures the final product remains refreshing yet complex, proving that low body does not have to mean low flavor impact. By layering these aromatic compounds, you create a sensory experience that feels full.
Water Chemistry Profiles for Light Lagers
Water chemistry is the unsung hero when brewing light lagers, directly influencing mouthfeel and flavor crispness. To achieve a dry, snappy finish, your water profile should be low in sulfate and low in chloride.
This mineral balance ensures that hop bitterness remains crisp and the malt character does not become cloying or heavy. You should aim for a low residual alkalinity to prevent the mash pH from rising too high, which can extract harsh tannins from the grain husks.
Using soft water with high calcium content helps yeast flocculation and promotes a clean fermentation, essential for letting subtle flavors shine. If your source water is too hard, consider diluting it with distilled water to hit the target profile.
By treating your water as a precise ingredient rather than just a solvent, you create the perfect canvas for delicate flavors to stand out without the weight of heavy minerals.
Avoiding ‘Watery’ Off-Flavors
The biggest risk in reducing body is developing a thin, watery mouthfeel that lacks character. To counter this, you must ensure yeast health and proper fermentation temperature.
Under-pitching yeast or fermenting too warm can produce unwanted fusel alcohols that clash with the light profile, while fermenting too cold might leave the beer tasting unfinished. Use a healthy yeast starter to ensure a complete attenuation, which removes residual sugars that could otherwise make the beer feel heavy.
However, to avoid the wateriness, consider adding a small percentage of crystal malt or dextrin malt. These specialty grains add non-fermentable sugars that provide a slight sense of body and palate coating without significantly increasing the final gravity or caloric content.
This subtle addition bridges the gap between a refreshing drink and a flavorful brew, ensuring the consumer enjoys a satisfying texture rather than just colored water.
Troubleshooting Common Light Beer Issues
Fixing a Stuck Fermentation
If your light beer fermentation stalls before reaching the target final gravity, it is crucial to act quickly to restart the process. First, ensure the fermentation temperature is stable and within the ideal range for your yeast strain, as light lagers often require cooler temperatures.
Gently swirl the fermenter to rouse the yeast back into suspension, which can often kickstart activity. If this fails, consider pitching a fresh, healthy yeast starter to ensure there are enough viable cells to finish the job.
You should also check your specific gravity to confirm it is actually stuck and not just finished. Avoid opening the fermenter too frequently to prevent contamination. Temperature control is the most critical factor in ensuring a complete fermentation cycle for lighter styles.
By maintaining a consistent environment and monitoring gravity readings, you can rescue a stuck batch and achieve the crisp, dry finish characteristic of a well-made light beer.
Dealing with Cloudiness or Haze
Cloudiness in light beer is often caused by proteins, starches, or yeast remaining in suspension, which is undesirable for the clear appearance expected in this style. To fix this, you can employ a process called cold crashing, where you lower the temperature of the beer near freezing for several days.
This causes suspended particles to settle to the bottom of the fermenter. Additionally, using fining agents like Irish moss or gelatin during the boil or secondary fermentation can help clarify the liquid by binding to haze-forming compounds.
Ensure you give the beer ample time to condition and clear naturally before bottling. Proper filtration is another effective method for achieving crystal-clear results. If the haze persists, check for potential infections or starch conversion issues during the mash.
Addressing these factors ensures your light beer looks as refreshing as it tastes, providing the visual appeal that drinkers expect.
Adjusting Recipes for Future Batches
To consistently brew better light beer, you must refine your recipes based on previous outcomes and tasting notes. If your beer feels too heavy or malty, consider increasing the percentage of rice or corn adjuncts to lighten the body and color without significantly raising alcohol content.
Conversely, if the flavor is too thin, try adding a small amount of Cara-Pils or other light crystal malts to enhance mouthfeel and head retention. Pay close attention to your water chemistry, as sulfate-to-chloride ratios can dramatically impact bitterness perception.
Keep detailed brewing logs to track every variable, including mash temperatures and yeast strain performance. Experimenting with different yeast varieties can also help you find the perfect balance of neutral flavor profiles.
By methodically tweaking ingredients and processes, you can dial in a recipe that produces the crisp, clean, and refreshing characteristics that define a high-quality light beer.
Frequently Asked Questions
What makes a beer ‘light’ compared to regular beer?
Light beer is characterized by having fewer calories and carbohydrates, which is typically achieved by using adjuncts like rice or corn to increase fermentability. This process results in a lower final gravity and a thinner body while maintaining alcohol content similar to standard beers.
What ingredients do I need to brew light beer?
You will need a base of pale 2-row malt along with adjuncts such as flaked corn, rice, or sugar to lighten the body and color. Additionally, a clean-fermenting yeast strain, usually a lager yeast, is essential for achieving the crisp finish expected in light beers.
How does mash temperature affect the brewing of light beer?
Mashing at a lower temperature, between 148°F and 150°F (65°C-65.5°C), promotes the production of highly fermentable sugars and reduces dextrins. This results in a drier beer with less residual sugar, significantly lowering the calorie and carbohydrate content.
Can I make light beer without using corn or rice?
Yes, you can brew light beer without corn or rice by using enzyme additions like amyloglucosidase to ensure complete sugar conversion. Alternatively, using a high-attenuation yeast and a low-temperature mash with only pale malt can also yield a lighter, drier profile.
What is the best yeast strain for making light beer?
The best yeast strains for light beer are those that ferment cleanly and leave minimal flavor profile, such as American Lager yeast or neutral American Ale yeast. These strains ensure that the final product is crisp and refreshing without heavy esters or phenols.
How long does it take to ferment light beer?
If using a lager yeast, the fermentation process for light beer typically takes two to four weeks at cooler temperatures, followed by a conditioning period. Using an ale yeast can shorten this time to approximately two weeks, though lagering is preferred for the traditional crisp taste.
Conclusion
Making light beer at home is a rewarding process that balances flavor with lower calories. By controlling mash temperatures, selecting highly attenuative yeast, and incorporating adjuncts like rice or corn, you can achieve a crisp, refreshing finish without sacrificing quality. Remember that patience during fermentation is key to the perfect brew. Now that you have the techniques, grab your equipment and start experimenting to craft your own delicious, guilt-free light beer today.