How To Make Cold Brew Latte At Home
Tired of spending five dollars at the coffee shop every morning? Learning how to make cold brew latte at home is surprisingly simple and will save you a fortune. You do not need fancy equipment or barista skills to achieve that smooth, velvety texture you love. In this guide, we provide a quick, foolproof method to craft the perfect chilled latte in your own kitchen. Stick with us to master the ratio and technique for a refreshing caffeine fix today.
What is a cold brew latte?
The difference between cold brew and iced coffee
To master the art of making a cold brew latte at home, you must first understand that cold brew is a unique extraction method, not just chilled coffee.
While standard iced coffee is brewed hot and poured over ice, cold brew involves steeping coarse grounds in room temperature water for 12 to 24 hours. This slow process results in a concentrated coffee syrup that is significantly less acidic and naturally sweeter than its heat-extracted counterparts.
When you make a cold brew latte, you are using this potent concentrate as your foundation rather than watered-down drip coffee. Because iced coffee is diluted twice—once during brewing and again as ice melts—it often tastes thin.
In contrast, cold brew maintains its robust profile and structural integrity even when mixed with heavy cream or alternative milks. Understanding this distinction allows you to control the strength of your beverage, ensuring that your homemade latte tastes as professional and flavorful as one from a high-end cafe.
Why cold brew makes the best latte base
The reason cold brew is the superior choice for home baristas is its incredible flavor density and low acidity. Traditional espresso can be difficult to pull perfectly at home without expensive equipment, often resulting in a bitter or sour latte.
However, cold brew concentrate offers a smooth, chocolatey richness that mimics the intensity of espresso but with a much more forgiving profile. Because the cold extraction process doesn’t pull out the oils and acids that heat does, the resulting liquid is exceptionally mellow.
This creates a velvety canvas for milk to shine. When you combine cold brew concentrate with your choice of dairy or plant-based milk, the natural sugars in the coffee harmonize with the fats in the milk to create a naturally sweet beverage that rarely requires added syrups.
This efficiency makes it the perfect solution-focused base for anyone wanting a high-quality caffeinated drink without the logistical hassle of operating a complex espresso machine or dealing with burnt, over-extracted beans.
Key characteristics of a perfect cold brew latte
A perfect homemade cold brew latte is defined by its balanced ratio and creamy texture. Unlike a standard cup of coffee with a splash of milk, a latte should prioritize a higher milk-to-coffee ratio, typically using one part concentrate to two or three parts milk.
The signature characteristic of a great latte is its homogenous blend; the coffee and milk should integrate fully to create a tan, opaque appearance.
To achieve this, use a high-quality concentrate that has been properly filtered through a fine mesh or paper filter to remove all sediment, ensuring a clean mouthfeel.
Additionally, the best lattes feature a slight froth or aeration, which can be achieved at home using a simple hand frother or by shaking the milk in a jar before pouring. This adds a luxurious, airy dimension to the drink.
By focusing on these specific sensory details—clarity of the brew, richness of the milk, and a smooth finish—you can consistently produce a refreshing, professional-grade beverage in your own kitchen.
Essential equipment and ingredients you need
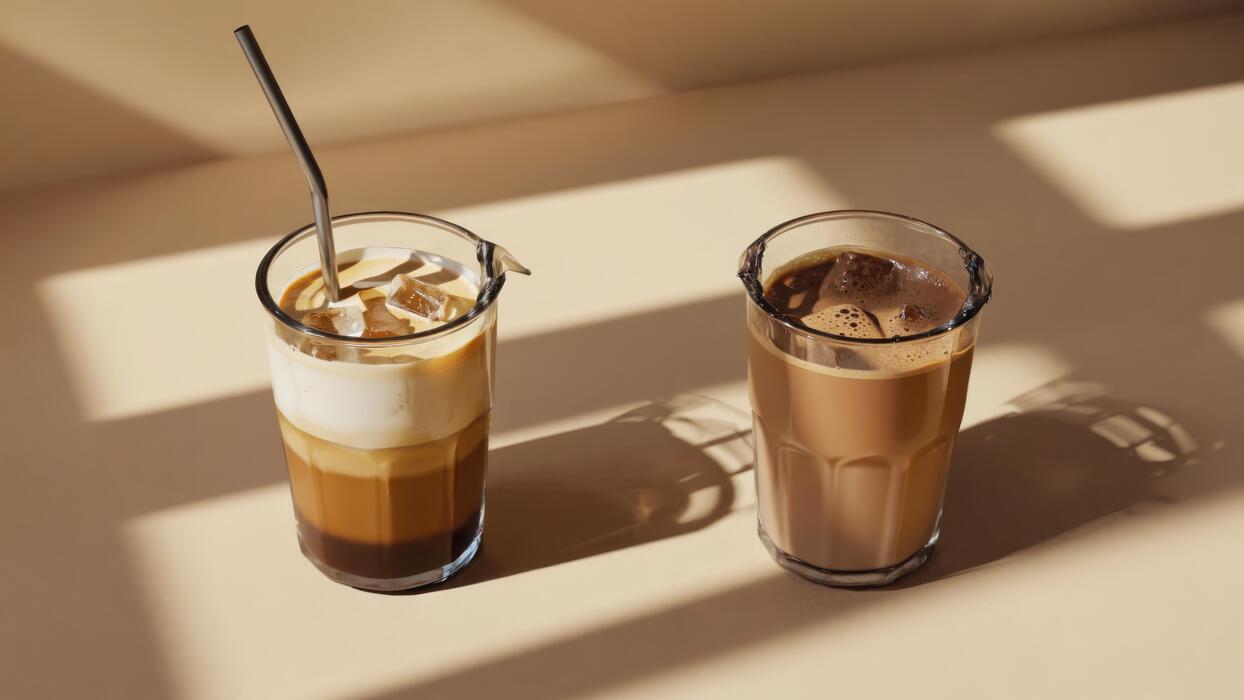
Choosing the right coffee beans and roast level
To craft a professional-grade cold brew latte at home, the foundation lies in selecting high-quality coffee beans. For this specific brewing method, we recommend choosing dark or medium-dark roast beans because they offer robust, chocolatey, and nutty profiles that stand up well to milk.
Since the cold extraction process significantly reduces acidity, lighter roasts can sometimes taste sour or underdeveloped when brewed cold. Instead, look for beans with flavor notes like caramel, cocoa, or toasted nuts to ensure your latte remains flavorful once diluted.
For the freshest possible taste, always opt for whole bean coffee and check the roast date on the packaging to ensure it was roasted within the last two to four weeks. Using single-origin beans from regions like Brazil or Sumatra often yields the best results for a creamy, low-acid beverage.
High-quality beans ensure that your homemade concentrate is rich enough to balance the addition of milk and ice without becoming watery or bland.
Best grinders for coarse coffee grounds
The most critical factor in successful cold brew extraction is the size of your coffee grounds. You must use a consistent coarse grind, similar in texture to sea salt or peppercorns, to prevent the final concentrate from becoming bitter or muddy.
A manual or electric burr grinder is the essential tool for this task because it crushes the beans into uniform particles, unlike blade grinders that create uneven dust. If you are a beginner, a high-quality hand grinder is a budget-friendly way to achieve the necessary precision.
For those making large batches frequently, an electric conical burr grinder with adjustable settings is a worthwhile investment to save time and effort. Using a coarse setting allows the water to flow freely through the grounds during the long steeping period, resulting in a clean, smooth flavor profile.
Avoiding fine grounds is vital, as they can over-extract and clog your filtration system, making the cleanup process difficult and ruining the clarity of your latte base.
Filtering tools and storage containers
Once your coffee has steeped for twelve to twenty-four hours, you need the right tools to separate the liquid from the grounds. A fine-mesh sieve lined with a paper filter or a dedicated nut milk bag works best to remove all sediment, ensuring a silky texture for your latte.
If you prefer a more specialized approach, a French press or a dedicated cold brew maker with a built-in stainless steel filter can simplify the process significantly. After filtration, you must store your concentrate in an airtight glass jar or carafe to maintain its freshness.
Glass is preferred over plastic because it does not retain odors or leach flavors into the coffee. A high-quality Mason jar or swing-top bottle will keep your concentrate fresh in the refrigerator for up to two weeks.
Proper storage ensures that you have a ready-to-use base whenever you crave a latte. Simply pour the concentrate over ice, add your favorite milk or dairy alternative, and enjoy a perfectly filtered, cafe-style drink at home.
How to make cold brew concentrate from scratch

The ideal coffee-to-water ratio
To craft a robust cold brew latte that stands up to milk and ice, you must start with a high-strength concentrate rather than standard drip coffee.
The most effective starting point for home baristas is a 1:4 ratio by weight, which translates to approximately one cup of coarsely ground coffee beans for every four cups of filtered water.
Using a coarse grind size, similar to sea salt, is essential because it prevents over-extraction and bitterness during the long soaking process. This specific ratio ensures that the final liquid remains bold enough to maintain its distinct flavor profile even after you dilute it with dairy or plant-based alternatives.
If you prefer an exceptionally thick, syrupy base for your lattes, you might experiment with a tighter 1:3 ratio, but the 1:4 balance is generally considered the gold standard for versatility.
Always prioritize freshly roasted beans and filtered water to ensure the cleanest possible taste, as the concentrate will amplify both the good and bad notes of your ingredients.
Step-by-step steeping instructions
Once you have measured your ingredients, place the coarse grounds into a large glass jar or dedicated cold brew maker.
Pour the room-temperature filtered water over the grounds slowly, ensuring every particle is fully saturated; you can use a long spoon to gently stir the mixture, but avoid over-agitating the sediment. Secure the lid and let the container sit undisturbed at room temperature for 12 to 18 hours.
While some people prefer steeping in the refrigerator, a countertop steep at ambient temperature often yields a more complex and nuanced flavor profile suitable for lattes. Avoid exceeding the 24-hour mark, as prolonged exposure can lead to the extraction of harsh tannins and woody flavors that ruin the smooth finish.
This slow, heat-free process is what reduces the acidity compared to hot brewing, resulting in a naturally sweet and chocolatey base that pairs perfectly with steamed milk or cold foam.
Consistency is key, so find a cool, dark spot in your kitchen where the brew can remain stable throughout the entire duration.
How to filter and store your concentrate
After the steeping time is complete, you must carefully separate the liquid from the spent grounds to stop the brewing process.
Start by pouring the mixture through a fine-mesh sieve to remove the largest particles, then follow up with a secondary pass through a paper coffee filter or cheesecloth to eliminate fine silt.
This double-filtration method ensures your latte has a clean, crisp mouthfeel without any gritty residue at the bottom of the glass. Once filtered, transfer the liquid into a clean, airtight glass carafe or mason jar.
This potent concentrate will stay fresh in the refrigerator for up to two weeks, allowing you to whip up a cold brew latte in seconds whenever a craving strikes.
When you are ready to serve, remember that this is a concentrate; always mix it with equal parts milk or water before adding ice.
Proper storage is vital to prevent the coffee from absorbing fridge odors, so ensure the seal is tight and keep the container away from pungent foods to maintain that premium, cafe-quality taste.
Best ways to froth milk for cold lattes
Using a handheld milk frother
For a quick and efficient way to elevate your cold brew latte, a handheld electric whisk is the ultimate tool for creating silk-like textures. To begin, pour cold milk into a tall glass, filling it only one-third of the way to account for the significant volume increase.
Submerge the wand at a slight angle just below the surface and turn it on, moving it vertically to incorporate air until the liquid becomes thick and glossy.
This method is particularly effective for emulsifying cold dairy or plant-based milks without adding any heat, ensuring your cold brew stays perfectly chilled. To achieve a professional finish, keep the wand moving to prevent large bubbles from forming on the surface.
Using a high-speed motor ensures that even thinner liquids like almond or oat milk transform into a stable, creamy topping. This approach is ideal for those who prioritize speed and minimal cleanup while still demanding a high-quality, cafe-style foam that sits beautifully atop a dark cold brew base.
The French press frothing method
If you do not have specialized electronics, your standard French press is an incredible manual alternative for creating dense, micro-foam for a cold latte. Simply pour cold milk into the carafe and insert the plunger, ensuring the mesh filter sits right at the liquid level.
Use short, rapid pumping motions for about thirty seconds to force air through the screen and into the milk. This mechanical process breaks down the proteins and fats, resulting in a velvety texture that is surprisingly sturdy and rich.
The key is to avoid over-pumping, which can create excessively large bubbles that dissipate quickly. Once the volume has doubled, remove the lid and give the carafe a firm tap on the counter to settle any remaining large air pockets.
This technique is highly recommended for batch frothing when serving multiple drinks at once, as the large capacity of the press allows you to prepare enough foam for several cold brew lattes simultaneously with consistent, professional results every single time.
How to make cold foam at home
To replicate the famous velvety topping found at major coffee chains, you can easily create cold foam by combining milk with a touch of sweetness.
The secret to a stable cold foam structure is using a mix of skim milk for volume and a small amount of heavy cream or half-and-half for fat-based stability.
Add a splash of vanilla syrup or honey to the mixture before frothing to enhance the flavor profile of your cold brew. Use an electric frother or a high-speed blender for roughly forty-five seconds until the mixture reaches a melted ice cream consistency that pours slowly.
Unlike standard steamed milk, this cold foam is designed to sit on top of the ice and slowly cascade down into the coffee, creating a beautiful marbled visual effect as you drink.
Always ensure your ingredients are chilled directly from the refrigerator, as colder temperatures help the proteins trap air more effectively, resulting in a luxurious, long-lasting foam that transforms a simple home-brewed coffee into a decadent, gourmet treat.
Step-by-step guide to assembling your latte

Measuring your concentrate and milk
To achieve a professional-grade latte texture at home, you must start with a precise ratio of cold brew concentrate to milk. Because cold brew concentrate is significantly more potent than standard drip coffee, the standard recommendation is a 1:2 ratio of coffee to milk.
Begin by pouring exactly four ounces of your preferred cold brew concentrate into a measuring cup to ensure consistency across every glass you prepare.
If you prefer a bolder caffeine kick, you can adjust this to a 1:1 ratio, but the higher milk volume is what defines the smooth, creamy profile of a traditional latte.
For the dairy component, whole milk provides the richest mouthfeel due to its fat content, though oat milk serves as an excellent high-protein alternative that froths beautifully. Ensure both liquids are thoroughly chilled before mixing to prevent the beverage from becoming diluted too quickly once it hits the ice.
Measuring your ingredients beforehand prevents the common mistake of an overly watery drink, allowing the deep chocolate and nutty notes of the cold brew to remain the primary focus of your morning beverage.
The proper way to layer ice and liquid
The sequence in which you add components to your glass determines the final temperature and visual appeal of your cold brew latte.
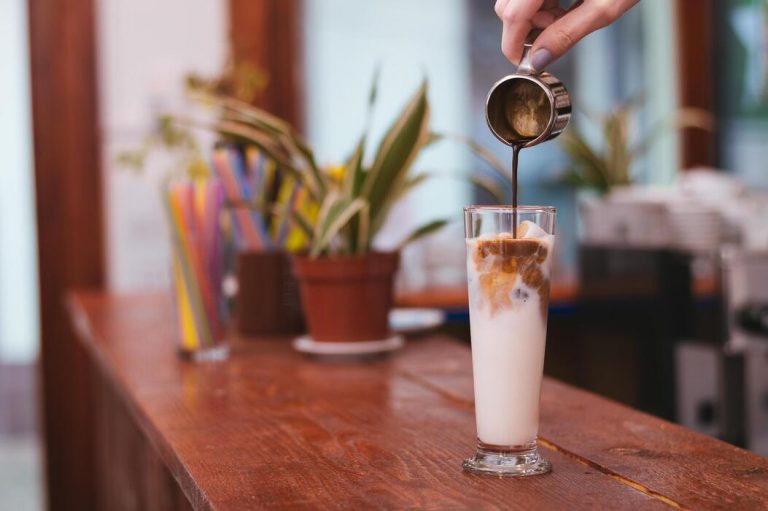
Start by filling a tall glass three-quarters full with large, solid ice cubes rather than crushed ice; larger cubes have less surface area and melt slower, keeping your latte cold without watering it down. Once the ice is positioned, pour your measured cold brew concentrate directly over the cubes.
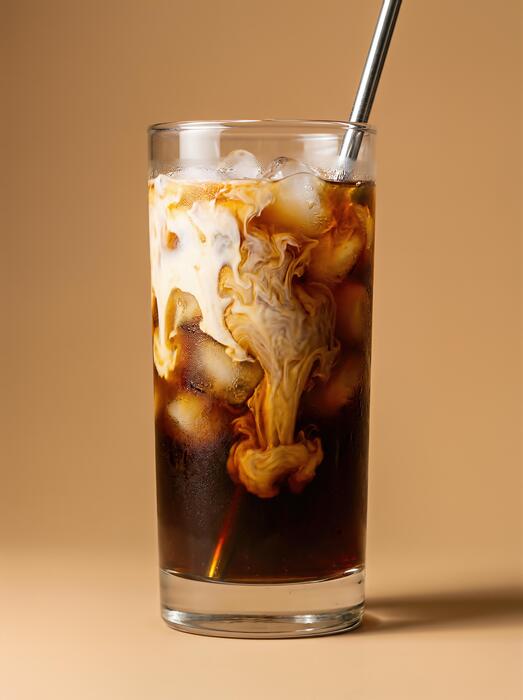
This allows the coffee to chill instantly upon contact. Next, slowly pour your milk of choice over the coffee. If you want a beautiful marbling effect for a cafe-style presentation, pour the milk over the back of a spoon held just above the surface of the coffee.
This technique breaks the fall of the liquid and creates those signature swirling clouds of white and brown. Avoid stirring aggressively at first; let the natural convection of the different liquid densities blend the flavors gradually.
This layering method ensures that the first sip is just as cold and flavorful as the very last drop in the glass.
Adding natural sweeteners and syrups
Customizing the sweetness of your cold brew latte requires an understanding of solubility, as granulated sugars often fail to dissolve in cold liquids, leaving a gritty residue at the bottom of the glass.
The most effective solution is to use liquid sweeteners like simple syrup, maple syrup, or agave nectar which integrate seamlessly into the cold mixture.
If you enjoy classic flavors, add one to two pumps of vanilla or caramel syrup before you pour the milk to ensure the flavor is distributed evenly throughout the drink.
For those seeking a healthier alternative, a dash of ground cinnamon or a drop of pure vanilla extract can enhance the perceived sweetness without adding refined sugars.
Always add your flavorings to the concentrate and give it a quick stir before adding the milk and ice; this ensures the sweetness is bonded to the coffee base.
If you prefer a frothy finish, you can even whisk your sweetener directly into the milk using a handheld milk frother before pouring it over the coffee. This extra step creates a sweetened cold foam that elevates the entire home brewing experience.
Popular flavor variations to try
How to make a vanilla bean cold brew latte
Elevating your morning caffeine routine starts with incorporating real vanilla flavor rather than synthetic syrups. To craft this premium version, begin by splitting a fresh vanilla bean and scraping the seeds directly into your cold brew concentrate before mixing.
If you prefer a smoother texture, whisk the seeds into your milk of choice until they are evenly distributed. Fill a tall glass with large ice cubes to prevent rapid dilution, then pour in four ounces of your potent cold brew base.
Slowly add the vanilla-infused milk, allowing the beautiful marble effect to form as the liquids merge. For those who enjoy a hint of sweetness, a teaspoon of pure maple syrup or agave nectar complements the floral notes of the vanilla perfectly without overpowering the coffee’s natural chocolatey profile.
This method creates a cafe-quality beverage that is remarkably clean and aromatic, providing a sophisticated twist on the standard vanilla latte that you can easily replicate every single morning in your own kitchen.
Recipe for a salted caramel version
The combination of salty and sweet remains a fan favorite for cold brew enthusiasts because it enhances the bean’s inherent richness. To build this drink, start by drizzling high-quality sea salt caramel sauce around the inner rim of your glass for a professional visual presentation.
In a separate small container, combine six ounces of cold milk with a pinch of flaky sea salt and a tablespoon of caramel syrup, frothing them together for twenty seconds to create a light, airy texture.
Pour your concentrated cold brew over a full glass of ice, then top it with the salted caramel milk mixture. The salt acts as a flavor enhancer, cutting through the bitterness of the coffee while highlighting the buttery notes of the caramel.
For an extra indulgent finish, add a small dollop of cold foam on top and an additional tiny sprinkle of salt. This balanced profile ensures your homemade latte tastes expensive and complex, offering a perfect midday treat that satisfies cravings for something savory and sweet simultaneously.
Best dairy-free milk alternatives for lattes
Choosing the right plant-based milk is essential for achieving the creamy consistency required for a satisfying cold brew latte. Oat milk is widely considered the gold standard for home baristas because its natural fats mimic the mouthfeel of dairy, and it resists curdling when hitting the acidic coffee.
If you prefer a nuttier profile, unsweetened almond milk offers a lighter, low-calorie option that pairs beautifully with darker roasts, though it provides a thinner texture. For those seeking maximum frothiness, look for ‘Barista Edition’ labels, as these contain stabilizers that help the milk hold its structure when whisked.
Creamy cashew milk is another fantastic contender, providing a neutral base that allows the specific notes of your cold brew beans to shine through without distraction. Regardless of your choice, always ensure your alternative milk is thoroughly chilled before mixing.
Experimenting with these various dairy-free bases allows you to customize the nutritional profile and thickness of your latte, ensuring every sip is perfectly tailored to your dietary preferences and taste buds.
Tips for better tasting home cold brew
Why water quality matters for your brew
Since your cold brew coffee is composed of approximately ninety-eight percent water, the quality of your tap or filtered water directly impacts the final flavor profile of your latte.
Using filtered water or bottled spring water is essential because it removes harsh impurities like chlorine and heavy minerals that can create metallic or chemical aftertastes.
Distilled water should be avoided as it lacks the necessary minerals required to effectively extract the nuanced flavors from the coffee grounds, often resulting in a flat or lifeless brew. For a truly professional home experience, aim for water that is clean and neutral in taste.
This allows the natural sweetness and chocolatey notes of your chosen coffee beans to shine through without interference.
When you start with a pure base, you ensure that the delicate balance of acidity and body is preserved, providing a much smoother foundation for when you eventually add your milk or cream for the perfect DIY cold brew latte.
How to avoid bitter or sour flavors
Achieving the perfect balance in your cold brew requires careful attention to your grind size and total steeping time. To prevent a sour taste, which usually indicates under-extraction, ensure you are using a coarse, salt-like grind rather than a fine powder.
If your coffee tastes overly bitter or harsh, it is likely over-extracted, meaning it steeped for too long or the grind was too fine.
The ideal window for steeping at room temperature is typically between twelve and eighteen hours; however, if you brew in the refrigerator, you may need to extend this to twenty-four hours.
Always remember to filter your concentrate thoroughly using a fine mesh sieve followed by a paper filter to remove all sediment. Residual silt can continue to extract in the pitcher, leading to an increasingly bitter profile over time.
By mastering these variables, you can produce a consistently smooth concentrate that pairs beautifully with frothed milk, ensuring every sip of your home-made latte is refreshing and delicious.
The secret to making coffee ice cubes
One of the most common mistakes when making a cold brew latte at home is allowing regular ice cubes to melt and dilute the rich flavor of your beverage. The ultimate solution is to create specialized coffee ice cubes using a portion of your fresh brew.
Simply pour your cold brew concentrate or diluted coffee into silicone ice trays and freeze them overnight. For an extra layer of flavor and luxury, you can even whisk in a touch of vanilla or a splash of maple syrup before freezing the liquid.
As these cubes melt in your glass, they actually strengthen the coffee flavor rather than weakening it, maintaining that bold caffeine kick until the very last drop. This technique is particularly effective for lattes because it keeps the milk-to-coffee ratio stable throughout your drinking experience.
Using these cubes ensures that your drink remains cold, creamy, and intensely flavorful, providing a professional-grade aesthetic and taste that rivals your favorite high-end local coffee shop.
Frequently Asked Questions
What is the basic ratio for cold brew latte concentrate?
A standard ratio is 1 part coarsely ground coffee to 4 parts cold water, steeped for 12-24 hours. Because a latte uses mostly milk, you want a strong concentrate that won’t taste watered down when mixed.
How do I assemble a cold brew latte at home?
Fill a glass with ice and add 1 part cold brew concentrate to 2 or 3 parts milk of your choice. Stir well and add sweeteners or syrups like vanilla or caramel if desired.
Do I need special equipment to make cold brew for lattes?
No special equipment is required; you can brew the coffee in a simple glass jar or French press. After steeping, just strain the grounds using a fine-mesh sieve, cheesecloth, or a paper coffee filter.
Can I froth the milk for a cold brew latte?
Yes, you can create a ‘cold foam’ by pulsing cold milk in a blender or using a handheld milk frother for 30 seconds. Pouring this frothed milk over your cold brew creates a creamy, cafe-style texture.
What kind of coffee beans are best for cold brew lattes?
Medium to dark roasts generally work best because they have low acidity and chocolatey notes that pair perfectly with milk. Ensure the beans are ground coarsely, similar to sea salt, to prevent the brew from becoming bitter.
How long does homemade cold brew concentrate stay fresh?
When stored in an airtight container in the refrigerator, cold brew concentrate stays fresh for up to two weeks. This makes it a convenient option for quick morning lattes throughout the work week.
Conclusion
Mastering the art of homemade cold brew lattes is both simple and rewarding. By steeping your grounds slowly and balancing the concentrate with your favorite milk and sweeteners, you can enjoy a coffeehouse-quality beverage without the premium price tag. Experiment with different beans and ratios to find your perfect flavor profile. Now that you have the tools and techniques, it is time to start brewing. Cheers to refreshing, smooth, and delicious mornings right in your own kitchen.