How To Make Cold Brew Easy
If you are tired of complicated coffee routines, you have come to the right place. Learning how to make cold brew easy is all about simplifying the process without sacrificing that smooth, bold flavor you love. You do not need expensive gadgets or professional barista skills to master this at home. In this guide, we will break down a foolproof method that takes minutes to prep. Get ready to enjoy cafe-quality coffee every morning with our quick and effortless solution.
The Basics of Making Cold Brew at Home
What is Cold Brew Coffee?
Cold brew coffee is a unique extraction method that relies entirely on time rather than heat to pull flavor from coffee grounds.
To make it easy at home, you simply combine coarsely ground coffee beans with room temperature or cold filtered water and let the mixture steep for twelve to twenty-four hours. This slow process results in a low-acid concentrate that is remarkably smooth and naturally sweet.
Unlike traditional brewing, you do not need expensive machinery or precise pouring techniques to achieve professional results. The fundamental goal is to create a high-quality coffee concentrate that can be stored in your refrigerator for up to two weeks.
Because the grounds are never exposed to boiling water, the bitter oils and acidic compounds typically found in hot coffee are left behind, ensuring every glass is consistently refreshing and mellow.
Mastering this basic concept allows you to enjoy a versatile caffeine base that works perfectly for a variety of different customized beverage recipes.
Why Cold Brew is Easier Than Drip Coffee
The primary reason cold brew is easier than drip coffee is its forgiving nature and hands-off approach. Drip coffee requires precise water temperatures, specific bloom times, and consistent pouring patterns to avoid a sour or burnt taste.
In contrast, cold brew is a set-it-and-forget-it method that eliminates the stress of morning preparation. You can mix your grounds and water in a simple mason jar or French press the night before, allowing the physics of immersion to do all the heavy lifting while you sleep.
There is no need for paper filters, specialized scales, or electric heating elements that can fail. Furthermore, cold brew is much harder to over-extract; a few extra hours of steeping rarely ruins the batch, whereas a few extra seconds of hot brewing can cause significant bitterness.
By preparing a large batch of ready-to-drink concentrate once a week, you simplify your daily routine and ensure you always have a convenient caffeine source available instantly.
The Difference Between Cold Brew and Iced Coffee
Understanding the difference between cold brew and iced coffee is essential for achieving a smooth, cafe-quality beverage at home. Iced coffee is simply hot-brewed coffee that has been cooled down and poured over ice, which often leads to a diluted and acidic flavor profile as the ice melts.
Cold brew, however, is never heated, which preserves the delicate chocolatey and nutty notes of the bean without the harshness. Because cold brew is created as a potent concentrate, it maintains its bold integrity even when you add milk, cream, or extra ice cubes.
This makes the process easier because you do not have to worry about the coffee becoming watery or weak over time. While iced coffee requires immediate consumption to prevent a stale taste, cold brew stays fresh and flavorful in the fridge for days.
Choosing the cold brew method provides a more consistent and reliable experience, allowing you to skip the watery disappointment often associated with traditional chilled drip coffee methods.
Essential Equipment for a Simple Setup

Best Low-Cost Containers to Use
You do not need an expensive dedicated brewer to make high-quality cold brew at home. The most efficient and accessible option is a standard 32-ounce wide-mouth Mason jar, which is durable, easy to clean, and fits perfectly in most refrigerator doors.
If you are brewing for a larger household, a glass beverage dispenser with a stainless steel spigot allows for bulk production and easy pouring without disturbing the sediment at the bottom.
Avoid using plastic containers that are not BPA-free, as they can sometimes leach unwanted flavors into the concentrate during the long steeping process.
A French Press also serves as an excellent dual-purpose vessel; it allows you to steep the grounds and then use the built-in plunger to separate them effortlessly once the timer hits the twelve-to-twenty-four-hour mark.
By repurposing items already in your kitchen, you keep the process streamlined and focused on the quality of the coffee rather than complex gear.
Choosing the Right Filter Type
Selecting the correct filtration method is the most critical step for achieving a smooth, sediment-free cup of cold brew. Disposable paper filters are highly recommended for beginners because they trap fine particles and oils, resulting in a crisp, clean flavor profile that highlights bright notes.
If you prefer a more sustainable approach, a fine-mesh stainless steel filter is a great investment; it allows more natural oils to pass through, creating a bolder, more full-bodied texture similar to traditional immersion methods.
For those who want the easiest cleanup possible, single-use organic cotton brew bags are a game changer. You simply fill the bag with grounds, cinch it shut, and drop it into your water container like a giant tea bag.
Once the brewing cycle is complete, you can lift the bag out and compost it, completely eliminating the need for messy straining or multiple pouring stages. This significantly reduces the friction involved in your daily caffeine routine while maintaining professional results.
Why a Burr Grinder Matters
While it may be tempting to use pre-ground coffee, investing in a concentric burr grinder is the single best way to ensure consistent extraction and prevent bitterness. Cold brew requires a consistent extra-coarse grind, resembling the texture of sea salt or cracked peppercorns.
Standard blade grinders often produce an uneven mix of large chunks and fine dust; those tiny particles, known as ‘fines,’ over-extract quickly and lead to a muddy, bitter aftertaste that masks the bean’s natural sweetness.
A burr grinder uses two revolving abrasive surfaces to crush the beans into uniform sizes, which allows water to flow evenly around every particle during the long immersion period. This uniformity ensures that you extract the rich chocolate and nutty undertones without the harsh acidity associated with hot brewing.
If you do not own a grinder, many local cafes will coarsely grind your beans upon request, which is a perfect solution for keeping your home setup simple yet highly effective for producing premium concentrate.
How to Choose the Best Coffee Beans
The Best Roast Levels for Cold Extraction
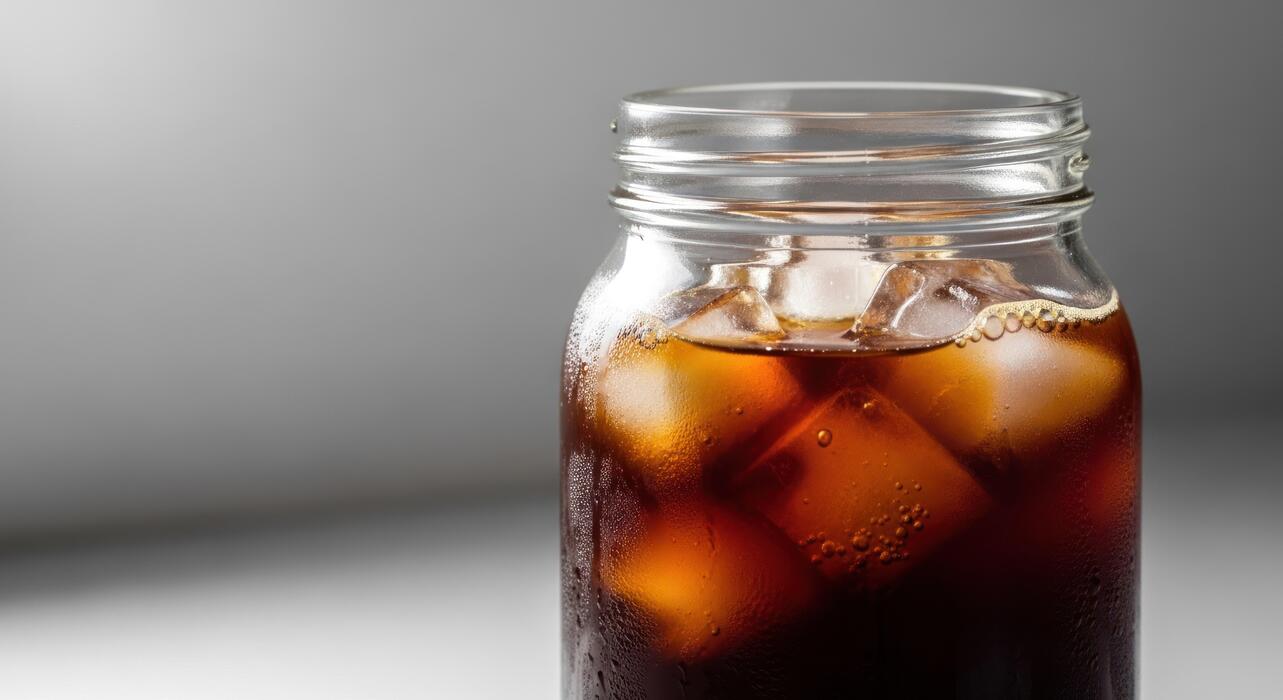
To make cold brew easy and delicious, start by selecting a dark or medium-dark roast. Unlike hot coffee which can highlight acidity, the cold steeping process excels at pulling out deep, chocolatey, and nutty notes while leaving bitterness behind.
Darker beans are more porous due to the longer roasting process, allowing water to penetrate more effectively during the long immersion period. This creates a concentrated, smooth profile that pairs perfectly with milk or cream.
While light roasts are popular for pour-overs, they often result in a weak or overly floral cold brew that lacks the body most drinkers desire. For the most consistent results, look for beans labeled with tasting notes like caramel, cocoa, or toasted nuts.
Choosing these flavor profiles ensures your cold brew tastes like a decadent treat rather than a sour infusion. By sticking to darker profiles, you simplify the extraction process and guarantee a rich, bold concentrate every single time you brew.
Why You Must Use a Coarse Grind
The secret to making cold brew easy and mess-free lies in the texture of your coffee grounds. You must use a coarse, sea-salt-like grind to ensure proper filtration and flavor balance.
Because cold brew involves a long steeping time, typically twelve to twenty-four hours, fine grounds will over-extract, leading to a harsh, bitter taste that ruins the experience. Furthermore, fine sediment is incredibly difficult to filter out, often resulting in a cloudy, gritty texture in your final cup.
Using a coarse grind allows the water to flow freely around the large particles, extracting flavor slowly and gently. This makes the cleanup process much faster, especially if you are using a mesh filter or a nut milk bag.
If you do not have a high-quality burr grinder at home, ask your local barista to grind your beans specifically for French Press or cold brew. This simple adjustment prevents the common pitfall of muddy coffee and ensures your homemade batch is consistently crisp and refreshing.
Freshness and Storage Tips
Even though cold brew is a forgiving method, using freshly roasted beans is the best way to elevate your results. Look for a ‘roasted on’ date rather than an expiration date to ensure the oils within the beans are still vibrant and flavorful.
Once you purchase your beans, store them in an airtight container in a cool, dark place to prevent oxidation, which can lead to a stale or flat flavor profile. Avoid the refrigerator or freezer, as moisture and odors can seep into the beans and alter the taste.
When your cold brew concentrate is finished steeping, remove the grounds immediately to stop the extraction process. Store your finished liquid concentrate in a glass carafe in the fridge, where it will stay fresh for up to two weeks.
This longevity is what makes cold brew so convenient; you can prep a large batch on Sunday and enjoy a quick, high-quality caffeine fix every morning of the week without any additional effort or specialized equipment.
Step-by-Step Guide to Making Cold Brew
The Perfect Coffee-to-Water Ratio
To make cold brew easy, you must start with the correct measurements to avoid a brew that is too weak or overly bitter.
The gold standard for a versatile concentrate is a 1:4 ratio, which means using one cup of coarsely ground coffee for every four cups of cold, filtered water.
Using a coarse grind is essential because it prevents over-extraction and ensures the water can flow freely through the grounds during the long steeping process. If you prefer a ready-to-drink beverage that does not require dilution, you can opt for a 1:8 ratio instead.
Always use filtered water to ensure a clean taste, as tap water minerals can sometimes interfere with the delicate chocolate and nutty notes typical of cold brew. Measuring by weight with a kitchen scale provides the most consistent results, but using standard measuring cups works perfectly for a simplified routine.
This foundation ensures your coffee is balanced, smooth, and exactly to your preferred strength every single time.
Mixing and Steeping Instructions
Once you have your ingredients ready, combine the coffee grounds and water in a large glass jar or a dedicated cold brew maker.
The key to a successful soak is to gently stir the mixture to ensure every single coffee ground is fully saturated; dry pockets will result in a weaker flavor profile. After mixing, cover the container tightly to prevent the coffee from absorbing any stray odors from your refrigerator.
You should allow the mixture to steep for 12 to 18 hours at room temperature or in the fridge. Steeping at room temperature tends to speed up the process and highlights brighter acidity, while refrigerated steeping takes longer but produces an incredibly mellow and heavy-bodied cup.
Avoid steeping for longer than 24 hours, as this can lead to woody or bitter off-flavors that ruin the signature smoothness. This hands-off waiting period is what allows the cold water to slowly pull the rich oils and caffeine from the beans without the harshness of heat.
How to Strain Without the Mess
The final step to making easy cold brew is achieving a sediment-free finish without creating a kitchen disaster. The most efficient method is to use a fine-mesh sieve lined with a paper coffee filter or a clean flour sack towel.
Slowly pour the steeped mixture through the filter into a clean carafe or pitcher.
It is vital that you do not squeeze the filter or the coffee grounds; while it might be tempting to speed things up, pressing the grounds will force fine particles and bitter tannins into your drink, resulting in a cloudy appearance and a harsh aftertaste.
If you find the process too slow, you can use a French press by simply pushing the plunger down, though a secondary pass through a paper filter is recommended for a truly crisp texture.
Once strained, your fresh cold brew concentrate can be stored in the refrigerator for up to two weeks. Simply dilute your concentrate with equal parts water or milk over ice whenever you need a quick caffeine fix.
How to Perfect Your Steeping Time

Room Temperature vs. Refrigerator Steeping
To make cold brew easy, you must first decide where your jar will live during the infusion process. Steeping at room temperature is the fastest method, typically requiring only 12 to 14 hours because warmer molecules move faster and extract flavor compounds quickly.
This is ideal for those who want their caffeine fix by the next morning. However, if you prefer a cleaner and more refined profile, refrigerator steeping is the gold standard.
Although it takes longer—usually 18 to 24 hours—the cold environment slows down the extraction of bitter tannins, resulting in a naturally sweeter concentrate. If you are a beginner, starting on the kitchen counter is often more convenient as it saves fridge space and provides quicker results.
Regardless of the location, ensure your container is tightly sealed to prevent the coffee from absorbing odors from nearby food. Consistency is the secret to perfecting your routine, so choose the environment that best fits your daily schedule and stick to it.
How Long to Let the Coffee Sit
Finding the sweet spot for timing is the most critical step in making cold brew easy and delicious. For a standard coarse grind, the ideal window is 16 to 20 hours at room temperature or up to 24 hours in the fridge.
If you pull the plug too early, say around 8 hours, you will end up with a weak, acidic tea-like liquid that lacks the signature chocolatey body of a true cold brew.
Conversely, letting it sit too long can lead to a heavy, woody taste that overpowers the beans’ natural notes. To simplify this, try setting a digital timer or a phone reminder the moment you submerge the grounds.
If you find your brew is consistently too strong, do not decrease the time; instead, simply dilute the concentrate with more water or milk when serving. This flexibility makes cold brew incredibly forgiving.
Remember that different roast profiles may require slight adjustments, but staying within the twenty-hour range ensures a balanced and smooth cup every single time.
Signs of Over-Extracted Coffee
Even though cold brew is a gentle process, it is possible to over-extract the grounds if they sit for more than 26 hours. The most obvious sign of over-extraction is a harsh, bitter aftertaste that lingers on the back of your tongue.
You might also notice a dry, astringent mouthfeel similar to over-steeped black tea. If the liquid looks cloudy or muddy rather than clear and dark, the fine particles have likely started to break down too much.
Another red flag is a pungent, almost dusty aroma that replaces the fresh scent of roasted beans. To fix an over-extracted batch without wasting it, try using a paper filter during the final strain to catch excess oils and fine sediments.
You can also balance the bitterness by adding a pinch of salt or extra creamy milk. To avoid this in the future, always use a very coarse grind, resembling sea salt, which prevents the water from pulling out those unpleasant compounds too quickly during the long steeping process.
Tips for Serving and Storing Your Brew
How to Dilute Cold Brew Concentrate
To turn your powerful concentrate into a smooth drink, the most important step is finding the right balance. Because cold brew is highly concentrated, drinking it straight can be overwhelming and overly caffeinated.
For a standard, refreshing cup, start with a one-to-one ratio of coffee concentrate to filtered water or milk. If you prefer a bolder flavor profile that stands up to heavy cream, try a two-to-one ratio favoring the coffee.
On the other hand, if you are sensitive to caffeine or prefer a lighter body, adding extra water or plenty of ice is a great way to customize the strength. Always remember to add your diluent gradually and taste as you go to ensure the perfect profile.
Using high-quality filtered water is essential, as it preserves the unique chocolatey and nutty notes of the cold brew without adding any unwanted metallic or chemical flavors that can ruin the experience of your homemade batch.
Best Ways to Store Leftovers
The key to making cold brew easy is preparing a large batch and keeping it fresh for the week ahead. To maintain that signature smooth taste, you should always store your brew in an airtight glass container, such as a mason jar or a dedicated glass carafe.
Glass is superior to plastic because it does not leach odors or flavors into your coffee over time. Make sure the container is sealed tightly to prevent the coffee from absorbing the scents of other foods in your refrigerator, like onions or garlic.
Additionally, try to minimize the amount of air space at the top of the jar; oxygen is the enemy of freshness and can lead to oxidation, which makes the coffee taste stale or acidic.
For the best results, keep the concentrate in its undiluted form while in storage and only add water or milk right before you are ready to serve, ensuring every glass tastes like it was freshly brewed.
How Long Cold Brew Stays Fresh
One of the biggest advantages of this brewing method is its impressive shelf life compared to traditional hot coffee. When stored properly in a sealed glass container in the refrigerator, your cold brew concentrate will stay fresh for up to two weeks.
However, for the absolute best flavor and aroma, many enthusiasts recommend consuming your batch within the first seven to ten days. After the two-week mark, you may notice the flavor profile beginning to flatten or develop a slightly bitter edge as the oils in the coffee slowly degrade.
If you have already diluted the concentrate with water, the shelf life drops significantly to about two or three days, so it is always more efficient to keep it concentrated until the moment of consumption.
If you find you have too much left over as the expiration date approaches, consider freezing the extra coffee into cold brew ice cubes to prevent dilution in future drinks while avoiding any unnecessary waste.
Easy Ways to Flavor Your Cold Brew
Homemade Simple Syrups and Creamers
One of the most effective ways to customize your drink while keeping the process simple is by preparing homemade simple syrups and creamers in advance.
To make a basic syrup, dissolve equal parts sugar and water over low heat, then stir in flavors like vanilla extract or almond oil once the mixture has cooled.
This allows you to control the sweetness level without the grainy texture often found when adding granulated sugar directly to cold liquids. For a richer experience, create a signature coffee creamer by blending sweetened condensed milk with your choice of milk or a dairy-free alternative.
Storing these components in the refrigerator ensures that you can transform a plain glass of concentrate into a gourmet beverage in seconds. Using natural sweeteners like honey or maple syrup provides a healthier alternative to store-bought options, ensuring your morning routine remains both effortless and delicious.
By having these pre-made additions ready, you eliminate the daily struggle of measuring ingredients, making your cold brew experience consistently smooth and enjoyable every single morning.
Adding Spices During the Brew Process
To elevate your coffee without adding extra steps to your serving routine, consider adding spices during the brew process itself. By mixing dry ingredients directly with your coarse coffee grounds before adding water, the flavors have ample time to infuse deeply into the concentrate.
Popular choices include cinnamon sticks, cardamom pods, or a pinch of sea salt, which helps to neutralize bitterness and enhance the natural sweetness of the beans.
This method is incredibly efficient because it requires zero additional effort once the steeping is complete; you simply strain the mixture as usual and enjoy a pre-flavored beverage.
For a more adventurous profile, try incorporating a small amount of dried orange peel or cacao nibs to create a complex, mocha-like undertone. This proactive approach ensures that every drop of your cold brew is packed with aromatic complexity, removing the need for artificial flavorings or messy powders later on.
It is the ultimate hack for anyone seeking a sophisticated taste profile while prioritizing a fast and easy preparation method that fits into a busy lifestyle.
Making Cold Brew Ice Cubes
A common challenge with iced coffee is dilution, but you can easily solve this by making cold brew ice cubes to keep your drink strong and flavorful. Simply pour a portion of your freshly strained concentrate into standard ice trays and freeze them until solid.
As these specialized cubes melt, they release extra coffee instead of water, ensuring your beverage maintains its bold integrity until the very last sip. This technique is a game-changer for those who enjoy drinking their coffee slowly or in warmer environments where standard ice melts rapidly.
You can even get creative by freezing milk or flavored creamer into cubes for a beautiful marble effect as they dissolve into your glass.
This small preparation step significantly improves the quality of your drink and simplifies your morning because you no longer have to worry about the perfect coffee-to-ice ratio.
Utilizing these cubes is a smart, solution-focused strategy that guarantees a premium experience every time, making the process of enjoying cold brew at home feel both professional and entirely stress-free for any coffee lover.
Frequently Asked Questions
What is the easiest way to make cold brew at home?
The simplest method is the ‘jar and sieve’ technique. Combine coarse coffee grounds and water in a mason jar, let it steep for 12-24 hours at room temperature, and then strain it through a fine-mesh sieve or paper filter.
What is the best coffee-to-water ratio for easy cold brew?
A foolproof ratio for beginners is 1:8 (one part coffee to eight parts water) for a ready-to-drink brew. If you prefer a concentrate to mix with milk or water later, use a stronger 1:4 ratio.
Do I need a special cold brew maker?
No, you don’t need expensive equipment to make great cold brew. You can use a standard French press, a large glass jar, or even a clean pitcher; the only requirement is a way to filter the grounds after steeping.
How can I avoid a messy cleanup when making cold brew?
To make cleanup effortless, use disposable or reusable ‘cold brew bags’ which act like giant tea bags for your coffee. When the brewing time is up, simply lift the bag out and discard the grounds without any straining required.
What grind size should I use for the simplest results?
Always use a coarse grind, similar in texture to sea salt or breadcrumbs. Coarse grounds are easier to filter out than fine grounds, resulting in a clearer cup and a much faster straining process.
How long should I let cold brew steep for the best flavor?
For a balanced flavor that isn’t bitter, steep your coffee for 12 to 18 hours at room temperature. If you are steeping it in the refrigerator, extend the time to 24 hours to account for the slower extraction.
Conclusion
Making delicious cold brew at home doesn’t have to be a complex chore. By focusing on a coarse grind, maintaining a simple water-to-coffee ratio, and allowing ample steeping time, you can achieve café-quality results in your own kitchen. Now that you have mastered the basics, grab your favorite beans and start brewing. Your perfect glass of refreshing iced coffee is just one soak away.