Google How Do You Make Iced Coffee
Searching for how do you make iced coffee on Google usually leads to complicated recipes, but refreshing caffeine is actually just minutes away. Whether you want a quick flash-brew over ice or a smooth overnight concentrate, we have the perfect solution for your morning routine. This guide breaks down the simplest methods to achieve coffeehouse quality at home without the premium price tag.
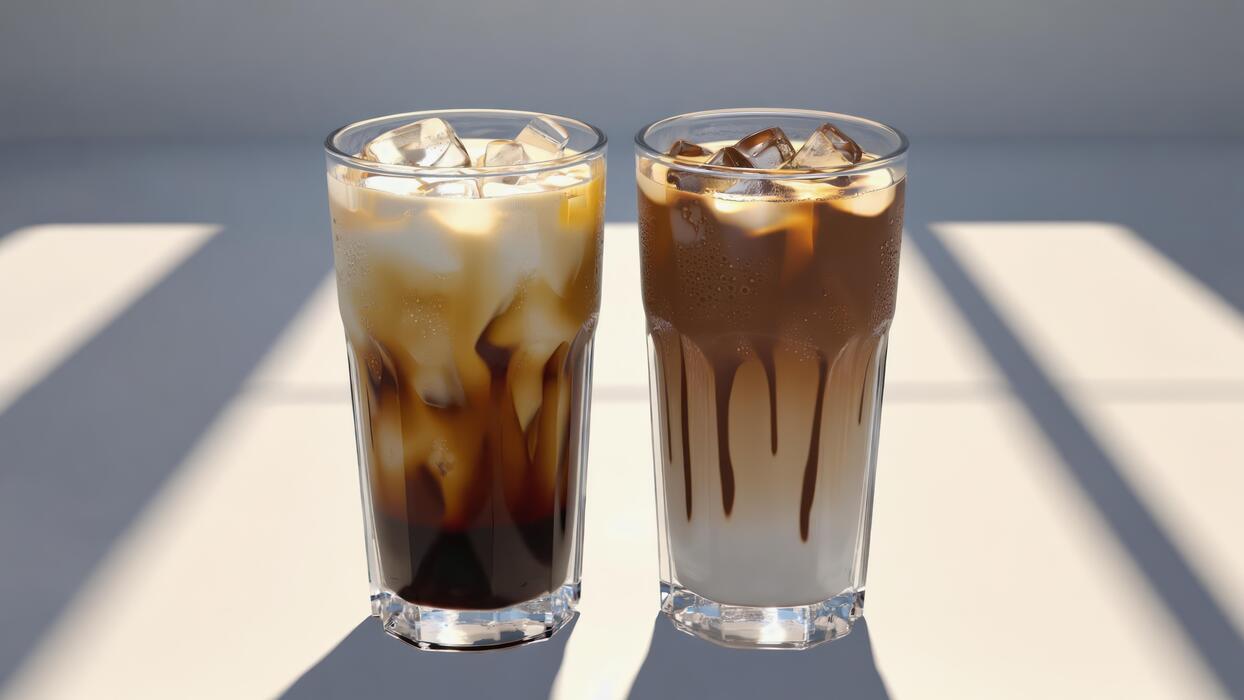
How to make the perfect iced coffee at home
The basic ratio for strong coffee
To prevent your iced coffee from tasting weak or watery, the secret lies in mastering the brewing ratio. When coffee meets ice, dilution is inevitable, so you must start with a concentrated base.
A standard recommendation for a robust iced coffee is a 1:8 ratio, which means using one part coffee grounds to eight parts water. This is significantly stronger than a typical hot brew.
If you are using a standard drip machine or pour-over method, try doubling the amount of coffee grounds while keeping the water volume the same. This creates a bold flavor profile that can stand up to melting ice cubes without losing its character.
For those who prefer the cold brew method, a 1:4 concentrate is ideal, allowing you to dilute the final product with milk or water to your exact preference.
Always remember that a stronger initial brew ensures that the final sip remains as flavorful and satisfying as the very first one you took.
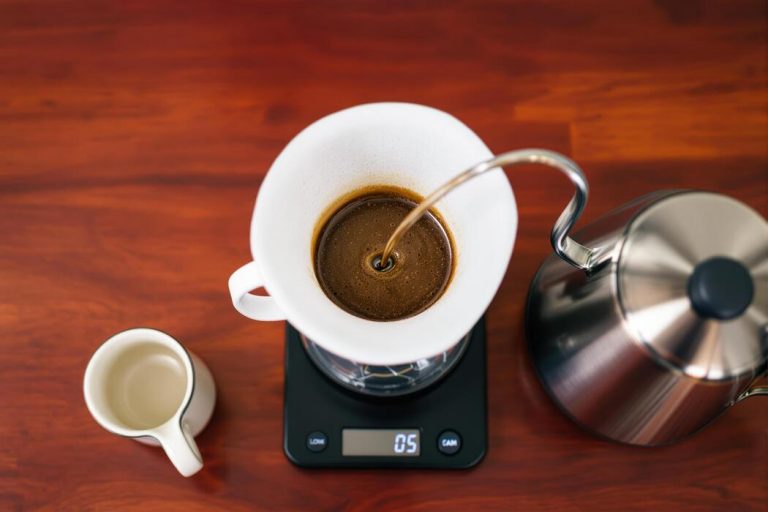
Essential tools and equipment
Creating a cafe-quality experience at home requires a few fundamental tools that elevate the process from basic to professional. First, a reliable coffee grinder is essential for ensuring your grounds are the correct consistency, whether you need a coarse grind for cold brew or a medium-fine grind for pour-over.
A digital kitchen scale is another vital piece of equipment, as measuring by weight rather than volume provides the precision needed for consistent results every morning. To achieve the perfect chill, consider investing in a large-capacity glass carafe or a dedicated cold brew maker with a built-in filter.
For those who enjoy a creamy texture, a handheld milk frother can add a luxurious touch to your drink. Don’t forget the importance of high-quality ice cube trays, specifically those that produce large, slow-melting cubes or even coffee-based ice cubes.
Having these tools ready ensures a seamless brewing workflow and a superior final beverage that rivals any local specialty coffee shop.
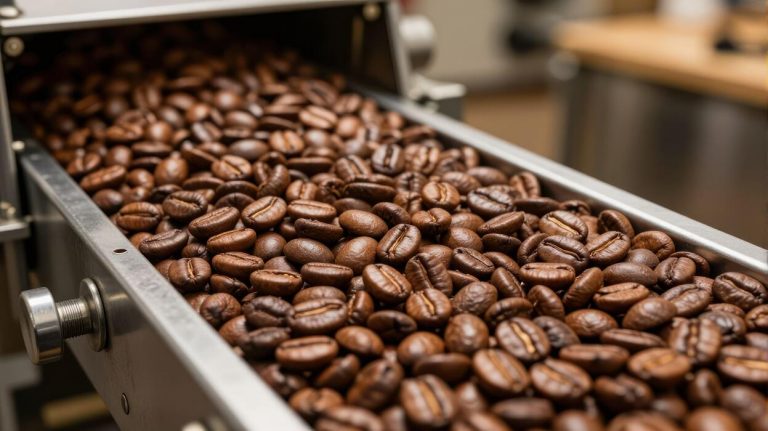
Choosing the right coffee beans
The foundation of any great iced coffee is the bean itself, and selecting the right variety can drastically change your sensory experience. For iced preparations, medium to dark roasts are generally preferred because they possess the low acidity and chocolatey, nutty notes that pair beautifully with cold temperatures and dairy.
Look for beans sourced from Central or South America, as these regions often produce flavors that remain prominent even when chilled.
If you prefer a brighter, more tea-like iced coffee, a lightly roasted African bean can offer refreshing citrus and floral notes, though these may be overshadowed if you add heavy cream.
Always prioritize freshly roasted whole beans and look for a ‘roast date’ on the packaging to ensure maximum aromatic intensity. Grinding your beans immediately before brewing preserves the volatile oils that contribute to a complex and nuanced flavor.
By selecting high-quality, specialty-grade beans, you guarantee that your homemade iced coffee has a vibrant and clean taste every single time.
Step-by-step guide to the hot-to-cold method

Brewing your coffee double-strength
To master the hot-to-cold method, you must start by brewing your coffee at double-strength to account for future dilution. When you pour hot liquid over ice, the immediate melting process introduces extra water that can make a standard cup taste thin and weak.
To achieve the perfect balance, use twice the amount of coffee grounds you normally would for the same volume of water. For example, if you typically use two tablespoons of grounds for six ounces of water, increase that to four tablespoons.
This creates a highly concentrated extraction that maintains its bold profile and caffeine kick even after the ice begins to melt. Using a pour-over dripper or an AeroPress is ideal for this step, as these manual methods allow for precise control over the saturation of the grounds.
Ensure your water is just off the boil, around 200 degrees Fahrenheit, to extract the full spectrum of oils and flavors without scorching the beans during this quick brewing process.
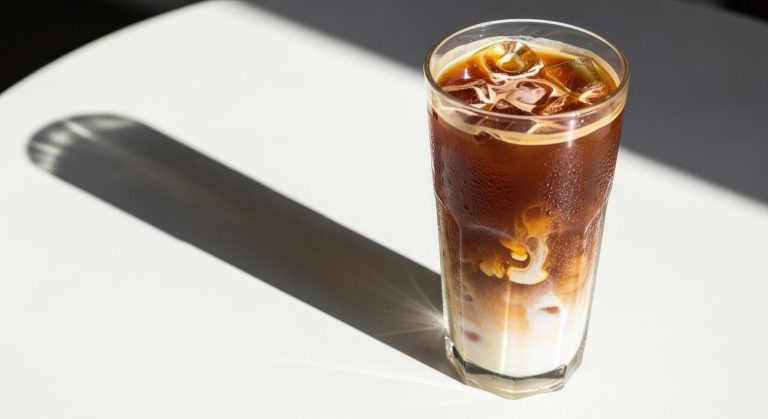
The fastest way to chill hot coffee
Once your concentrated brew is ready, the goal is to lower the temperature as quickly as possible to preserve the bright acidity and prevent the development of bitterness. The most efficient technique involves filling a sturdy glass or cocktail shaker to the brim with fresh, large ice cubes.
Pour the hot coffee directly over the ice, which triggers an immediate thermal transfer.
For an even faster chill, use a stainless steel cocktail shaker to agitate the liquid; shaking the coffee with ice for just ten to fifteen seconds creates a frothy texture and brings the temperature down to near freezing instantly.
If you are not in a rush, you can pour the hot coffee into a shallow glass container and place it in the freezer for five minutes before serving over fresh ice.
This rapid cooling method is superior to letting coffee sit at room temperature, as it locks in the delicate aromatics that otherwise dissipate during a slow cooling period.
How to prevent watered-down flavor
The biggest challenge with the hot-to-cold technique is maintaining a rich consistency, but you can prevent watered-down flavor by utilizing a few clever barista secrets. One of the most effective strategies is to create coffee ice cubes by freezing leftover brewed coffee in silicone trays.
Using these instead of standard water ice ensures that as the cubes melt, they release more coffee into your drink rather than diluting it.
Additionally, consider the type of ice you use; large, dense ice spheres or cubes have less surface area than crushed ice, meaning they melt much slower and keep your beverage cold without adding excessive water.
If you prefer a creamier drink, adding a splash of heavy cream or condensed milk can provide a fat-based barrier that enhances the mouthfeel and masks any slight dilution.
Finally, always serve your drink in a pre-chilled glass to ensure the ice stays frozen for as long as possible while you enjoy your perfectly balanced, refreshing homemade iced coffee.
Best ways to make cold brew for iced coffee

Mixing your grounds and water
To begin your cold brew journey, you must start with a coarse grind size that resembles sea salt or breadcrumbs. Using fine grounds will result in a cloudy, overly bitter brew that is difficult to filter properly. For a versatile concentrate, follow a 1:4 coffee-to-water ratio by weight.
For example, combine one cup of ground beans with four cups of filtered, room-temperature water in a large glass jar or dedicated cold brew maker.
It is essential to use filtered water to ensure the cleanest flavor profile, as tap water minerals can interfere with the subtle notes of the bean. Gently stir the mixture with a long spoon to ensure every coffee ground is fully saturated, but avoid over-agitating the slurry.
Once mixed, seal the container tightly to prevent the coffee from absorbing any stray odors from your refrigerator or kitchen environment. This foundational step ensures a smooth, low-acid base that serves as the perfect starting point for any refreshing iced coffee drink.
Steeping times for maximum flavor
Patience is the secret ingredient when making cold brew, as the extraction process relies on time rather than heat. For the best results, let your coffee steep for 12 to 18 hours at room temperature or up to 24 hours if keeping it in the refrigerator.
Steeping at room temperature generally accelerates the process and yields a bolder, more chocolatey profile, while cold steeping in the fridge produces a brighter, cleaner taste. Avoid exceeding the 24-hour mark, as over-extraction can lead to unpleasant woody or bitter flavors that ruin the characteristic smoothness of the drink.
If you are using a lighter roast, aim for the longer end of the spectrum to fully pull out the floral and fruity notes. Conversely, darker roasts usually reach their peak flavor around the 14-hour mark.
Regularly checking the brew after 12 hours allows you to customize the strength to your personal preference, ensuring every batch of iced coffee concentrate meets your specific standards for richness and balance.
Filtering and storing your concentrate
Once the steeping process is complete, you must carefully separate the grounds from the liquid to stop the extraction. Use a fine-mesh sieve lined with a paper coffee filter or a cheesecloth to catch the smallest particles, ensuring a crisp and sediment-free finish.
Pour the mixture slowly to avoid clogging the filter, and never squeeze the grounds, as this releases harsh tannins into your concentrate. Transfer the resulting liquid into a clean glass carafe or airtight bottle for storage.
This potent cold brew concentrate can stay fresh in the refrigerator for up to two weeks, making it a convenient option for quick morning routines. When you are ready to serve, dilute the concentrate with equal parts water or milk over plenty of ice.
Because the concentrate is highly stable, you can also freeze it into ice cubes to prevent your drink from becoming watered down. Proper filtration and airtight storage are the final steps to maintaining that velvety texture and sweet aroma in every glass.
How to use a French Press for iced coffee
The immersion brewing process
To begin your iced coffee journey, start by adding coarse coffee grounds to your French Press. Unlike a standard hot brew, you should use a higher coffee-to-water ratio to ensure the flavor remains robust even after dilution. Use about two tablespoons of coffee for every six ounces of water.
Pour filtered water that has just come off the boil over the grounds, ensuring they are fully saturated. Give the mixture a gentle stir with a wooden spoon to break up any clumps and promote even extraction during the immersion phase.
Place the lid on top with the plunger pulled all the way up to trap the heat. Allow the coffee to steep for approximately four to five minutes.
This immersion method is ideal for iced drinks because it extracts full-bodied oils and complex flavors that stand up well to the addition of cold milk or sweeteners later in the process. Patience during this steeping stage ensures a rich, concentrated base for your refreshing beverage.
Plunging and pouring over ice
Once the steeping time is complete, slowly and steadily press the plunger down to the bottom of the carafe. It is vital to apply consistent pressure to prevent fine sediment from escaping past the mesh filter into your brew.
Fill a tall glass to the brim with large ice cubes; using larger cubes is better as they melt slower and prevent your drink from becoming watery. Pour the hot concentrated coffee directly over the ice.
You will notice the ice melting rapidly to chill the liquid, which is why the initial concentrated brew strength is so important for flavor balance. If you prefer a smoother finish, you can pour the coffee through an additional paper filter to remove any remaining micro-grounds.
At this stage, you can customize your iced coffee by adding cold milk, cream, or flavored syrups. Stir the mixture thoroughly to ensure the temperature is uniform throughout the glass, providing a crisp and invigorating caffeine kick that is perfect for warm weather.
Cleaning tips for oily coffee residue
Maintaining your French Press is crucial because coffee beans contain natural oils that can become rancid and ruin future batches of iced coffee. After you have enjoyed your drink, discard the spent grounds and rinse the carafe with warm water.
To effectively remove stubborn oily buildup, disassemble the plunger assembly and soak the mesh filters in a solution of warm water and mild dish soap. Use a soft sponge or a dedicated bottle brush to scrub the glass interior, paying close attention to the bottom where oils tend to settle.
For a deeper clean, a mixture of baking soda and water can act as a gentle abrasive to lift stains without scratching the surface. Periodically soaking the metal components in white vinegar will help dissolve mineral deposits and keep the filter screen flowing freely.
Ensure every part is completely dry before reassembling the unit to prevent any musty odors. A pristine French Press ensures that every glass of iced coffee you brew tastes fresh, vibrant, and exactly as intended.
Tips for flavoring and sweetening your drink
How to make simple syrup at home
To avoid undissolved sugar granules at the bottom of your glass, creating a homemade simple syrup is the most effective solution. This process involves heating equal parts granulated sugar and water in a small saucepan over medium heat.
Stir the mixture constantly until the liquid becomes completely clear, which indicates that the sugar has fully dissolved into the water. Once the syrup reaches a simmer, remove it from the heat and let it cool to room temperature before transferring it to a glass jar.
You can store this versatile sweetener in the refrigerator for up to four weeks. Using a liquid sweetener ensures your iced coffee remains perfectly smooth and consistently sweet from the very first sip to the last.
For a deeper flavor profile, experiment with using brown sugar or honey as a substitute for white sugar. This simple DIY method is significantly more cost-effective than buying pre-made bottled syrups and allows you to control the exact sweetness level of your morning beverage.
Best milk and dairy-free alternatives
Choosing the right creamer can drastically change the texture and richness of your iced coffee. Whole milk provides a classic, creamy mouthfeel, but many people now prefer oat milk for its natural sweetness and impressive ability to froth even when cold.
Almond milk is a popular low-calorie choice that adds a subtle nutty undertone, though it is thinner than dairy. For those seeking a tropical twist, coconut milk offers a rich consistency that pairs exceptionally well with dark roast coffee beans.
If you want a more indulgent, cafe-style experience, try using half-and-half or a heavy cream splash to create a velvety texture. When selecting dairy-free options, look for barista blend versions specifically designed to resist curdling when hitting the acidity of the coffee.
Always pour your milk or alternative over the ice after the coffee is already in the glass to ensure the liquids blend smoothly. Experimenting with different fat contents will help you find the perfect balance between a refreshing drink and a satisfyingly creamy treat.
Natural ways to add vanilla or cinnamon
If you want to enhance your drink without relying on processed sugars, look to your pantry for aromatic spices and extracts. Adding a few drops of pure vanilla extract directly into your coffee provides a sophisticated aroma and a hint of sweetness that mimics expensive lattes.
For a warm, spicy profile, try whisking a pinch of ground cinnamon into your milk before pouring it over the ice. Because cinnamon does not dissolve easily in cold liquids, mixing it with the cream first ensures an even distribution of flavor throughout the glass.
Another professional trick is to brew your coffee with a cinnamon stick or a split vanilla bean already in the carafe; this infuses the liquid with deep, natural oils during the cooling process.
These natural flavor enhancers allow you to customize your beverage while keeping it healthy and free from artificial preservatives. Using high-quality spices ensures that the natural bitterness of the coffee is balanced by warm, inviting notes that make your homemade iced coffee feel like a gourmet experience.
Creative variations of classic iced coffee
How to make a creamy iced latte
To elevate your standard brew into a professional-grade creamy iced latte, start by preparing a concentrated shot of espresso or very dark roast coffee. Allow the coffee to cool slightly so it doesn’t immediately melt your ice.
Fill a tall glass with large ice cubes and pour in approximately six to eight ounces of cold milk of your choice; whole milk provides the richest texture, but oat milk offers a fantastic dairy-free creaminess that froths well.
Slowly pour the concentrated coffee over the milk to create a beautiful layered effect. For a touch of sweetness, stir in a homemade simple syrup or a splash of vanilla extract while the coffee is still warm to ensure it dissolves completely.
The secret to the perfect texture is the ratio of milk to coffee, ensuring the drink remains velvety and smooth rather than watery. Using a long spoon, gently stir from the bottom up to integrate the flavors before serving. This method provides a cafe-quality experience right in your own kitchen.
Making coffee ice cubes to save flavor
One of the most common complaints when learning how to make iced coffee is the dilution that occurs as standard ice melts. To solve this, you should freeze leftover brewed coffee in silicone ice cube trays.
Simply pour room-temperature coffee into the molds and let them set for at least four hours or overnight. When you are ready to enjoy your beverage, use these caffeine-infused cubes instead of regular water ice.
As the cubes melt, they release more coffee flavor rather than watering down your drink, ensuring that the last sip is as strong as the first.
For a creative twist, you can add a drop of chocolate syrup or a dash of cinnamon to each tray slot before freezing to infuse subtle flavor notes into your glass.
This technique is especially effective for slow sippers who want to maintain a consistent bold profile throughout a warm afternoon. It is a sustainable way to use up any extra coffee from your morning pot while significantly upgrading your afternoon refreshment routine.
The secret to whipped dalgona coffee
For a trendy and visually stunning variation, try crafting whipped dalgona coffee, which acts as a decadent topping for cold milk. The fundamental secret is the equal ratio of instant coffee, sugar, and boiling water.
Combine two tablespoons of each in a small bowl and use a hand mixer or whisk vigorously until the mixture transforms from a dark liquid into a thick, frothy golden foam with stiff peaks.
This process usually takes about three to five minutes of constant whisking to achieve the correct aeration. The sugar is essential here as it stabilizes the foam, so do not omit it.
Once your coffee cream is ready, fill a glass with ice and cold milk, then dollop the airy mixture on top. The result is a sophisticated, reverse-layered drink that is incredibly photogenic and rich.
Before drinking, use a straw to partially fold the bitter, sweet foam into the cold milk for a perfectly balanced flavor profile that mimics a luxurious coffee mousse. It is a delightful way to repurpose pantry staples into a gourmet treat.
Common mistakes to avoid when making iced coffee
Why you should never use old coffee
One of the most frequent errors people make when learning how to make iced coffee is reusing yesterday’s pot or letting brewed coffee sit out for hours.
When coffee remains at room temperature, it undergoes a process called oxidative degradation, which destroys the delicate oils and aromatic compounds that provide flavor. This results in a stale, cardboard-like taste that even heavy cream cannot hide.
Instead of using old leftovers, you should always brew a fresh concentrate specifically for your iced beverage. If you are in a rush, use the flash-chill method by brewing hot coffee at double strength directly over a large cup of ice.
This immediate temperature drop locks in the vibrant acidity and sweetness of the beans before they have a chance to oxidize.
By ensuring your base is always freshly extracted, you avoid the muddy bitterness associated with old grounds and guarantee a professional, cafe-quality result every single time you prepare it at home.
Fixing bitter or sour tastes
If your homemade iced coffee tastes unpleasantly sharp or overly harsh, you are likely dealing with an extraction issue. A sour taste usually indicates under-extraction, meaning the water passed through the grounds too quickly or the grind size was too coarse for the brewing method.
Conversely, a lingering bitter aftertaste is a sign of over-extraction, often caused by using boiling water that scorched the delicate grounds. To fix this, aim for a water temperature between 195 and 205 degrees Fahrenheit.
Additionally, the water-to-coffee ratio is critical when ice is involved; you must account for the inevitable dilution that occurs as the ice melts. Use a higher ratio of coffee grounds to water than you would for a standard hot mug.
By adjusting your grind size and monitoring your water temperature, you can balance the flavor profile to be smooth and refreshing. Always use filtered water to ensure that no mineral impurities interfere with the clean, natural notes of your chosen coffee beans.
The problem with adding sugar to cold liquid
Many beginners attempt to sweeten their iced coffee by stirring granulated sugar directly into the cold glass, only to find a gritty pile of undissolved crystals at the bottom. Granulated sugar requires heat to break down its molecular structure, so it will not dissolve properly in chilled liquids.
This results in an unevenly flavored drink that is bitter at the top and syrupy at the bottom. To solve this, you should use a simple syrup, which is a liquid sweetener made by dissolving equal parts sugar and hot water.
You can also add your sugar to the coffee while it is still hot, just after brewing, to ensure full integration before adding ice.
Another professional tip is to use alternative liquid sweeteners like agave nectar, maple syrup, or honey, which blend much more effectively into cold beverages than dry crystals.
By transitioning to liquid-based sweeteners, you ensure every sip is perfectly consistent and free of that unpleasant sandy texture often found in poorly made homemade iced coffee.
Frequently Asked Questions
What is the fastest way to make iced coffee at home?
The quickest method is brewing a concentrated pot of hot coffee using double the grounds, then immediately pouring it over a large cup filled with ice. The extra ice will dilute the strong brew to a perfect consistency while chilling it instantly.
How do I make iced coffee that isn’t watery?
To prevent dilution, use coffee ice cubes made by freezing leftover coffee in a tray. Additionally, brewing your coffee at double strength ensures that as the ice melts, the beverage retains a bold, flavorful profile rather than becoming weak.
What is the difference between iced coffee and cold brew?
Iced coffee is brewed hot and then chilled, resulting in a crisp, acidic flavor profile. Cold brew is made by steeping coarse grounds in room temperature water for 12-24 hours, creating a smoother, less acidic concentrate.
How should I sweeten my iced coffee?
Standard granulated sugar doesn’t dissolve well in cold liquids, so it is best to use simple syrup or flavored liquid creamers. You can make a quick simple syrup by dissolving equal parts sugar and hot water together before stirring it into your drink.
What is the best coffee-to-water ratio for iced coffee?
A standard ratio is two tablespoons of ground coffee for every six ounces of water, but for iced coffee, you should increase this to four tablespoons. This ‘double-strength’ brew accounts for the melting ice that occurs during the cooling process.
Can I use a regular coffee maker for iced coffee?
Yes, you can use any standard drip machine or Keurig to make iced coffee. Simply brew the coffee directly into a heat-safe carafe or mug, then transfer it to a glass filled with ice once the brewing cycle is complete.
Conclusion
Mastering the art of iced coffee at home is both simple and rewarding. Whether you prefer the quick convenience of the hot-over-ice method or the smooth, bold richness of cold brew, the key lies in using quality beans and managing dilution. Experimenting with homemade syrups and milk alternatives allows you to customize every cup to your liking. Now that you have the techniques, it is time to start brewing and enjoy your perfect chilled creation.