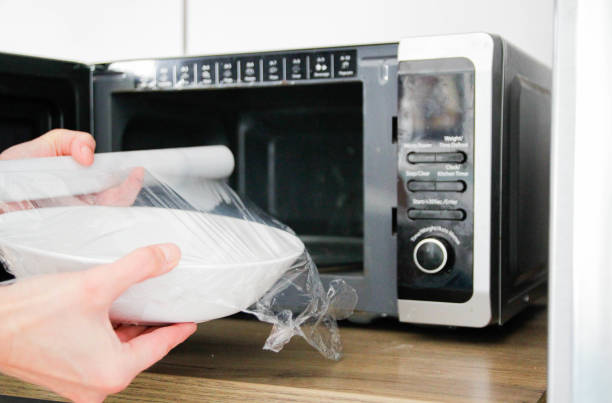
How To Sterilize Haakaa In Microwave
Wondering how to sterilize your Haakaa breast pump quickly and safely using a microwave? You’re in the right place. No complicated jargon—just clear, practical guidance that gets your Haakaa ready for the next feeding in minutes.
Understanding Haakaa Breast Pump Sterilization
Why Sterilization Matters
Keeping a Haakaa silicone breast pump clean is essential for both baby health and pump performance. Bacteria and milk residues can multiply quickly at room temperature, leading to potential infections or unpleasant odors that may transfer to future milk collections.
Regular sterilization also prevents the silicone from becoming sticky or degraded, which can affect suction and cause leaks. For nursing parents, a sterile pump reduces the risk of introducing pathogens to a newborn’s delicate immune system, especially during the first weeks when immunity is still developing.
Moreover, a properly sterilized Haakaa maintains its transparency, allowing you to see any cracks or wear that could compromise safety. By integrating a simple microwave sterilization routine after each use, you ensure consistent hygiene, extend the device’s lifespan, and give yourself peace of mind during every feeding session.
Materials Safe for Microwave
When sterilizing a Haakaa pump in the microwave, only microwave‑safe items should be used to avoid melting or chemical leaching. The pump itself is made of medical‑grade silicone, which tolerates temperatures up to 200 °C and is microwave‑friendly as long as it is placed in a water bath.
Use a microwave‑safe glass or BPA‑free plastic bowl, fill it with enough water to fully submerge the pump, and ensure the water covers the silicone by at least one centimeter.
Avoid metal trays, aluminum foil, or plastic containers that are not labeled microwave‑safe, because they can spark or release harmful substances. Additionally, do not use harsh detergents before microwaving; a simple rinse removes milk residue, then the steam generated during the 2‑minute heating cycle will eradicate most microbes.
After sterilization, let the pump cool in the water for a minute before removing it to prevent burns.
Common Misconceptions
Many parents believe that boiling or using a dishwasher is the only safe way to sterilize a Haakaa, but these methods can actually damage the silicone’s elasticity. Boiling for more than five minutes can cause the material to become brittle, leading to cracks that harbor bacteria.
Another myth is that a quick 30‑second microwave burst is sufficient; however, steam needs at least two minutes at full power to penetrate the pump’s interior and kill resilient spores.
Some users also think that adding vinegar to the water improves sterilization, but acidic solutions can degrade the silicone surface over time.
Finally, there is a misconception that a dry microwave cycle without water will sanitize the pump; in reality, dry heat does not reach the temperatures needed for effective microbial reduction and may warp the silicone.
Understanding these misconceptions helps you choose the validated 2‑minute water‑bath method, which balances safety, efficiency, and longevity.
Preparing Your Haakaa for Microwave Sterilization
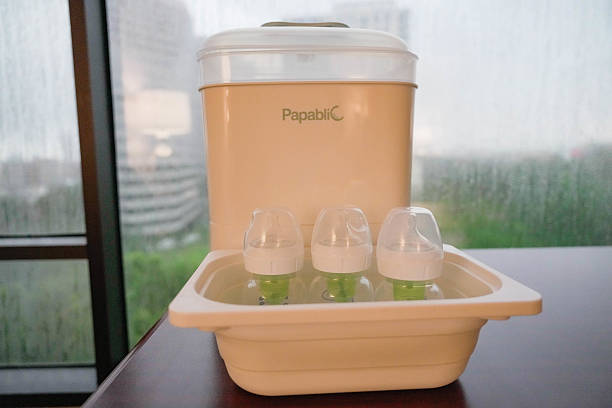
Disassembling the Pump
Start by unplugging the Haakaa pump and placing it on a clean surface. Gently pull the silicone breast‑milk collector away from the plastic base, making sure the small valve stays attached to the base.
Next, detach the silicone valve by pressing the release tab and sliding it off; this prevents water from pooling during sterilization. Separate any additional accessories such as the suction ring or anti‑spillage cap, keeping each piece separate in a microwave‑safe container.
Handle all parts with clean hands to avoid re‑contamination, and lay them out in a single layer so steam can reach every surface evenly. If your model includes a detachable suction cup, remove it as well and set it aside.
This thorough disassembly ensures that no hidden crevices trap milk residue, which could compromise the effectiveness of the upcoming microwave sterilization step.
Cleaning Before Sterilizing
Before you place any parts in the microwave, give each piece a quick rinse under warm running water to eliminate visible milk droplets.
Use a soft, fragrance‑free brush or a clean cloth to gently scrub the silicone collector, valve, and any plastic components, paying special attention to the tiny openings where milk can hide.
For stubborn residue, soak the parts for two minutes in a bowl of diluted baby‑safe dish soap, then rinse thoroughly to remove soap film. Avoid abrasive scrubbers as they can damage the silicone surface and reduce the pump’s suction power.
After rinsing, shake off excess water and pat each component dry with a lint‑free towel. Arrange the cleaned pieces on a microwave‑safe plate, ensuring they do not touch each other, which helps steam circulate uniformly during the sterilization cycle.
Inspecting for Damage
Once the parts are clean and dry, take a moment to inspect every component for signs of wear before you sterilize. Look closely at the silicone collector for cracks, thinning, or discoloration that could harbor bacteria; replace it if any defects are visible.
Examine the valve’s tiny hinge and the plastic base for scratches or broken tabs, which may affect the pump’s seal and suction efficiency. Test the flexibility of the silicone ring by gently pulling it; it should rebound smoothly without tearing.
Do not attempt to sterilize a damaged piece, as heat can exacerbate cracks and release harmful chemicals. If any part fails the visual or tactile check, set it aside and use a fresh replacement.
Only components that pass this inspection should proceed to the microwave sterilization step, ensuring safe and effective reuse.
Step-by-Step Microwave Sterilization Process
Choosing the Right Microwave Settings
Begin by checking the microwave’s power level; most household microwaves operate at 700‑1000 watts. For a Haakaa breast pump, select a medium‑high setting (around 70‑80 % power) to generate enough heat without causing plastic deformation. Before starting, inspect the pump for any cracks or discoloration that could worsen under heat.
Place the pump on a clean, dry towel to absorb any condensation. If your microwave has a “defrost” or “steam” function, avoid it, as those modes deliver uneven temperature spikes.
Instead, use the standard cooking mode with a timed interval, allowing the heat to distribute evenly throughout the silicone and plastic components. This approach ensures the pump reaches the recommended sterilization temperature of 70‑80 °C, effectively killing bacteria while preserving the material’s integrity.
After the cycle completes, allow the pump to cool inside the microwave for a minute before handling, which prevents sudden temperature changes that could warp the material.
Using a Microwave-Safe Container
Select a container specifically labeled as microwave‑safe; glass or BPA‑free plastic bowls work best for sterilizing a Haakaa pump. Avoid metal trays or containers with metallic trim, as they can spark and damage the appliance.
Place the pump parts—flange, valve, and silicone cup—inside the container, ensuring they are not touching the walls to allow steam circulation.
If the container has a lid, keep it slightly ajar or use a microwave‑safe vented cover to let excess moisture escape, which helps achieve an even temperature throughout the pump.
Adding a small amount of water (about 2‑3 tablespoons) to the bottom of the container creates a gentle steam environment that enhances bacterial kill rates without direct contact with boiling water.
Ensure the water does not overflow onto the pump, as excess liquid can seep into seams and affect the pump’s suction performance later.
Timing and Monitoring
Set the microwave timer for a short initial burst of 30 seconds, then pause to check the temperature of the Haakaa components. Use a food‑grade thermometer to verify that the interior of the silicone cup reaches at least 70 °C (158 °F), the threshold where most common pathogens are eliminated.
If the temperature is lower, continue heating in 15‑second increments, re‑checking after each interval to avoid overheating, which can cause the silicone to become brittle. Throughout the process, listen for a steady hum rather than loud clicking, indicating stable power delivery.
Keep a close eye on the water level in the container; if it evaporates completely, stop the cycle immediately to prevent the pump from drying out and potentially warping.
Once the desired temperature is confirmed, allow the pump to rest for an additional 30 seconds inside the microwave; this residual heat ensures thorough sterilization of hidden crevices before you safely remove and dry the parts with a clean towel.
Safety Tips and Precautions
Avoiding Overheating
Before placing the Haakaa in the microwave, remove any residual milk and rinse it with warm water. Pat dry with a clean towel to eliminate excess moisture that can cause steam bursts.
Set the microwave to medium power (50‑70%) and limit the heating time to 30‑45 seconds per cycle; longer exposure can warp the silicone or create hot spots. After each interval, pause and rotate the pump to ensure even heating.
Use a microwave‑safe, non‑metallic container or a microwave‑safe silicone mat to keep the Haakaa stable and prevent it from touching the oven walls. If you notice any unusual odors, discoloration, or deformation, stop the process immediately.
By controlling power level and time, you avoid overheating, preserving the pump’s elasticity and preventing damage that could compromise its hygiene. Repeat the cycle only if necessary, never exceeding two rounds.
Preventing Chemical Leaching
Choose a Haakaa model that is BPA‑free, food‑grade silicone to minimize the risk of chemicals migrating during microwave sterilization. Before heating, inspect the pump for scratches or cracks, as damaged surfaces can release polymer fragments when exposed to heat.
Place the Haakaa in a microwave‑safe glass bowl filled with a shallow layer of water; the water acts as a buffer, reducing direct microwave energy on the silicone and limiting leaching. Set the timer to no more than 60 seconds and avoid using high‑heat settings, which can accelerate chemical breakdown.
After sterilization, let the pump cool completely before removing it from the water to prevent condensation from depositing residues back onto the surface. Finally, store the cleaned Haakaa in a clean, dry container away from sunlight, as prolonged UV exposure can also degrade silicone and increase leaching potential over time.
Handling Hot Items Safely
After the microwave cycle finishes, the Haakaa and the water it sits in will be extremely hot, so always use heat‑resistant gloves or a kitchen towel to retrieve it.
Hold the pump by the base or handle, never by the silicone cup, to avoid burns and to keep the sterilized interior untouched. Place the hot Haakaa on a heat‑proof silicone mat or a dry dish rack, allowing steam to dissipate without condensing on the surface.
Give the pump at least two minutes to reach a safe handling temperature before wiping it dry; this prevents accidental splashes of scalding water.
If you need to repeat the sterilization, let the pump cool completely to room temperature before the next microwave run, reducing thermal stress that could cause cracks. Finally, inspect the pump once more for any signs of deformation before using it on your baby, ensuring both safety and effectiveness.
Alternative Sterilization Methods
Boiling Water Technique
Begin by disassembling the Haakaa breast pump, removing any silicone valves or accessories. Rinse the parts under running water to eliminate milk residue, then place them in a heat‑proof bowl. Fill a pot with enough water to fully submerge the pieces and bring it to a rolling boil.
Once boiling, lower the bowl into the water for 5‑7 minutes, ensuring the water covers every surface. After the time elapses, carefully remove the items with tongs and set them on a clean towel to air‑dry. This method kills bacteria, yeast, and viruses without damaging the silicone.
For extra safety, repeat the process weekly or after each use during illness. Remember to never microwave silicone directly, as uneven heating can cause warping. Allow the components to cool completely before reassembling, and store them in a sealed container to maintain sterility until the next feeding session.
Steam Sterilizer Devices
Invest in a compact countertop steam sterilizer designed for baby accessories; these units use high‑temperature saturated steam to eradicate microbes in minutes. Start by cleaning the Haakaa pump with mild soap and rinsing thoroughly, then place the disassembled parts on the provided rack.
Fill the sterilizer’s water reservoir to the indicated level and select the cycle labeled “breast pump” or the shortest 3‑minute setting. The device will raise the temperature to 121 °C (250 °F), delivering steam that penetrates silicone crevices and eliminates bacteria, mold, and spores without chemical residues.
After the cycle finishes, keep the lid closed for an additional minute to allow the interior to cool, then remove the items with the supplied tongs. Let them air‑dry on a clean surface before reassembly.
For optimal results, run the sterilizer after every use or at least once daily during the first weeks of breastfeeding.
UV Sterilization Options
UV‑C light boxes offer a chemical‑free way to sterilize the Haakaa pump using germicidal ultraviolet radiation. First, wash the silicone components with warm, soapy water and rinse well; any organic film can block UV rays.
Place the dried pieces on the tray inside the UV chamber, ensuring they are spaced apart and not overlapping. Close the lid and activate the preset cycle, typically 5‑7 minutes for small accessories.
The UV‑C wavelength (around 254 nm) disrupts the DNA of bacteria, viruses, and fungi, rendering them harmless without heat that could deform the material.
After the timer ends, leave the lid open for a minute to allow any residual ozone to dissipate, then retrieve the pump and store it in a sterile container. For consistent hygiene, use the UV unit after each feeding session or combine it with a weekly boil for added safety.
Maintaining Sterility After Cleaning
Proper Storage Solutions
After you finish microwave sterilization, place the Haakaa breast pump in a clean, dry container that shields it from dust and airborne microbes. Use a breathable, food‑grade silicone pouch or a dedicated sterilizer bag that can be sealed after each use.
Keep the container on a shelf away from direct sunlight, because UV exposure can degrade the silicone over time. If you have limited space, stack the Haakaa vertically inside a sterile drawer liner to prevent contact with other objects.
Label the storage bin with the date of the last sterilization so you can track when a new cycle is needed. Finally, avoid storing the pump near strong odors or chemicals, as these can be absorbed by the silicone and affect milk taste.
Consider placing a small desiccant packet inside the container to absorb residual moisture and further protect sterility.
Routine Cleaning Schedule
Develop a consistent cleaning timetable to ensure the Haakaa remains sterile between milk sessions. Clean the pump after every use with warm, soapy water, rinse thoroughly, and dry with a lint‑free cloth.
Schedule a microwave sterilization cycle at least once every 24 hours, even if the pump appears clean, because invisible bacteria can accumulate. Mark your calendar or set a phone reminder titled “Haakaa Sterilize” to avoid missed cycles.
When you have multiple pumps, rotate them so each one receives a dedicated sterilization slot, reducing the risk of cross‑contamination. If you notice any discoloration, odor, or loss of elasticity, increase the frequency to twice daily and inspect the silicone for cracks.
Document each cleaning and sterilization event in a simple log; this record helps you identify patterns and maintain compliance with hygiene standards recommended by lactation consultants.
Using Sterile Covers
Employing sterile covers adds an extra barrier that protects the Haakaa after it has been microwaved. Choose covers made of medical‑grade, BPA‑free silicone that can be autoclaved or microwave‑sterilized alongside the pump.
Before each feeding, place the pump inside the cover, seal the edges, and ensure there are no gaps where air can enter. Store the covered pump in a sealed, airtight container to maintain the sterile environment created by the microwave cycle.
Replace the cover every 2–3 weeks, or sooner if it shows signs of wear, because micro‑tears can compromise protection. For travel or daycare use, pack the covered Haakaa in a dedicated insulated pouch that includes a small, disposable sterile wipe for quick surface cleaning if needed.
This layered approach minimizes re‑contamination risk and keeps milk safe for the baby.
Troubleshooting Common Issues
Residual Odor Problems
To eliminate lingering smells after using a Haakaa breast pump, start by giving the silicone cup a thorough rinse with hot, soapy water. Rinse immediately to prevent milk residue from drying, which can trap odors.
Next, place the clean cup on a microwave‑safe plate and fill a shallow bowl with water, submerging the cup up to its rim. Microwave on high for 60‑90 seconds; the steam loosens any trapped particles and neutralizes odors.
After heating, carefully remove the cup—use oven mitts—and let it cool for a minute before wiping it dry with a lint‑free cloth. For stubborn smells, add a teaspoon of white vinegar to the water before microwaving; the acidity helps break down odor‑causing compounds.
Finally, store the cup in an airtight container to keep it fresh until the next use again.
Warping or Deformation
If your Haakaa silicone cup shows signs of warping after microwave sterilization, first verify that you are using the correct power setting. Use medium power (50‑70%) rather than full blast, because excessive heat can soften the silicone and cause it to lose its original shape.
Place the cup on a flat, heat‑resistant surface and avoid stacking it with other items that could press unevenly. After the 60‑second cycle, let the cup sit inside the microwave for an additional 30 seconds; this gradual cooling reduces thermal shock.
Once removed, gently press the rim with clean fingers to check for any permanent bends—if the cup returns to its round form, the deformation was temporary.
For persistent warping, repeat the process using a lower wattage or a shorter time, and consider using a microwave steam sterilizer bag that distributes heat more evenly. Always inspect the cup before each feeding; a misshapen cup may affect suction and milk flow.
Ineffective Sterilization Signs
When the microwave method does not fully sterilize your Haakaa pump, you may notice lingering bacteria or a cloudy residue on the silicone. Look for visual cues such as faint film, sticky spots, or an unusual taste during the next feeding.
These signs indicate that the steam cycle was too short or that the cup was not completely submerged in water.
To correct this, fill a microwave‑safe bowl with enough water to cover the cup by at least one centimeter and add a pinch of baking soda to boost the cleaning power.
Microwave on high for 90‑120 seconds, then let the cup sit in the hot water for an extra minute before removing it. After cooling, rinse thoroughly under running water and dry with a sterile cloth.
Repeating this extended cycle weekly ensures that any hidden microbes are destroyed, keeping the pump safe for both mother and baby.
Frequently Asked Questions
Can I sterilize a Haakaa breast pump in the microwave?
Yes, the Haakaa silicone pump can be safely sterilized in a microwave using a microwave-safe sterilizing container or a bowl of water. Ensure the pump is fully submerged and follow the recommended time to avoid damage.
What equipment do I need to microwave sterilize a Haakaa?
You’ll need a microwave-safe sterilizing bag, a clean bowl, or a dedicated microwave sterilizer, plus enough water to cover the pump completely. The container should be free of metal and tightly sealed if using a bag.
How long should I microwave the Haakaa for sterilization?
Microwave the Haakaa for 2 to 3 minutes on high power, depending on your microwave’s wattage. Check the manufacturer’s guidelines; over‑cooking can degrade the silicone.
What steps should I follow to sterilize the Haakaa in the microwave?
1. Disassemble the pump and rinse it with warm water. 2. Place it in a microwave‑safe container filled with water, ensuring it’s fully submerged. 3. Microwave for 2‑3 minutes, then let it cool before removing.
Do I need to clean the Haakaa before microwaving it?
Yes, always rinse the pump with warm, soapy water and rinse thoroughly before sterilizing. This removes milk residue and ensures effective sterilization.
Is it safe to microwave the Haakaa multiple times?
Repeated microwaving is generally safe if you follow the recommended time and avoid overheating. However, inspect the silicone regularly for signs of wear, such as discoloration or brittleness.
Conclusion
Regular sterilization protects your baby’s health and extends the pump’s lifespan. Try this method today and enjoy peace of mind with every feeding.
