How To Make Sweet Wine At Home
Want to know how to make sweet wine at home? It’s easier than you think, and you don’t need fancy equipment to get started. We’ll show you simple techniques like stopping fermentation early or back-sweetening, so you can craft delicious homemade sweet wine that suits your taste. Let’s get started!
What Is Sweet Wine and How It’s Made
Definition of Sweet Wine
Sweet wine is a type of wine that retains a significant amount of residual sugar after fermentation, giving it a noticeably sweet taste compared to dry wines. This sweetness comes from the natural sugars in grapes that are not fully converted into alcohol during fermentation.
The level of sweetness can vary widely, from slightly off-dry to intensely syrupy, depending on the winemaking technique. Stopping fermentation early, adding unfermented grape juice (called *must*), or using naturally concentrated sugars from dried or frozen grapes are common methods.
Sweet wines can be made from many grape varieties, including Riesling, Chenin Blanc, and Muscat. For home winemakers, understanding sugar-to-alcohol conversion is essential. Using a hydrometer to monitor specific gravity helps determine when to halt fermentation.
Sweet wines are often enjoyed as dessert pairings or sipped on their own, offering rich aromas of honey, fruit, and flowers.
Difference Between Dry and Sweet Wine
The primary difference between dry and sweet wine lies in the amount of residual sugar left after fermentation. Dry wines ferment nearly all their sugar into alcohol, resulting in little to no sweetness, while sweet wines preserve sugar by interrupting fermentation or adding sweetening agents.
This distinction affects not only taste but also alcohol content—sweet wines typically have lower ABV because fermentation stops early. For home winemakers, controlling this process is key: using potassium sorbate and sulfites stabilizes the wine and prevents renewed fermentation in the bottle.
Taste preference plays a big role; dry wines often pair with savory dishes, while sweet wines complement desserts or spicy foods. Monitoring sugar levels with a hydrometer before and during fermentation ensures accuracy.
Understanding this contrast helps home producers tailor their methods—whether they prefer a crisp, dry profile or a lush, sweet finish—making winemaking both a science and an art.
Types of Sweet Wines You Can Make at Home
Home winemakers can craft several delicious types of sweet wines using accessible techniques and ingredients. Dessert-style wines like fortified ports or late-harvest Rieslings are popular choices, made by stopping fermentation and adding brandy or preserving natural sugars.
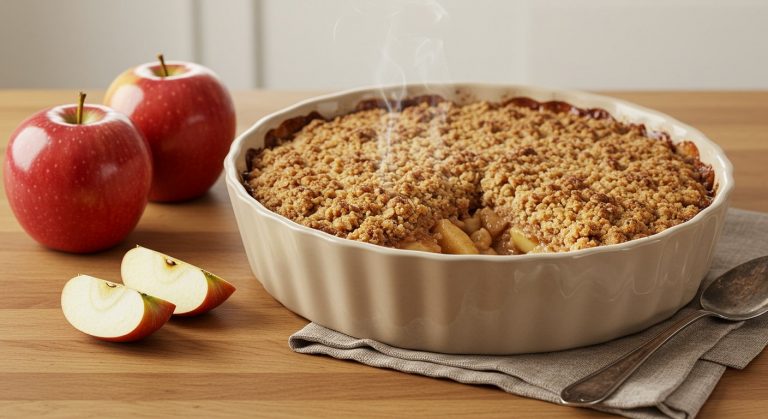
Ice wine-style versions can be mimicked by freezing grape juice and concentrating the sugars before fermentation. Botrytized wines, inspired by Sauternes, can be approximated using select mold-affected grapes or blending techniques to achieve honeyed complexity. Fruit wines made from peaches, berries, or apples also lend themselves well to sweet profiles.
Using aroma-rich grape varieties enhances flavor depth. With proper sanitation, sugar monitoring, and stabilization, even beginners can produce balanced, sweet wines. Experimenting with different yeast strains and fermentation temperatures allows customization.
These homemade sweet wines can age well and make impressive gifts, offering a rewarding way to explore the craft with creative freedom and delicious results.
Essential Equipment for Home Winemaking

Basic Tools Needed for Making Wine
To make sweet wine at home, start with essential tools that ensure precision and safety. You’ll need a primary fermenter (food-grade plastic bucket or glass carboy), an airlock and stopper to allow gas to escape without contamination, and a siphon hose for transferring wine without disturbing sediment.
A hydrometer is critical to measure sugar levels before and after fermentation, helping you achieve the desired sweetness. Use a long-handled spoon for stirring must, and bottles, corks, and a corker for final storage. Mesh bags help contain fruit, making pressing easier.
A funnel and wine thief assist in sampling and transferring liquid cleanly. All tools should be non-reactive and food-safe. Having the right equipment from the start prevents spoilage and ensures consistency, especially when halting fermentation to preserve natural sweetness or adding sugar later.
Invest in quality basics—they’ll last for many batches.
Choosing the Right Fermentation Vessel
Selecting the correct fermentation vessel is vital for crafting sweet wine successfully. Use a glass carboy or food-grade plastic fermenter with an airtight seal and room for expansion—typically, leave 20% headspace to prevent overflow during active fermentation.
Glass is preferred for secondary fermentation because it’s non-porous and easy to sanitize, reducing contamination risks. The vessel must accommodate an airlock to allow CO₂ to escape while blocking oxygen and microbes.
For sweet wines, you may need to stop fermentation early to retain residual sugar, so a vessel with a narrow neck helps control this process. Ensure the container is large enough to handle your batch size plus foam production.
Avoid metal or non-food-grade plastic, as they can react with acids in the wine. A properly chosen vessel supports stable fermentation and helps maintain the delicate balance of sugar, alcohol, and flavor in your homemade sweet wine.
Sanitizing Your Equipment Properly
Proper sanitization is the most crucial step in home winemaking, especially for sweet wines, which are more prone to spoilage due to higher sugar content. Before use, clean all equipment with a non-abrasive cleaner, then sanitize with a no-rinse solution like potassium metabisulfite or Star San.
Soak fermenters, airlocks, siphons, and utensils for at least 5–10 minutes, ensuring full coverage. Never skip sanitizing—even invisible microbes can ruin a batch. Pay close attention to joints, lids, and tubing where bacteria hide. After sanitizing, let items air-dry in a clean environment.
Re-sanitize any tool that contacts the wine post-fermentation, such as during racking or bottling. Contamination can lead to off-flavors or refermentation in the bottle, which is dangerous with sweet wines. Consistent sanitation practices protect your wine’s quality, aroma, and sweetness, ensuring a safe, delicious final product every time.
Choosing the Right Ingredients
Best Fruits for Sweet Wine
Choosing ripe, high-sugar fruits is essential for making sweet wine at home. Fruits like grapes, peaches, plums, pears, and cherries naturally contain high levels of fructose and glucose, which contribute to a rich, sweet flavor profile.
Opt for fully ripe or even slightly overripe fruit to maximize sugar content and depth of flavor. Avoid underripe fruit, as it can result in a tart, unbalanced wine. When using non-grape fruits, consider blending with Concord or Niagara grapes to enhance body and fermentation stability.
Always wash and sanitize fruit thoroughly, removing any stems, pits, or bruised areas. Crushing or pureeing the fruit helps release juices and sugars for better extraction. Using fresh, organic fruit is ideal, but frozen fruit can also work well since freezing breaks down cell walls, improving juice yield.
The natural sugar in your chosen fruit directly impacts the final sweetness, so selecting the right base is a critical first step.
Using Sugar and Honey for Sweetness
Supplementing natural fruit sugars with additional sugar or honey allows greater control over the final sweetness and alcohol content of your homemade wine. Granulated white sugar is the most common choice because it’s neutral in flavor and easily fermentable. Dissolve sugar completely in the must to prevent uneven fermentation.
For a more complex profile, honey can be used to make melomel-style wines, adding floral notes and subtle sweetness. However, honey ferments more slowly and may require specialized yeast.
To retain sweetness post-fermentation, consider stopping fermentation early or using potassium sorbate and metabisulfite to stabilize the wine before adding a sugar-based sweetener. This method, known as back-sweetening, lets you fine-tune sweetness without restarting fermentation. Always measure sugar levels with a hydrometer to monitor progress and ensure consistency.
Proper timing and stabilization are crucial for achieving a balanced, sweet wine that doesn’t turn overly dry or re-ferment in the bottle.
Selecting Wine Yeast Strains
The yeast strain you choose dramatically affects the sweetness, aroma, and alcohol tolerance of your homemade sweet wine. Unlike bread yeast, wine-specific yeasts are bred to thrive in high-sugar, high-alcohol environments while enhancing flavor.
For sweet wines, select low-alcohol-tolerance strains like Lalvin 71B or Red Star Cote des Blancs, which stop fermenting while residual sugar remains, naturally preserving sweetness. Alternatively, use neutral strains like EC-1118 and halt fermentation early through chilling and sulfite addition.
Some yeasts also produce floral or fruity esters, complementing delicate fruit bases. Always rehydrate dry yeast properly before pitching to ensure healthy fermentation. Temperature control is vital—too hot or cold can stress yeast, leading to off-flavors or stuck fermentation.
Choosing the right yeast and managing fermentation conditions gives you precise control over sweetness, ensuring a well-balanced, aromatic, and consistently delicious homemade sweet wine.
Step-by-Step Process to Make Sweet Wine
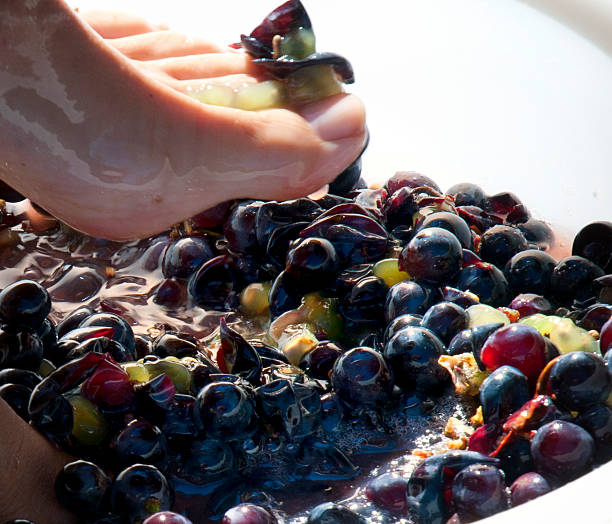
Preparing the Fruit and Must
Start by selecting ripe, high-sugar fruits like grapes, peaches, or berries, as their natural sugar content is crucial for sweetness. Wash and crush the fruit thoroughly to release juices, then transfer it to a sanitized fermenting bucket.
Use a hydrometer to measure the original gravity (OG), aiming for a reading between 1.090 and 1.120 to ensure enough sugar for a sweet profile. Add wine yeast nutrient and acid blend as needed to support healthy fermentation.
Optionally, add campden tablets (potassium metabisulfite) 24 hours before pitching yeast to eliminate wild microbes. This preparation creates a balanced, clean must ideal for controlled fermentation and a rich, sweet wine base.
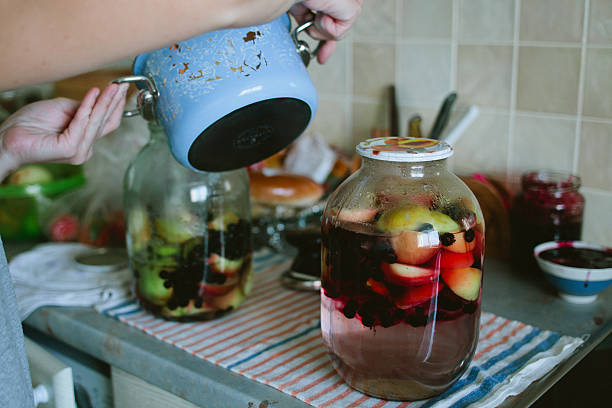
Fermenting the Wine Safely
Rehydrate the appropriate wine yeast strain—such as Lalvin K1-V1116 or EC-1118—for optimal performance, then pitch it into the must. Cover the fermenter with an airlock to allow CO₂ to escape while preventing contamination. Ferment at a steady temperature of 65–75°F (18–24°C) to avoid off-flavors and stalled fermentation.
Stir the must daily during the first few days to extract flavor and prevent mold. Monitor specific gravity weekly using a sanitized hydrometer. Sanitation is critical—clean all tools and containers with a no-rinse sanitizer to avoid spoilage.
This phase typically lasts 5–10 days, depending on yeast activity and temperature, setting the foundation for a safe and flavorful sweet wine.
Stopping Fermentation to Retain Sweetness
To preserve residual sugar and achieve sweetness, halt fermentation intentionally before all sugar converts to alcohol. The most reliable method combines potassium sorbate and potassium metabisulfite after chilling the wine to slow yeast activity.
Rack the wine into a sanitized carboy, then add 1/2 tsp potassium sorbate and 1/4 tsp metabisulfite per gallon to stabilize it. Alternatively, cold crashing—cooling the wine to near-freezing for several days—can temporarily stop fermentation, followed by racking to remove yeast. Avoid simply letting fermentation complete if you want sweetness.
Timing is key: test gravity regularly and stabilize when desired sugar level is reached, typically around 1.020–1.040 specific gravity.
Racking and Clarifying the Wine
After stabilization, rack the wine off sediment (lees) using a sanitized siphon into a clean carboy, minimizing oxygen exposure. Fit another airlock and allow the wine to age for several weeks to months, depending on desired maturity.
Use wine fining agents like bentonite or gelatin to accelerate clarification by binding to particles and settling them out. Rack again after 4–6 weeks to remove any new sediment. For crystal-clear results, consider filtering through a wine filter before bottling.
Store bottles upright for the first week, then lay them horizontally in a cool, dark place. Proper racking and clarification ensure a bright, stable, and professional-quality sweet wine ready for enjoyment.
How to Stabilize and Sweeten Your Wine
When to Add Sugar or Sweetener
Adding sugar or sweetener at the right time is crucial to making sweet wine at home. Never add sugar before fermentation is complete, as yeast will convert it into alcohol, reducing sweetness. Instead, wait until fermentation has fully stopped—confirm this using a hydrometer reading of 0.990–1.000 over three consecutive days.
Once stable, you can begin sweetening. Start by cold stabilizing the wine to prevent refermentation. Then, conduct a sweetness trial: take a small sample, chill it, and gradually add sugar or a non-fermentable sweetener like xylitol or glycerin until desired taste is achieved.
Multiply the amount used by the total volume of your wine to determine the final addition. Always dissolve sugar completely in a little wine first to avoid sediment. This method ensures consistent sweetness without restarting fermentation.
Using Potassium Sorbate and Campden Tablets
To stabilize sweet wine and prevent refermentation, use potassium sorbate and Campden tablets correctly. Potassium sorbate inhibits yeast reproduction but doesn’t kill yeast, so it must be used after fermentation has fully stopped.
Add ½ teaspoon per gallon of wine, combined with one crushed Campden tablet per gallon, which releases sulfur dioxide to suppress microbial activity. This combination creates a hostile environment for yeast and bacteria, preserving your wine’s sweetness. Never rely on potassium sorbate alone—active yeast can still ferment and produce off-flavors.
After adding both stabilizers, stir gently but thoroughly and wait 24 hours before bottling. This stabilization step is essential for back-sweetened wines. It ensures your wine remains stable during storage. Proper use of these additives allows you to safely sweeten wine without risking bottle explosions or spoilage.
Cold Stabilization Techniques
Cold stabilization is a key step in making sweet wine at home, especially when planning to back-sweeten. This process involves chilling the wine to near-freezing temperatures (32–40°F) for 5–7 days, which forces leftover yeast and tartrate crystals to settle out.
Use a refrigerator, cold garage, or wine fridge to maintain a consistent temperature. Cold stabilization reduces the risk of refermentation after sweetening by weakening or inactivating yeast. After chilling, rack the wine carefully off the sediment using sanitized equipment.
This clear, stable wine is now ready for potassium sorbate and sweetener addition. While cold stabilization doesn’t kill yeast, it significantly improves stability. Combine this method with chemical stabilizers for best results.
This dual approach ensures your sweet homemade wine remains clear, stable, and delicious over time, with no unexpected fermentation in the bottle.
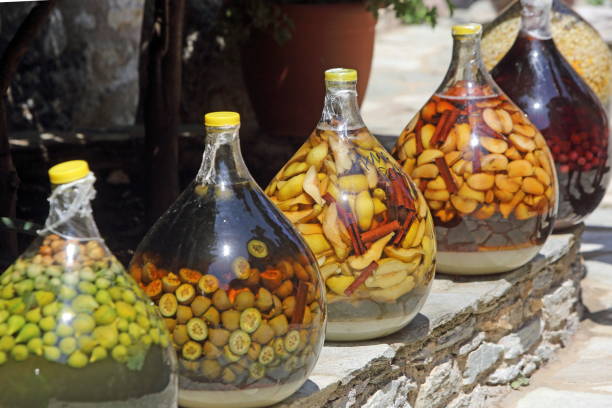
Bottling and Storing Homemade Sweet Wine
Choosing the Right Bottles and Corks
Selecting high-quality glass bottles is essential for preserving the flavor and integrity of your homemade sweet wine. Use dark green or amber bottles to protect the wine from UV light, which can degrade its taste and aroma over time.
Ensure bottles are thoroughly cleaned and sanitized before use to prevent contamination. Standard 750ml wine bottles are ideal for consistency and storage.
For closures, opt for natural or synthetic corks that create an airtight seal—natural corks offer traditional appeal and allow minimal oxygen exchange, beneficial for long-term aging, while synthetic corks are easier to insert and remove. Use a proper corker designed for home winemaking to ensure a secure fit.
Avoid reusing old corks, as they may not seal effectively. Choosing the right combination of bottle type and closure helps maintain sweetness, prevent oxidation, and support proper aging, ensuring your sweet wine remains vibrant and delicious for months or even years.
How to Fill and Seal Bottles
Proper filling and sealing are critical steps in bottling sweet wine to preserve its quality. Begin by sterilizing all equipment, including bottles, funnels, and tubing, to eliminate bacteria or wild yeast.
Use a siphon system to transfer wine gently from the carboy to bottles, minimizing aeration that can lead to spoilage. Fill each bottle to within about 1 inch of the top (the ‘headspace’) to allow for slight expansion during aging while reducing oxygen exposure.
Immediately insert corks using a double-lever or floor corker for consistent, tight seals. Check each seal by gently tugging the cork to ensure it’s secure. Label bottles with the wine type, sugar level, and bottling date for future reference.
Avoid bottling too soon—ensure fermentation has fully stopped and the wine is clear. Proper sealing locks in sweetness and aroma, preventing contamination and oxidation during storage.
Ideal Storage Conditions for Aging
To age sweet wine successfully, store bottles in cool, dark, and humidity-controlled conditions. The ideal temperature range is 55°F (13°C), with minimal fluctuations—warmer environments accelerate aging and risk spoilage, while colder temps stall development.
Keep bottles stored horizontally to keep corks moist and prevent them from drying out, which could allow air leakage. Maintain a relative humidity of 60–70% to prevent cork shrinkage and wine evaporation. Avoid areas with strong odors, vibrations, or direct sunlight, as these can negatively affect flavor.
Sweet wines often benefit from 6 months to 2 years of aging, allowing flavors to mellow and integrate. Periodically check bottles for leaks or spoilage. Proper storage ensures your homemade sweet wine retains its sweetness, complexity, and balance over time, delivering a rewarding drinking experience when opened.
Tips for Perfecting Your Sweet Wine
Common Mistakes to Avoid
One of the most common mistakes when making sweet wine at home is stopping fermentation too early without stabilizing the wine, which can lead to bottle explosions due to residual yeast activity. Always use potassium sorbate and metabisulfite after fermentation to halt yeast reproduction safely.
Another error is overestimating sugar additions—adding too much sugar before fermentation ends can stress the yeast, causing off-flavors or stuck fermentation. Use a hydrometer to monitor specific gravity and ensure fermentation is complete before sweetening. Poor sanitation is another critical issue; even small contaminants can spoil an entire batch.
Clean and sanitize all equipment thoroughly. Finally, many beginners rush the aging process—patience is key. Sweet wines often benefit from weeks or months of aging to mellow flavors and integrate sweetness. Avoid these pitfalls by planning carefully and following tested procedures.
Adjusting Flavor and Sweetness
To achieve the ideal sweetness in homemade sweet wine, back-sweetening is the most effective method. This involves fermenting the wine completely dry, then adding sugar or unfermented grape juice (called *must*) just before bottling. This gives you precise control over the final sweetness level.
Always stabilize the wine with potassium sorbate and campden tablets before sweetening to prevent renewed fermentation. Taste frequently as you add sweetener—small increments help avoid over-sweetening. Consider using honey, maple syrup, or concentrated grape juice for more complex flavor profiles.
Balance is crucial: pair sweetness with adequate acidity to prevent cloying flavors. If the wine tastes flat, a splash of lemon juice or acid blend can brighten it. Remember, chilling the wine before tasting gives a more accurate impression of its final profile, as cold reduces perceived sweetness.
How to Test Alcohol and Sugar Levels
Accurate measurement of sugar and alcohol is essential for consistent sweet wine results. Begin by using a hydrometer to measure specific gravity before and during fermentation. The original gravity (OG) indicates starting sugar levels, while final gravity (FG) shows when fermentation has stopped.
A stable FG over several days confirms fermentation is complete. To estimate alcohol by volume (ABV), subtract FG from OG and multiply by 131—for example, (1.090 – 1.010) × 131 = 10.5% ABV. For residual sugar, use refractometer readings adjusted for alcohol content or specialized test strips.
Testing after stabilization and before bottling ensures safety and consistency. Regular testing helps you understand fermentation progress and make informed decisions when back-sweetening. Always calibrate instruments and take samples at room temperature for accuracy.
Frequently Asked Questions
What ingredients do I need to make sweet wine at home?
You’ll need fruit (like grapes or berries), granulated sugar, wine yeast, yeast nutrient, and water. Additional items like acid blend and tannin can help balance flavor and structure, especially when using non-grape fruits.
How do I stop fermentation to keep the wine sweet?
You can stop fermentation early by chilling the wine and adding potassium sorbate and sulfites, which stabilize it and prevent yeast from fermenting further. This preserves residual sugar for sweetness.
Can I use regular table sugar to make sweet wine?
Yes, you can use granulated sugar to increase the sugar content before fermentation. Adding sugar (chaptalization) helps achieve a higher potential alcohol and residual sweetness when fermentation is stopped at the right time.
How long does it take to make sweet wine at home?
The fermentation process usually takes 2–3 weeks, followed by several weeks to months of aging. Sweet wines may need 2–6 months to develop a balanced flavor, depending on the recipe and storage conditions.
What type of yeast should I use for sweet wine?
Use a wine yeast strain suited for sweet wines, such as Lalvin K1-V1116 or Red Star Côte des Blancs. These yeasts tolerate higher sugar and alcohol levels while preserving fruity aromas.
How do I add sweetness after fermentation is complete?
You can back-sweeten by adding sugar syrup, honey, or unfermented juice after stabilizing the wine with potassium sorbate and sulfites to prevent renewed fermentation.
Do I need special equipment to make sweet wine at home?
Basic equipment includes a fermentation bucket or carboy, airlock, siphon, bottles, and sanitizing supplies. A hydrometer is also helpful to monitor sugar levels and fermentation progress.
Conclusion
Making sweet wine at home is a rewarding process that combines patience and creativity. By selecting the right grapes, controlling fermentation, and balancing sugar levels, you can craft delicious, personalized wines. Remember sanitation, proper yeast selection, and careful monitoring are key. With practice and attention to detail, anyone can enjoy the rich flavors of homemade sweet wine. Start small, stay consistent, and savor the sweet results of your efforts.