How To Get Stains Out Of Yeti Cup
Wondering how to get stains out of yeti cup without damaging the stainless steel? You’re in the right place. Coffee and tea tannins often leave stubborn brown rings, but the solution is simple. Forget harsh chemicals—baking soda, white vinegar, or a denture tablet will lift stains instantly.
Why Yeti Cups Stain and What Causes Discoloration
Common stain sources: coffee, tea, and wine
Stubborn discoloration in your Yeti cup often comes from everyday beverages. Coffee, tea, and red wine are the primary culprits because they contain natural tannins and pigments that bind to microscopic scratches in stainless steel.
When you sip dark liquids, these compounds can settle into the metal’s surface, especially if the cup isn’t rinsed immediately after use. To prevent deep-set stains, rinse your cup with warm water right after finishing your drink—this simple habit stops pigments from drying and bonding.
If stains have already formed, try a paste of baking soda and water: apply it to the interior, let it sit for 15 minutes, then scrub gently with a soft sponge. For tea stains, a soak with diluted white vinegar for 30 minutes can lift discoloration without damaging the steel.
Remember, frequent use of these drinks doesn’t mean permanent stains—prompt cleaning and targeted treatments keep your Yeti looking fresh and ready for your next brew.
How stainless steel reacts to acidic drinks
Stainless steel is durable, but acidic drinks like citrus juices, soda, or tomato-based beverages can cause temporary discoloration or a dull film. The acid can react with the metal’s chromium oxide layer, creating a slight chemical change that appears as a stain or rainbow-like sheen.
This doesn’t mean your cup is damaged—it’s often a surface reaction that can be reversed. To tackle this, wash your cup with mild dish soap and warm water immediately after use to neutralize acid residues.
For stubborn marks, a mixture of lemon juice and baking soda (let it fizz for 10 minutes) can help restore shine. Avoid harsh abrasives or bleach, as they can scratch the protective layer.
With regular care, your Yeti’s stainless steel will resist long-term damage, but prompt cleaning after acidic drinks is key to preventing visible discoloration.
Why stains are more visible on white or light-colored lids
White or light-colored Yeti lids are prone to showing stains because their bright surface contrasts sharply with any discoloration from coffee, tea, or food dyes. The plastic material can absorb pigments over time, especially if not cleaned promptly.
To keep lids stain-free, hand wash them with a non-abrasive sponge and a baking soda paste (mix 1 tablespoon baking soda with water) to gently lift marks.
For tough stains, soak the lid in a solution of equal parts white vinegar and water for 30 minutes, then scrub with a soft brush. Avoid dishwasher use, as high heat can set stains permanently.
A quick tip: after washing, dry the lid immediately to prevent water spots from highlighting any remaining discoloration. With consistent care, you can maintain that crisp, clean look and extend your lid’s lifespan.
How to Remove Stains from a Yeti Cup with Baking Soda

Step-by-step baking soda paste method
Start by rinsing your Yeti cup with warm water to loosen any loose debris. Then, create a simple paste by mixing three parts baking soda with one part water in a small bowl. Stir until it forms a thick, spreadable consistency, similar to toothpaste.
Using a soft sponge or a microfiber cloth, apply the paste directly onto the stained areas inside the cup. Focus on the bottom and sides where coffee, tea, or berry residue tends to cling.
Gently scrub in circular motions, letting the mild abrasiveness of the baking soda lift the stains without scratching the stainless steel. For tougher spots, add a few drops of white vinegar to the paste for extra fizzing action that helps break down residue.
Avoid using steel wool or harsh scrubbers, as these can damage the cup’s finish. This method is safe, non-toxic, and effective for restoring your Yeti to its original shine.
How long to let the paste sit for best results
After applying the baking soda paste, let it sit for 15 to 30 minutes to maximize stain removal. This dwell time allows the baking soda to penetrate and break down stubborn residues from drinks like coffee, tea, or red wine.
For light stains, 15 minutes is usually sufficient; for older or set-in stains, extend the time to 30 minutes. You can cover the cup with plastic wrap or a lid to prevent the paste from drying out too quickly, which reduces effectiveness.
During this waiting period, the paste may start to dry slightly, but that’s normal. If you’re dealing with particularly tough stains, consider a second application or gently scrubbing with a soft brush after the paste has sat.
Avoid leaving the paste on for more than an hour, as prolonged exposure isn’t necessary and may require more rinsing. This simple patience step ensures your Yeti cup comes out looking like new.
Rinsing and drying tips to avoid residue
After the paste has done its work, thoroughly rinse your Yeti cup with warm water to remove all baking soda traces. Use your fingers or a soft sponge to gently wipe away any remaining paste, especially in crevices like the rim or bottom.
For a streak-free finish, follow with a final rinse using a mixture of equal parts water and white vinegar to neutralize any alkaline residue. Then, dry the cup immediately with a clean, lint-free microfiber cloth to prevent water spots and mineral deposits.
Avoid air-drying, as this can leave behind cloudy marks or streaks. If you notice any white residue after drying, it likely means the paste wasn’t fully rinsed; simply re-rinse and dry again. For the lid, hand-wash separately with mild soap and dry thoroughly to avoid trapping moisture.
These simple steps ensure your Yeti stays spotless, stain-free, and ready for your next drink.
Best Ways to Use Vinegar for Yeti Cup Stain Removal
Mixing vinegar with water for a soak
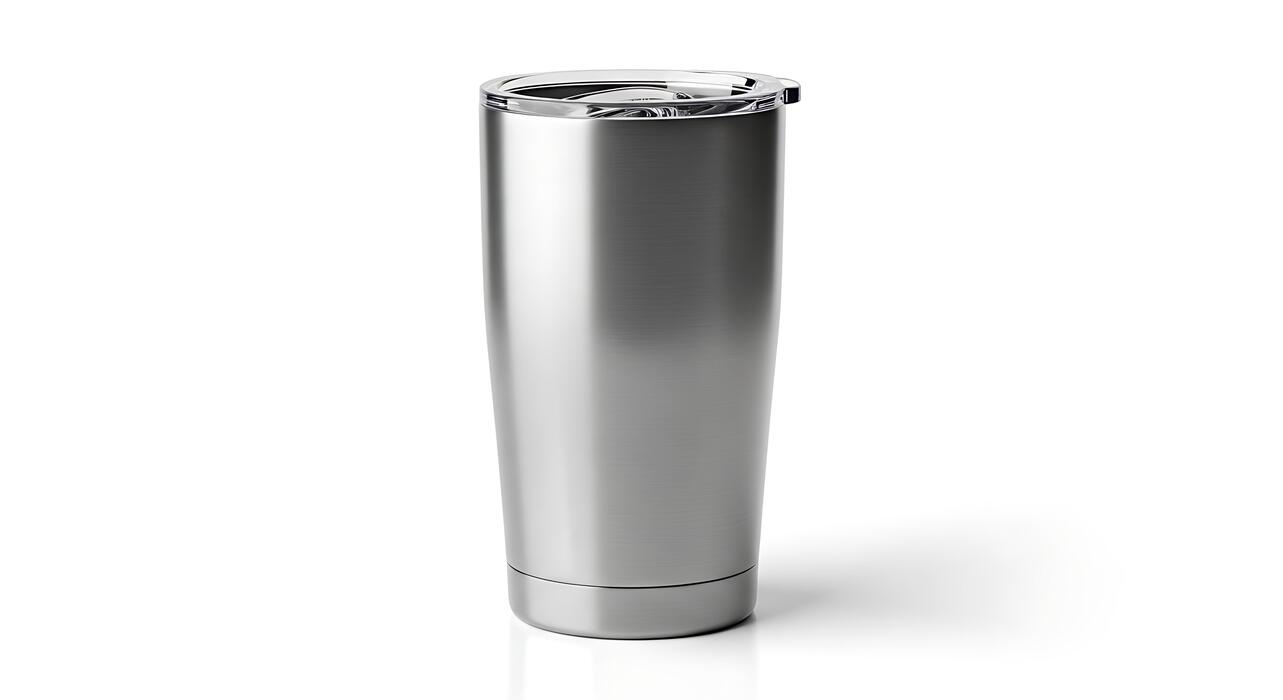
For a simple, effective stain removal, mix equal parts white vinegar and warm water directly in your Yeti cup. Use enough solution to fully submerge the stained areas.
Let the cup soak for 30 minutes to an hour; for tough, set-in stains like coffee or tea, extend the soak to up to two hours. The acetic acid in vinegar works to break down mineral deposits and organic residues without harsh scrubbing.
After soaking, pour out the solution and wash the cup with mild dish soap and a soft sponge. Rinse thoroughly with warm water to remove any lingering vinegar smell. This method is gentle on the stainless steel and preserves the cup’s vacuum insulation.
For best results, avoid using abrasive scrubbers that can scratch the surface. Repeat weekly if you use your Yeti daily for staining beverages. Always use white vinegar rather than darker varieties to prevent additional staining.
Using vinegar and baking soda together
Combine white vinegar and baking soda for a powerful, fizzy cleaning reaction that lifts stubborn stains. Start by sprinkling a generous layer of baking soda inside the cup, then slowly pour in enough white vinegar to cover the stained area.
The mixture will bubble vigorously—this helps dislodge residue and stains from the stainless steel surface. Let it sit for 15 to 30 minutes to allow the reaction to work. After the fizzing subsides, scrub gently with a soft-bristled brush or non-abrasive sponge.
Rinse thoroughly with warm water and dry immediately to prevent water spots. This method is ideal for removing coffee, tea, or berry stains that have built up over time. Avoid using too much baking soda, as excess can be difficult to rinse out.
For extra stubborn spots, repeat the process or let the paste sit longer. Always follow up with a soapy wash to ensure no residue remains.
Safety tips for vinegar on stainless steel
While vinegar is safe for Yeti cups, always use it diluted with water to prevent any potential damage to the stainless steel finish. Undiluted vinegar is highly acidic and can dull the surface or affect the cup’s protective layer over repeated use.
Never let vinegar soak for more than two hours, as prolonged exposure may cause pitting or discoloration. After cleaning, rinse the cup thoroughly with warm water to remove all acidic residue, which could otherwise react with future beverages.
Avoid mixing vinegar with bleach or other harsh chemicals, as this can release toxic fumes. For cups with painted exteriors, keep vinegar away from the outside to avoid fading the color. Always use a soft cloth or sponge for scrubbing; steel wool or abrasive pads will scratch the surface.
If you notice any cloudiness after cleaning, buff the cup with a microfiber cloth. These precautions ensure your Yeti stays stain-free and long-lasting.
How to Clean Stains from a Yeti Cup with Dishwasher Tablets
Soaking method with a single dishwasher tablet
For a deep clean that targets set-in coffee, tea, or berry stains, start by filling your Yeti cup with hot tap water (not boiling, to avoid damaging the vacuum seal). Drop in one standard dishwasher tablet (any brand works, but avoid gel packs for best results).
Let the tablet fizz and dissolve completely, then allow the cup to soak for 15 to 30 minutes. For lighter stains, 15 minutes is sufficient; for older or darker discoloration, extend soaking up to an hour.
After soaking, pour out the solution and scrub the interior with a soft-bristle bottle brush or a non-abrasive sponge. Rinse thoroughly with warm water to remove any residue. This method lifts stains without harsh scrubbing, preserving the cup’s stainless steel finish.
Always check that the tablet is fully dissolved before scrubbing to prevent scratching.
Hot water and tablet ratio for tough stains
When dealing with stubborn stains like coffee rings or tomato sauce residue, the water-to-tablet ratio matters. Use one full dishwasher tablet per 16 to 20 ounces of hot water—this concentration ensures enough cleaning agents to break down baked-on or dried stains.
Fill your Yeti cup with water as hot as your tap can deliver (around 120–140°F) and drop in the tablet. For extra-heavy stains, add a second tablet only if the cup is larger than 24 ounces.
Let it soak for 30 to 45 minutes, then scrub with a nylon brush or soft cloth. For tough interior base stains, tilt the cup during soaking to keep the tablet solution in contact with the stained area.
Avoid using boiling water, as extreme heat can compromise the cup’s double-wall insulation. After treatment, rinse twice and air dry upside down.
What to avoid when using tablets on lids
Dishwasher tablets are not safe for Yeti lids made of plastic or Tritan, as the strong chemicals can cause warping, cracking, or discoloration. Never soak lids in a dishwasher tablet solution—instead, clean them separately with mild dish soap and warm water using a soft brush.
Avoid using abrasive scrubbers or bleach-based tablets on lids, which can degrade the rubber gasket or seal. If your lid has stubborn stains, try a baking soda paste (mix with water) and a soft toothbrush.
Also, never place a dishwasher tablet directly into the lid’s crevices or drinking spout, as residue can clog the mechanism. Always remove the lid before using the tablet method on the cup body. For best results, hand wash lids promptly after each use to prevent stain buildup.
This protects the lid’s integrity and ensures a tight, leak-proof seal over time.
Tips for Removing Stubborn Stains from Yeti Cup Lids
Using hydrogen peroxide on plastic lids
For tough, set-in stains on your Yeti lid, hydrogen peroxide is a gentle yet effective bleach alternative. Start by removing the lid’s rubber gasket to ensure full coverage. Place the lid in a bowl or zip-top bag and pour in enough 3% hydrogen peroxide to completely submerge it.
Let it soak for at least 4-6 hours or overnight for maximum stain lifting. The peroxide works by releasing oxygen bubbles that break down organic stains like coffee, tea, or berry juice without damaging the plastic. After soaking, rinse the lid thoroughly with warm water and dish soap.
For any remaining spots, dab a cloth with fresh peroxide and scrub gently before a final rinse. This method is safe for all lid colors and avoids the harsh fumes of chlorine bleach. Always wash the lid and gasket separately before reassembling to ensure no residue remains.
Repeat the soak if stains persist, as peroxide is non-toxic and won’t degrade the lid’s material over time.
Bleach soak method for white lids
If your Yeti lid is white and has stubborn stains, a diluted bleach soak can restore its bright appearance. First, remove the rubber gasket to prevent damage. Fill a bowl with one part bleach to nine parts water—never use undiluted bleach, as it can yellow or warp the plastic.
Submerge the lid completely for no more than 15-20 minutes to avoid weakening the material. Bleach is highly effective at whitening and killing mold or mildew in crevices. After soaking, immediately rinse the lid under cool running water for at least 30 seconds, then wash with warm soapy water.
Do not mix bleach with other cleaners to avoid toxic fumes. This method is best for white lids only, as colored lids may fade or discolor. For extra deodorizing, add a tablespoon of baking soda to the rinse step.
Always dry the lid thoroughly before reattaching the gasket to prevent moisture buildup.
How to clean lid crevices with a toothbrush
Lid crevices are magnets for stain-causing residue, but a dedicated toothbrush makes precision cleaning easy. Use a soft-bristled toothbrush to avoid scratching the plastic. Dip it in a paste of baking soda and water or a mild dish soap solution.
Focus on the drinking spout, slider mechanism, and the groove where the gasket sits—these areas trap coffee, tea, or juice particles. Scrub in a circular motion for 30-60 seconds per section, applying gentle pressure. For deeper stains, let the paste sit for 5 minutes before scrubbing.
Rinse the lid under warm water while brushing to flush out loosened debris. Pay extra attention to the underside of the lid, where mold can grow. After scrubbing, wash the lid and gasket separately with soap and water.
For a final rinse, use a diluted vinegar solution (1:1 with water) to neutralize odors and kill bacteria. Dry all parts completely before reassembling to prevent new stains or mildew.
How to Prevent Stains from Setting in Your Yeti Cup
Rinsing immediately after use
The simplest and most effective way to prevent stains from setting is to rinse your Yeti cup immediately after you finish your drink. Stains, especially from coffee, tea, or dark sodas, begin to bond with the stainless steel surface as they dry.
By giving the cup a quick swish with warm water right after use, you dilute and remove the majority of the staining agents before they have a chance to adhere. This takes less than 30 seconds and drastically reduces the need for deep cleaning later.
If you cannot wash it fully, at least fill it with water and let it sit until you can. For stubborn residues like milk or smoothies, a quick rinse prevents protein buildup that can trap pigments.
Make this a non-negotiable habit, and you will find that your cup stays looking fresh and bright for much longer. A rinse now is the best prevention against scrubbing later.
Avoiding prolonged contact with staining liquids
To keep your Yeti cup stain-free, avoid leaving staining liquids in it for extended periods. While Yeti cups are designed to keep drinks hot or cold for hours, this same insulation allows pigments from coffee, tea, red wine, or berry smoothies to settle and oxidize on the stainless steel surface.
The longer the liquid sits, the deeper the stain can penetrate the microscopic pores of the metal. Make it a practice to finish your beverage within a few hours, or transfer it to a different container if you need to store it longer.
When you do have a staining drink, consider using a straw to minimize contact with the cup’s interior walls. For daily coffee drinkers, alternating between two cups can help, as it allows one to be thoroughly cleaned while the other is in use.
By limiting the contact time, you dramatically reduce the chances of a stubborn ring or patch forming.
Regular maintenance cleaning schedule
Establish a regular maintenance cleaning schedule to prevent stains from becoming permanent. Even with immediate rinsing, microscopic residues can accumulate over time. Aim to give your Yeti cup a thorough cleaning at least once a week, or more frequently if you use it daily for staining beverages.
A simple paste of baking soda and warm water is highly effective: apply it with a soft sponge, scrub gently, and rinse thoroughly. For deeper cleaning, fill the cup with a mixture of white vinegar and water (1:1 ratio) and let it soak for 15-20 minutes before washing.
Avoid using bleach or harsh abrasives that can damage the stainless steel finish. This proactive routine not only removes early-stage stains but also prevents odors and bacterial growth.
Consistency is key: a quick weekly clean will keep your cup looking like new and save you from needing intensive stain removal later.
Common Mistakes to Avoid When Cleaning Yeti Cups
Why abrasive scrubbers damage the finish
When tackling stains in your YETI cup, it’s tempting to grab a steel wool pad or a stiff scouring sponge. However, abrasive scrubbers will permanently scratch the stainless steel finish, creating microscopic grooves where bacteria and future stains can hide.
This damage also compromises the cup’s signature durability and can lead to rust spots over time. Instead, always use a soft sponge or a non-abrasive brush with a gentle cleaner.
For stubborn stains, try a paste of baking soda and warm water applied with a soft cloth; let it sit for 15 minutes before rinsing. This method lifts stains without harming the surface.
Remember, YETI cups have a powder-coated exterior that is especially vulnerable to scratching, so avoid any scouring pads, even on the outside. By choosing the right tools, you’ll keep your cup looking like new and free from stains without sacrificing its integrity.
Dangers of using bleach on stainless steel
Bleach might seem like a quick fix for tough stains, but it’s a major mistake for YETI cups. Bleach is highly corrosive to stainless steel and can cause pitting, discoloration, and a dull, uneven finish over time.
The chemical reaction can also break down the protective layer of chromium oxide that prevents rust, leading to permanent damage. Instead, opt for a mixture of white vinegar and water (one part vinegar to three parts water) to safely remove stains.
Soak the cup for 15-20 minutes, then scrub gently with a soft sponge. For coffee or tea stains, baking soda is a safer, effective alternative that neutralizes odors without harming the metal.
If you must use a commercial cleaner, ensure it’s labeled as safe for stainless steel and never mix it with other chemicals. Your YETI will stay stain-free and durable without the risks of bleach.
What not to put in the dishwasher
While YETI cups are advertised as dishwasher-safe, frequent dishwasher use can accelerate staining and damage. Dishwasher detergents often contain harsh chemicals that may dull the finish and react with stainless steel over time, especially with high-heat cycles.
Additionally, the cup’s vacuum seal can be compromised by prolonged exposure to high temperatures, reducing its insulation efficiency. To avoid this, hand wash your YETI cup with mild dish soap and warm water using a soft sponge.
For stains, a quick soak in baking soda and water is more effective than a dishwasher cycle. If you must use the dishwasher, place the cup on the top rack away from heating elements, and skip the heated dry cycle.
However, for best results in preventing stains and preserving your cup’s performance, hand washing is the safest choice. This simple habit will extend your cup’s life and keep it looking pristine.
Frequently Asked Questions
What is the best way to remove coffee or tea stains from a Yeti cup?
The most effective method is to fill the cup with hot water and add a denture cleaning tablet or a tablespoon of baking soda. Let it soak for 15-30 minutes, then scrub with a soft brush and rinse thoroughly.
Can I use bleach to clean stains out of my Yeti cup?
No, you should avoid bleach as it can damage the stainless steel finish and is not recommended by Yeti. Stick to mild cleaners like baking soda, vinegar, or dish soap.
How do I get rid of stubborn rust-colored stains from inside my Yeti cup?
Mix a paste of baking soda and a small amount of water, then apply it to the stains. Let it sit for 10 minutes, scrub with a non-abrasive sponge, and rinse. For tough stains, try a diluted vinegar soak (1 part vinegar to 3 parts water) for 20 minutes.
Will a Magic Eraser damage my Yeti cup’s finish?
Yes, Magic Erasers can be abrasive and may scratch the exterior or interior coating. Use them sparingly on the exterior only, and avoid the inside to prevent damage to the stainless steel.
How can I prevent stains from setting in my Yeti cup in the first place?
Rinse the cup immediately after use, especially with coffee, tea, or dark beverages. For deeper cleaning, soak with baking soda weekly to prevent buildup and keep the cup stain-free.
Is it safe to put my Yeti cup in the dishwasher to remove stains?
Yeti recommends hand washing to preserve the cup’s finish and insulation. However, you can use the top rack of the dishwasher on a gentle cycle, but avoid high heat and harsh detergents that may cause staining or fading.
Can lemon juice remove stains from a Yeti cup?
Yes, lemon juice’s acidity can help break down stains. Squeeze fresh lemon juice into the cup, add a bit of salt for gentle abrasion, scrub, and rinse. This works well for light stains but may not be as effective on heavy buildup.
Why do my Yeti cups get a metallic smell after cleaning stains?
This often happens from using acidic cleaners like vinegar or lemon juice. To fix it, rinse the cup thoroughly with warm water and mild dish soap, then dry completely. A baking soda soak can also neutralize odors.
Conclusion
For tough coffee or tea marks, a paste of baking soda and water works best, while a vinegar soak tackles odors. Always avoid bleach and abrasive scrubbers to protect the finish. With these easy methods, your cup will look like new. Keep your favorite drink fresh and your Yeti spotless—happy cleaning