
How To Get Stains Out Of White Mugs
If you’re wondering how to get stains out of white mugs, you’ve likely noticed stubborn tea, coffee, or turmeric rings that ruin that crisp look. The problem is porous ceramic absorbing pigments over time.
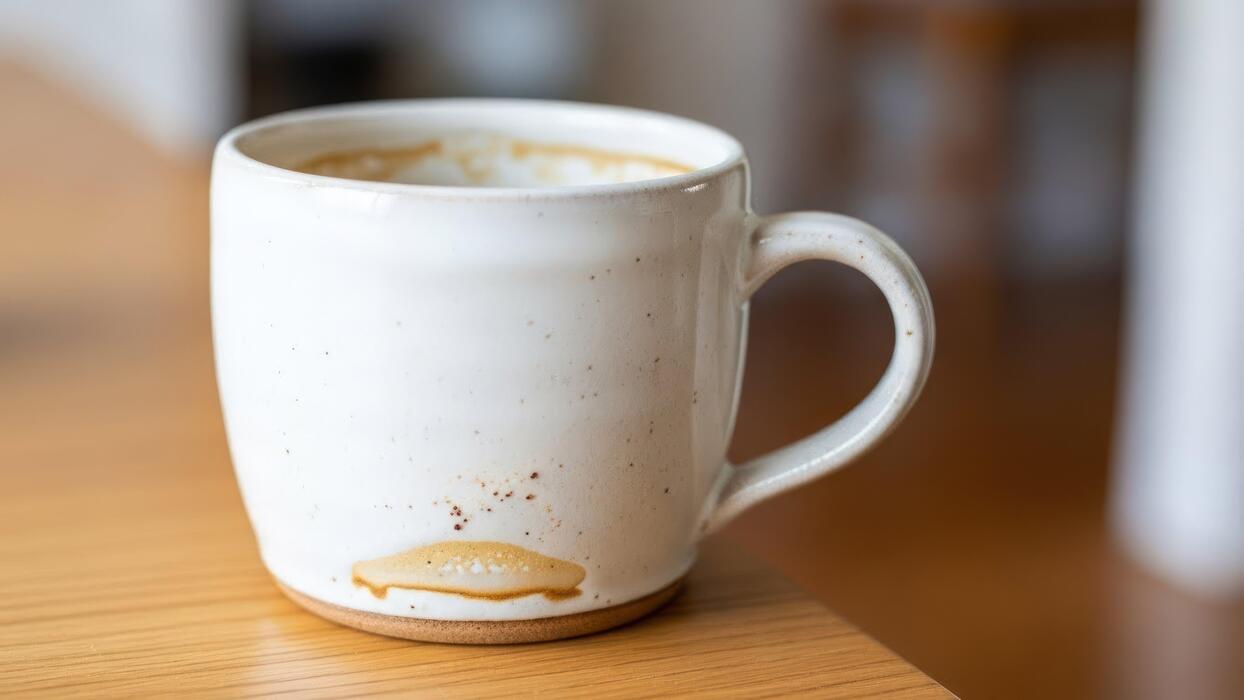
Why White Mugs Stain So Easily
Common causes of stubborn mug stains
White mugs stain easily due to the porous nature of ceramic glazes, which can develop microscopic cracks over time. These tiny fissures trap pigments from dark beverages.
Tannins in coffee and tea are the primary culprits, as they bind to the mug’s surface and oxidize, creating a yellowish or brownish film. Improper cleaning worsens the problem: using abrasive sponges scratches the glaze, creating more hiding spots for stains.
Insufficient rinsing leaves soap residue that attracts tannins, while microwaving can expand existing micro-cracks. Hard water minerals also react with tannins, forming stubborn calcium-tannin complexes that resist regular dish soap. To prevent stains, rinse mugs immediately after use and avoid stacking them while wet, which traps moisture and accelerates staining.
For existing marks, baking soda paste or hydrogen peroxide can lift stains without scratching the surface.
How coffee and tea leave marks
Coffee and tea contain tannins, natural plant compounds that are acidic and highly pigmented. When hot liquid contacts the mug’s surface, tannins dissolve and seep into microscopic pores. As the mug cools, tannins polymerize—forming long molecular chains that cling tightly to ceramic.
Coffee stains are often darker and more uniform because coffee has a higher concentration of roasted oils and melanoidins, which create a sticky residue. Tea stains tend to be more ring-like and yellowish due to theaflavins and thearubigins, which oxidize when exposed to air.
Reheating beverages in the same mug without washing allows layers of tannins to build up, baking them into the glaze. Adding milk can worsen staining because milk proteins coagulate and trap tannins.
To remove these marks, soak mugs in white vinegar or a denture tablet solution to break down tannin bonds without scrubbing.
Why porcelain and ceramic mugs stain differently
Porcelain and ceramic mugs have different firing temperatures and glazing processes, which affect stain resistance. Porcelain is fired at extremely high temperatures (over 1200°C), creating a vitrified, non-porous surface that resists staining. However, lower-quality porcelain may have tiny pinholes from rapid cooling.
Ceramic mugs are typically fired at lower temperatures (900-1000°C), leaving the glaze slightly porous—especially if it’s a matte finish. Hand-painted or reactive glazes often have uneven surfaces that trap liquid. Bone china contains calcium phosphate, which can be slightly absorbent if not properly sealed. Microwave-safe labels don’t indicate stain resistance.
To test your mug, apply a drop of water—if it beads up, the glaze is intact; if it soaks in, the mug is prone to staining. For both types, avoid dishwasher detergents with bleach, which can etch the glaze and increase porosity.
Use a paste of cream of tartar and lemon juice to gently polish stains from delicate surfaces.
How to Remove Stains with Baking Soda and Vinegar
Step-by-step baking soda paste method
To remove stubborn stains from white mugs, start by making a baking soda paste using a 3:1 ratio of baking soda to water. Mix 3 tablespoons of baking soda with 1 tablespoon of water in a small bowl until it forms a thick, spreadable paste.
Apply this paste directly to the stained areas inside the mug using a soft sponge or cloth, focusing on tea, coffee, or rust marks. Let it sit for 15–30 minutes to allow the mild abrasive to break down the stains without scratching the ceramic.
Gently scrub in circular motions, then rinse thoroughly with warm water. For extra stubborn spots, add a few drops of lemon juice to the paste for enhanced stain-lifting power. Repeat the process if necessary, but avoid using metal scrubbers that could damage the mug’s surface.
This method is safe, non-toxic, and leaves your mugs looking bright and clean.
Using white vinegar for deep cleaning
For deep cleaning white mugs, white vinegar is a powerful natural acid that dissolves mineral deposits and tough stains. Fill the mug with equal parts white vinegar and warm water (about 1/2 cup each) and let it soak for 30 minutes to 1 hour.
For extra stain removal, add 1 tablespoon of baking soda to the mixture—it will fizz, helping to lift grime. After soaking, scrub the inside with a soft brush or sponge, paying attention to ring marks at the bottom. Rinse thoroughly with warm water and dry with a clean cloth.
If stains persist, create a vinegar soak overnight by filling the mug with undiluted white vinegar, then scrub again in the morning. This method is effective for removing coffee, tea, and hard water stains, restoring your mugs to their original whiteness without harsh chemicals.
Safety tips for combining these ingredients
When combining baking soda and vinegar for cleaning, always follow safety guidelines to avoid damage or injury. First, never mix them in a sealed container—the chemical reaction produces carbon dioxide gas, which can cause pressure buildup and potential bursting.
Instead, combine them directly in the mug or a well-ventilated area to allow gas to escape safely. Start with the baking soda paste first, then add vinegar slowly to control the fizzing reaction.
Wear rubber gloves to protect your skin from prolonged contact with vinegar, as it is acidic and can cause irritation. Avoid using this mixture on delicate or metallic finishes, as vinegar may etch or discolor them.
Always test a small hidden area first, and rinse thoroughly after cleaning to remove any residue. Store both ingredients separately in cool, dry places to maintain their effectiveness.
Best Ways to Use Bleach on White Mugs

Diluting bleach for safe stain removal
To effectively remove stains without damaging your white mugs, always dilute bleach with water. Using undiluted bleach can be too harsh and may weaken the mug’s glaze over time.
Mix one tablespoon of bleach per cup of cool water in a plastic or glass bowl—never use metal, as it can react with bleach. Stir gently to combine. For best results, use standard household bleach (5.25% to 8.25% sodium hypochlorite) and avoid splash-less or scented varieties, which may leave residues.
Before soaking, rinse the mug with water to remove loose debris, then submerge it completely in the bleach solution. Wear rubber gloves to protect your skin and work in a well-ventilated area. This dilution is safe for most ceramic and porcelain mugs, but always check the manufacturer’s care instructions first.
For lighter stains, a weaker solution of one teaspoon per cup may suffice. Proper dilution prevents yellowing and ensures the bleach targets stains effectively while preserving the mug’s finish.
Soaking technique for tough stains
For stubborn coffee, tea, or berry stains, soak the mug in the diluted bleach solution for 15 to 30 minutes. Place the mug fully submerged, ensuring no air pockets trap stains. For set-in stains, extend soaking up to one hour, but avoid longer periods to prevent glaze damage.
To boost effectiveness, scrub the stained area gently with a soft sponge before soaking to loosen residue. For hard-to-reach spots like the bottom or handle, use a bottle brush or old toothbrush dipped in the solution.
If stains persist, add one teaspoon of baking soda to the soak—this creates a mild abrasive action without scratching. Never mix bleach with ammonia or vinegar, as this releases toxic fumes. Check the mug every 10 minutes; once stains lift, remove it promptly.
This method works best on white, non-porous mugs; avoid using on hand-painted or metallic designs, as bleach can fade them.
Rinsing and drying to avoid residue
After soaking, thoroughly rinse the mug under cool running water for at least 30 seconds to remove all bleach traces. Residual bleach can cause skin irritation or alter future drink flavors. For extra safety, wash the mug with mild dish soap and a soft sponge, then rinse again.
Dry the mug immediately with a clean, lint-free cloth to prevent water spots or mineral deposits. If you prefer air-drying, place the mug upside down on a drying rack to ensure no water pools inside. For final polish, buff the mug with a dry microfiber cloth to restore its shine.
Check for any lingering odor; if present, rinse with a solution of one part white vinegar to three parts water, then rinse again. Never use bleach on mugs with cracks or chips, as it can seep into porous areas.
Proper rinsing and drying keep your mugs looking pristine and safe for daily use, extending their lifespan significantly.
How to Clean Stains with Lemon Juice and Salt
Making a natural scrub with lemon and salt
Start by cutting a fresh lemon in half and squeezing about one tablespoon of juice into a small bowl. Add two tablespoons of table salt and stir to form a thick, gritty paste.
The salt acts as a mild abrasive that physically lifts stains without scratching ceramic surfaces, while the citric acid in lemon juice chemically breaks down tannins and mineral deposits. For tougher stains, increase the salt slightly to create a coarser texture.
If the mixture seems too runny, add more salt; if too dry, add a few extra drops of lemon juice. This simple combination is safe for all white mugs, including those with delicate prints, and avoids harsh chemicals found in commercial cleaners.
You can also use bottled lemon juice if fresh lemons aren’t available, but fresh juice provides stronger acidity. Prepare the scrub just before use to maintain its abrasive quality and maximum potency.
Applying the mixture to stained areas
Dip a soft cloth, sponge, or the cut side of the lemon half directly into the salt-lemon paste. Rub the mixture firmly onto the stained interior and exterior of the white mug, focusing on coffee, tea, or lipstick marks.
Use circular motions and apply gentle pressure to work the scrub into porous stains. For stubborn rings or baked-on residue, let the paste sit on the mug for 5–10 minutes to allow the citric acid to penetrate. Then scrub again with the same motion.
Rinse thoroughly with warm water to remove all salt and lemon residue. If stains persist, repeat the process or add a small amount of baking soda to boost abrasion. Avoid using metal scrubbers, which can scratch the glaze. For hard-to-reach spots, use an old toothbrush dipped in the mixture.
Always check that no grit remains before drying, as salt crystals can leave scratches if left to dry on the surface.
Benefits of using citrus for odor removal
Lemon juice does more than remove visible stains—it also neutralizes stubborn odors trapped in ceramic pores. Coffee, tea, and even garlic smells can linger in mugs even after washing. The fresh, acidic scent of lemon acts as a natural deodorizer, breaking down odor-causing compounds without leaving artificial fragrances.
Unlike bleach or vinegar, lemon juice leaves a pleasant, clean aroma that doesn’t require rinsing multiple times. This makes it ideal for everyday mugs used for both hot and cold beverages. Additionally, the salt in the scrub helps absorb any residual moisture that might harbor bacteria, further preventing musty smells.
Using citrus also avoids chemical residues that could alter the taste of your next drink. For ongoing maintenance, a quick lemon-salt scrub once a week keeps mugs bright, stain-free, and smelling fresh. This method is eco-friendly, cost-effective, and gentle on both your mugs and your senses.
Tips for Removing Stains with Denture Tablets

How denture tablets work on mug stains
Denture tablets are an effective, low-effort solution for removing stubborn coffee, tea, or berry stains from white mugs. Their cleaning power comes from sodium bicarbonate, citric acid, and oxidizing agents like sodium perborate.
When dropped into warm water, the tablet effervesces, releasing oxygen bubbles that physically lift stain particles from the porous ceramic surface. The mild alkaline solution also helps break down tannins—the compounds in tea and coffee that cause yellow-brown discoloration.
Unlike harsh bleach, denture tablets are gentle on glaze and won’t scratch or dull your mugs. For best results, ensure the mug is fully submerged in the fizzing solution so the bubbles reach every stained area.
This method is especially ideal for mugs with narrow openings or intricate designs where scrubbing is difficult. Pro tip: Use one tablet per mug for moderate stains, or two for heavily discolored mugs.
Soaking instructions for best results
To remove stains effectively, fill your mug with warm (not boiling) water—hot tap water works perfectly. Drop one denture tablet into the water and watch it dissolve and fizz. Let the mug soak for 15 to 30 minutes for light stains, or up to 2 hours for deep-set discoloration.
For stubborn rings at the bottom, give the mug a gentle swirl after the first 10 minutes to redistribute the solution. After soaking, pour out the liquid and scrub lightly with a soft sponge—most stains will rinse away effortlessly. If any residue remains, repeat the process with a fresh tablet.
Avoid using metal utensils or abrasive pads, as they can scratch the glaze and make future staining worse. For mugs with handles, tilt the mug during soaking to ensure the handle cavity is also exposed to the solution.
Rinse thoroughly with water before use to remove any lingering taste or smell.
Comparing denture tablets to other methods
Denture tablets outperform many common stain-removal methods because they combine chemical action with physical agitation from the fizzing. Baking soda paste requires scrubbing and often misses porous stains; bleach can damage ceramic glaze and leave a harsh odor.
Vinegar and baking soda create a fizzy reaction but are less effective on tannin stains. Denture tablets are safer for your mugs than abrasive powders or steel wool, which cause micro-scratches that trap stains over time.
They are also cost-effective—a box of generic tablets costs a few dollars and cleans dozens of mugs. However, for extremely old or baked-on stains, you may need to combine soaking with a gentle paste of baking soda and water.
Key advantage: Denture tablets are hands-off—you drop, soak, and rinse, with no scrubbing required. This makes them ideal for busy mornings or for cleaning multiple mugs at once. Just avoid using them on mugs with metallic accents or hand-painted designs, as the oxidizing agents may cause fading.
How to Prevent Stains from Forming on White Mugs
Rinsing mugs immediately after use
The simplest and most effective way to prevent stains is to rinse your white mug immediately after finishing your drink. Coffee, tea, and other dark beverages contain tannins and pigments that bond to porous ceramic surfaces as they dry.
By running hot water into the mug right away, you dilute and wash away these staining compounds before they have a chance to set. Make it a habit to take the mug to the sink as soon as you’re done, even if you plan to wash it later.
A quick swirl of water removes the majority of residue, drastically reducing the likelihood of stubborn rings. For added protection, use a bottle brush or sponge to gently scrub the interior while rinsing, focusing on the bottom and sides where stains often accumulate.
This proactive step takes only seconds but can save you from needing deep cleaning later. If you’re away from a sink, carry a reusable water bottle to rinse your mug in a restroom. Consistency is key—making this a routine will keep your mugs looking like new for years.
Using a protective coating or sealant
Another effective strategy is to apply a food-safe protective coating or sealant to the interior of your white mugs. Many porous ceramics benefit from a thin barrier that prevents liquids from penetrating the surface.
Products like ceramic sealers, glass-like coatings, or even a simple application of diluted food-grade mineral oil can fill microscopic pores where stains take hold. Before applying, ensure the mug is clean and completely dry.
Follow the manufacturer’s instructions carefully, as some coatings require curing in an oven or air-drying for 24 hours. Reapply periodically, especially after heavy use or dishwashing, as coatings can wear off. This approach is particularly useful for handmade or vintage mugs that lack a glossy, non-porous finish.
A sealed surface makes rinsing more effective and reduces the need for harsh scrubbing. Additionally, consider using silicone or plastic liners designed for travel mugs, which are non-porous and easy to clean. While this requires an initial investment, it dramatically extends the life and appearance of your favorite white mugs.
Avoiding common staining drinks
While you don’t have to give up your favorite beverages, being mindful of which drinks cause the most staining can help you take preventive action. Coffee, black tea, red wine, fruit juices, and dark sodas are notorious for leaving stubborn marks on white ceramic surfaces.
These drinks contain tannins, chromogens, or artificial coloring that bind to porous materials. To minimize risk, avoid letting these beverages sit in the mug for extended periods—never leave a half-finished cup on your desk for hours. If you do indulge, follow up with immediate rinsing.
Alternatively, switch to lighter-colored drinks like herbal tea, green tea, or clear beverages when using your white mugs. For coffee lovers, consider using a straw or a lid to reduce contact between the liquid and the mug’s interior.
You can also dilute staining drinks with water or milk, which lowers their pigment concentration. By choosing when and how you use your white mugs, you can enjoy your favorite drinks without sacrificing their pristine look. Remember, prevention is always easier than removal.
When to Replace a Stained White Mug
Signs of permanent damage or cracking
Even if stains are your primary concern, it’s crucial to inspect your white mug for structural damage before committing to stain removal. Cracks, chips, or hairline fractures are clear indicators that the mug should be replaced immediately, as these flaws can harbor bacteria and pose a cutting or burning risk.
Similarly, if your mug has a permanently rough or porous glaze where stains have etched into the surface, cleaning efforts may be futile.
Run your finger over the stain—if it feels textured or the discoloration has turned into a dark, ingrained shadow that won’t lift with baking soda paste or bleach soaking, the mug’s integrity is compromised. In these cases, no amount of scrubbing will restore it to a safe, hygienic state.
Prioritize safety: a damaged mug can leach materials or break during use, so replace it immediately to avoid injury or contamination.
Health concerns with deep-set stains
While surface stains on a white mug are often cosmetic, deep-set, persistent discoloration may signal a health risk. If you’ve tried multiple methods—like a bleach soak, hydrogen peroxide paste, or dishwasher cycles—and the stain remains, it’s likely that organic residues from coffee or tea have penetrated the glaze’s micropores.
These trapped compounds can become a breeding ground for mold or mildew in moist environments, especially if the mug is used daily. Additionally, deep stains may indicate the glaze has worn down, exposing the underlying ceramic which can absorb bacteria and flavors.
For mugs with a musty odor or visible dark rings that resist cleaning, replace them to prevent potential gastrointestinal issues from microbial growth.
Your health is worth more than a favorite mug; if the stain persists after three thorough cleaning attempts, it’s time to say goodbye and choose a new, stain-free vessel.
Eco-friendly disposal or repurposing ideas
Before tossing a stained white mug in the trash, explore creative, eco-friendly repurposing that gives it a second life.
If the mug is structurally sound but just stained, use it as a paintbrush holder, desk organizer for pens and scissors, or a mini planter for succulents (add a drainage hole with a drill). For gardening, it’s perfect for starting seedlings or storing small tools.
Alternatively, transform it into a bathroom catchall for cotton balls, q-tips, or jewelry. If repurposing isn’t feasible, check if your local recycling program accepts ceramic or porcelain—some facilities do, but confirm first. As a last resort, consider upcycling into a candle holder by adding wax and a wick.
Always clean the mug thoroughly before repurposing. By choosing reuse or recycling, you reduce landfill waste and honor the mug’s material, making your replacement choice both practical and sustainable.
Frequently Asked Questions
What is the best way to remove coffee stains from white mugs?
The most effective method is to make a paste of baking soda and water, apply it to the stains, and scrub gently with a sponge. For stubborn stains, let the paste sit for 15-20 minutes before scrubbing, then rinse thoroughly.
Can I use bleach to clean stains from white mugs?
Yes, but dilute it with water (1 part bleach to 10 parts water) and soak the mug for 10-15 minutes. Rinse extremely well with hot water afterward to remove all bleach residue, as it can be harmful if ingested.
How do I remove tea stains from white mugs?
Fill the mug with white vinegar and let it soak for 30 minutes, then scrub with a non-abrasive sponge. Alternatively, use a denture cleaning tablet dissolved in warm water and soak overnight for tough tannin stains.
Will lemon juice work to get stains out of white mugs?
Yes, lemon juice is acidic and can break down stains. Rub half a lemon directly on the stain or soak the mug in a mixture of lemon juice and salt for 20 minutes, then scrub and rinse.
How can I prevent stains from setting into white mugs?
Rinse mugs immediately after use with hot water to remove coffee or tea residue. Avoid letting beverages sit for hours, and occasionally use a baking soda scrub as a preventative measure.
Is it safe to use a Magic Eraser on white mugs?
Yes, Magic Erasers (melamine foam) are effective for removing surface stains from glazed white mugs. Dampen the eraser and gently rub the stain, but avoid using on mugs with metallic or decorative finishes as it may damage them.
What if the stain is still there after trying baking soda?
For persistent stains, try soaking the mug in a solution of hydrogen peroxide and baking soda (1:1 ratio) for an hour. If that fails, use a specialized ceramic stain remover or repeat the process with a longer soak time.
Can toothpaste remove stains from white mugs?
Yes, white non-gel toothpaste works as a mild abrasive. Apply a small amount to a damp cloth or toothbrush, scrub the stain in circular motions for a minute, then rinse well. This is gentle and safe for most mugs.
Conclusion
Removing stains from white mugs is simple with everyday items like baking soda, vinegar, or lemon juice. For tough marks, create a paste and let it sit before scrubbing. Bleach soaks work for deep stains, but always rinse thoroughly. Remember, regular cleaning prevents buildup. With these easy methods, your mugs can look bright and new again. Don’t let stubborn stains ruin your favorite cup—try these tricks today for sparkling results.