Full Size Refrigerator Kegerator
Converting a standard fridge or buying a dedicated unit gives you the space for multiple kegs and extra storage. In this guide, we will quickly break down the best models available, how to handle the conversion process, and what features matter most so you can start pouring the perfect pint today.
Benefits of Using a Full Size Refrigerator Kegerator
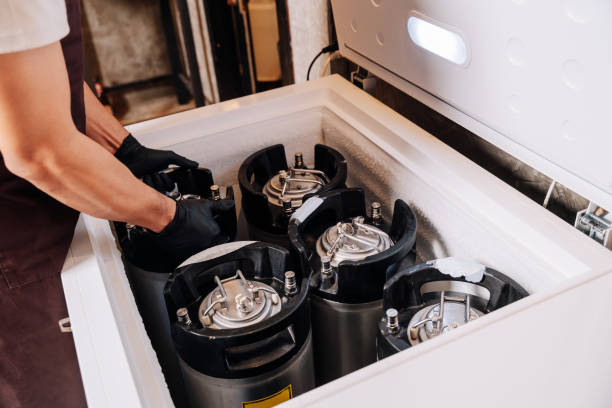
Extra Storage for Multiple Kegs
A primary advantage of opting for a full size refrigerator kegerator is the significant internal volume, which allows for storing multiple kegs simultaneously.
Unlike compact units that struggle to fit more than one standard barrel, a full-sized conversion can easily accommodate two or three sixth-barrel kegs or even a combination of different sizes.
This versatility is perfect for those who enjoy variety, as it enables you to tap different beer styles at once without needing separate cooling systems.
By utilizing the vertical and horizontal space of a standard fridge, you can maintain a diverse inventory of craft brews, ciders, or even cold brew coffee. This setup ensures that you are always prepared for gatherings, providing consistent carbonation and temperature control for every keg in the lineup.
Investing in a larger unit eliminates the frustration of rotating inventory, allowing you to keep backstock chilled and ready for immediate tapping when the current keg runs dry.
Room for Food and Chilled Glassware
One of the most practical benefits of a full size refrigerator kegerator is the abundance of additional shelf space for perishables. While the kegs occupy the bottom portion, the upper shelves and door bins remain available for storing party platters, mixers, and snacks.
This dual-purpose functionality makes it a versatile appliance for entertaining, as you can keep your hors d’oeuvres fresh right next to your draft system. Furthermore, the extra room allows you to store chilled glassware, ensuring every pour is served in a frosted mug for the ultimate drinking experience.
Having a dedicated space for hops, yeast, or even overflow groceries during the holidays adds immense value to your home setup. By maximizing the cubic footage, you avoid the clutter of multiple small appliances and streamline your kitchen or basement bar.
This solution-focused approach ensures that you have everything needed for a perfect pour and a successful social event all contained within a single, organized cooling environment.
Cost Savings Compared to Commercial Units
Choosing to build or buy a full size refrigerator kegerator often results in significant long-term cost savings compared to purchasing high-end commercial draft systems.
Commercial-grade kegerators are frequently overpriced due to branding and heavy-duty exterior finishes, whereas a full-sized residential conversion offers comparable cooling performance at a fraction of the price.
By repurposing a standard refrigerator, you can allocate your budget toward premium draft components like stainless steel towers, high-quality regulators, and custom tap handles. Additionally, residential units are often more energy-efficient for home use, leading to lower utility bills over time.
Maintenance is also more affordable, as replacement parts for standard refrigerators are widely available and easy to install without professional assistance. This DIY-friendly approach allows you to customize your draft system to your exact specifications without the steep markup of specialized retail units.
Ultimately, you achieve a professional-level pour and massive storage capacity while keeping your initial investment and ongoing operational expenses well within a reasonable budget.
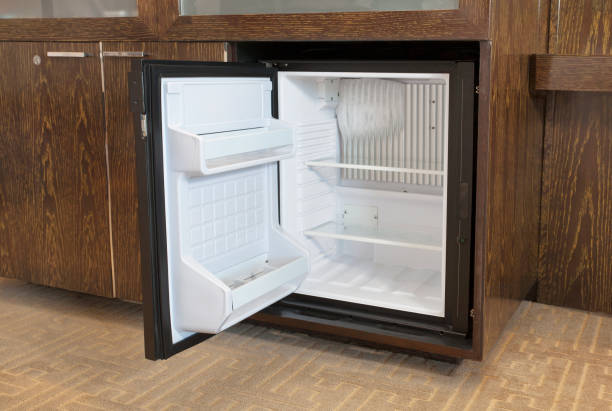
How to Choose the Right Refrigerator for Your Conversion
Top Freezer vs. Bottom Freezer Models
When selecting a full size refrigerator for a kegerator conversion, the configuration of the freezer plays a pivotal role in both ease of installation and daily functionality.
Top freezer models are generally considered the gold standard for DIY enthusiasts because the lower refrigeration compartment is typically a wide, open cavern that can accommodate multiple kegs without obstruction.
This layout allows you to mount your draft tower directly through the top of the fridge section or out the side wall with minimal interference. Conversely, bottom freezer units often feature pull-out drawers that can complicate the plumbing of beer lines and CO2 hoses.
While bottom freezers keep your kegs at a more ergonomic height for swapping, the mechanical slides and drawer tracks often eat into the usable width needed for larger diameter kegs.
If you prioritize a high keg capacity and a straightforward drilling process for your shanks and faucets, a classic top-mount refrigerator is usually the most cost-effective and reliable choice for a home bar setup.
Measuring Internal Dimensions for Keg Clearance
Before purchasing a full size refrigerator, you must perform precise internal measurements to ensure your specific keg configuration will fit comfortably. Do not rely solely on the external cubic footage, as internal shelving tracks and compressor humps significantly reduce the usable floor space.
Start by measuring the depth from the back wall to the inside of the door, accounting for any protruding door shelves that might need to be removed.
You must ensure there is enough vertical clearance for the keg itself plus the height of the D-system or Corny couplers and the arc of the beer lines.
If you plan on housing a CO2 tank internally, factor in that extra footprint to avoid overcrowding, which can restrict airflow and lead to uneven cooling.
Most standard full size units can hold two to four half-barrels or several five-gallon Cornelius kegs, but verifying the floor-to-ceiling height and the width between the side walls is essential to avoid the frustration of a unit that cannot close securely.
Avoiding Units with Cooling Lines in the Door
One of the most critical technical hurdles in a full size refrigerator kegerator conversion is the placement of refrigerant lines and electrical wiring. Modern refrigerators, particularly those with integrated door dispensers for ice and water, often have complex cooling loops or power harnesses embedded directly within the door insulation.
If you plan to mount your faucets through the door, drilling into one of these lines will result in an immediate and irreparable loss of coolant, effectively ruining the appliance.
To mitigate this risk, it is highly recommended to choose basic, manual-defrost models or older units that utilize simpler construction methods.
Always use a ‘pilot hole’ technique or apply a mixture of cornstarch and rubbing alcohol to the exterior to identify heat patterns from hidden lines before committing to a large hole saw cut.
By opting for a unit with plain, solid doors, you ensure a safer drilling environment and a much cleaner installation for your tap handles and drip trays without risking a total mechanical failure.
https://kitchnadvisor.com/best-travel-electric-kettle
Essential Parts for a Full Size Kegerator Setup
CO2 Tanks and Dual-Gauge Regulators
To maintain the ideal carbonation levels in a full size refrigerator kegerator, you must start with a high-quality CO2 tank and a dual-gauge regulator.
For most home setups, a 5lb aluminum CO2 cylinder is the industry standard because it fits comfortably inside the fridge cabinet while providing enough gas to dispense several full-sized kegs.
The dual-gauge regulator is a critical safety and performance component; the first gauge monitors the internal tank pressure to let you know when you are running low on gas, while the second gauge allows you to set the precise output pressure for your specific beer style.
This ensures your beer remains perfectly carbonated without becoming overly foamy. Using a high-pressure braided gas line with secure worm clamps is essential to prevent leaks that could drain your tank overnight.
Investing in a reliable regulator prevents the common headache of inconsistent pours and ensures your full-size conversion operates with professional-grade efficiency and safety.
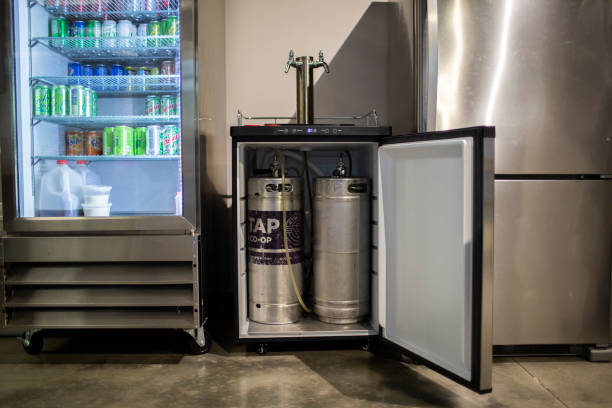
Draft Beer Towers and Faucets
The draft tower is the most visible part of your full size refrigerator kegerator and serves as the bridge between the cold keg and your glass. When converting a standard fridge, a top-mounted insulated draft tower is the most popular choice for a clean, professional look.
It is vital to choose a tower with internal foam insulation to keep the beer lines cold, which prevents the first pour from being mostly foam. For the best experience, upgrade to stainless steel forward-sealing faucets.
Unlike standard rear-sealing models, forward-sealing faucets do not allow beer to dry inside the mechanism, which significantly reduces the risk of bacterial growth and sticking components. This hardware choice ensures that every pint tastes exactly as the brewer intended.
Additionally, ensure your tower is mounted with a heavy-duty gasket and mounting bolts to prevent any wobbling or air leaks that could compromise the temperature stability of your refrigerator unit, keeping your energy bills low and your beer consistently chilled.
Couplers and Gas Line Connections
The connection between your gas system and the keg itself is handled by the keg coupler, which is the unsung hero of any full size refrigerator kegerator setup. For the vast majority of domestic beers in the United States, you will need a Type D American Sankey coupler.
This device simultaneously allows CO2 to enter the keg and beer to exit through the lines. To ensure a leak-proof system, use food-grade vinyl tubing for your beer lines, ideally with a 3/16-inch inner diameter to provide the necessary flow resistance for a balanced pour.
Secure all connections with stainless steel stepless Oetiker clamps or high-quality screw clamps to maintain a tight seal under pressure.
It is also wise to include a check valve within the coupler or regulator setup to prevent beer from backflowing into your gas lines, which can cause permanent damage to your regulator.
Proper maintenance of these connections, including regular cleaning and inspection of rubber O-rings and gaskets, is the key to a long-lasting and reliable home draft system.
Step-by-Step Guide to Converting a Refrigerator into a Kegerator
Drilling the Door or Sidewall Safely
Before you begin drilling into your full size refrigerator, you must identify the location of cooling lines and electrical wiring to avoid permanent damage. For most conversions, drilling through the front door is the safest option because manufacturers rarely run coolant lines through the door assembly.
If you prefer a side-mount tap, apply a paste of baking soda and water to the exterior; the heat from internal coils will dry the paste faster, revealing their location.
Once a safe spot is confirmed, use a one-inch hole saw bit to cut through the outer metal skin and inner plastic liner. It is helpful to start with a small pilot hole to ensure precision and prevent the drill bit from wandering.
Always wear safety goggles and clear out any loose fiberglass insulation from the hole to ensure a clean fit for the hardware. Taking these precautions ensures your refrigerator remains functional as a cooling unit while accommodating your new draft beer dispensing system.
Installing the Shank and Beer Lines
With the hole prepared, insert the faucet shank through the opening from the outside of the refrigerator. Secure it firmly on the interior using the provided large hex nut and a plastic spacer to ensure a tight, leak-proof seal against the curved or flat surface.
Once the shank is immobile, attach the beer line using a stainless steel tailpiece and wing nut. It is critical to use at least five to six feet of 3/16-inch ID beer line to provide the necessary resistance for a perfect pour without excessive foam.
Secure all connections with stainless steel O-clips or worm gear clamps to prevent leaks under pressure. On the other end of the line, attach the liquid-out coupler that will connect directly to your keg. Ensure the rubber washers are seated properly within the fittings to maintain an airtight environment.
This setup allows the beer to travel from the keg to the faucet while maintaining consistent temperature and carbonation levels throughout the line.
Mounting the CO2 Tank and Manifold
The final stage involves setting up the gas system to push beer to the faucet. You can choose to keep the CO2 tank inside the refrigerator for a streamlined look or mount it outside to save space for more kegs.
If mounting outside, drill a small hole for the gas line and use a rubber grommet to seal the gap. Connect the high-pressure regulator to the tank and run the gas line to a multi-port manifold if you plan on serving more than one type of beer.
This manifold allows you to shut off gas to individual kegs without affecting the entire system. Use reinforced gas tubing and secure every junction with heavy-duty clamps to avoid dangerous CO2 leaks.
Set your regulator to approximately 10-12 PSI for a standard pour, though this may vary based on the beer style and temperature. Double-check all connections with a spray bottle of soapy water; any bubbles will indicate a leak that needs immediate tightening before use.
Temperature Control and Cooling Optimization
Using External Temperature Controllers
When converting a full size refrigerator into a kegerator, the built-in thermostat often lacks the precision needed for draft beer. To achieve professional results, you should bypass the internal dial by plugging the fridge into an external digital temperature controller.
This device uses a waterproof probe to monitor the actual liquid temperature rather than just the ambient air. For the most accurate reading, submerge the probe in a jar of water or tape it to the side of a keg with insulation covering it.
This prevents the compressor from cycling too frequently, which extends the life of your appliance while maintaining a consistent 38-degree environment. Keeping your beer at a stable temperature is the first step in preventing spoilage and ensuring that every pour is crisp.
By using an external unit, you gain the ability to adjust settings to within a single degree, providing the thermal stability required for sensitive craft ales and lagers that require specific serving ranges.
Proper Airflow for Foam Reduction
Temperature stratification is a common issue in full size refrigerator conversions, where the air at the bottom stays cold while the top remains warm. This heat rise affects the beer line and the shank, leading to the dreaded first-pour foam.
To solve this, you must install a small internal circulation fan to move air from the bottom of the unit toward the top. Ensuring that the beer lines and the back of the faucet stay as cold as the keg itself is vital for keeping CO2 in solution.
If your setup includes a draft tower mounted on top of the fridge, you should use a copper pipe or insulated hose to blow cold air directly into the tower assembly. Maintaining a uniform internal climate prevents the beer from warming up as it travels to the faucet.
By eliminating these warm spots through active air circulation, you significantly reduce waste and ensure that every glass features a perfect, creamy head without excessive foam.
Setting the Ideal PSI for Full Size Kegs
Achieving the perfect pour in a full size kegerator requires a delicate balance between temperature and CO2 pressure. For a standard half-barrel keg stored at 38 degrees Fahrenheit, you should typically set your regulator to 10 to 12 PSI.
This pressure level maintains the carbonation level intended by the brewer while providing enough push to overcome the resistance of your beer lines.
It is essential to use at least five to six feet of 3/16-inch ID tubing to create the necessary line resistance; shorter lines often lead to a fast, foamy pour even if the pressure is correct.
Always check for leaks at the coupler and regulator connections using soapy water to ensure your CO2 tank pressure remains steady. If you notice the beer is coming out too slowly or appears flat, incrementally increase the pressure by one PSI and wait an hour for the system to stabilize.
Proper pressure management ensures a balanced system that delivers brewery-quality beer every time you pull the tap handle.
Maintenance Tips for Clean Beer and Longevity
Cleaning Beer Lines Every Two Weeks
To maintain the pristine flavor profile of your draft beer and prevent the accumulation of yeast and bacteria, you must perform a thorough flush of your beer lines every fourteen days or whenever you switch out a keg.
In a full size refrigerator kegerator, the longer line runs can often trap residual sugars that lead to off-flavors or cloudy pours if left unaddressed. Use a specialized alkaline-based cleaning solution mixed with warm water to effectively dissolve organic buildup and beer stone within the vinyl tubing.
For the best results, utilize a pressurized cleaning bottle to force the solution through the shank and faucet, ensuring every internal surface is sanitized. Don’t forget to disassemble the faucet and soak the individual components in the cleaning solution to remove sticky residue from the vent holes.
Regular maintenance not only guarantees a crisp and clean taste but also extends the operational life of your dispensing hardware by preventing corrosive buildup that can permanently damage metal fittings and seals over time.
Inspecting Gaskets and Door Seals
The efficiency of a full size refrigerator kegerator relies heavily on its ability to maintain a consistent internal temperature, which is why inspecting the door gaskets is a critical maintenance task.
Over time, the rubber seals can become brittle, cracked, or coated in sticky spills, leading to significant cold air leaks that force the compressor to work harder than necessary.
To ensure a tight seal, wipe down the entire perimeter of the gasket with warm, soapy water at least once a month to remove any debris that might prevent a flush closure.
You can perform a simple dollar bill test by closing the door on a bill; if it slides out easily, your seal is compromised and needs replacement. Maintaining a proper seal prevents the temperature fluctuations that cause foamy pours and excessive energy consumption.
Furthermore, applying a thin layer of food-grade silicone lubricant to the hinge side of the gasket can prevent the rubber from folding or tearing, ensuring your refrigerator remains airtight and your beer stays perfectly chilled for the long term.
Preventing Mold and Moisture Buildup
Because a full size refrigerator kegerator operates in a chilled environment, condensation is an inevitable byproduct that can lead to mold growth if not managed proactively. The dark, damp corners of a converted fridge are prime real estate for mildew, which can eventually affect the hygiene of your pouring station.
To combat this, place a rechargeable dehumidifier unit or a container of moisture-absorbing crystals inside the cabinet to pull excess humidity from the air. It is also vital to regularly check the drip tray and the area surrounding the CO2 tank for any standing water.
Always wipe down the interior walls with a mild vinegar solution during keg swaps to kill any emerging spores and keep the environment smelling fresh. Proper air circulation is equally important; avoid overstuffing the fridge so that the internal fan can distribute cold air evenly.
By keeping the interior dry and well-ventilated, you protect the mechanical components from rust and ensure that your home bar setup remains a sanitary space for serving high-quality craft beverages to your guests.
Common Problems and Easy Fixes
How to Fix Excessive Beer Foam
Excessive foam is the most frequent issue encountered with full-size refrigerator kegerator conversions, often caused by incorrect pressure settings or temperature fluctuations. To resolve this, first ensure your CO2 regulator is set between 10 and 12 PSI for standard ales and lagers.
If the pressure is correct but foam persists, check the temperature of the liquid; beer should ideally be kept at a consistent 38 degrees Fahrenheit. Warm beer in the draft lines is a common culprit, so consider installing a tower cooler fan to circulate cold air up to the faucet.
Additionally, inspect your beer lines for kinks or obstructions that create turbulence. Using at least five to six feet of 3/16-inch ID tubing provides the necessary resistance to slow the pour and maintain a smooth flow.
Always ensure the glass is tilted at a 45-degree angle when pouring to minimize the impact and prevent a head that is too large for the glass.
Finding and Sealing Gas Leaks
A sudden drop in your CO2 tank level usually indicates a gas leak, which can be frustrating and expensive if left unaddressed. To identify the source, create a solution of soapy water and spray it onto all connection points, including the regulator, coupler, and gas line fittings.
Look for growing bubbles, which signal escaping gas that needs to be sealed. Tighten all worm gear clamps and ensure that the rubber washers inside the hex nuts are not cracked or missing.
It is essential to use a plastic or fiber washer between the regulator and the CO2 tank to create an airtight seal. If the leak persists at the coupler, check the O-rings for signs of wear and apply a thin layer of food-grade keg lubricant to improve the seal.
Regularly checking these components ensures your system remains pressurized, preventing flat beer and saving you from frequent, unnecessary trips to the local gas supplier for refills.
Correcting Uneven Cooling Issues
Full-size refrigerators are designed to cool large compartments, but when converted into a kegerator, they often suffer from stratified air layers where the bottom is freezing while the top remains too warm. This uneven cooling can lead to inconsistent pours and potential freezing of the keg.
To fix this, install a small internal circulation fan to move air throughout the cabinet, ensuring a uniform temperature from top to bottom. If you notice the compressor cycling too frequently or not enough, consider bypassng the internal thermostat with an external digital temperature controller.
This device allows for more precise monitoring by placing a probe inside a bottle of water to simulate the actual liquid temperature of the beer. Additionally, check the door gaskets for any gaps caused by the conversion process, as air leaks can lead to moisture buildup and frost.
Keeping the condenser coils clean will also improve the overall efficiency and lifespan of your dedicated full-size refrigeration unit.
Frequently Asked Questions
Can I convert a standard full-size refrigerator into a kegerator?
Yes, a full-size refrigerator can be converted into a kegerator using a conversion kit which includes a CO2 tank, regulator, and tap handles. This process involves drilling a hole through the door or side wall to mount the faucet and shank while ensuring you avoid coolant lines.
How many kegs can fit inside a full-size refrigerator kegerator?
A standard 18 to 21 cubic foot full-size refrigerator can typically hold up to four 5-gallon ‘corny’ kegs or two standard 15.5-gallon half-barrel kegs. The specific capacity depends on whether you remove the interior shelving and the configuration of the crisper drawers.
What are the benefits of using a full-size refrigerator over a mini-kegerator?
Full-size refrigerators offer significantly more storage space, allowing you to chill multiple kegs simultaneously or store bottled beer and glassware alongside your draft system. They are also often more energy-efficient and easier to repair than specialized small-scale appliances.
Do I need to remove the freezer compartment for a kegerator setup?
You do not need to remove the freezer compartment if you are using a top-freezer or side-by-side model, as the cooling systems are separate. In fact, keeping the freezer functional allows you to store ice or frozen mugs without affecting the temperature of the beer kegs below.
How do I ensure the beer lines stay cold in a full-size conversion?
To prevent ‘first pour foam,’ ensure your beer lines are kept away from the warm spots of the fridge and consider using a small internal fan to circulate cold air. If you are mounting a tower on top of the fridge, you must use an insulated tower blower to keep the lines chilled all the way to the faucet.
What tools are required to build a full-size refrigerator kegerator?
The essential tools include a power drill, a hole saw or spade bit (usually 7/8 inch for the shank), a screwdriver, and a wrench for the CO2 regulator. You will also need a conversion kit containing the food-grade tubing, couplers, and the CO2 cylinder.
Conclusion
Investing in a full size refrigerator kegerator is the ultimate upgrade for any home bar or entertainment space. By converting a standard fridge or purchasing a dedicated unit, you gain the capacity to serve multiple beer styles at perfect temperatures. This setup offers unmatched convenience, cost savings over bottles, and a professional aesthetic. Whether you are a homebrewer or a craft beer enthusiast, take the leap today and enjoy brewery-quality pours from your own kitchen.