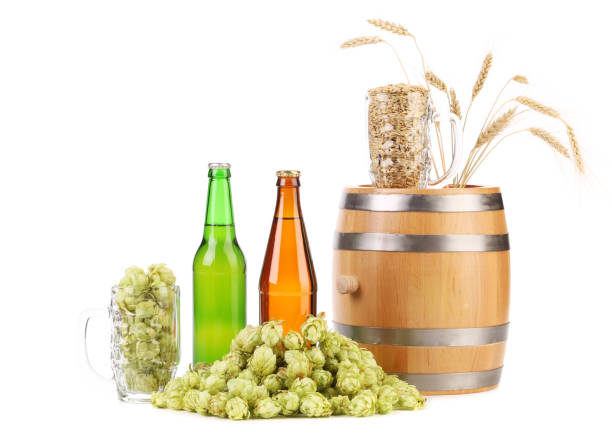
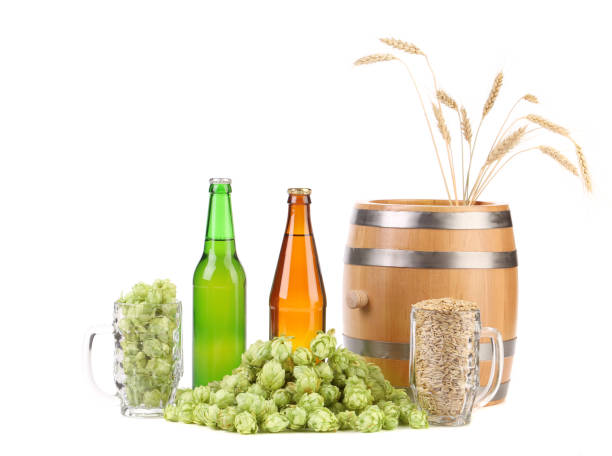
Beer And Wine Making Kits
Thinking about making your own beer or wine at home but not sure where to start? Beer and wine making kits are the perfect solution—everything you need in one box, from ingredients to easy-to-follow instructions. Whether you’re a beginner or looking to refine your craft, these kits take the guesswork out of fermentation. In this guide, we’ll break down the best options, what to expect, and how to choose the right kit to start creating delicious homemade brews in no time.
What Are Beer and Wine Making Kits
What components are included in beer making kits
Beer making kits typically include all essential ingredients and equipment needed to brew beer at home. Most kits contain malt extract or grain, hops, yeast, and priming sugar for carbonation. Basic kits may also include bottles, a bottle capper, and sanitizing solution to ensure cleanliness.
Advanced kits often add fermenters with airlocks, siphons, and hydrometers to monitor alcohol content. Pre-measured ingredients eliminate guesswork, making the process accessible even for beginners. By providing a complete setup, these kits allow users to start brewing immediately with minimal additional purchases, ensuring consistency and reducing the risk of contamination.
Following included instructions leads to reliable, high-quality results.
What components are included in wine making kits
Wine making kits are designed to streamline the winemaking process with pre-measured juice concentrates, yeast, and clarifying agents like bentonite or fining agents. They often include sulfites for preservation and acid blends to balance flavor. Equipment-wise, kits usually provide a glass carboy, airlock, siphon tube, bottles, corks, and a corker.
Some also contain hydrometers to track fermentation progress. All-in-one packaging ensures compatibility between ingredients and tools, reducing errors. These kits eliminate the need to source grapes or juice separately, making them ideal for consistent, high-quality results at home.
Step-by-step instructions guide users through fermentation, racking, and bottling for a professional finish.
How pre-packaged kits simplify home brewing and winemaking
Pre-packaged beer and wine making kits remove the complexity of sourcing individual ingredients and equipment. By offering curated, matched components, they ensure compatibility and optimal results. Beginners benefit from clear, step-by-step instructions that guide them through each stage, from fermentation to bottling.
These kits minimize preparation time and reduce the risk of contamination with included sanitizers and sealed ingredients. Consistent formulations mean users can replicate successful batches with ease. Whether making beer or wine, kits provide a structured, foolproof approach that builds confidence.
This convenience makes home brewing and winemaking accessible, enjoyable, and repeatable for hobbyists of all levels, turning a potentially daunting process into a rewarding experience.
Differences between beginner and advanced kits
Beginner beer and wine making kits focus on simplicity and ease of use, featuring pre-measured ingredients, basic equipment, and straightforward instructions. They often use extract-based brewing or juice concentrates to minimize steps. In contrast, advanced kits offer greater customization, including all-grain brewing options, specialty yeasts, and higher-quality components.
They may require additional equipment like temperature controllers, refractometers, or secondary fermenters. Advanced kits encourage experimentation with flavor profiles, fermentation techniques, and aging processes. While beginner kits prioritize quick results and low investment, advanced versions cater to enthusiasts seeking precision, control, and artisanal outcomes.
Choosing the right level ensures a satisfying progression from novice to expert.
Top Benefits of Using Home Brewing and Winemaking Kits

Cost savings over time compared to store-bought beverages
Home brewing and winemaking kits offer significant long-term cost savings compared to purchasing commercial beer and wine. While the initial investment in a kit may seem high, the cost per batch drops dramatically with each use.
A single batch can produce up to 30 bottles, often costing less than $2 per bottle when factoring in ingredients and supplies. Over time, this adds up, especially for enthusiasts who regularly enjoy craft beverages. Plus, you avoid markups from retailers, distributors, and branding.
By sourcing ingredients in bulk or reusing equipment, savings increase further. With proper care, kits last for years, making them a smart financial choice for budget-conscious consumers who appreciate quality and value in their drinks.
Customization options for flavor and alcohol strength
One of the greatest advantages of beer and wine making kits is the freedom to customize your beverage exactly to your taste. Whether you prefer a bold, hoppy IPA or a smooth, fruity merlot, kits allow you to tweak ingredients, fermentation times, and yeast strains.
You can adjust alcohol content by modifying sugar levels or choosing specific yeasts, tailoring strength to your preference. Add your own hops, fruits, spices, or oak chips to create unique flavor profiles unavailable in stores.
This level of control turns brewing into a creative hobby, perfect for experimenting and refining recipes. Over time, you can develop signature blends that reflect your personal taste—something no commercial product can replicate.
Convenience and time efficiency for beginners
Beer and wine making kits are designed with beginners in mind, offering step-by-step instructions and pre-measured ingredients for foolproof results. Most kits require minimal equipment and can be used in small spaces like a kitchen or closet, making them highly accessible.
The entire process—from mixing to bottling—can take as little as a few hours of active work over a few weeks, with much of the time involving passive fermentation. Clear guidelines and reliable ingredients reduce guesswork and minimize the risk of failure, boosting confidence for new brewers.
Many kits also include sanitizers, fermenters, and bottling tools, so you don’t need to source items separately. This streamlined approach makes it easy to start crafting quality beverages quickly and efficiently, even with no prior experience.
Environmental benefits of home production
Producing beer and wine at home using kits can significantly reduce your environmental footprint. By making beverages in bulk, you cut down on packaging waste from bottles, cans, and labels associated with store-bought options. Many home brewers reuse glass bottles and caps, further minimizing landfill contributions.
Additionally, you eliminate the carbon emissions tied to transportation and refrigeration in commercial supply chains. Sourcing local or sustainable ingredients amplifies these benefits. Home production also encourages mindful consumption—since you brew in set batches, you’re less likely to waste unused product.
Overall, using a home brewing or winemaking kit supports a greener, more sustainable lifestyle while enjoying high-quality, eco-conscious drinks you can feel good about.
How to Choose the Right Beer Making Kit
Identify your preferred beer styles and flavors
Start by determining the beer styles you enjoy drinking, as this will guide your kit selection. Whether you love hoppy IPAs, malty stouts, crisp lagers, or fruity wheat beers, many beer making kits are tailored to specific styles.
Choose a kit that matches your flavor preferences to ensure a satisfying brewing experience and end result. Some kits even allow customization, letting you experiment with hops, yeast, or adjuncts. If you’re new to brewing, consider starting with an easy-to-brew style like pale ale or amber ale to build confidence.
Wine making kits also vary by varietal—think red, white, or fruit wines—so identify your taste preferences early. Matching your kit to your palate ensures you’ll enjoy the process and the final product.
Compare extract vs all-grain brewing kits
Understanding the difference between extract and all-grain brewing kits is crucial for selecting the right one. Extract kits use pre-processed malt syrup or powder, making them ideal for beginners due to their simplicity and shorter brewing time. They require less equipment and offer consistent results.
All-grain kits, on the other hand, involve mashing raw grains to extract fermentable sugars, offering greater control over flavor and complexity—perfect for advanced brewers. While all-grain brewing is more time-consuming and requires additional tools like a mash tun, it allows for full recipe customization.
For wine making kits, most are concentrate-based, similar to extract brewing. Decide based on your experience level, time availability, and desire for creative control when choosing between the two approaches.
Check kit size and batch yield for your needs
Ensure the batch size of the beer or wine making kit matches your consumption and storage capacity. Most beginner kits produce 5-gallon (19-liter) batches, which yield about 50 standard bottles—ideal for sharing or regular enjoyment. If you live alone or have limited storage, consider smaller 1- or 2.5-gallon kits.
Larger batches are cost-effective per unit but require more space and ingredients. Also, verify that your fermentation vessel and bottling equipment can accommodate the batch size. Wine kits typically range from 1 to 6 gallons, with 5-6 gallon kits standard.
Matching kit output to your lifestyle prevents waste and ensures freshness. Always check the kit specifications for yield and equipment requirements before purchasing.
Read reviews and brand reputation
Before purchasing a beer or wine making kit, research customer reviews and brand reliability to ensure quality and satisfaction. Look for feedback on ease of use, consistency, flavor outcomes, and included components. Trusted brands like Northern Brewer, Midwest Supplies, and Mr.
Beer have established reputations for dependable kits and customer support. For wine kits, brands such as Winexpert and Brew King are widely praised for their reliable results and variety. Pay attention to recurring issues mentioned in reviews, such as missing parts or poor instructions.
Verified buyer reviews on retail sites or homebrew forums offer real-world insights. Choosing a well-reviewed kit from a reputable brand minimizes frustration and increases your chances of brewing success, especially as a beginner.
How to Choose the Right Wine Making Kit
Select grape varieties and wine types you enjoy
Start by choosing grape varieties and wine styles that match your personal taste, as this will make the process more enjoyable and the end result more satisfying.
Whether you prefer bold reds like Cabernet Sauvignon, crisp whites like Chardonnay, or fruity rosés, most wine making kits offer a range of options. Consider trying kits that mimic your favorite store-bought wines to achieve familiar flavors. Some kits even allow blending different varietals for a custom profile.
If you’re new to wine making, begin with a popular, easy-to-make variety to build confidence. Remember, your enjoyment of the final product hinges on starting with a style you love, so take time to research and select accordingly.
Understand juice concentrate vs fresh juice options
Wine making kits typically use either juice concentrate or fresh juice, and understanding the difference helps you choose the right one. Juice concentrate is more stable, easier to store, and often more affordable, making it ideal for beginners. It’s reconstituted with water before fermentation and still produces high-quality wine.
Fresh juice, on the other hand, offers a more authentic winemaking experience with richer, more nuanced flavors, but it requires faster processing and proper refrigeration. While fresh juice kits may demand more attention, they appeal to enthusiasts seeking a craft-level result.
Consider your storage space, timeline, and skill level when deciding—both options can yield excellent wine with proper technique.
Evaluate fermentation time and complexity levels
Different wine making kits vary significantly in fermentation duration and technical demands, so assess your schedule and experience level before choosing. Beginner kits often take 4–6 weeks and involve minimal steps, using pre-balanced ingredients and straightforward procedures.
Advanced kits may require 2–3 months or longer, with options for oak aging, malolactic fermentation, or custom adjustments. Matching the kit’s complexity to your available time and skill ensures a successful, stress-free experience. If you’re balancing other hobbies like beer making, opt for a parallel timeline or staggered projects.
Look for labels indicating ‘quick release’ or ‘extended aging’ to align with your goals. Simpler kits build confidence, while complex ones offer depth for growing enthusiasts.
Look for kits with clear instructions and support
One of the most important factors in choosing a wine making kit is the quality and clarity of the included instructions and customer support. A well-designed kit provides step-by-step guidance, troubleshooting tips, and recommended timelines in an easy-to-follow format.
This is especially crucial for beginners transitioning from beer making, where processes differ slightly. Opt for brands known for responsive support teams, online resources, or active user communities. Some companies even offer video tutorials or helplines. Clear labeling, precise measurements, and included checklists reduce errors and boost confidence.
Investing in a kit with strong educational support increases your chances of success and encourages continued exploration in home winemaking.
Step-by-Step Guide to Using a Beer Making Kit
Sanitize equipment and prepare your workspace
Before starting, thoroughly sanitize all equipment that will come into contact with your beer, including fermenters, spoons, airlocks, and bottles. Use a no-rinse sanitizer to eliminate bacteria and wild yeast that could spoil your batch. Wash hands and clean your workspace to prevent contamination.
Organize your sanitized tools within easy reach and ensure your brewing area is free from drafts, pets, and dust. Most beer and wine making kits include detailed instructions—review them first.
Proper sanitation is the most critical step in successful home brewing, as even small contaminants can ruin flavor or halt fermentation. Taking time to sanitize correctly sets the foundation for a clean, consistent brew every time.
Mix wort and add hops according to instructions
Begin by heating water to the recommended temperature and pouring it into your sanitized brew kettle. Carefully add the malt extract (wort) from your beer making kit, stirring continuously to prevent scorching. Once fully dissolved, bring the mixture to a boil.
At this stage, add hops as directed—typically at the beginning, middle, and end of the boil to achieve bitterness, flavor, and aroma. Follow your kit’s timeline precisely. After boiling, cool the wort quickly using an ice bath or wort chiller to prevent contamination and prepare it for fermentation.
Rapid cooling helps preserve hop characteristics and ensures a healthy start for your yeast.
Ferment beer and monitor temperature
Transfer the cooled wort to your sanitized fermenter and top up with cold water to reach the desired volume. Check the temperature—most ale yeasts perform best between 64–72°F (18–22°C). Sprinkle or pitch the included yeast evenly and seal the fermenter with an airlock filled with sanitizer or water.
Store the fermenter in a dark, temperature-stable location away from sunlight and fluctuations. Fermentation typically begins within 12–24 hours, indicated by bubbles in the airlock. Avoid opening the fermenter during this phase to prevent contamination.
Fermentation lasts about 1–2 weeks; use a hydrometer to confirm completion when readings stabilize over two days.
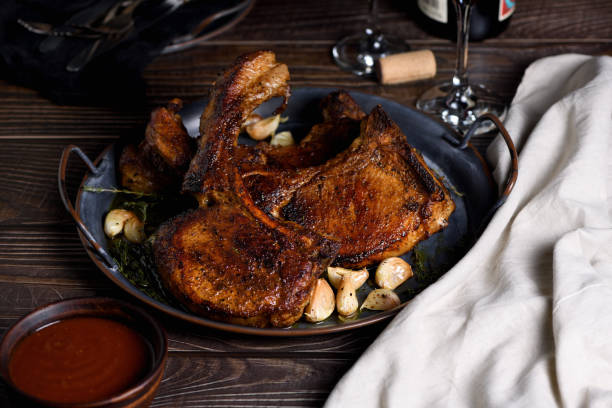
Bottle, carbonate, and store your finished beer
Once fermentation is complete, prepare a priming solution by boiling the included sugar (usually corn sugar) in water, then mixing it into your beer to ensure even carbonation. Use a sanitized siphon to transfer the beer into clean bottles, leaving sediment behind. Cap the bottles securely with sanitized caps.
Store bottles at room temperature (68–75°F) for 1–2 weeks to allow natural carbonation. Avoid refrigeration during this phase. After carbonation, chill a test bottle and sample it—if properly carbonated and flavorful, refrigerate the rest. Most homebrews improve with 1–2 weeks of cold conditioning.
Enjoy your craft beer at its peak freshness.
Step-by-Step Guide to Using a Wine Making Kit
Prepare the must and adjust acidity and sugar levels
Begin by combining the juice or concentrate from your wine making kit with water in a sanitized fermenter to create the must. Stir thoroughly to ensure even mixing.
Use a hydrometer to measure the specific gravity, which indicates sugar content, and adjust with sugar or water if needed to reach the target range specified in the kit instructions.
Test the acidity using a titration kit and adjust with acid blend or water as necessary to achieve the ideal pH level, typically between 3.2 and 3.6. Proper balance ensures a stable, flavorful wine. Sanitation is critical—clean all equipment thoroughly to prevent contamination.
Once balanced, cover the fermenter and prepare for yeast addition.
Add yeast and start fermentation
Rehydrate the included wine yeast according to package directions, usually involving sprinkling it into warm, sterile water and waiting 15 minutes. Once activated, gently stir the yeast into the must to ensure even distribution.
Seal the fermenter with an airlock filled with sanitizer or water to allow carbon dioxide to escape while preventing airborne contaminants from entering. Keep the fermenter in a dark place with a stable temperature between 68–75°F (20–24°C). Fermentation typically begins within 12–24 hours, indicated by bubbling in the airlock.
Avoid opening the fermenter unnecessarily to reduce oxidation and contamination risks. Active fermentation lasts 5–7 days, after which primary fermentation slows.
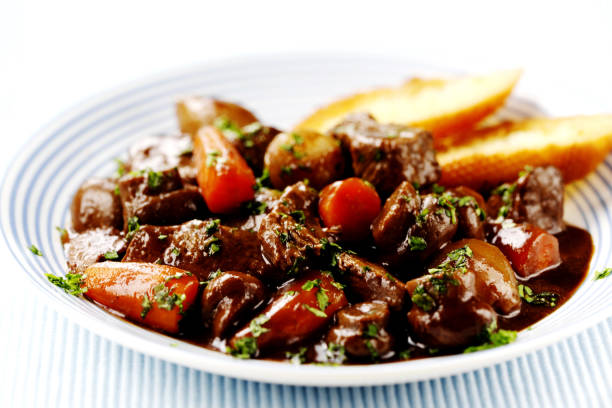
Rack wine to remove sediment
After primary fermentation slows, transfer the wine to a clean, sanitized glass carboy using a siphon and tubing—a process known as racking. This separates the clear wine from the sediment (lees) of dead yeast and debris at the bottom. Attach a sanitized racking cane to prevent disturbing the sediment.
Leave behind the last inch of liquid to avoid transferring solids. Fit the carboy with a bung and airlock. This step improves clarity and prevents off-flavors from prolonged lees contact. Depending on your wine making kit, you may need to rack a second or third time over several weeks.
Always maintain strict sanitation to protect wine quality and stability during transfers.
Bottle and age wine for best results
Once fermentation is complete and the wine is clear, it’s time to bottle your wine. Sanitize bottles, corks, and bottling equipment. Use a siphon and bottling wand to fill each bottle, leaving about an inch of headspace. Cork each bottle securely using a hand or floor corker.
Store bottles upright for 24 hours, then lay them on their sides in a cool, dark place with consistent temperature (ideally 55°F or 13°C). Aging allows flavors to mellow and integrate—most kit wines benefit from 4–8 weeks of aging, though some improve over several months.
Properly stored, homemade wine can last years. Label bottles with the type and date for best tracking.
Tips for Success with Beer and Wine Making Kits
Maintain strict sanitation to avoid contamination
One of the most critical steps in successful beer and wine making is maintaining strict sanitation throughout the entire process. Bacteria and wild yeast can easily spoil your batch, leading to off-flavors or complete failure.
Always sanitize all equipment that comes into contact with your brew, including fermenters, airlocks, siphons, and bottles. Use a no-rinse sanitizer for convenience and effectiveness, and never assume equipment is clean just because it looks it. Replace old or cracked tubing and inspect your gear regularly.
Even brief exposure to unsanitized surfaces can introduce contaminants. Make sanitation a habit from the moment you begin until packaging—consistency prevents spoilage and ensures your beer or wine turns out as intended every time.
Control fermentation temperature for consistent results
Fermentation temperature plays a crucial role in the flavor, clarity, and overall quality of your beer or wine. Yeast strains have specific temperature ranges, and deviating from these can produce unwanted esters, fusel alcohols, or sluggish fermentation.
Use a fermentation chamber, swamp cooler, or temperature-controlled fridge to maintain a stable environment. For most ale yeasts, aim for 64–72°F (18–22°C); wine and lager fermentations often require cooler or more precise control. Avoid rapid temperature swings, as they stress yeast and can lead to incomplete fermentation.
Monitoring with a digital thermometer or fermentation tracker helps you stay within ideal ranges. Consistent temperature control leads to cleaner, more predictable results batch after batch.
Keep detailed notes for future batches
Recording detailed brewing notes is one of the best ways to improve your beer and wine making over time. Track every variable: ingredients used, quantities, water source, fermentation temperature, start and final gravity, and any deviations from the kit instructions. Include tasting notes and observations after fermentation and bottling.
This log becomes a valuable reference for identifying patterns, successes, and mistakes. Over time, you’ll notice how small changes affect flavor and clarity, allowing you to refine your process. Use a notebook or digital app to organize your batches.
Reproducibility and improvement depend on accurate records—your future self will appreciate the insight when scaling up or tweaking recipes for better results.
Troubleshoot common issues like off-flavors or stuck fermentation
Even with kits, issues like off-flavors or stuck fermentation can occur, but most are fixable with prompt action. Off-flavors such as sourness, butteriness, or medicinal notes often stem from poor sanitation, incorrect fermentation temps, or yeast stress.
A stuck fermentation—where activity halts prematurely—may result from low temperature, old yeast, or nutrient deficiency. First, check the temperature and gently warm the fermenter if needed. For stuck batches, try rousing the yeast by gently swirling the carboy or pitching fresh yeast with energizer.
Use a hydrometer to confirm fermentation progress. Prevent future problems by following kit instructions closely, maintaining ideal conditions, and addressing issues early—most common problems have straightforward solutions when caught in time.
Frequently Asked Questions
What are beer and wine making kits?
Beer and wine making kits are packaged sets that include all the essential ingredients and equipment needed to brew beer or make wine at home. They typically contain yeast, hops, malt extract for beer, or grape concentrate for wine, along with instructions and sanitation materials.
How do I choose the right beer or wine making kit?
Choose a kit based on your experience level, desired flavor profile, and available brewing space. Beginners should look for kits labeled ‘easy’ or ‘starter’ with clear instructions and minimal required equipment.
What equipment is needed besides the kit?
Most kits require additional basic equipment like a fermenter, airlock, siphon, bottles, and a bottle capper. Some advanced kits may also need a hydrometer, thermometer, and cleaning solutions.
How long does it take to make beer or wine with a kit?
Beer kits typically take 2–6 weeks from brewing to bottling and carbonation. Wine kits usually take 4–8 weeks, depending on the type and desired aging period.
Are beer and wine making kits cost-effective?
Yes, making beer or wine with kits is generally more affordable than buying equivalent commercial products, especially over time. Homebrewing can save money while allowing customization of flavors and alcohol content.
Can I make high-quality beer or wine with a kit?
Absolutely. Many beer and wine making kits produce high-quality results comparable to store-bought brands. Success depends on following instructions carefully and maintaining proper sanitation.
Is home brewing with kits legal?
Yes, home brewing for personal consumption is legal in many countries, including the U.S., where federal law allows up to 100 gallons per adult annually. Always check local regulations to ensure compliance.
Conclusion
Home beer and wine making kits offer an accessible, rewarding way to craft delicious beverages from the comfort of your kitchen. With user-friendly instructions, consistent results, and a variety of flavors to explore, these kits cater to beginners and seasoned enthusiasts alike. They provide a fun, educational hobby that fosters creativity and pride in every bottle. Embrace the art of fermentation—start your brewing journey today and savor the satisfaction of sipping your own handmade creations.