Electrolux Microwave How To Use
Got an Electrolux microwave and unsure where to start? No worries—we’ve got you covered! Whether you’re reheating leftovers or cooking a quick meal, using your Electrolux microwave is simpler than you think. You’ll master it in minutes! Let’s dive in and get your Electrolux microwave working like a pro.
How Do You Use an Electrolux Microwave for the First Time?
Unboxing and Initial Setup Steps
Start by carefully removing your Electrolux microwave from the packaging, ensuring you don’t damage the power cord or door during the process. Place the appliance on a flat, dry surface with enough clearance around it for proper ventilation—usually at least 4 inches on all sides.
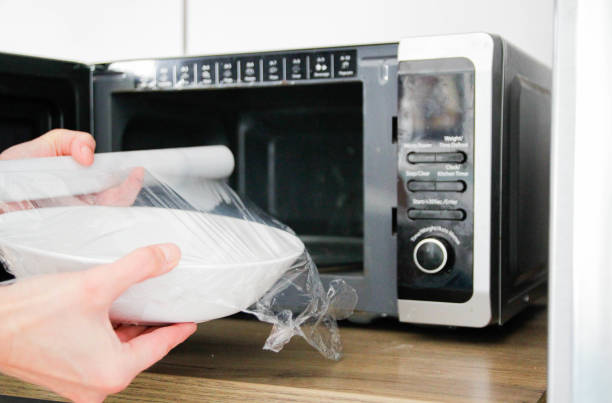
Peel off any protective plastic films from the door, control panel, and interior to prevent melting during future use. Next, plug the microwave into a dedicated grounded outlet to avoid electrical issues.
Initial setup isn’t complete until you’ve read the manual for any specific warnings, such as not running it empty. This simple step ensures your safety and the appliance’s longevity. Once positioned, you’re ready to familiarize yourself with the controls and test its functionality.
Understanding the Control Panel Layout
Take a moment to explore the control panel, which typically includes a digital display, numeric keypad, and function buttons like ‘Power Level,’ ‘Time Cook,’ and ‘Stop/Cancel.’ The display shows the clock and cooking time, while the numeric keypad lets you input duration.
Power level adjustment is key—most Electrolux models default to 100% power, but you can lower it for defrosting or gentle reheating. Look for dedicated buttons for common tasks like popcorn, pizza, or beverages, which simplify operation. Don’t forget the ‘Start/+30 Sec’ button, a handy shortcut to add 30 seconds instantly.
If your model has a dial, turn it to select settings or adjust time. Understanding these controls upfront makes cooking intuitive and stress-free.
Running the First Test Cycle
Before cooking real food, run a quick test to ensure everything works smoothly. Fill a microwave-safe bowl with water—about 1 cup—and place it inside the oven.
Set the timer for 1-2 minutes on high power and press ‘Start.’ Watch and listen for the turntable to rotate and the fan to hum, both signs of normal operation. Once done, carefully check the water’s temperature to confirm heating efficiency.
Test cycle completion means your microwave is ready for daily use. If anything seems off, like sparks or unusual noises, unplug it immediately and consult the manual or support. This simple test gives you confidence in your appliance and helps you avoid mishaps later.
Setting the Clock and Power Levels
Step-by-Step Clock Setting Instructions
Setting the clock on your Electrolux microwave is the first step to mastering your kitchen. Start by pressing the Clock button usually found on the control panel. You will see the display begin to flash, indicating it is ready for input.
Use the number pad to enter the current time, ensuring you select AM or PM if your model requires it. Once the numbers are entered, press the Clock button again or the Start button to confirm the setting. The display should stop flashing and show the correct time.
If the clock resets after a power outage, simply repeat this quick process. Keeping the time accurate ensures your timed cooking functions work perfectly every time.
Adjusting Power Levels for Different Foods
Cooking at full power isn’t always the best option for every dish. To adjust the power level, press the Power Level button after entering your cooking time. The default is usually 100%, but you can cycle down to 50% for reheating or 30% for defrosting delicate foods.
Lower power levels allow heat to penetrate deeper without overcooking the edges, making them perfect for casseroles or melting butter. For example, use 50% power to reheat pasta evenly without drying it out.
Selecting the right setting ensures your meals come out perfectly cooked rather than hot on the outside and cold in the middle.
Common Display Errors and Fixes
If your display shows an error code like ‘F1’ or ‘F3’, don’t panic. These codes usually indicate a sensor issue or a door latch problem. First, try opening and closing the door firmly to ensure it is properly secured, as a loose latch can trigger errors.
If the code persists, unplug the microwave for one minute to reset the internal computer. This simple soft reset clears many minor electronic glitches. After plugging it back in, check if the display returns to normal.
If the error reappears, consult your user manual for specific code meanings or contact Electrolux support to prevent further damage.
How to Cook or Reheat Food Using Manual Settings
Setting Cook Times accurately
When using manual settings on your Electrolux microwave, setting the cook time accurately ensures your food is perfectly done without overcooking. Start by pressing the Time Cook button, then use the number pad to enter the desired duration. For example, input ‘2:30’ for two minutes and thirty seconds.
If you’re unsure about the time, start with less and add more if needed. Always check the food’s progress to avoid drying it out. Remember, microwaves vary in power, so keeping an eye on your meal is key. For precise results, use the +30 Sec button for quick adjustments.
This handy feature adds extra time in small increments, making it easier to avoid undercooking or burning your food. Whether reheating soup or cooking a quick snack, mastering time settings will make your microwave experience smoother and more efficient.
Using the Stop/Start and Pause Functions
The Stop/Start button on your Electrolux microwave is more than just an on-off switch—it’s a versatile tool for controlling your cooking. Press it once to start the microwave, and press it again to pause if you need to check or stir your food.
This pause function is especially useful for ensuring even heating or adding ingredients mid-cycle. If you want to stop completely, press the button three times or open the door. The microwave will remember your settings until you cancel them.
For safety, always use the Stop/Clear button to reset the microwave after use. This prevents accidental starts when you’re not ready. Understanding these functions helps you cook with confidence, knowing you can pause or stop anytime.
Whether you’re adjusting cook times or ensuring safety, mastering the Stop/Start and Pause features makes your microwave more user-friendly and efficient.
Tips for Evenly Heating Leftovers
Reheating leftovers evenly can be tricky, but a few simple tips will make your Electrolux microwave work like a pro. Start by spreading food in a single layer on a microwave-safe dish. This allows microwaves to penetrate uniformly, avoiding cold spots.
For thicker items, like casseroles, stir halfway through heating to redistribute warmth. Covering your food with a microwave-safe lid or damp paper towel helps trap moisture, preventing dryness. If your microwave has a Turntable, ensure it’s spinning freely to rotate the food for consistent results.
For larger portions, consider heating in shorter bursts and stirring between intervals. This technique ensures every bite is heated evenly without overcooking the edges. By following these practical tips, you’ll enjoy perfectly reheated leftovers that taste fresh and delicious.
Say goodbye to uneven meals and hello to effortless reheating with your Electrolux microwave!
Using Electrolux Preset Programs and Sensor Cooking
Activating Auto Cook Menus (Popcorn, Potato, etc.)
To quickly prepare common snacks, your Electrolux microwave features convenient Auto Cook menus designed for specific foods like popcorn, potatoes, and beverages. Simply press the Auto Cook button repeatedly until the display shows the desired food item number or name.
Once selected, the microwave automatically sets the optimal power level and cooking time for that specific dish. For items like popcorn, you might also need to select the package size weight if prompted.
Always place the food in the center of the turntable and start the process by pressing the Start/Confirm button. This function removes the guesswork from heating, ensuring your favorite snacks are prepared perfectly every single time.
Check your specific model’s manual for the exact list of available menu options and corresponding numerical codes to get the best results.
How Sensor Reheat and Sensor Cook Work
Electrolux microwaves with Sensor technology use advanced humidity sensors to detect moisture released from food, automatically adjusting cooking time for perfect results. Unlike traditional timed heating, Sensor Reheat and Sensor Cook prevent overcooking by stopping the cycle once the food is hot.
To use this feature, simply place your food in the microwave without covering it tightly, as the sensor needs to detect the escaping steam. Press the Sensor Cook or Reheat button and select the food category if required.
The microwave will beep when the sensor detects the correct moisture level, signaling that heating is complete. This smart technology takes the mental math out of meal prep, delivering consistently heated leftovers and cooked dishes without needing you to constantly check on progress.
Using the Defrost Function by Weight or Time
Thawing frozen food is easy using the dedicated Defrost feature, which allows you to choose between weight or time settings based on your preference.
For precise defrosting, press the Defrost button and enter the exact weight of the meat or poultry using the number pad; the microwave calculates the necessary time and power level automatically.
If you prefer manual control, press the Defrost button repeatedly until the time mode appears, then set your desired duration using the keypad. Regardless of the method selected, the microwave will pause periodically and prompt you to turn or separate the food to ensure even thawing.
Always remove food from metal ties or packaging before placing it in the microwave, and let it stand for a few minutes after the cycle ends for best results.
Advanced Features: Grill, Convection, and Combination Modes
How to Use the Grill Function
To get that crispy, golden finish on your dishes, the Grill function is your go-to. Start by placing your food on the metal grill rack provided with your Electrolux microwave, ensuring it’s centered for even cooking.
Select the Grill mode on the control panel and set the cooking time based on your recipe. For best results, preheat the grill for a few minutes before placing your food inside. Keep an eye on your dish, as the grill works quickly to brown the top layer.
Use the turntable to rotate your food halfway through if needed. Perfect for melting cheese on nachos or grilling chicken, this mode adds that satisfying crunch without needing a full-sized oven. Just remember to use oven-safe cookware and avoid plastic containers, as they can melt under the grill’s direct heat.
Baking with the Convection Mode
When you want to bake cakes, cookies, or even roast a chicken, the Convection mode is a game-changer. This mode uses a fan to circulate hot air evenly, ensuring your dishes cook uniformly.
First, press the Convection button and set the desired temperature, typically between 180°C to 220°C, depending on your recipe. Preheat the oven to the required temperature before placing your batter or dough inside. Use metal or glass bakeware for the best results, as they withstand high heat.
Unlike regular microwaving, convection baking takes a bit longer, so allow extra time for your dish to cook through. The even heat distribution means no more burnt edges or undercooked centers.
It’s perfect for creating bakery-style treats right in your kitchen, making your Electrolux microwave versatile for both quick meals and gourmet baking.
Combination Microwave and Grill Cooking
For the best of both worlds, try the Combination mode, which blends microwave speed with grilling crispiness. This mode is ideal for dishes that need to cook through quickly while browning on top, like casseroles or pizza.
Select the Combination setting and choose the microwave power level alongside the grill function. For example, use 30% microwave power with the grill to cook a lasagna thoroughly while melting the cheese on top. Always place your food on the grill rack to allow air circulation.
The dual functionality saves time compared to using the grill alone, as the microwave energy reduces overall cooking time. Remember to check your food periodically, as this mode can cook faster than you expect.
It’s a smart way to achieve juicy interiors with perfectly crispy exteriors, making weeknight dinners a breeze.
Maintenance and Cleaning for Optimal Performance
Daily Cleaning Tips for the Interior
Keeping your Electrolux microwave’s interior clean is essential for both hygiene and performance. After each use, wipe up spills immediately with a damp cloth or paper towel to prevent food from hardening and becoming difficult to remove.
For a deeper clean, fill a microwave-safe bowl with water and a few slices of lemon or a tablespoon of vinegar. Heat it on high for 2–3 minutes to create steam, which loosens grease and grime. Let it sit for 5 minutes before wiping the interior with a soft sponge.
Avoid abrasive scrubbers or harsh chemicals, as they can damage the surface. Regular cleaning not only keeps your microwave looking fresh but also ensures even cooking by preventing food buildup from blocking heat distribution. Make this a habit to maintain optimal performance and extend the lifespan of your appliance.
How to Clean the Exterior and Control Panel
The exterior and control panel of your Electrolux microwave require gentle care to avoid scratches or damage. Start by unplugging the microwave for safety. Use a soft, damp cloth with mild dish soap to wipe down the outside, including the door handle.
For stubborn stains, a paste of baking soda and water can work wonders. When cleaning the control panel, avoid spraying cleaning solutions directly onto it, as liquid can seep into the electronics. Instead, apply the cleaner to your cloth first.
Gently wipe the buttons and display, being careful not to press too hard. Dry the surface with a microfiber cloth to prevent streaks. Regular exterior cleaning not only keeps your microwave looking sleek but also ensures the buttons remain responsive.
This simple maintenance step helps your appliance stay in top condition and ready for daily use.
Deodorizing the Microwave to Remove Smells
If your Electrolux microwave has lingering odors, a quick deodorizing routine can freshen it up. One effective method is to place a bowl of water with a few drops of vanilla extract or lemon juice inside the microwave.
Heat it on high for 1–2 minutes, then let it sit with the door closed for another 5 minutes. The steam helps absorb and neutralize smells. Alternatively, you can leave an open box of baking soda inside the microwave overnight to absorb odors naturally.
For a refreshing twist, heat a cup of water with cinnamon sticks for a pleasant aroma. Avoid using strong chemical deodorizers, as they can leave residues. Regularly deodorizing your microwave ensures it smells clean and ready for your next meal, making your cooking experience more enjoyable.
Troubleshooting Common Electrolux Microwave Issues
Microwave Not Starting or Heating Food
If your Electrolux microwave isn’t starting or heating, first ensure the appliance is securely plugged into a working outlet. Check your home’s circuit breaker or fuse box, as a tripped breaker is a common culprit.
If the display is lit but food remains cold, verify you haven’t accidentally engaged the Child Lock feature, which disables controls. You can usually deactivate this by pressing and holding the Stop or Clear button for three seconds.
Additionally, ensure the door is closing completely; the safety interlock system prevents operation if the latch is misaligned or dirty. Wipe the door edges clean and listen for the distinct click when closing. If the microwave runs but doesn’t heat, the magnetron might need professional service.
Always refer to your specific model’s manual for the exact control panel sequences to reset these settings.
Turntable Not Rotating Properly
A turntable that refuses to spin often leads to unevenly cooked meals, but the fix is usually straightforward. Remove the glass plate and the support roller ring to wash them in warm, soapy water. Food debris or sticky spills often build up underneath, causing friction that stops movement.
While the parts are out, inspect the drive coupler located in the microwave floor’s center to ensure it isn’t cracked or worn out. Once everything is clean and dry, reassemble the turntable, ensuring it sits flat and level on the track.
Listen for the motor engaging; if the shaft spins but the plate doesn’t, the support ring might be warped. Remember, some cooking modes, like convection or grilling, may use a stationary rack instead of the rotating turntable, so verify your selected mode before assuming there is a mechanical failure.
Resolving Error Codes on the Display
Seeing a mysterious letter and number combo on your display can be worrying, but these codes are simply diagnostic tools. Common codes like ‘F1’, ‘F3’, or ‘F5’ usually indicate a sensor failure or an issue with the keypad wiring.
If you see an error, try resetting the unit by unplugging it from the power source for at least sixty seconds. This simple reboot often clears temporary electronic glitches that cause false readings.
If the specific code reappears after plugging it back in, consult your user manual’s troubleshooting section for the exact meaning. Codes involving the door switch usually mean the latch isn’t engaging the safety mechanism correctly. Open and close the door firmly to test the connection.
For persistent errors that affect heating or operation, it is best to contact Electrolux support, as internal components like the main control board may require professional replacement to function safely.
Frequently Asked Questions
How do I start my Electrolux microwave?
Plug in the microwave and open the door. Place your food inside on a microwave-safe dish, close the door, and press the ‘Start’ button to begin heating.
How do I set the cooking time on my Electrolux microwave?
Press the ‘Time Cook’ or similar button, then use the number pad to enter the desired cooking time. Press ‘Start’ to begin cooking.
How do I use the auto-cook functions on my Electrolux microwave?
Press the ‘Auto Cook’ or ‘Sensor Cook’ button, then select the food type or weight using the number pad. Follow the on-screen prompts to start cooking.
How do I defrost food in my Electrolux microwave?
Press the ‘Defrost’ button, then enter the weight of the food using the number pad. Press ‘Start’ to begin defrosting, and check the food periodically to avoid overcooking.
How do I adjust the power level on my Electrolux microwave?
Press the ‘Power Level’ button, then use the number pad to select the desired power level (e.g., 5 for 50% power). Press ‘Start’ to confirm the setting.
How do I turn off the sound on my Electrolux microwave?
Press and hold the ‘Stop/Cancel’ button for 3-5 seconds until the display confirms the sound is off. Repeat the process to turn the sound back on.
How do I clean my Electrolux microwave?
Wipe the interior with a damp cloth or sponge after each use. For stubborn stains, place a bowl of water with lemon slices inside and heat on high for 3 minutes to loosen grime.
What should I do if my Electrolux microwave won’t start?
Ensure the door is fully closed and the microwave is plugged in. Check if the child lock is activated by looking for a lock icon on the display and disable it if needed.
Conclusion
From setting the clock to using auto-cook programs, you can now efficiently heat, defrost, and cook meals. Remember to adjust power levels and follow safety guidelines for best results. With practice, your Electrolux microwave will become an essential kitchen tool, saving you time and effort. Explore its features fully to enjoy delicious, perfectly prepared dishes every day. Happy cooking